Tag Archives: wood

Bench from “Oscar”

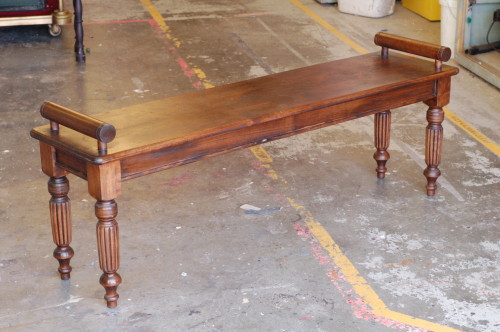
Our final opera at this past season of the Santa Fe Opera was “Oscar”, a world premiere based on Oscar Wilde. I made a bench for it. It was a simple bench, and the legs were purchased rather than made by us, but it was all solid alder wood, and the end result was quite attractive.
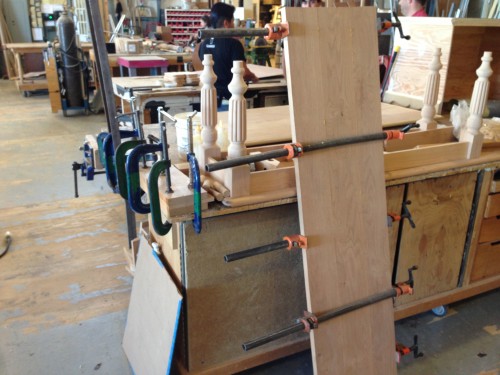
Gluing up the seat
Gluing up the seat

I picked up a truckload of alder from the local lumber store, and planed and jointed some boards for the seat. The seat was a full inch thick, so it was quite hefty. After gluing them together, I rounded off the corners and routed a round-over along the whole circumference.
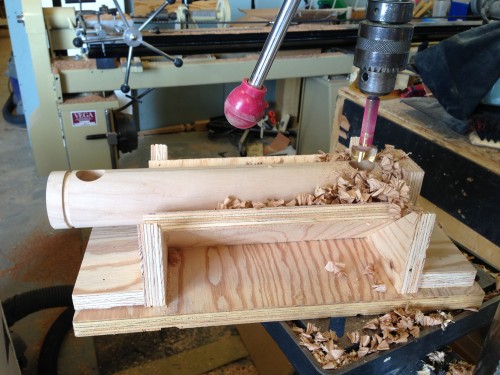
Hole-drilling jig
Hole-drilling jig

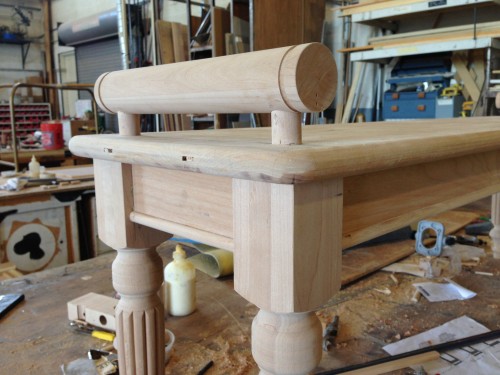
The trickiest part were the bars on either side which stood on top of the seat. I turned them out of the same alder I had bought. I then constructed a jig for drilling the holes. The jig allowed me to drill the hole exactly perpendicular to the bar, as well as to place the hole directly in the center (width-wise) of the bar. I also marked the bars so I could drill both holes along the same line.
Attaching the side bar

Next, I had to line up the holes on the bars with the holes on the seat. The dowels connecting the bars to the bench were also turned by me out of alder. They ran through the top into the legs, so you could pick the bench up by the bars very securely.

For an extra touch, I fabricated the half-round molding along the bottom of the apron from the same alder I used on the rest of the bench. Since the legs we bought were also alder, this meant the entire bench was solid alder, and it would have a consistent appearance when stained.
Bench from "Oscar"
Bench from “Oscar”

The final bench was stained by our paint department; I had actually constructed two (the one above and a much longer one), but the second one was cut. Again, it was fairly simple, and the legs were not turned by me, but working in solid wood is always fun and interesting.



Turned Quaich

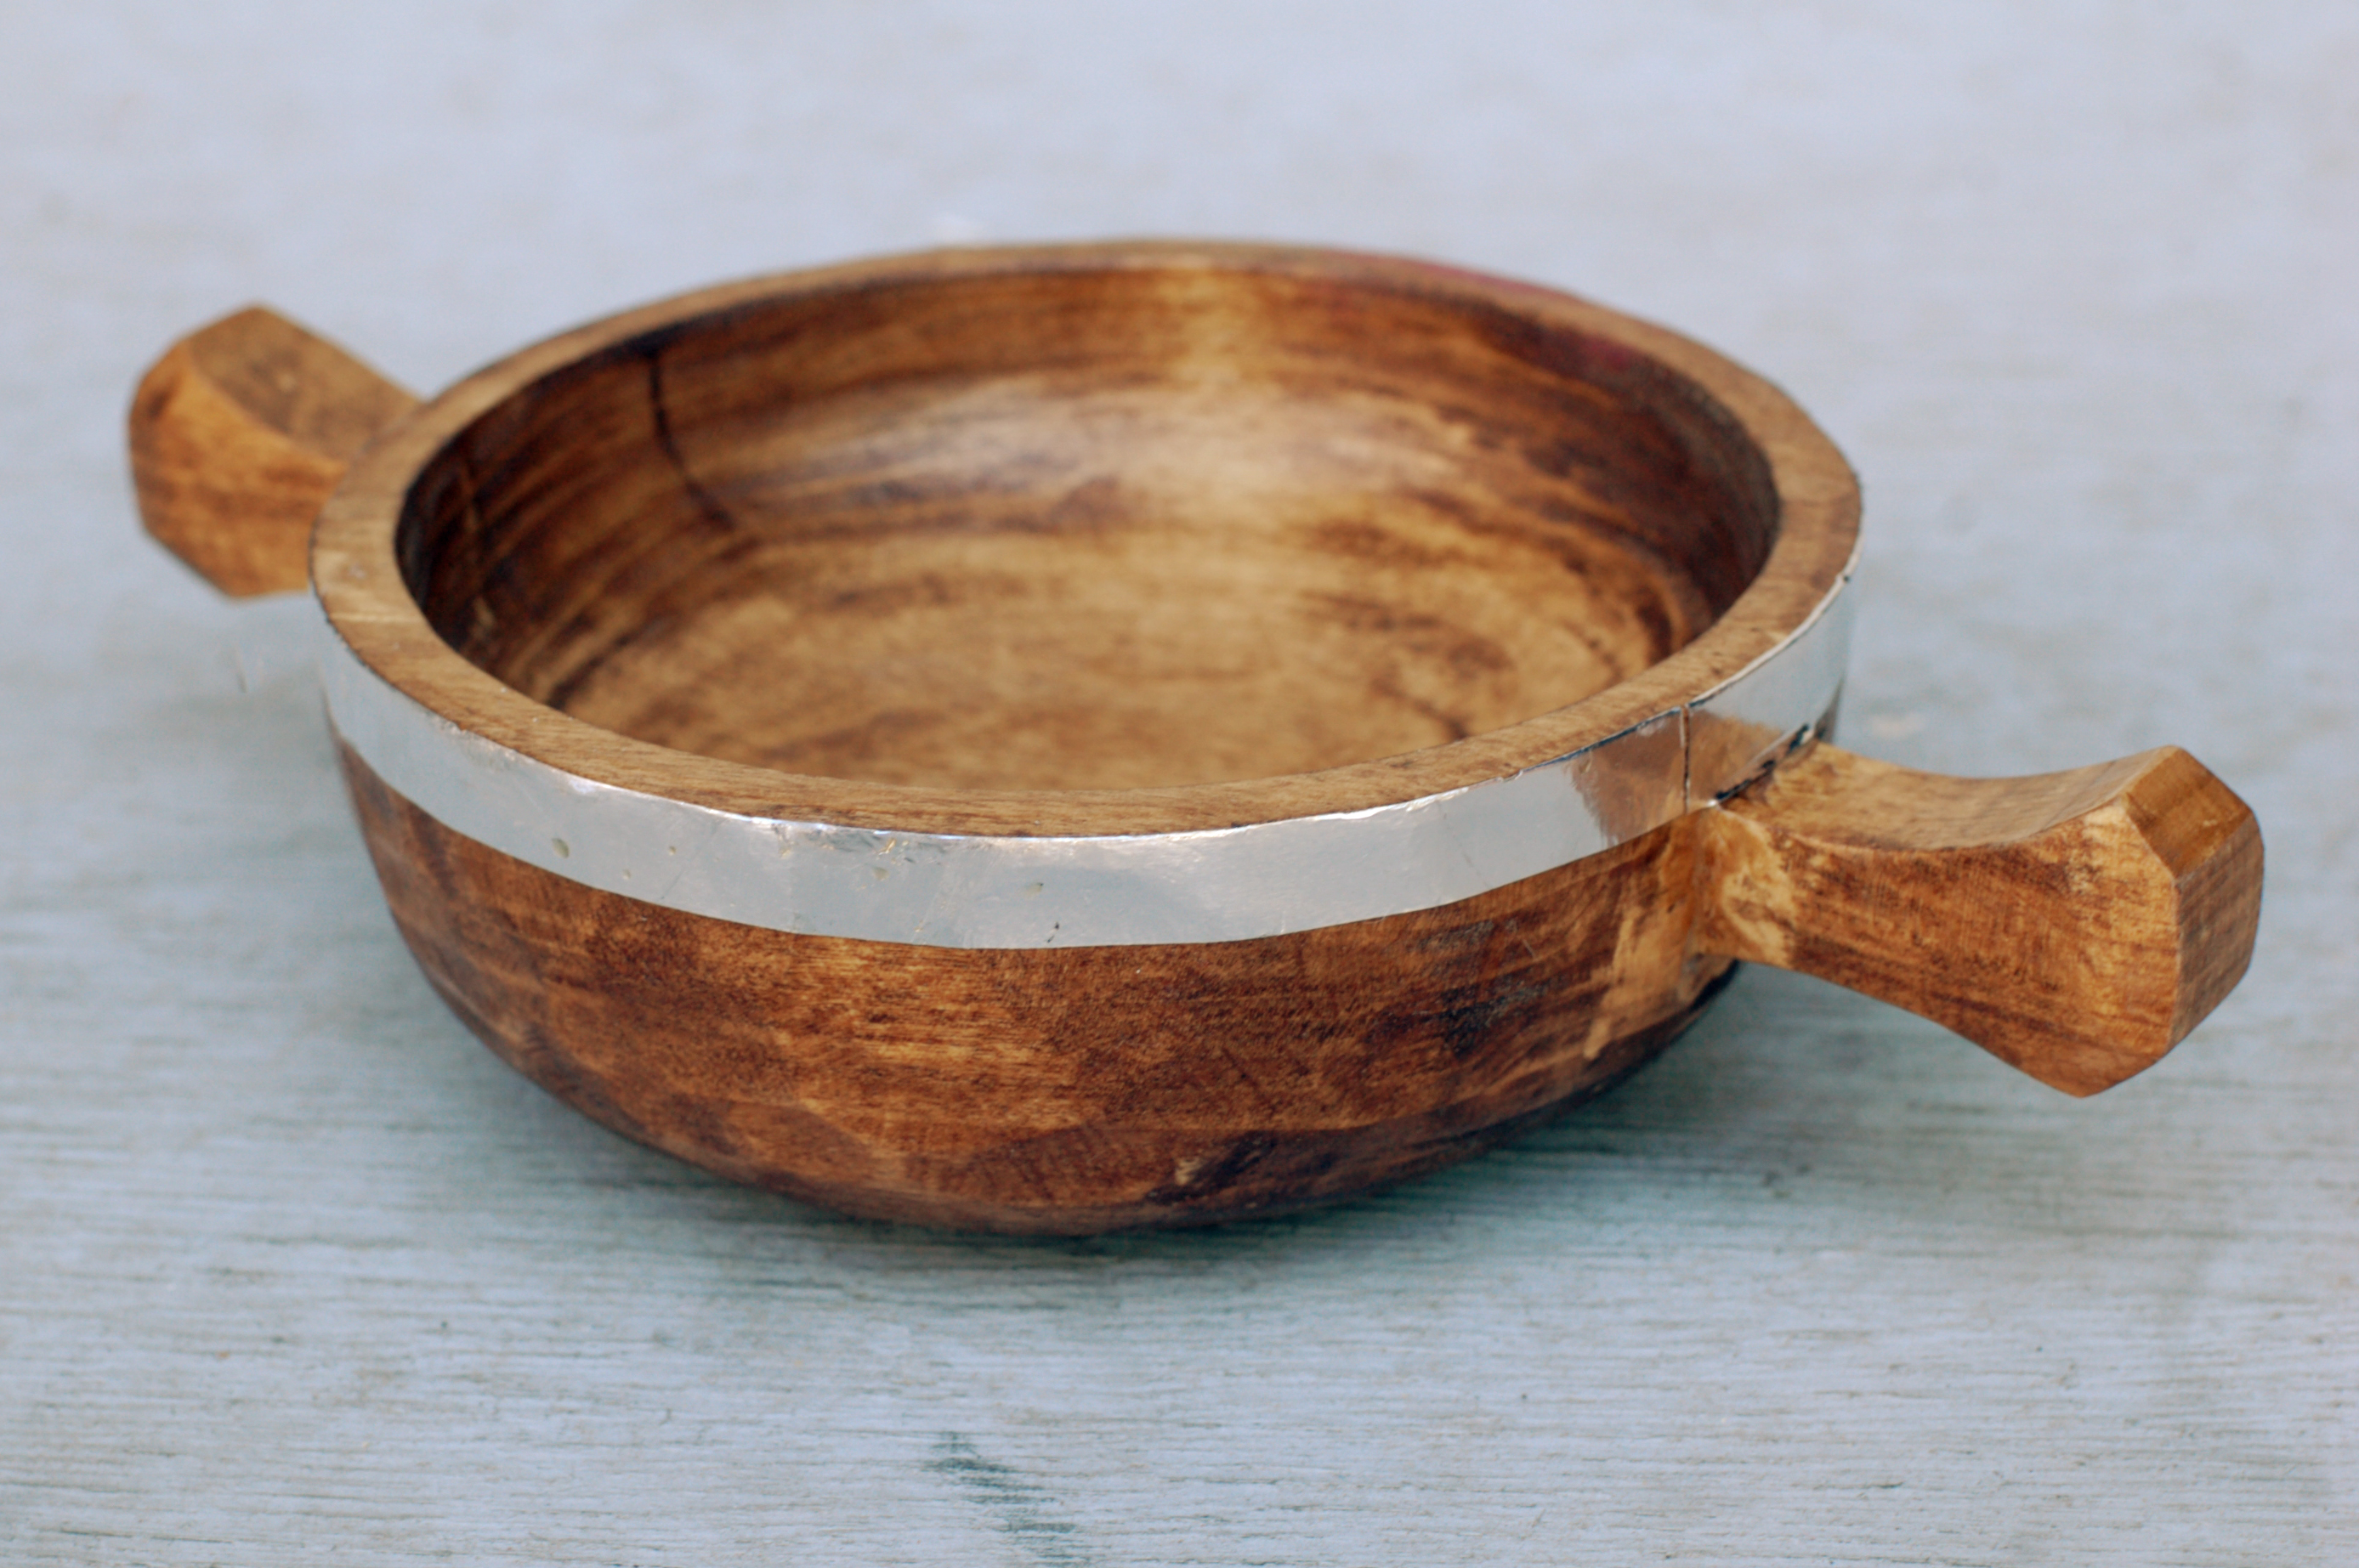
One of the props I built for our production of La Donna del Lago was a quaich. A quaich is a two-handled drinking vessel from Scotland; you can find out more on the Wikipedia page, which incidentally, has the research photograph I worked from.

Full-scale drawing
Full-scale drawing

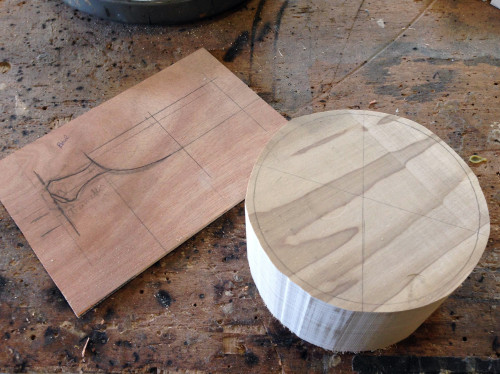
I began by adapting the research photograph to a full-scale drawing of the profile I would make. This was fit to the measurements that they wanted to use, shown to the designer, then refined some more based on his feedback. When my drawing was approved, I cut a turning blank from a piece of poplar we had laying around.

Turning the outside
Turning the outside

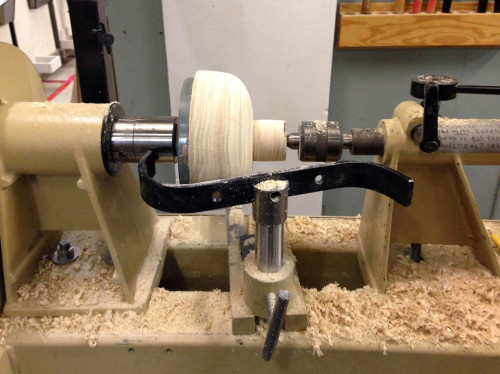
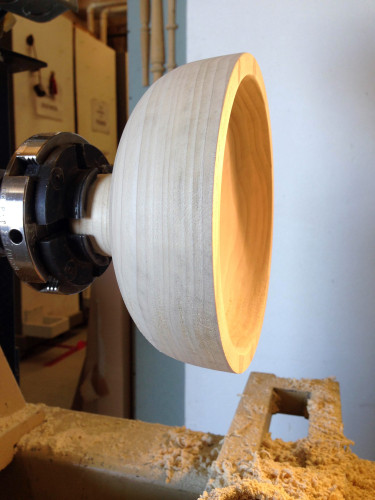
This was the first time I have ever turned a bowl on a lathe. Our lathe is not actually set up to turn on the outboard side, so I had to turn the whole bowl on the inboard side. I began by turning the profile of the outside, leaving a large foot on the bottom that I could hold on to when it came time to turn the inside.

Hollowing out the inside

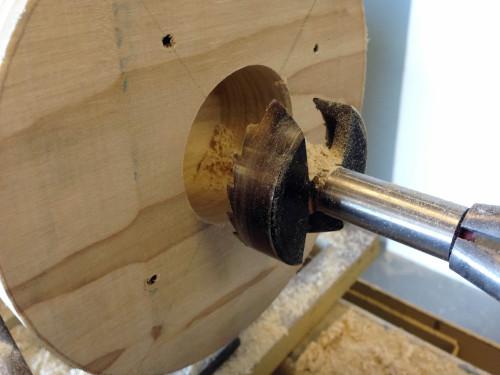
I flipped the bowl around and started hollowing out the inside. One of the other carpenters told me a trick where you first use a drill bit to remove as much of the material on the inside as you can. I grabbed the largest Forstner bit we had, stuck it in the drill bit chuck on the tailstock, and drilled out the center of my bowl.

Finished turning
Finished turning

Hollowing out the rest of the center was straightforward once I got used to how the tools acted. The tricky part about turning a bowl, compared to turning spindles, is the way the grain faces. The curve brings you from face grain to end grain, so your tool cuts differently as you move along the curve.

Unpainted quaich
Unpainted quaich

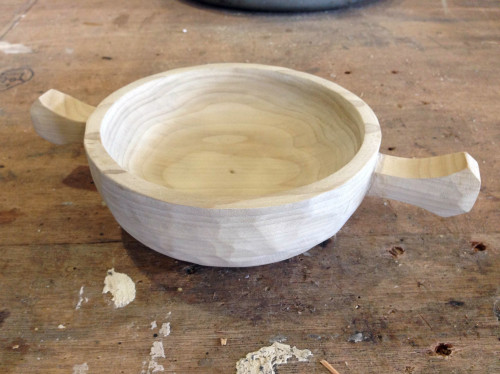
After the bowl itself was complete, I added the handles. I chiseled and Dremeled a square notch in each side of the bowl that the handles could fit into, and epoxied them in place. I also took a grinder and carved the outside so it looked like it was hand-carved with gouges.

Quaich
Quaich

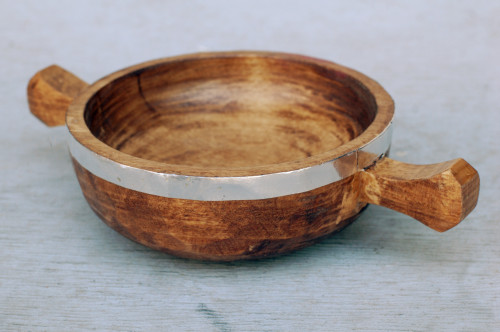
The painting and faux metal strip along the top was handled by the rest of the props team. It was sealed with a food-safe sealer since the artists drank actual liquid from it every performance. It was a simple prop, but it turned out nicely and allowed me to learn some new skills in the process.

Vacuum Formed Balustrades

One of the first projects I worked on when arriving in Santa Fe was actually for a scenic element. One of the shows has a number of decorative balustrades way upstage, and they wanted to vacuum form them. I was tasked with turning the wooden master.

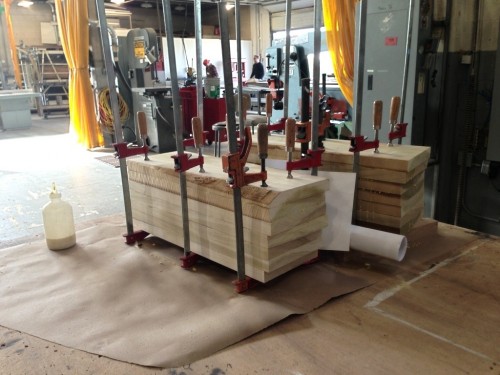
Clamping the boards
Clamping the boards

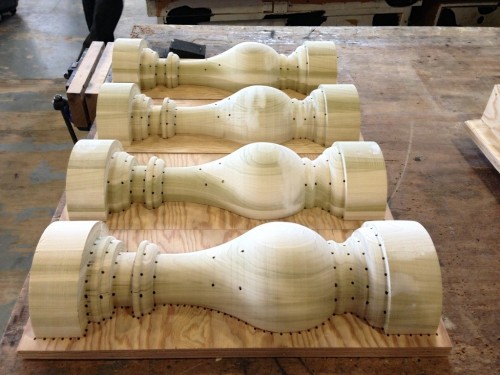
The first step was gluing up a number of poplar boards. This was going to be a fairly thick piece. I made two, so I could split them down the middle and give them four halves to vacuum form on a single sheet of plastic.

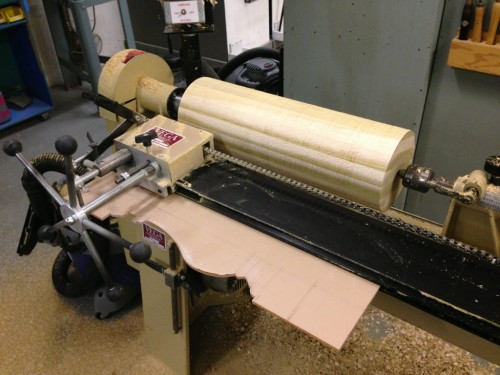
Turning the blank
Turning the blank

The lathe in our props shop has a duplicater set up. This allows you to cut out the profile of what you want to turn in a thin sheet of plexiglas, and the blade can follow that shape. You still need to finish it up by hand to make sharp corners and smooth it out, but it helps keep your shapes and sizes consistent across multiple pieces.

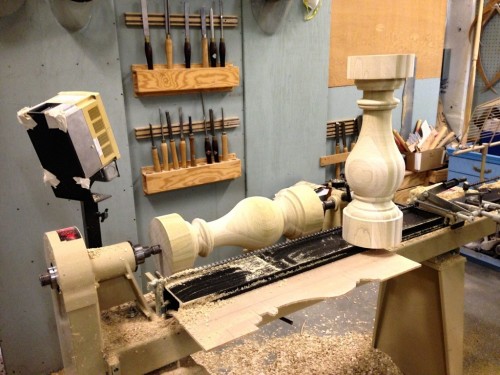
Completed balustrades

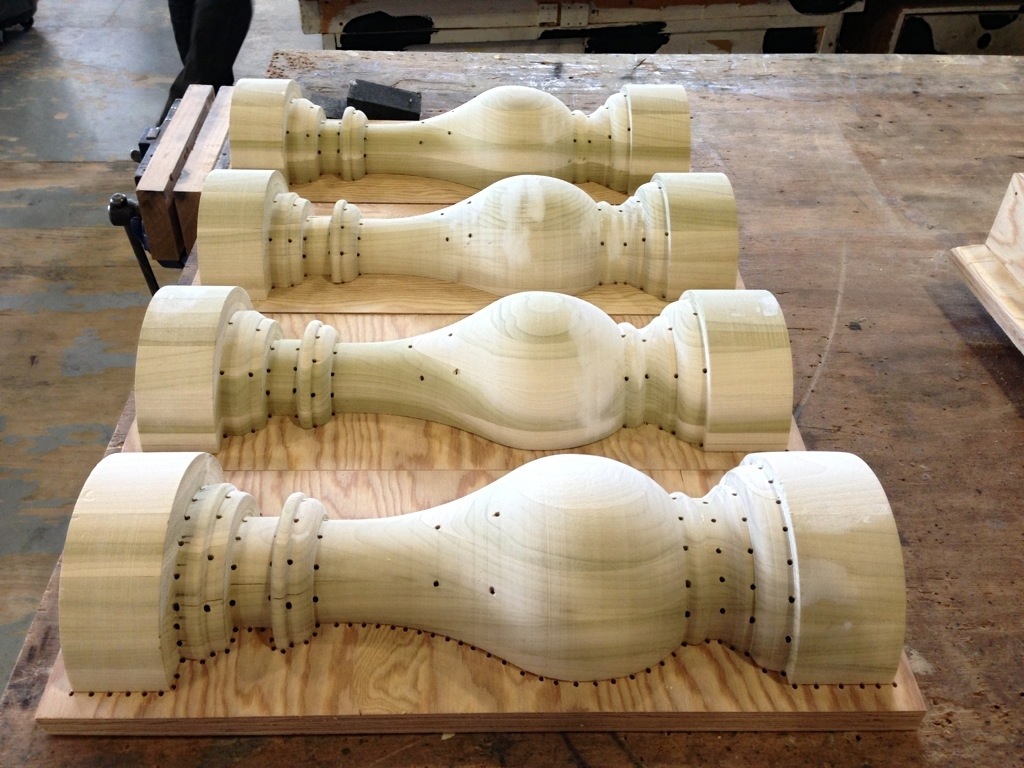
Above are the two balustrades, ready to go!

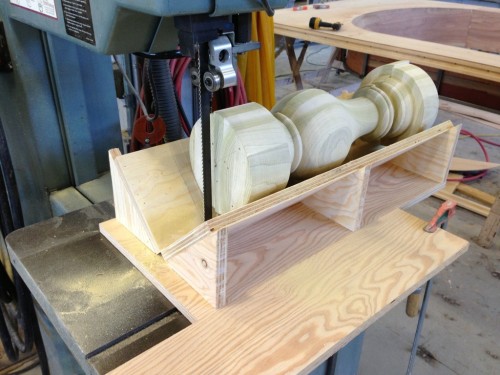
Cutting in half
Cutting in half

Next I had to split them directly in half. Luckily, we have a massive bandsaw, and I could build an oversized dowel-splitting jig to cut the whole baluster in half in one pass.

Mounting the wooden forms

The next step included a new technique for me. I had to drill holes throughout the wooden mold for the vacuum to pull air through, paying particular attention to the undercuts. They also asked me to mount the molds on a sheet of plywood with a gap underneath, and drill holes all along the periphery. Since the vacuum form platen only has holes at regularly-spaced intervals, it would not suck the plastic tight against the bottom of the mold; this technique was like creating a custom platen to sit on top of the regular platen.

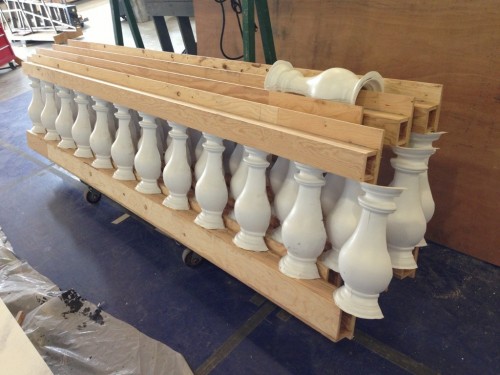
Vacuum formed copies

That was actually the end of my part. The scenery department took my molds and began running them through the vacuum former. I don’t have any pictures of that, but I do have a video of the machine in action. Above is a photo of the resulting pieces as they get mounted to the scenic piece.

Piano for Wild Party

Every musical needs a piano, right? Of course, if you have a piano on stage and people are dancing, you’re going to want the people to dance on the piano as well. Such is the prop master’s life. I had to build a dance-able piano for Elon University’s production of The Wild Party, which closed a few weeks ago.

Appropriated Piano Parts

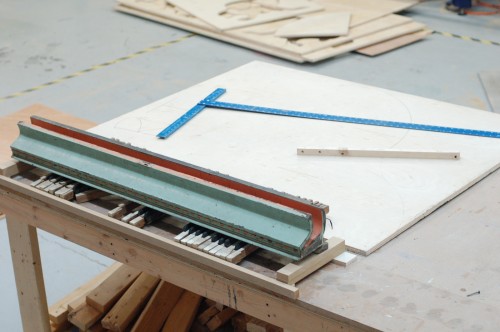
As it turns out, my father has taken apart a piano or two and kept the pieces in his barn. When I was visiting over Christmas, I picked up some of these parts, including the keyboard lid and a partial keyboard. While I probably could have faked the keys, the lid was a real find; it’s two pieces of solid oak cupped along the entire length. This shape would be hard to fake on my own, and it would be nowhere near as sturdy as the piece I found, which could support a person’s weight in the center without bending.

Shape and Structure
Shape and Structure

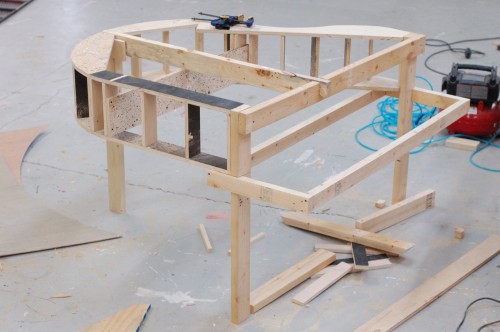
It needed to be strong and sturdy, but lightweight enough that it could be quickly turned and moved throughout the musical by the actors. The photograph above shows the beginning stages. I had to make the shape also serve as the structure, because there was not a lot of room to hide cross bracing or reinforcements.

Unpainted Piano
Unpainted Piano

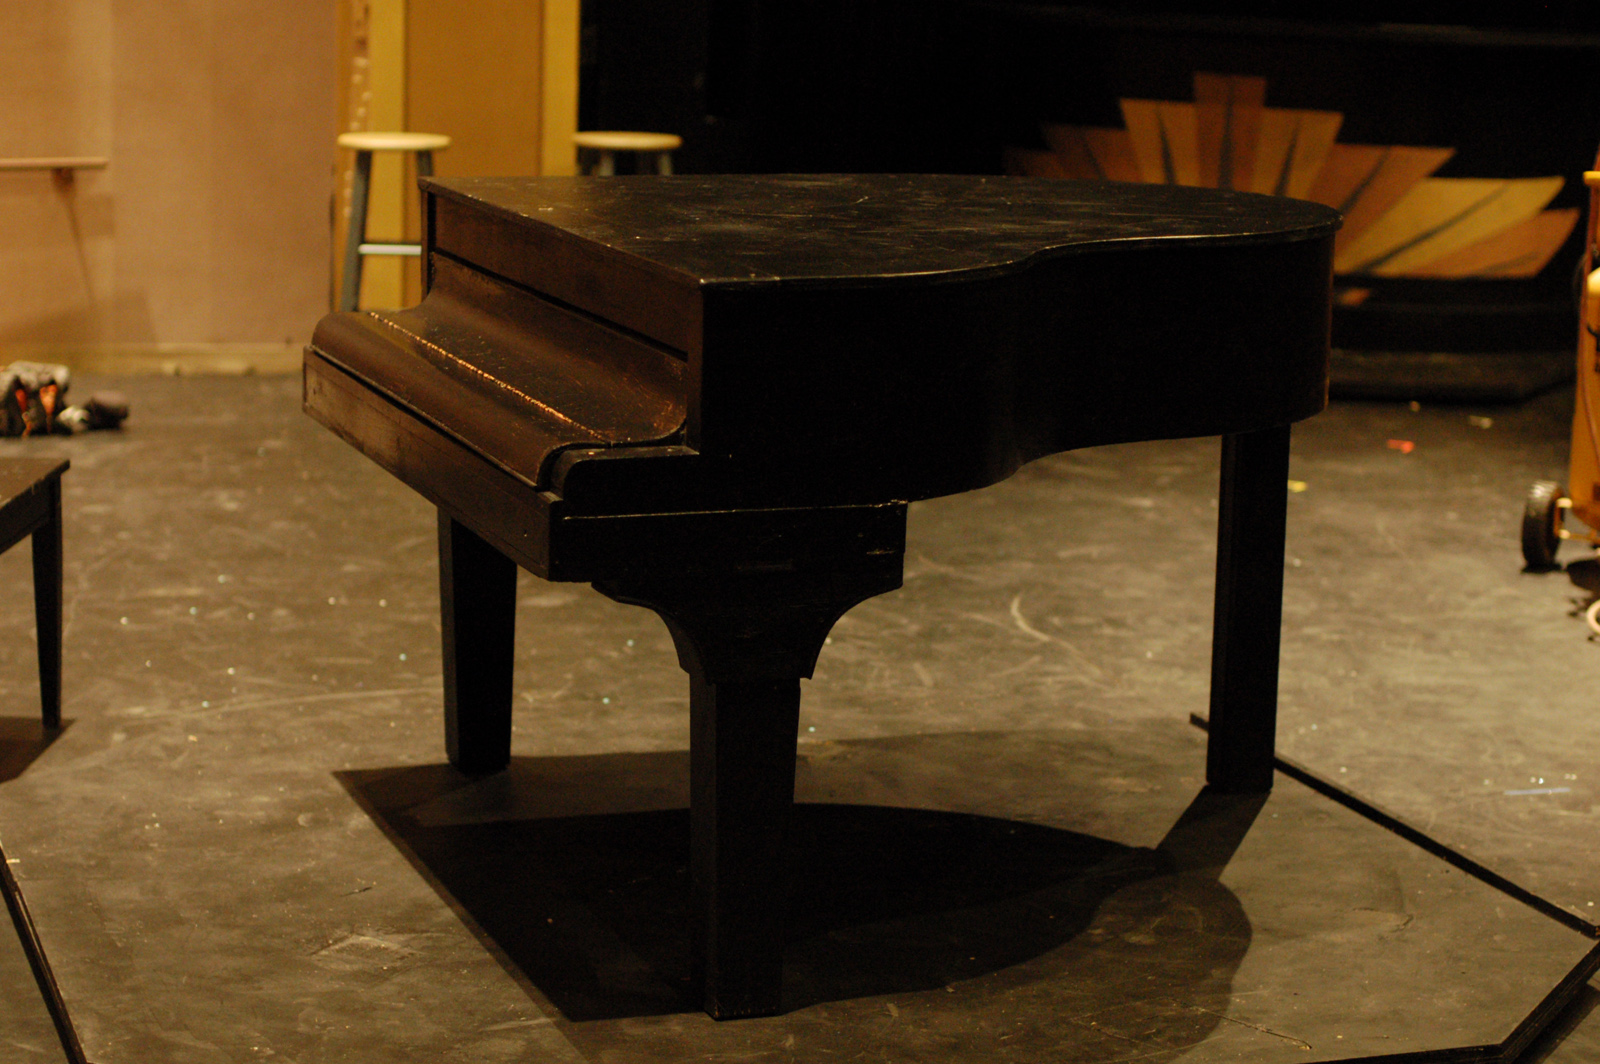
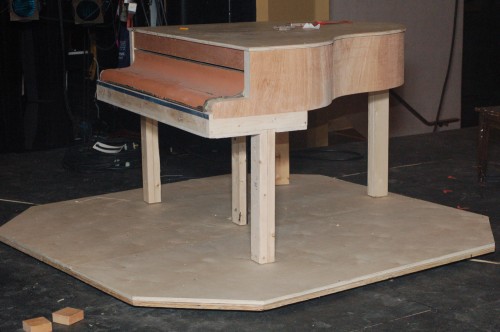
The two-by-four in the center of the piano hides a pipe that leads down into the platform itself. This gave a pivot point to the piano so when the actors spun it around on the wagon, it would rotate on a fixed point.

Painted Piano
Painted Piano

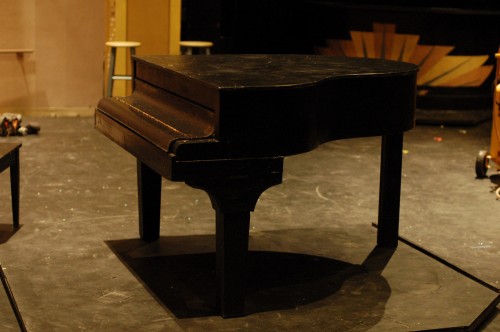
The piano received a coat of black paint followed by a few coats of Sculptural Arts’ Plastic Varnish Gloss (one of my wife’s favorite products). You can see in the photo above that I added more facing to the front legs to make them appear like more traditional piano legs. On a real piano, these would be cut from solid wood, but on my prop piano, they are pieces of quarter-inch plywood and wiggle wood over top a leg made from two two-by-fours.

Wild, Wild Party
Wild, Wild Party

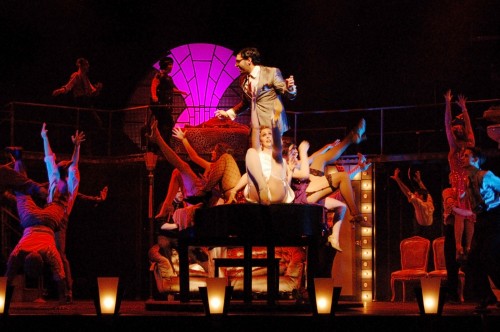
There are six people dancing on the piano in the photograph above. It featured throughout the musical, with people dancing on top, jumping up and off of it, and generally subjecting it to all sorts of abuse. I’m happy to say it sat there like a rock, never sagging or shaking no matter how hard they tapped or how much shimmy was in their shake.


Box Elder Boxes

Welcome back, everybody! I hope the holidays went well. There is a lot of great stuff on the way for this blog as we count down to the release of The Prop Building Guidebook, one of the first guides to building props to be published in a decade, and one of the most complete ever.

Today, I wanted to show off some boxes I made as Christmas gifts. These were done awhile ago, but I did not post them because the recipients read this blog. It was interesting working with “nice” wood and building an item the “real” way, because it makes you realize how many shortcuts you can take in prop making, and how much you can get away with when an object is only viewed at a distance from the audience.

Not that the props I and others make aren’t well-made; frequently, they are sturdier and more polished than many items you can find in the store. But there is a difference when the item you are making will be held up close, and any joints that are a bit proud can actually be felt, or an errant glue drip on the inside will be studied closely.

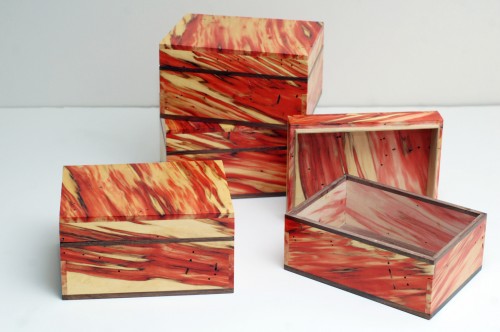
Four boxes made from box elder.

I used an exceptional piece of box elder for these boxes. You can see in the open box above, the inside is completely unfinished. The polyurethane coating adds a bit of contrast and depth to the surface, but otherwise, that is the natural color of the wood. The red streaks comes from a fungal growth. Box elder is rarely harvested commercially, because it grows in flood plains. Many people do not realize it can look like that on the inside, so they just burn it as firewood or turn it to mulch when they need to get rid of a box elder tree that has fallen down or died.

I found my pieces at a local sawmill that specializes in salvage lumber. The sawyer had rescued a bunch of box elder trees when the park services cleared a riverfront. My wife and I saw this wood at a wood show awhile back and were asking questions about it. The next day, we returned to the show and the sawyer had set aside some particularly bold pieces of the box elder for us.

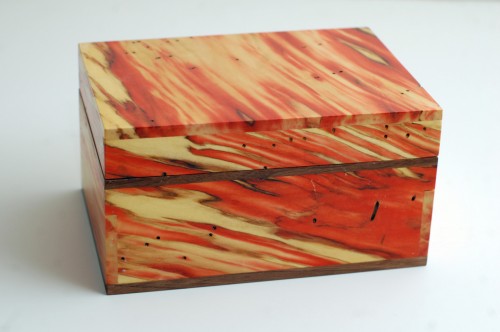
A box made from box elder.

I used a piece of walnut for the bottom and as an accent around the lid opening. The boxes were cut entirely on my table saw. As I mentioned above, I finished them with a few coats of polyurethane; specifically, I used spar varnish because it imparts a lot of UV protection. The red coloring will actually fade away when left in direct sunlight, which would be a shame.