Tag Archives: vacuum forming

A Disappearing Turkey

To all of my American readers, I hope you have a Happy Thanksgiving this week! Brian Wolfe from Costume Armour sent me some photographs of a trick turkey they recently created, which seems apropos to the holiday.

For this trick, a waiter needed to walk in with a food cart. He lifts the lid off of a covered tray revealing a delicious roast turkey. He replaces the lid, and the next time the lid is removed, the turkey is gone. Instead, an actor’s head is on the tray, and the actor begins to speak.

This is the drawing he shared with me:
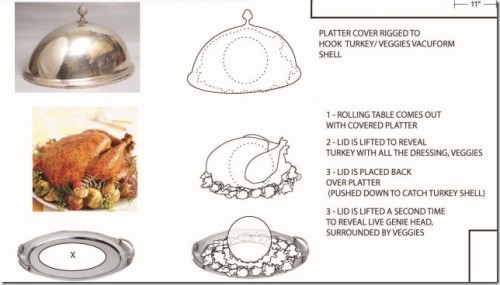
Drawing for a turkey trick

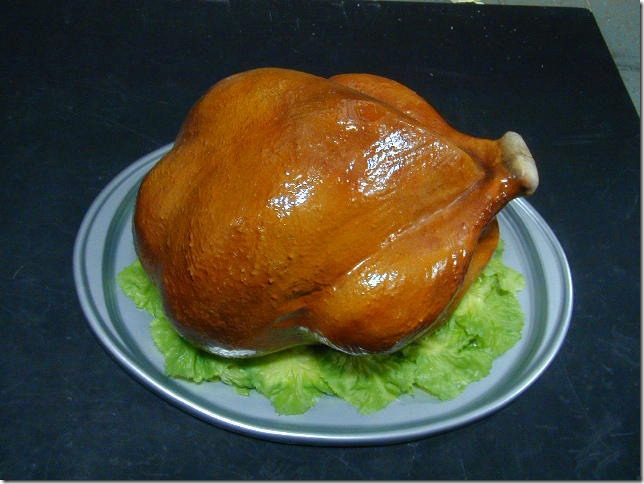
They needed a giant, oversized turkey with enough room inside to fit a head; it also needed to be light enough that it could be lifted along with the tray (you will see why in a minute). They had a rubber turkey in stock, but it was too small and heavy. So they decided to vacuum form a new one. They carved the turkey in foam, made a two-piece mold, and vacuum formed it in 0.04″ Kydex plastic.

Vacuum formed turkey halves

They cut out the pieces, glued them together, and painted them. Next, they cut a large hole in the bottom:

Hole in the bottom of the turkey

The tray was also vacuum formed, this time in a heavy 0.093″ Kydex plastic with a metallic finish. The bottom was formed over a wooden mold, while the lid used a plaster mold. They also added some artificial lettuce which was bought.
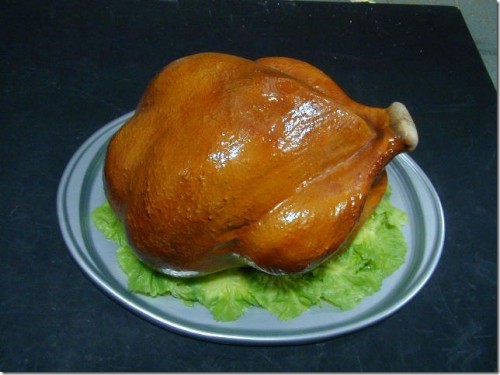
Vacuum formed turkey

A brass drawer pull completed the look to the lid. The small black rectangle next to it in the photograph below is a small toggle switch:
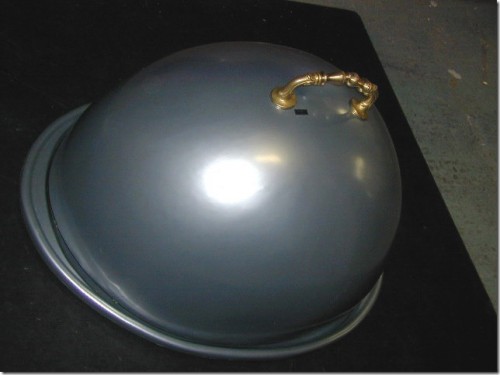
Tray Cover
Tray Cover

When the waiter flips this switch, a small battery-powered electromagnet turns on (shown in the next photograph). The turkey had a small piece of flat steel hidden on top which is grabbed by this magnet. So when the magnet is on and the tray lid is lifted, the turkey travels along with it, hidden from the audience’s view.
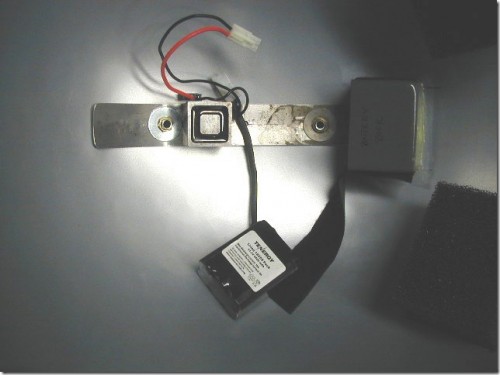
Battery and magnet
Battery and magnet

The diagram below illustrates how the whole trick was set up. I’ve seen this same basic principle carried out in a number of different ways, but the combination of the hollow turkey and electromagnet makes this execution especially elegant; you can control whether the turkey or head is visible simply by the flick of a switch. The actor underneath does not have to do anything.
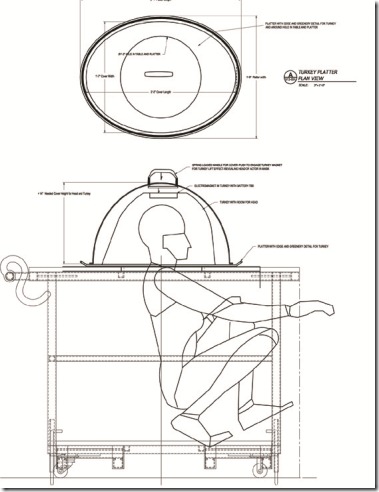
Turkey trick diagram

Hope you enjoyed this! Have a Happy Thanksgiving!

Phoning it in

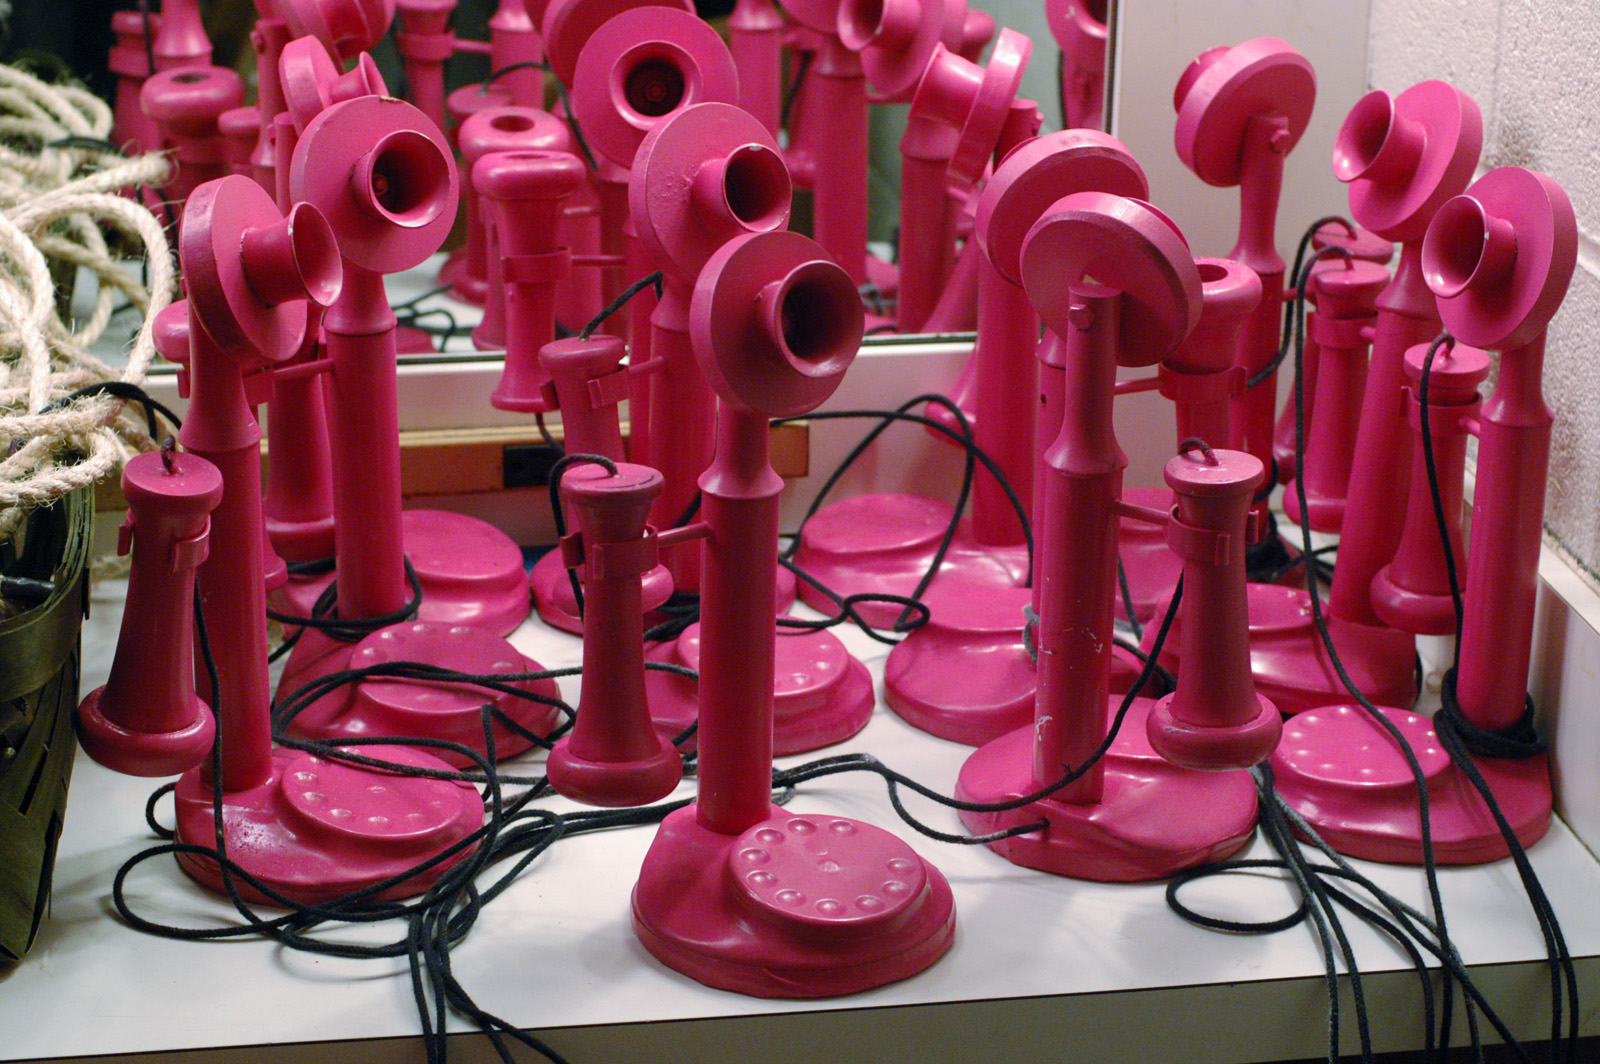
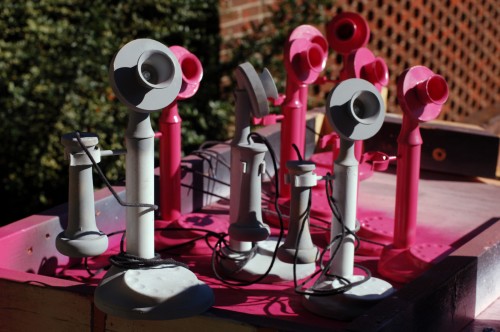
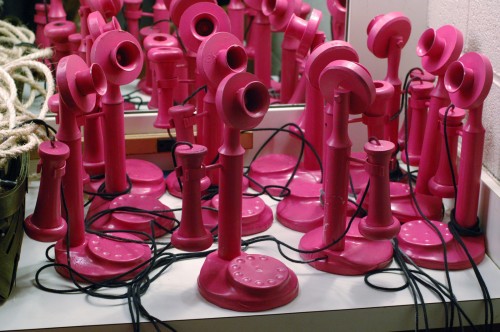
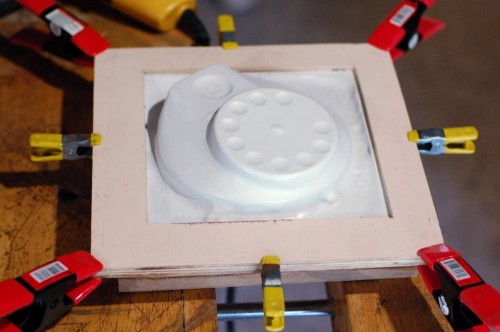
Yesterday was strike for Crazy For You, the first musical I prop mastered down here in North Carolina. I’ll be posting some of the projects I did for this production at Elon University over the next few days. One of my favorite builds on this show was a set of twelve matching pink candlestick phones. I’ve dealt with getting multiple period phones in the past, so I knew with this budget these would have to be a custom build. I have already posted about how I made a vacuum former to create the bases.

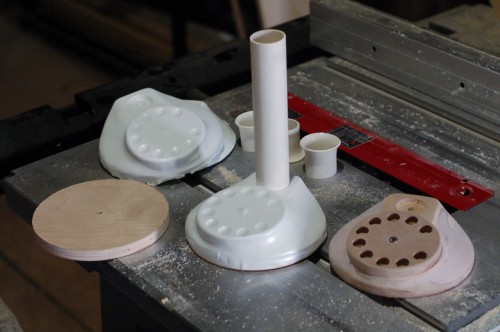
Assembling the base
Assembling the base

On the right in the photograph above is the model for the base of the phone. In the upper left are some vacuum-formed shells. Dead center is a shell on the base with a section of PVC pipe forming the “candlestick” portion. Behind the half-completed phone are three sections of PVC pipe with a flange in them. I made a video showing how to form these.

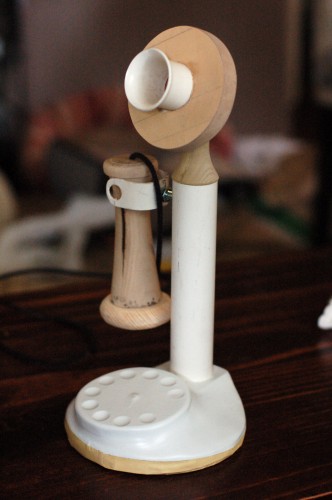
A completed but unpainted phone

The neck piece which connects the mouthpiece to the candlestick is a solid piece of poplar I turned on the lathe. The receiver (mouthpiece) was also turned on the lathe. The only difference between the prototype above and the final phone is the hook which holds the receiver. I sliced a section of PVC pipe, made a slit down one side, than used a heat gun to open it up into a “U” shape. I bent the ends out so the receivers could be pushed in and the hook would snap back to hold them snugly.

Painting the telephones

The plastic parts were primed first with a plastic spray paint primer. I then hit the rest of the parts with a sandable primer. The sandable primer helped make all the surfaces appear to be unified and made of a single material, and I could smooth out minor imperfections.

Pink candlestick telephones

All the phones were painted pink. Bright pink. The kind of pink that hurts your eyes. It was a gloss pink too, and because the phones were sufficiently primed, the gloss made them look like solid chunks of plastic. I intended to add more paint for highlights and to differentiate the parts (and maybe throw some glitter on for good measure), but this show really came down to the wire (I was working up until the house opened on Opening Night) and I ended up not having time.

Bring! Bring! "Hello, Bobby!"
Bring! Bring! “Hello, Bobby!”

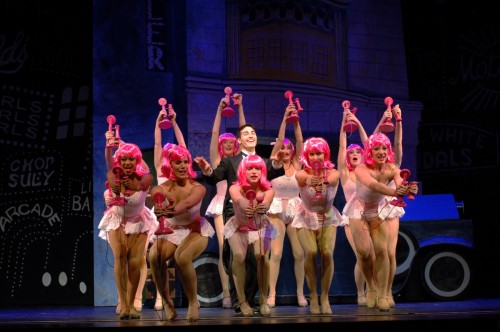
Regardless, they looked great in the context of the scene. It’s a big dance meant to be a fantasy sequence, with lots of flash and movement. You can see in the photograph above how well the color worked in that number. The shapes of the phones were distinct enough to convey their essence. They were a pretty big hit, and some of the audience thought they were rented.

Vacuum Forming on Zero Dollars

I am currently working as props master on Crazy for You at Elon University. In one of the musical numbers, twelve showgirls dance around the main character while talking on the phone. The show is set in the early 1930s, so that is twelve candlestick phones needed (all of them painted pink). If you’ve ever had to get candlestick phones, you know that the real ones are prohibitively expensive, and even the replicas are too expensive when twelve are needed. I decided I would make them all (which is what most theatres do).

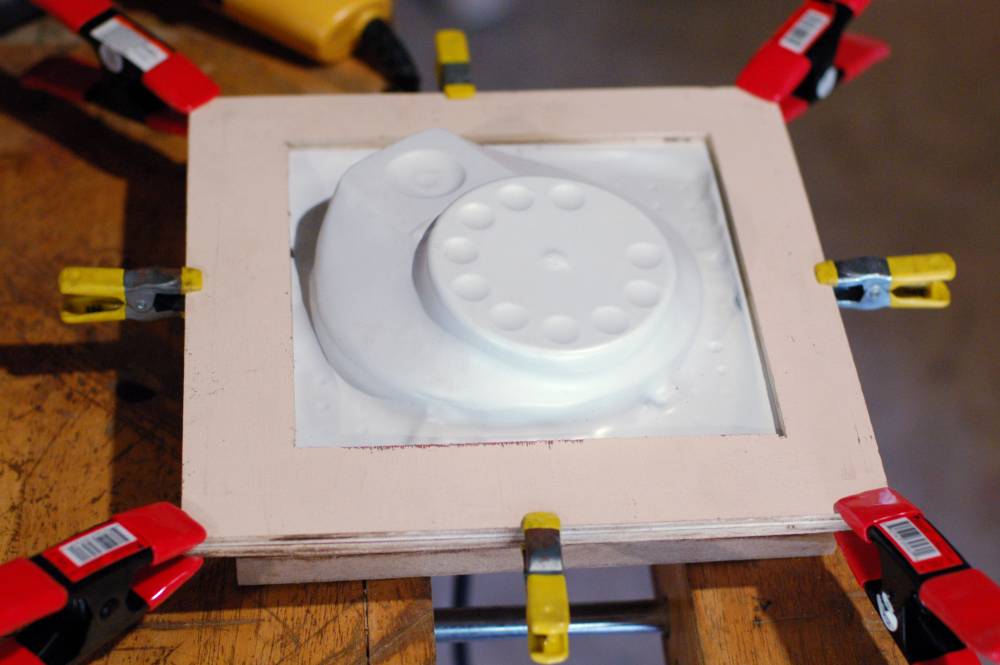
Most hand-built candlestick phones I’ve seen have a pretty simple base, and I wanted to try for something a bit more interesting and realistic. Since these were just being used during a dance number, the dial didn’t need to work. It looked like I could sculpt the base as a solid object and than just vacuum form twelve copies. The only problem? I don’t have a vacuum forming machine.

Vacuum forming one of the telephone bases

I ended up assembling a very small and fairly weak vacuum forming system out of tools I already had and scrap materials which were laying around. Other than my time, the cost was free. I was able to make all the phone bases I needed though the process was a bit inelegant at times. I like what vacuum forming can accomplish, and I think I may spend some more time (and maybe even some money) making a more usable vacuum former after this show opens, but it was nice to be up and running without too much investment on my part.

I have posted an Instructable on how I built my free vacuum forming machine if anyone else is interested in how this all works. I also have a video of how it works and what it looks like when it’s being used:

Costume Armour

This past weekend I made a trip up to Cornwall, NY, to visit Costume Armour. Brian Wolfe, the general manager, happily showed me around the shop, storage areas and all the pieces they have on display. Costume Armour was founded over 50 years ago by Peter and Katherine Feller, and later purchased by theatrical sculptor Nino Novellino in 1976, and has produced pieces for nearly every Broadway show since then.

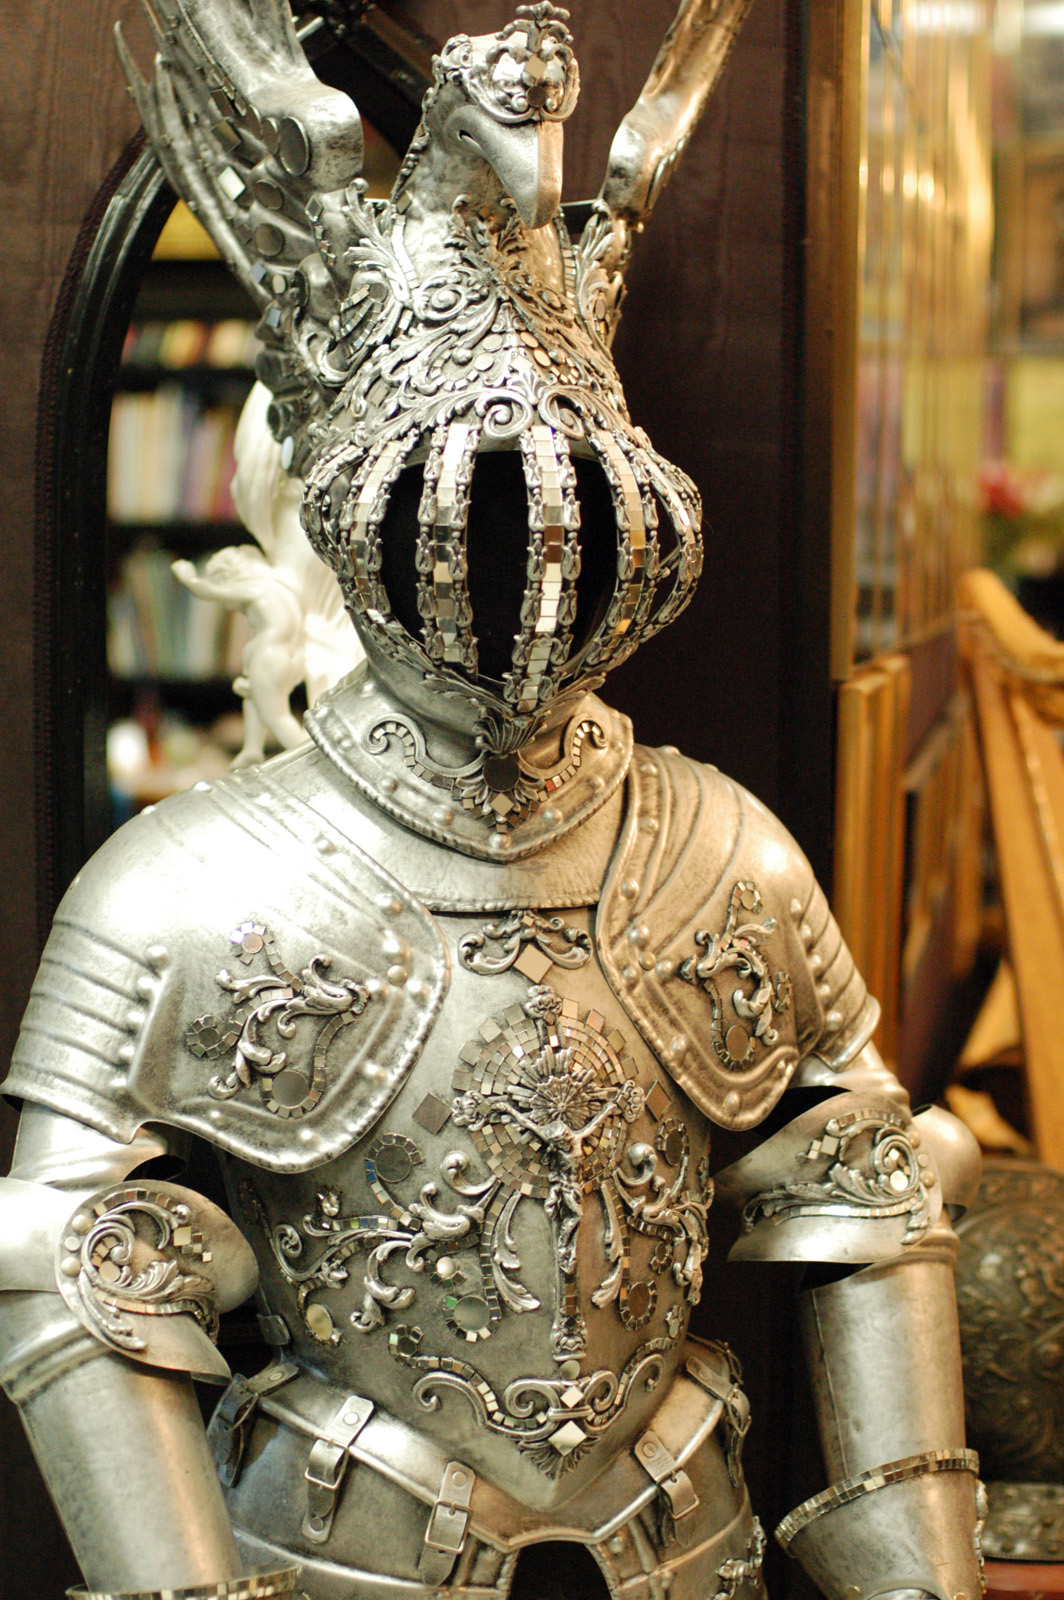
Knight of the Mirrors from "Man of La Mancha"

The piece that kind of began Costume Armour is the armor from the original Broadway production of The Man of La Mancha. Before then, armor was either leather, felt or heavy metal. They solved many problems by vacuum forming a suit of armor from newly sculpted molds based off of historical research. Though the suit itself predates the company, Novellino made it while working with Peter Feller on the vacuum forming machines built by Feller to construct the Vatican pavilion at the 1964 World’s Fair. Costume Armour still has those machines, and they are part of what makes their company extraordinary. The vacuum tank is over 1000 gallons, and they can produce pieces from sheets of plastic as large as 52″ by 12′-0″.

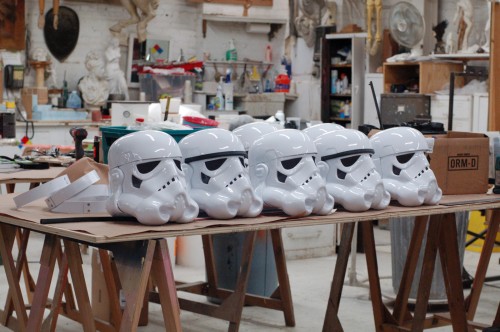
Helmets
Helmets

The shop was in the midst of a big order for the Disney Jedi Training Academy, Star Wars Weekends and Celebration, which they have been doing since 2004.

Celastic
Celastic

I was interested to learn that the shop still uses Celastic quite a bit for many of their sculptures. The original brand-named Celastic has long ceased being manufactured, though they did have a few rolls stock-piled for those extra-special projects (pictured above). The modern equivalents are a bit thicker, but act the same; the cloth is saturated with acetone, than draped or molded over a form or sculpture, and when the acetone evaporates, you are left with a rigid and rock hard surface. Brian explained that it is unrivaled for making realistically-sculpted drapes and clothes on statues.

So I stand corrected on my earlier article on Celastic, in which I claimed that it is rarely used and that there are less toxic alternatives that can do the same thing. Of course, using it requires the proper safeguards for dealing with large buckets of acetone, but working with most materials in the props shop requires understanding and protecting yourself against any potential hazards and toxins.

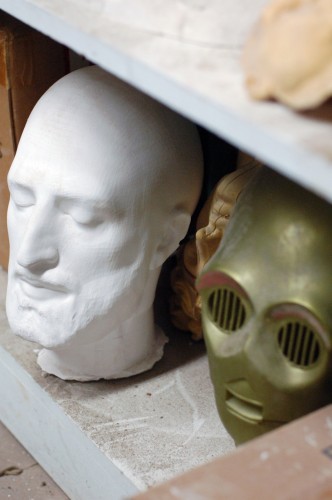
Jesus and C-3PO
Jesus and C-3PO

While I saw something cool around every corner, I thought I would point out the above picture. They cast a head based off of a scan and model of the Shroud of Turin, so what you have here is what many believe to be the real head of Jesus. He is, of course, on a shelf next to a C-3PO mask.

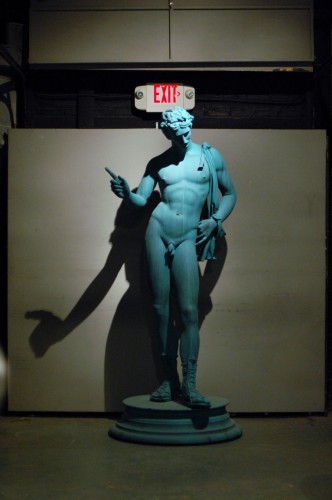
See you later!
See you later!

The statue pictured above was produced was was sculpted in foam, molded in silicone and cast in fiberglass . Though larger than me, I could easily pick it up off the ground; most of the weight, in fact, came from the plywood base, and not the statue itself.

Novellino was featured in the American Theatre Wing’s In the Wings series; watch the video to learn more about the company and to see the vacuum forming machines in action.

Friday’s Rehearsal Notes

The Food Network gives some credit to the shows’ prop master (or design director). Wendy Waxman is responsible for decorating and accessorizing the sets of all the shows filmed at the Food Network’s studios at Chelsea Market.

Congressman Das Williams has introduced legislation to make flesh or proximity detection technology mandatory in all table saws sold in California after January 1, 2015. I have mixed feelings about this. I think safety is important, and I feel in a lot of situations, companies will put out unsafe products until forced otherwise; this is more true with chemicals and toxic substances. But this kind of feature on a table saw is expensive and unwieldy. The vast, vast majority of table saw accidents happen on untrained home hobbyists. [ref]Popular Woodworking analyzed the injury statistics for table saws put out by the CPSC last year.[/ref] This law would make trained users pay for a safety feature that’s more needed for untrained users. Not only that, but job site saws and contractor saws are far too small and light to utilize this technology; I’m only guessing, but I would imagine these kinds of saws are more likely to be used by home hobbyists. Why stop at the table saw? Why not legislate these features on band saws, planers and circular saws? Is it just because a table saw is statistically more dangerous? Because if we’re looking at statistics, a door causes just as many finger amputations per year as a table saw; why not require flesh detection technology on all doors? Anyway, it will be interesting to see how this plays out in the coming months.

Speaking of dangerous tools, AnnMarie Thomas makes the case to let kids use real tools to build things, and not those cheap toy versions. She mentions how an engineering professor asked his class of 35 first-year students whether anyone had ever used a drill press before, and not a single hand was raised. Looks like props people are single-handedly preserving manual-arts training in higher education. Maybe if kids were taught to use tools, we wouldn’t have so many table saw accidents (the majority of which are sustained by men in their 50s; age does not make one safer, only training does).

I’ve wanted something like this for awhile, but never actually sat down to plan one out. But this adjustable sanding jig for a disc sander looks like it’s the perfect design.

The Studio Creations website has a nice tutorial on vacuum forming plastic. Don’t have a vacuum forming table? No, problem, they have a tutorial on how to build one of those as well.