Tag Archives: trick

10 Things to Know about your Table Saw

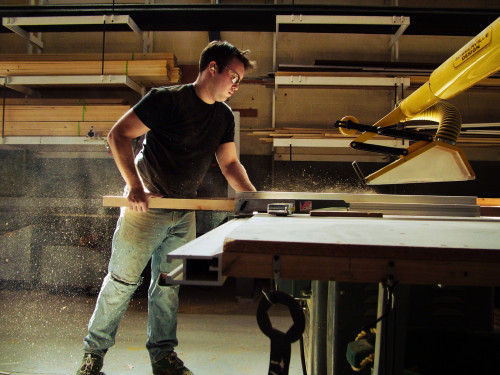
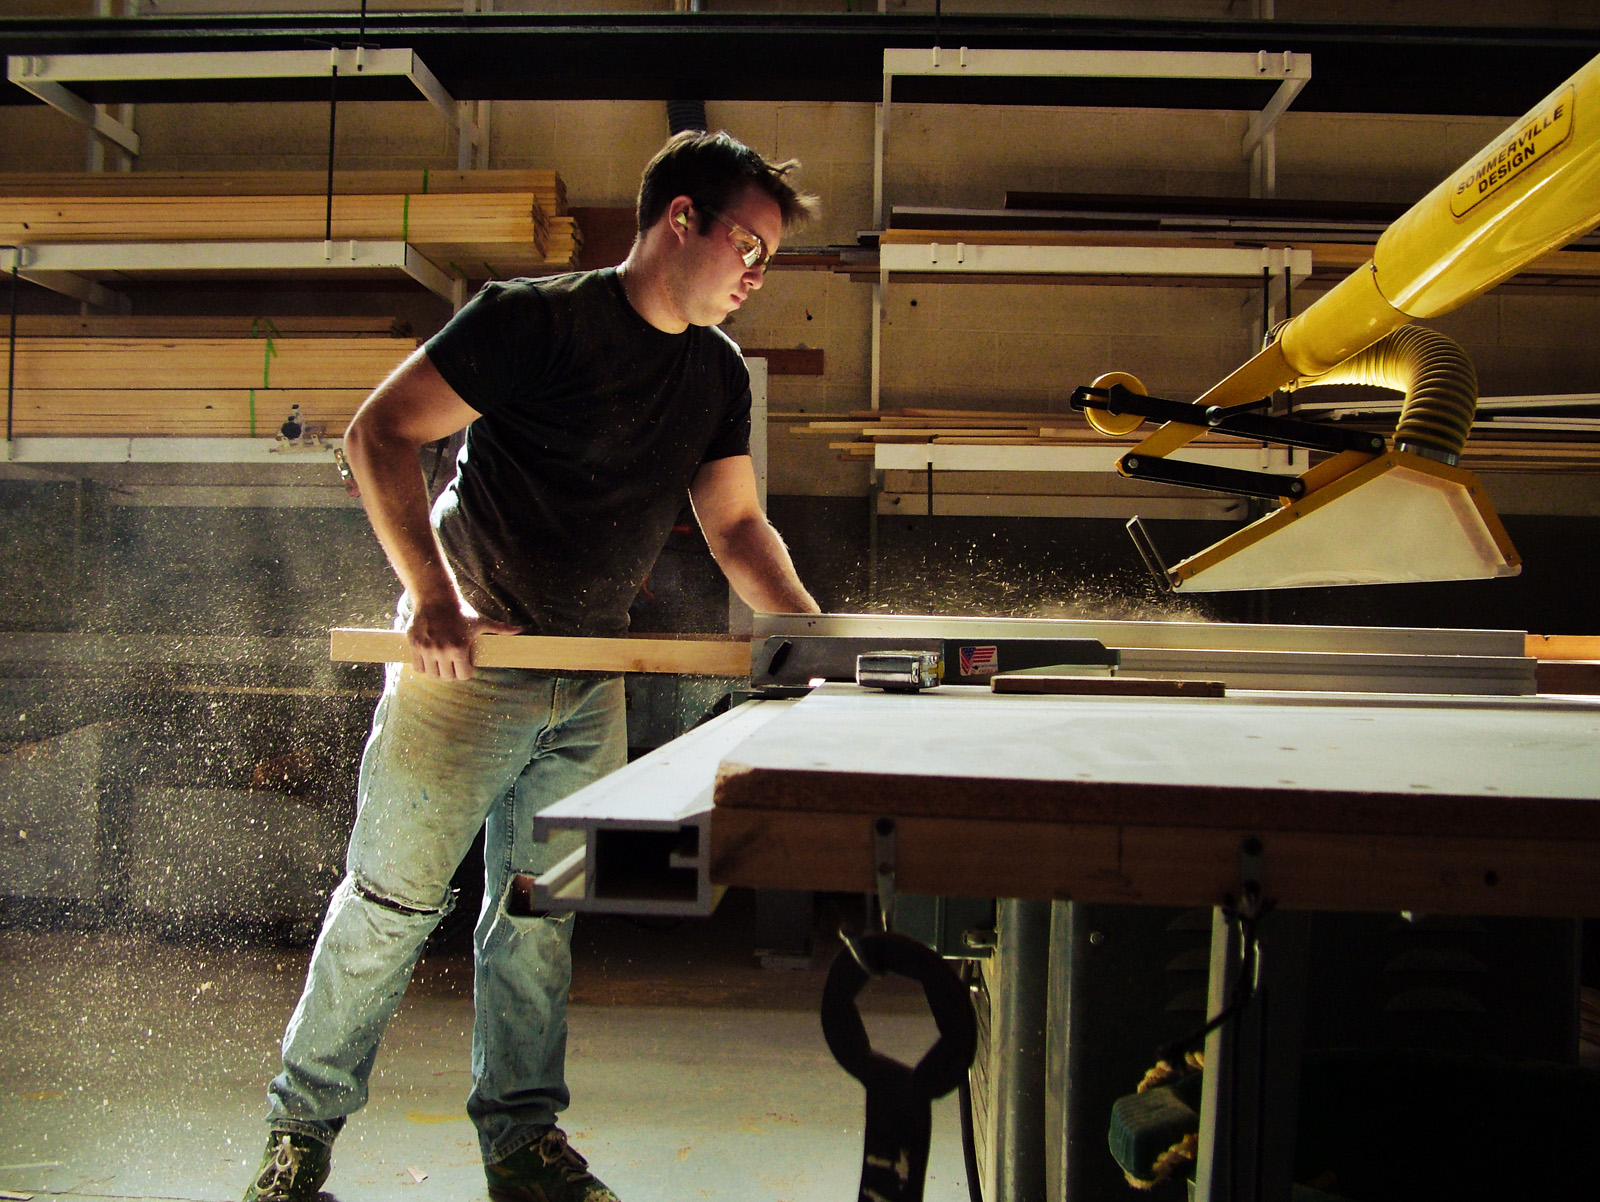
Stephen Dobay using the table saw.

1. There are two main types of table saws: contractor and cabinet.  Contractor saws are lighter and cheaper, and often built to be portable. They are also usually less exacting and have less power. Cabinet saws have an enclosed “cabinet” base, making them quieter and easier to use dust collection on. Compared to contractor saws, they typically have a larger table size and are more precise, but can be far more expensive, and are definitely not portable. They also typically require a 220v outlet. Most permanent props shops use cabinet saws, as contractor saws are not sturdy enough on their own to handle full-size sheet goods. Some manufacturers are now making hybrid saws, which capture features from both. You can also find hobby saws in specialty shops, which are small and fit on a table top. They can be useful for small projects and model work (though a full-size machine can also do this work with the proper setup). Hobby table saws range from cheap and inaccurate toys, to highly precise machines packed into small bodies.

2. Watch for kickback. While a SawStop can prevent your fingers being cut off (a very expensive accident), the most common injuries on a table saw come from kickback, which is when the spinning blade catches the material and flings it back at you. Never stand directly behind the piece you are cutting, but rather, just to the side. And never, ever let go of the wood while it is in contact with the blade; even if kickback is in progress, you have more control if you keep hold of the board than if you panic and let go. A splitter, or “riving knife”, is the single most effective method for preventing kickback. Never force the wood through; the blade may be too dull, or it may be binding, either of which can cause kickback. Pay attention to the sound of the blade; if it is whining or sounds like it is slowing down, you’re getting close to a kickback.

3. Double-check your measurements. Always measure from the fence to the blade, especially when using a particular saw for the first time. The ruler which is attached to the fence rail may not be accurate or precise. Only when you are certain the ruler on the machine is accurate and precise should you use it for setting your fence.

4. Keep the wood in place. Your wood (or other material) needs to be held snugly against the rail and down against table. Use featherboards or other attachments to hold your wood if your fingers will get too close during a cut. Featherboards are especially useful on miter cuts. Push sticks and push shoes are also vital accessories for holding your material snug and keeping your fingers away from the blade.

5. Never wear gloves when cutting. If a bit of the glove, or even just a single loose thread, gets caught by the spinning blade, it can be pulled into the blade, which will catch more of the fabric and pull more of the glove into the blade. This creates a vicious chain reaction where your entire hand can be pulled into a spinning blade within a fraction of a second. Without gloves, the blade cuts through the skin or bones before being able to grab on and pull more in. On this same note, avoid rings, ties, necklaces, loose hair, apron strings in the front, &c. If you are wearing long sleeves, roll them up tightly before using the table saw.

6. With the correct jigs, you can do almost anything on the table saw. You can cross-cut, cut slots and channels, cut patterns, cut tapers, cut circles, taper long boards, make cove molding, and much more, and you can do it all safely. For tricky cuts or complex operations, it will actually take longer to set up the tool than to carry out the actual operation.

7. Maintain the top of your table. Rust will slowly damage the top, making it hard to push material through. It will also discolor your wood. Clean the top with metal cleaners, or even steel wool for stubborn rust spots. When clean, you should wax and polish it to prevent further rusting. Paste wax works well, particularly carnauba-based wax; anything made for cars will work as well. A freshly-waxed surface will also make your materials slide through the saw much more effortlessly.

8. Watch where your wood goes. Never start a cut until you know that the wood can go all the way through without falling off the edge or hitting an obstacle, and that you can reach it and keep hands on it at all times. Use stands, outfeed tables, or a friend when necessary. You may wish to “walk-through” a cut first, to check all this before you cut. Do not forget that the balance of the wood will change after it is cut into two pieces; where a full-size piece may rest comfortably on your table, the off-cut may tip off the side.

9. Use the right blade. Some blades are made for ripping, some for cross cutting, while more specialty blades exist for cutting veneers, laminates and plastics. For most props shops, you will be ripping and cross-cutting plywoods and soft woods throughout the day, and constantly changing the blade will be inefficient, so invest in a good combination blade that will work for the majority of your most common operations.

10. Set the correct blade height. Your blade should be high enough so the gullets of the teeth (the spaces between the teeth) are at or just below the top of the wood’s surface. This allows the blade to clear sawdust and introduce fresh air into the cut, while minimizing the amount of exposed blade to your fingers.

A Friday of Links Gone By

Have you entered the Prop Building Guidebook contest and voted on your favorite prop yet? This is the last time I’ll remind you, because the contest ends next Tuesday.

The BBC has a lengthy story on the history of the tin can. It is far more thrilling and complex than you may have imagined.

Jesse Gaffney has a great post on how to make running water on stage. It’s a common trick amongst props masters, but it is great to see all the steps photographed and explained in detail.

Tested has an interesting post on the low budget special effects from yesteryear, particularly those employed by Ed Wood.

Chris Schwartz points us to a paper written by Matt Pelto on the difference between an artist, artisan and craftsperson (follow the link at the site to see the actual paper). It’s an appropriate question for props people, who may refer to themselves as artisans, builders, designers, artists, or many other descriptors. It is interesting to read the actual historical origin of some of these terms.

Janet Sellery runs a website dedicated to health and safety in the arts. She is based in Canada, so the workplace laws are specific to there, but the list of resources she provides is useful to everyone. I like her slogan, too: “Creative Risks without Safety Risks.”

Exploding Cuckoo Clock

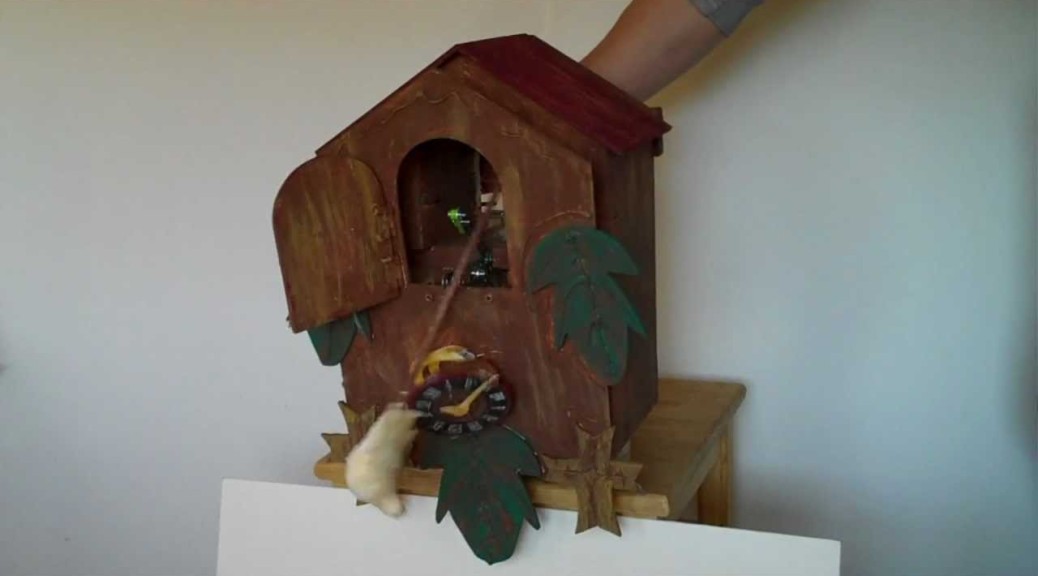
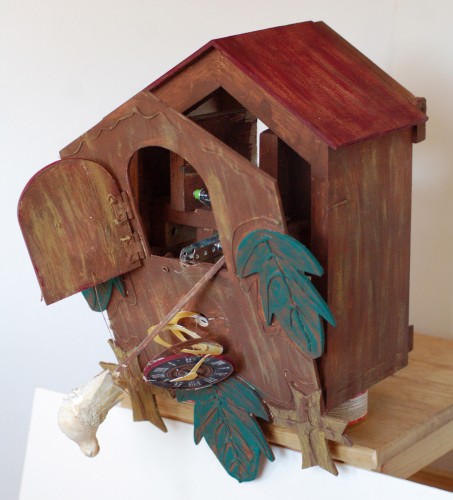
Last fall, I did the props on Crazy for You. For those unfamiliar with the show, there is a scene were a cowboy shoots his gun off in the saloon. The bullets hit various objects in the room for comedic effect, including a cuckoo clock that explodes.

Cuckoo Clock, exploded

I have not shared any photographs or information on the clock yet because I was actually writing an article on it. The full details and pictures are now up in the latest issue of Stage Directions magazine in an article called “Don’t Go Cuckoo.”

I also shot a short video showing the action of how the clock cuckoos, explodes, and how long it takes to reset it for the next performance.

A Disappearing Turkey

To all of my American readers, I hope you have a Happy Thanksgiving this week! Brian Wolfe from Costume Armour sent me some photographs of a trick turkey they recently created, which seems apropos to the holiday.

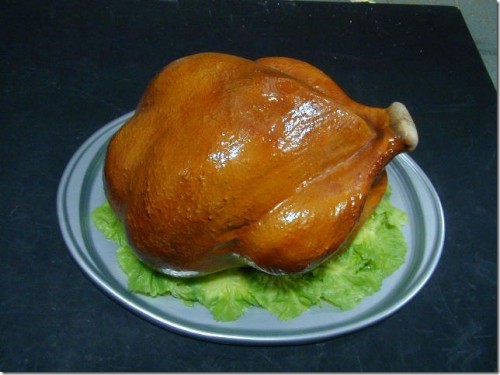
For this trick, a waiter needed to walk in with a food cart. He lifts the lid off of a covered tray revealing a delicious roast turkey. He replaces the lid, and the next time the lid is removed, the turkey is gone. Instead, an actor’s head is on the tray, and the actor begins to speak.

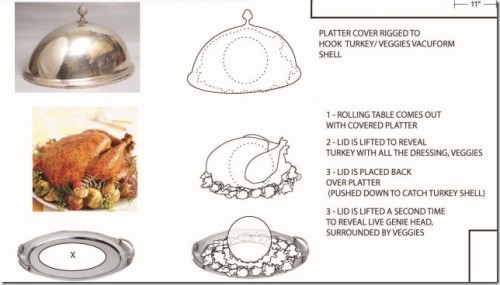
This is the drawing he shared with me:

Drawing for a turkey trick

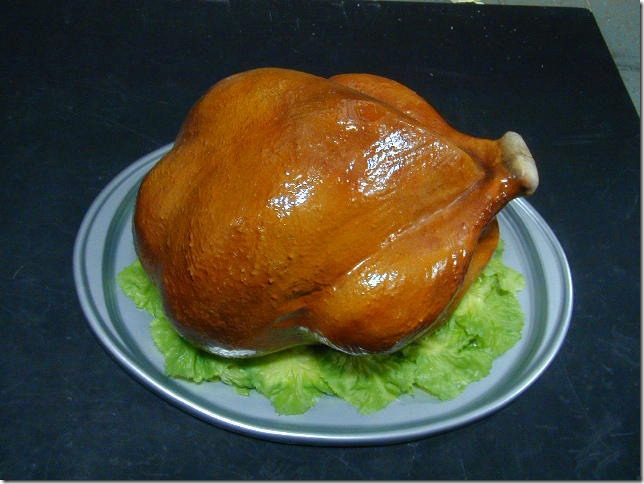
They needed a giant, oversized turkey with enough room inside to fit a head; it also needed to be light enough that it could be lifted along with the tray (you will see why in a minute). They had a rubber turkey in stock, but it was too small and heavy. So they decided to vacuum form a new one. They carved the turkey in foam, made a two-piece mold, and vacuum formed it in 0.04″ Kydex plastic.

Vacuum formed turkey halves

They cut out the pieces, glued them together, and painted them. Next, they cut a large hole in the bottom:

Hole in the bottom of the turkey

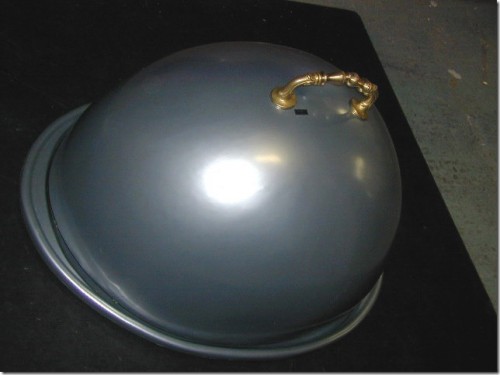
The tray was also vacuum formed, this time in a heavy 0.093″ Kydex plastic with a metallic finish. The bottom was formed over a wooden mold, while the lid used a plaster mold. They also added some artificial lettuce which was bought.

Vacuum formed turkey

A brass drawer pull completed the look to the lid. The small black rectangle next to it in the photograph below is a small toggle switch:

Tray Cover
Tray Cover

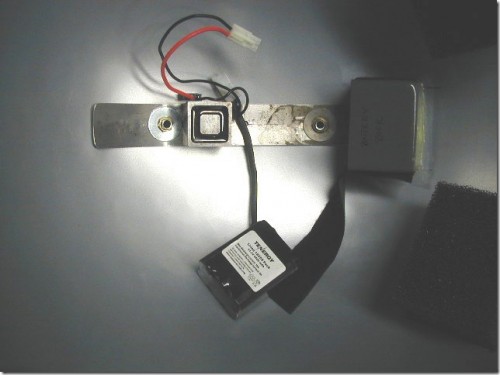
When the waiter flips this switch, a small battery-powered electromagnet turns on (shown in the next photograph). The turkey had a small piece of flat steel hidden on top which is grabbed by this magnet. So when the magnet is on and the tray lid is lifted, the turkey travels along with it, hidden from the audience’s view.

Battery and magnet
Battery and magnet

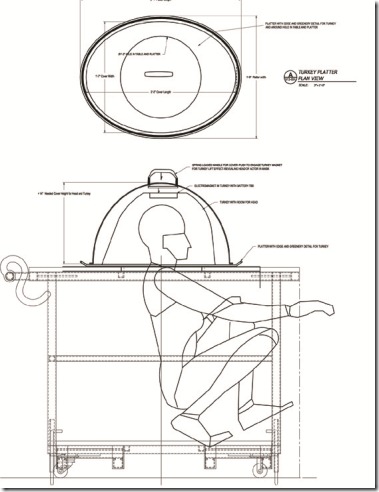
The diagram below illustrates how the whole trick was set up. I’ve seen this same basic principle carried out in a number of different ways, but the combination of the hollow turkey and electromagnet makes this execution especially elegant; you can control whether the turkey or head is visible simply by the flick of a switch. The actor underneath does not have to do anything.

Turkey trick diagram

Hope you enjoyed this! Have a Happy Thanksgiving!

Player Piano for Crazy for You

Another project I worked on for Crazy for You at Elon University was a player piano. The piano sits against the wall of the saloon for a number of scenes. It has a couple of gags; when we first see it, a cowboy is playing a song on it, then gets up and walks away as the piano continues to play. Later, another cowboy fires a gun which hits the piano and causes it to start playing on its own again until it is kicked.

We began by looking for a real piano which we could take apart and modify. After a few weeks of unsuccessful searching, I decided I would just build one. After all, it needed to be a custom size to fit into the set, so transporting and modifying a real piano might be just as labor-intensive. The exterior of a piano is not really that complicated; it’s mostly a giant box with various levels of molding and details. The tricky part was getting it to play on its own.

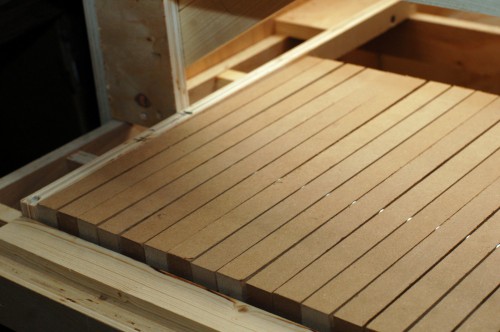
Detail of the piano keyboard

One of the perks of working at a university is that you have a lot of crew members backstage who can operate tricks by hand. I knew the player piano could be worked manually from behind, so I just needed to figure out how to make that work. I cut out a set of piano keys from 3/4″ MDF and drilled a hole through each one. I ran a piece of metal rod through all the holes; I added a washer between each piece of MDF as a spacer. You can just make out the washers in the photograph above, catching a glint of light. This method allowed the MDF “keys” to pivot around the rod. I set the “keyboard” in the piano and added  blocks underneath to limit their movement to that which a piano has. You will notice the holes were drilled offset from the center. The extra length in the back gave the back extra weight; when you let go of a key in the front, gravity would pull the back down, returning the key to its natural position. This simple mechanism would allow someone in front to play the keyboard normally, and someone in the back could make the piano appear to play on its own by pushing the keys up.

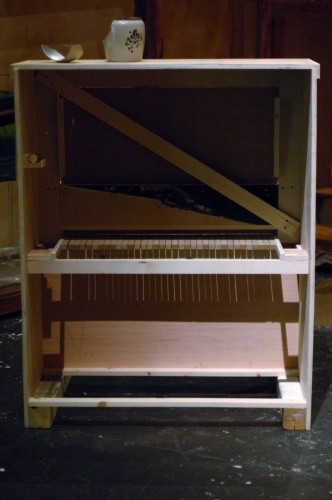
A view from the back

In the view from the back, you can hopefully get a better sense of what is going on. The keys can be accessed from behind; pushing them up causes the keys in front to move down, as if the piano is playing itself. When you let go of the keys in behind, they return to their normal position. The piano was pushed up against the wall, and a hole was cut in the flat, allowing a crew member to reach in and “play” the piano without being seen by the audience. The music itself was played live by the orchestra.

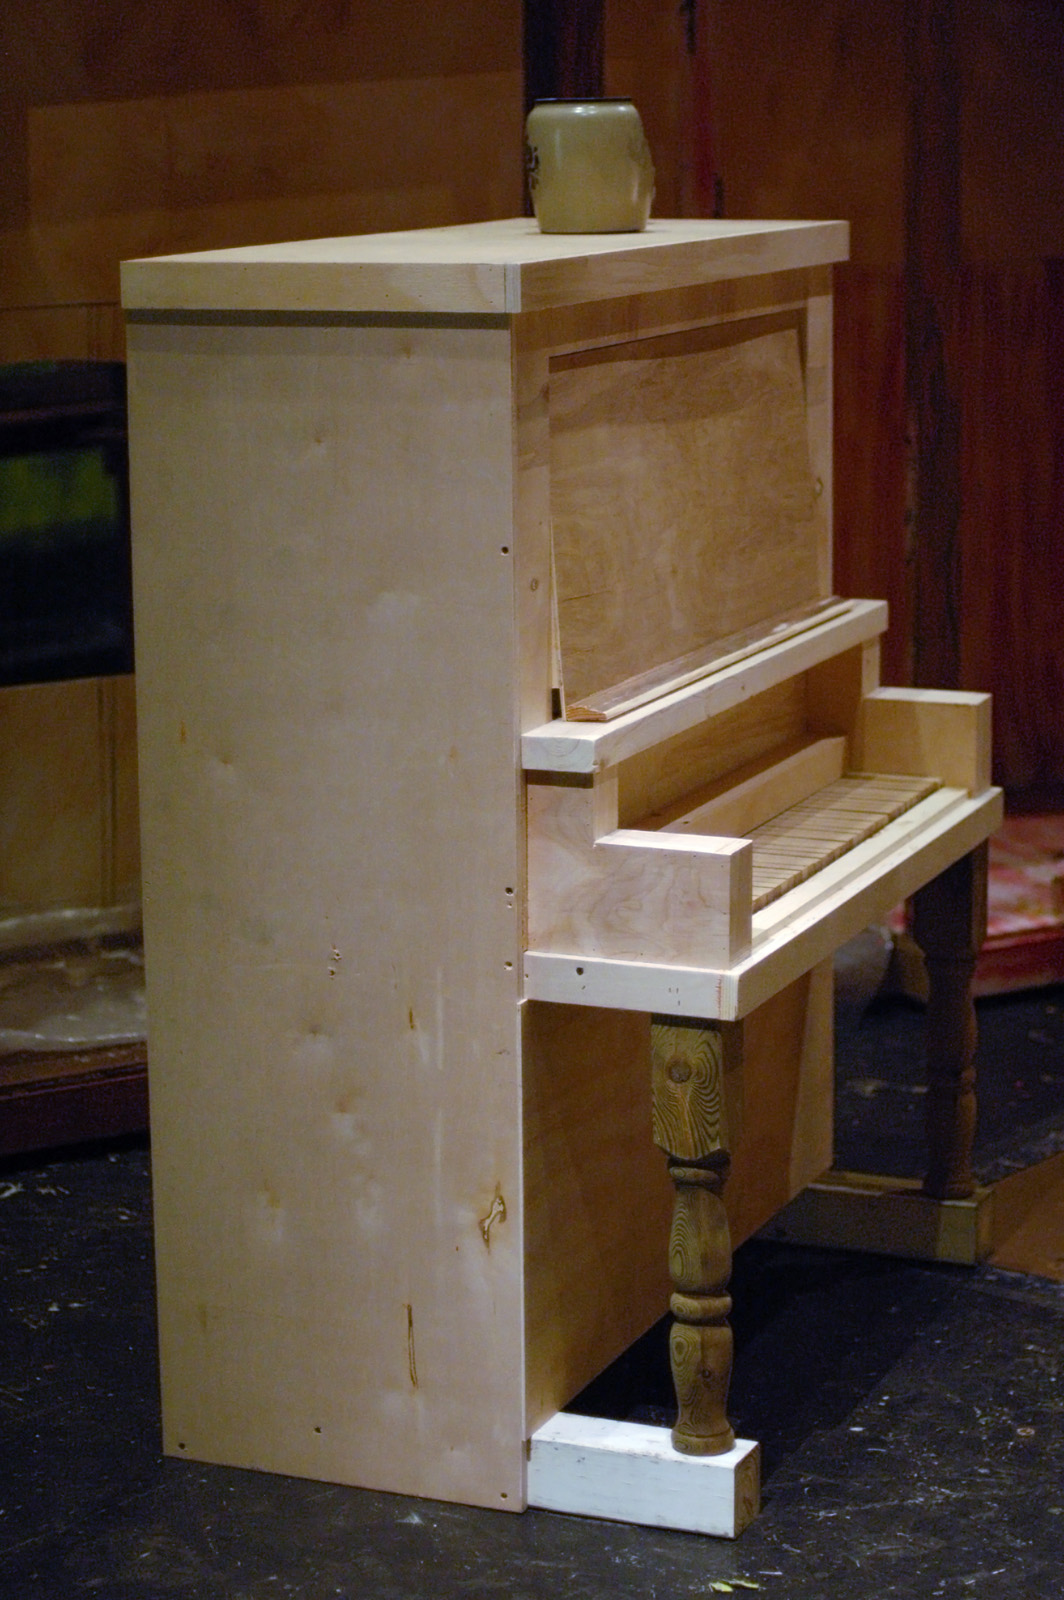
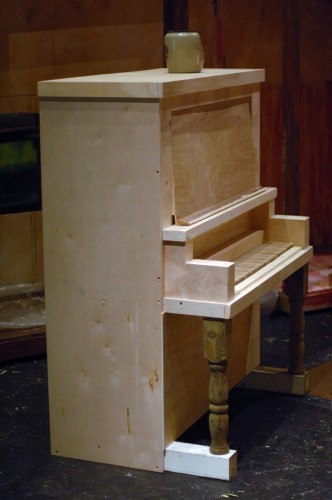
The finished, unpainted piano

The photograph above shows the piano immediately before it is painted. I managed to build the entire thing with scrap material, amazingly enough. The scene shop at Elon has a CNC machine, and it produces some wacky off-cuts. The scene shop usually doesn’t have time to trim the edges to make them square and usable again, but I do, so it gives me some nice large pieces of quality plywood and lauan.

The saloon in Crazy for You

The piano was painted to match a lot of the other woodwork used in the saloon scene. I cut some black keys out of black foam core and hot glued them on top of the white keys; they basically moved along with the white keys as they were played, but were not playable on their own. With the keys painted white and the piano painted with dark wood tones, it gave enough contrast that even the balcony seats could witness that the piano was playing on its own. All in all, it was a pretty fun prop for having been built in little over a day.