Tag Archives: Triad Stage

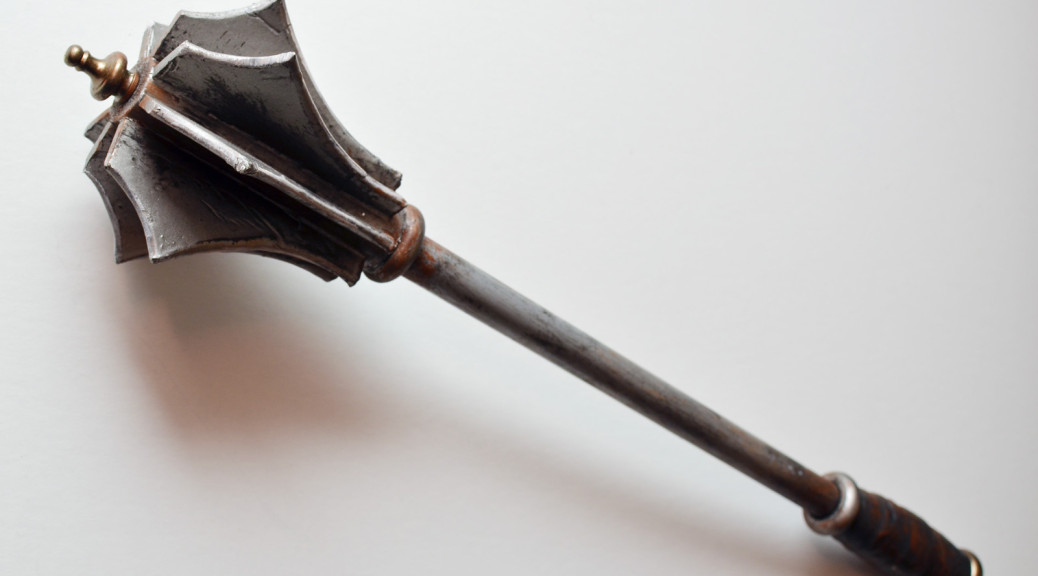
Mace from Deathtrap

Anyone who has done Deathtrap knows that the “wall of weapons” could be a challenge. I was able to source most of what we needed, but the mace was a bit tricky. I had a flail, but when we got to tech, we decided it really needed to be a mace. It is never used, but the characters reference it a few times, and they would know the difference between a flail and a mace. I was pretty much out of money, so I decided to build one with whatever I had laying around while they worked on lighting and sound cues.
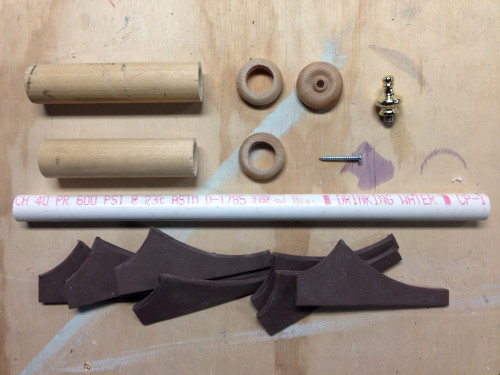
Mace parts
Mace parts

I printed out some research of a flanged mace that had a cool look but was not too intricate. The shaft was a length of PVC pipe. I attached a bit of wooden dowel on either end; one for the handle and one for the head. I cut the flanges out of craft foam. I drilled out the center of a few wooden toy wheels to make the various ridges, and a lamp finial finished off the top.
Painted pieces
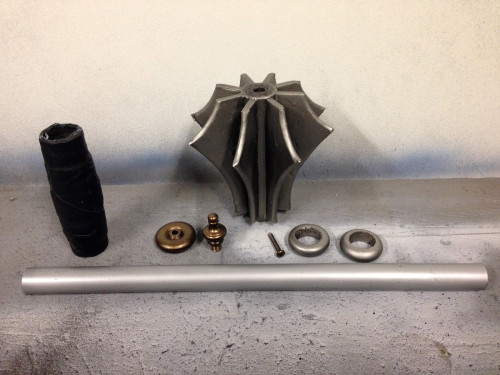
Painted pieces

I attached the flanges to the head with some hot glue and sealed it all with some fiberglass resin. I only used one coat, which did not really stiffen the foam, but since it was just a wall-hanger, I figured it was enough. Everything got sprayed with various metallic spray paints before I attached it all together.

For the handle, I wrapped tape around it to give it more of a bulging cigar shape. I wrapped the final layer of tape in a spiral to make it look like a leather-wrapped handle.
Mace
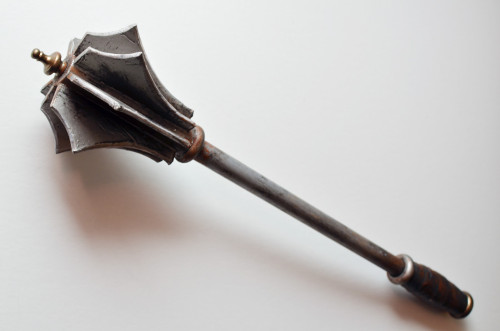
Mace

I finished the whole thing off with some weathering and aging using acrylic paints. The end result looked pretty a-mace-ing.

Foam Firewood for Fighting

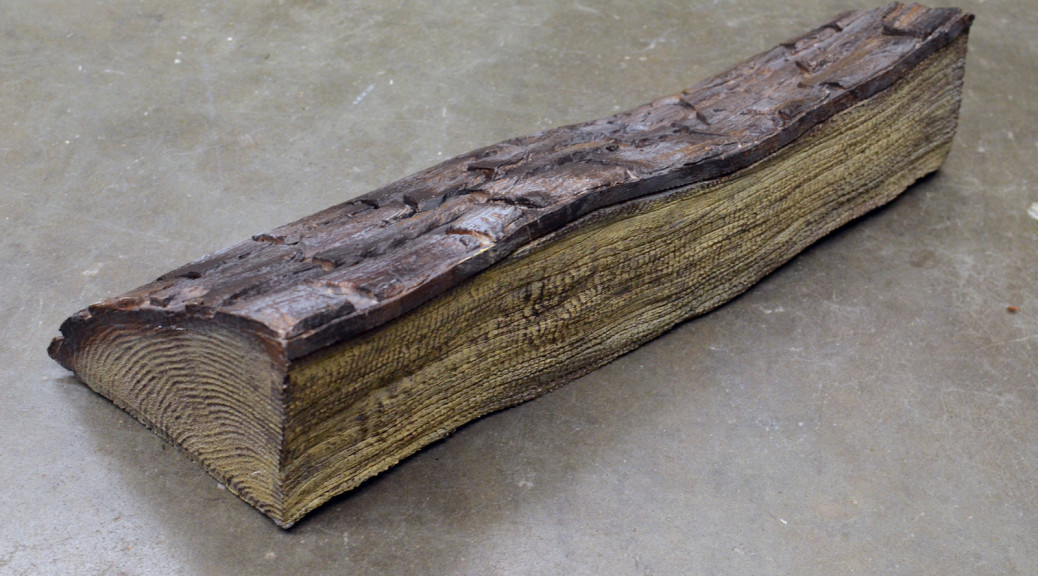
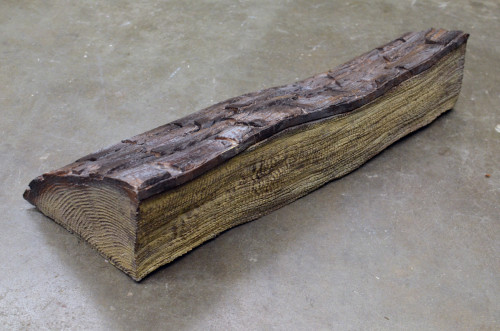
We just closed Deathtrap at Triad Stage. Anyone who has done or seen the show knows it has quite a few tricks, not to mention all the set dressing. One of the projects I made for the show was a piece of firewood that could safely be used to beat someone to death. I put together this video showing the process from start to finish.

I started off borrowing some techniques from LARPers; they build weapons out of foam intended for actual combat. I tried wrapping closed-cell foam around a piece of PVC, but that was too hard to hit someone with. I ended up using a core of polyurethane upholstery foam with three pieces of closed-cell foam around the outside.

The foam I used was a mix of anti-fatigue mats from Harbor Freight and Silly Winks foam from the craft store. Some people call this EVA foam. It’s more likely to be XLPE foam. I don’t think there’s enough of a difference to worry about, but it’s one of the things I’m investigating for the second edition of The Prop Building Guidebook.

Textured Foam
Textured Foam

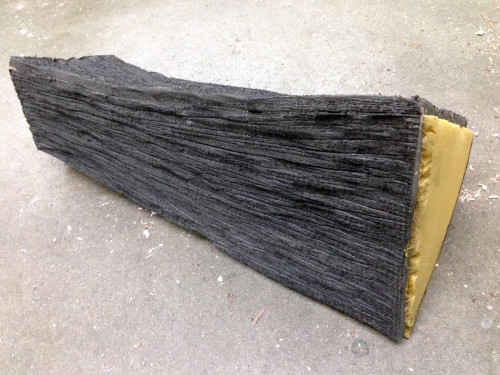
To get the texture on the inside parts of the foam, I went over the whole surface with a wire wheel. Next, I scored the foam with a knife in the direction of the “grain” of the wood. One of the great tricks with this kind of foam is that when you score it, you can run a heat gun over the surface and the foam will open up, turning the scored lines into beveled grooves.

Bark
Bark

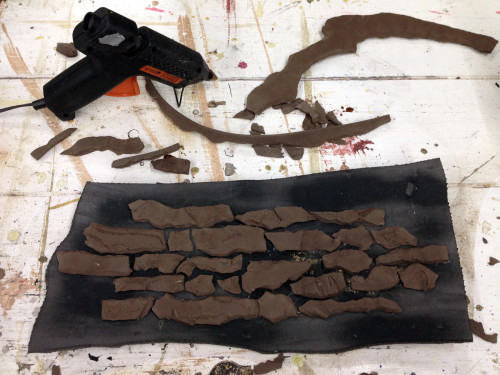
For the bark side of the log, I cut and tore apart chunks of thinner Silly Winks foam and hot glued them to the surface. I roughed them up with a surform and a knife; you can see that part of the process pretty well in the video.

Flexcoat
Flexcoat

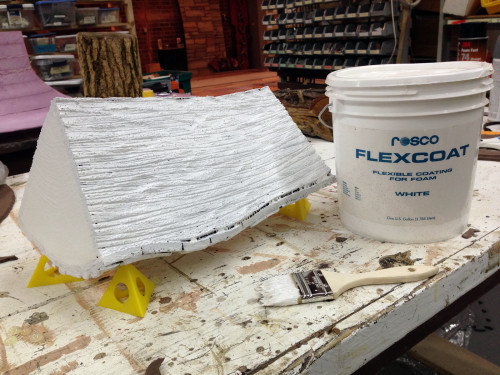
Everything was coated with a layer of Rosco Flexcoat. This sealed everything in and gave a nice even layer to paint on. And as the name suggests, it remained flexible when dry.

When you watch the video, you will also see me adding some torn strips of paper towel with the Flexcoat on the bark side. This gave it a touch of texture and made it feel a bit more organic.

Finished Firewood
Finished Firewood

The whole thing was painted with a mix of scenic paint, acrylics, and Design Master, all of which remain pretty flexible when dry. We got the thing out on stage, and the lighting made it look very red, so I gave it another few coats of paint to make it look more realistic under the light.

Under natural lighting in the picture above, it looks very theatrical, but on stage it worked very well. The actor was able to beat the other actor without injuring him, and it produced a wonderful dull thud as he did so.

End of the Week Link-o-Rama

StarWars.com has a great interview with Bill Hargreaves, one of the prop makers on the original Star Wars trilogy. He talks about how he got the job, how he built many of the props, and what it was like working on the set. His most famous creation was the bounty hunter droid, IG-88, and he has gone on to build props for the Indiana Jones films and many others.

Speaking of interviews with cool people, the Greensboro News & Record talked with me about my work on Deathtrap, which begins performances this Sunday at Triad Stage. “Eric Hart won’t be on stage when “Deathtrap” opens Sunday, but his talents will be seen in every thrill delivered and every goosebump raised.” Aw, shucks.

CineFX has a cool (though very gross) look at the creatures and special effects in The Strain, a TV series based on the novels by Guillermo del Toro and Chuck Hogan. Don’t read this right after you’ve eaten.

So, this is something I really want to try someday: hydro-dipping. I first started coming across videos of it a few months ago. Now, Make Magazine has collected 12 tutorials on how to hydro-dip. I can try to explain it, but once you see the videos, you’ll know what it’s all about.

Window Shade Gag from 39 Steps

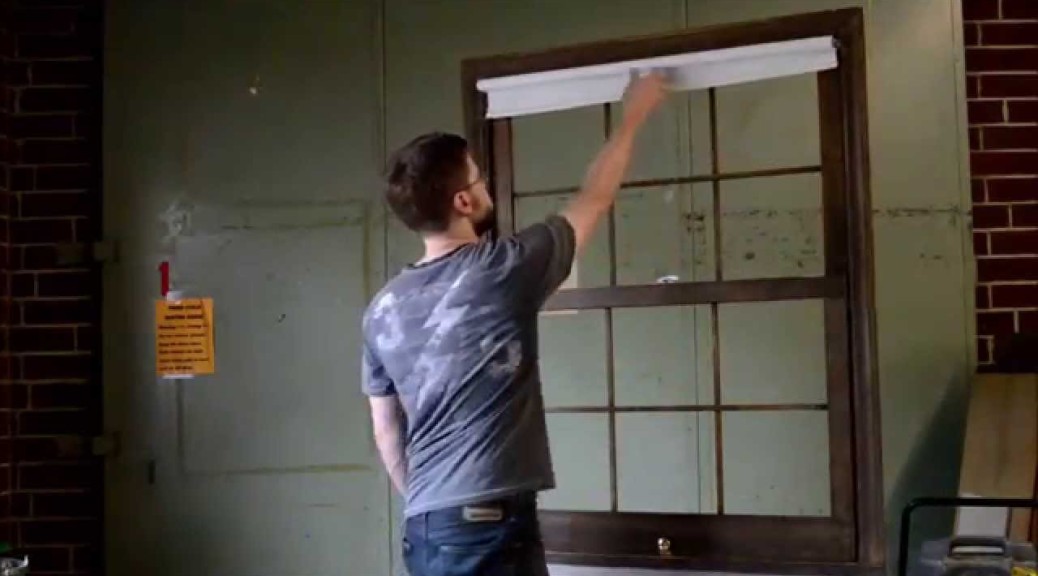
I have a new article in the October issue of Stage Directions magazine. Last fall at Triad Stage, we did 39 Steps. I already posted about the giant chandelier I made for that show. The script also calls for a number of tricks and gags. One of them is a window shade with a mind of its own.

In my article, “Get a Grip“, I go through my process of solving that problem. I start off with an initial idea, and after a few rounds of testing and modifications, come up with a gag that works. How does it work? Well, you’ll have to read the Stage Directions article for that.

I also made a little video on it. You can witness my awesome acting skills.

Farm Table for Abundance

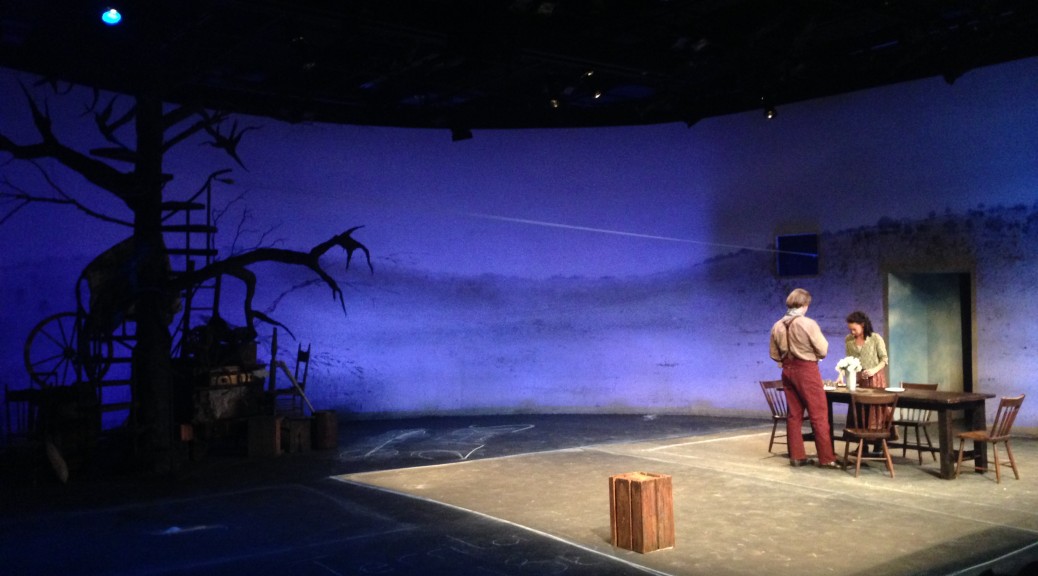
Last spring, Triad Stage did a production of Abundance, one of the lesser-performed plays by Beth Henley. It was directed by Preston Lane, with scenic design by Robin Vest. One of the main furniture pieces was a giant farmhouse table. I decided to build it because finding a farmhouse table this size would blow the budget, and they are usually pretty hefty.

It needed to be super sturdy but fairly lightweight, because they jumped up and down off of it, flipped it onto its side, and dragged it around on stage. To cut down on the weight, only the boards around the perimeter of the top were the full thickness; the ones on the inside were thinner, with a bit of hidden framing to sturdy them up.

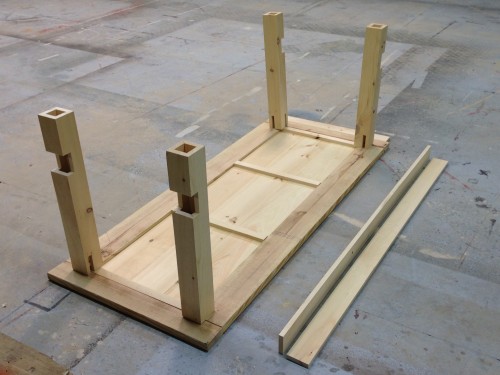
Underside of the table

The breadboard ends allowed me to hide the different thicknesses of wood used for the top. I positioned the legs so they would straddle the joint where the breadboard was attached so it would not snap off if the actors ever stepped on the very edge.

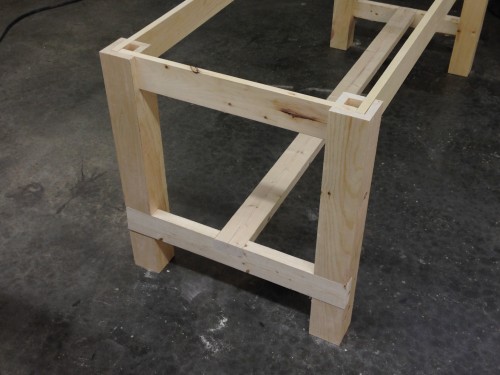
I also made the legs hollow. They were made from four pieces of wood with mitered edges glued together. To save time, I glued up four long pieces of wood, and when dry, cut it into the four legs.

Joinery
Joinery

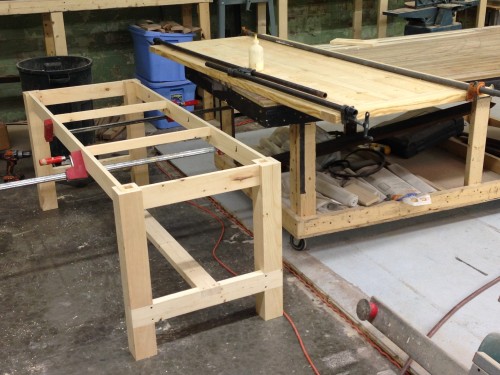
The research images for the table led me to a website called “Ana White”, which also had plans for the table the designer liked. I’ve since come across several woodworking forums which resent White’s style of furniture, since it seems to be flooding the market with this kind of shabby chic table that won’t hold up to seasonal changes. Ah well, the look was right, and it was easy to slap together.

Clamp it up
Clamp it up

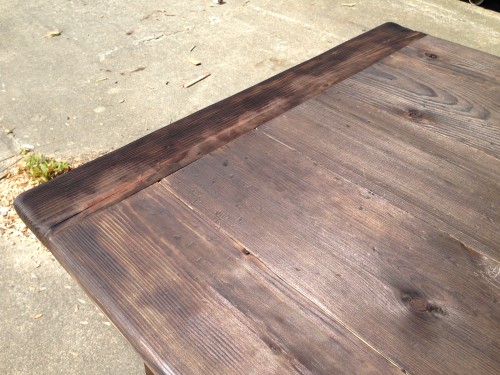
I experimented with some new (for me) finishing techniques to get a really aged, rustic appearance. The first step was scorching the entire surface with a propane torch and rubbing the charred wood away with steel wool. It took forever; I wonder if an oxy-acetylene torch would have been faster, or if it would have just started an unstoppable fire.

Burning the wood
Burning the wood

After that, I rubbed an oxidizing solution over the whole thing. You can find instructions on various websites; basically, you let a piece of steel wool dissolve in vinegar for a few days. Apply it to the wood with a paintbrush and it starts to darken and grey the wood over the next few hours. Once it was all done, I rubbed a coat of paste finishing wax onto the whole thing.

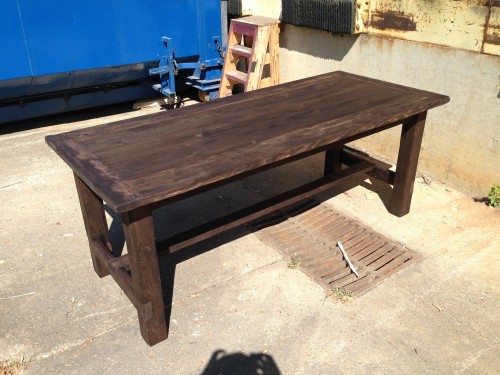
Final table
Final table

It ended up being a great table for the show. I could actually carry it around myself, though for the show, it was always two actors moving it. It only started loosening up during the last show, after weeks of being tossed up on its side, which placed a lot of stress on its legs.

Abundance
Abundance