Tag Archives: Triad Stage

Benches from Beautiful Star

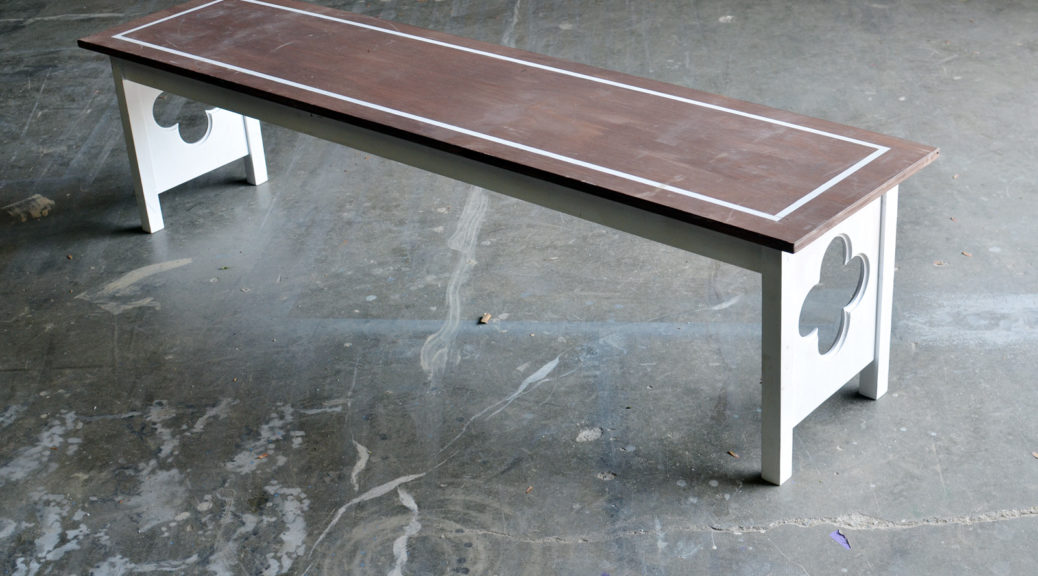
A few months ago, Triad Stage put on their Christmas show, Beautiful Star. Though it was a remount, it had some major design changes this year. For the props shop, we needed to build six church benches that could be rearranged throughout the show to create various “locations.”

For the quatrefoil cut-out, I laid out the pattern with a compass and cut it with a jigsaw. I sanded it smooth using a sanding drum that was nearly the same diameter as the individual circles in the pattern.
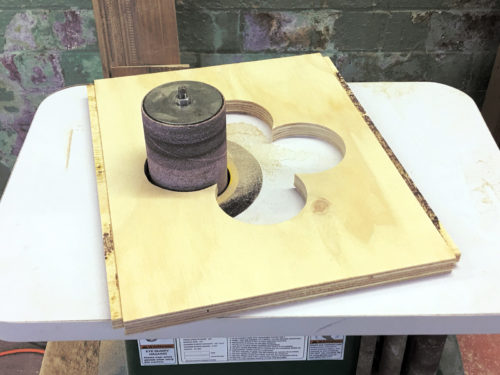
Cutting the quatrefoils

I took the time to make one of the quatrefoils as perfect as possible, and then used a pattern cutting bit on my router to cut the rest of the side panels. I needed twelve panels for the six benches I was making.
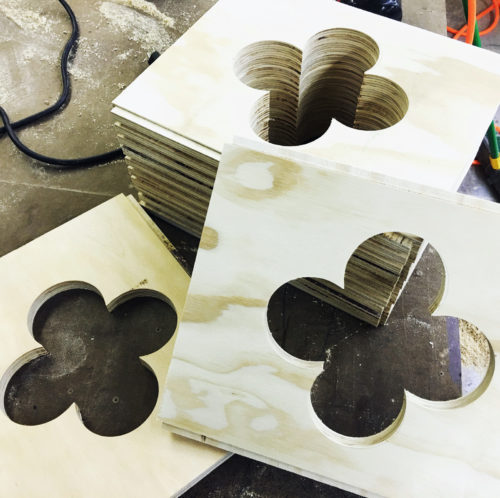
So many panels
So many panels

The team wanted the benches to be able to stack on top of each other, sit up on their sides, and otherwise act as instant scenery. They also needed to support the weight of actors standing on them, but be lightweight enough for children to carry them.

I routed a groove down the sides of all the legs. My jig kept the groove in the center of the leg and set stop points for the top and bottom as well. I also cut a tongue on the side panels, which you can see in the previous photos.
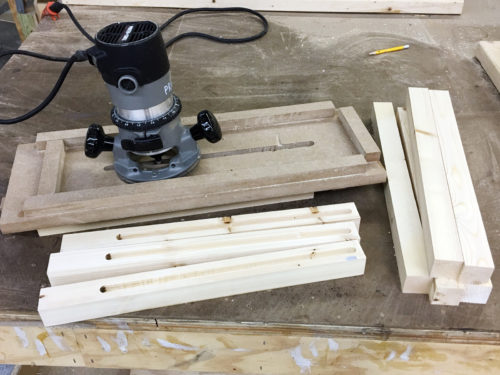
Routing the joints
Routing the joints

In the picture below, you can see I also cut a mortise and tenon for the apron to connect to the leg, and a notch for the leg to fit up into the seat. Additionally, the aprons and side panels were attached to the seat with pocket hole screws. This sucker was going to be strong.
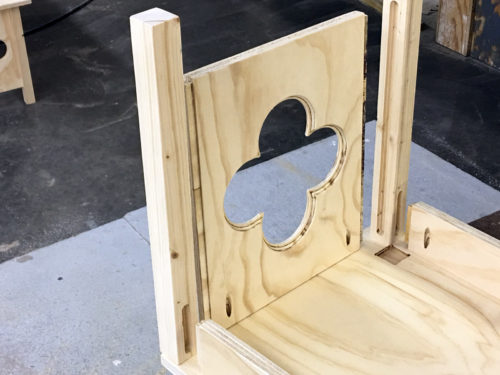
Fitting it together
Fitting it together

The joints made the whole bench pretty sturdy even without glue, but once it was glued and screwed together, it was rock solid.
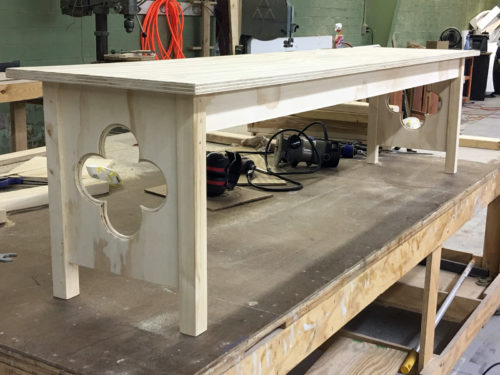
The unpainted bench
The unpainted bench

We glazed the seat with a dark brown and painted the sides white. During tech we added the white border around the seat to finish off the look. Now we have six lightweight church benches that can be used in a whole host of shows.
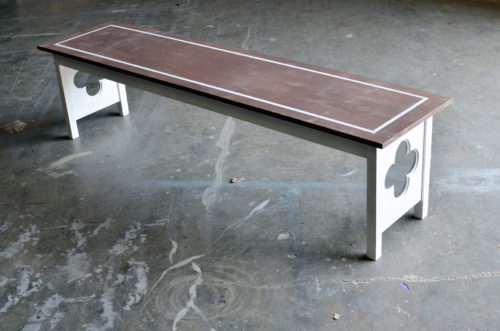
Beautiful Star bench

Bubble Blowing Automaton

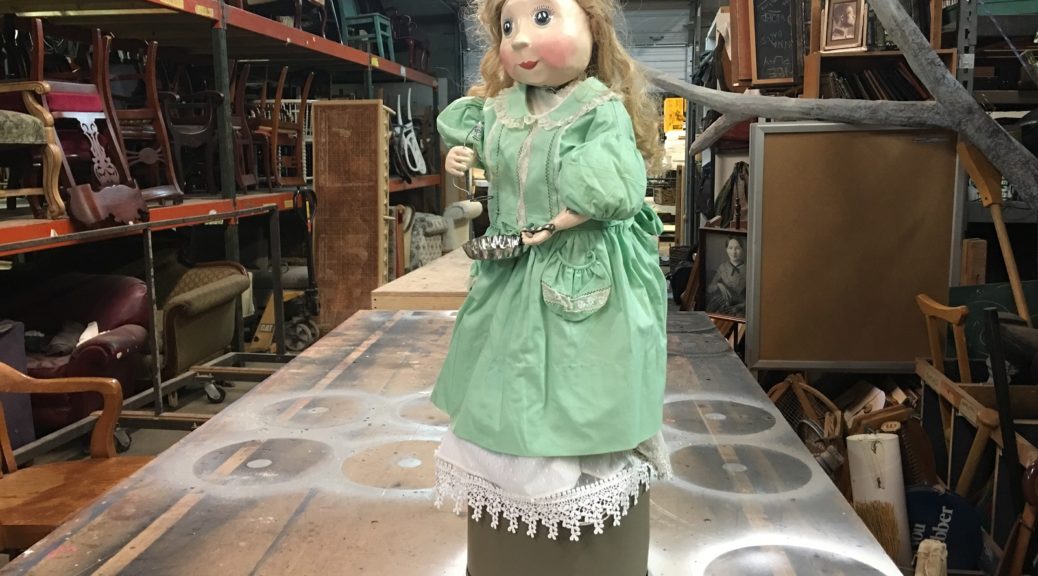
If you’ve ever seen the play Buyer and Cellar, you know that a key scene revolves around the description of “Fifi”, an antique bubble blowing automaton. An automaton is a mechanical device that repeats a series of predetermined motions; think of a wind-up toy, or a cuckoo clock. They were really in vogue in the 16th through 18th centuries, when clock makers made all sorts of intricate moving automata in the shape of humans and animals playing out various whimsical scenes.

Most productions of Buyer and Cellar imply the existence of Fifi. The whole set is usually quite minimal, and the props are limited to a chaise and a book. For Triad Stage’s production, the director wanted to know if we could actually have a doll that dipped a wand into soap and blew bubbles out of it. She felt the audience, like herself, may not know what an automaton was, and this pivotal scene would be confusing without some visual reference.

I told the team it would be no problem to make an automated doll that moved by itself, and then I feverishly racked my brain as to how I was going to pull this off. I have been reading The Automata Blog for years, so I had a good mental catalog of potential solutions (anyone interested in automata should definitely dig through the archives on that site).

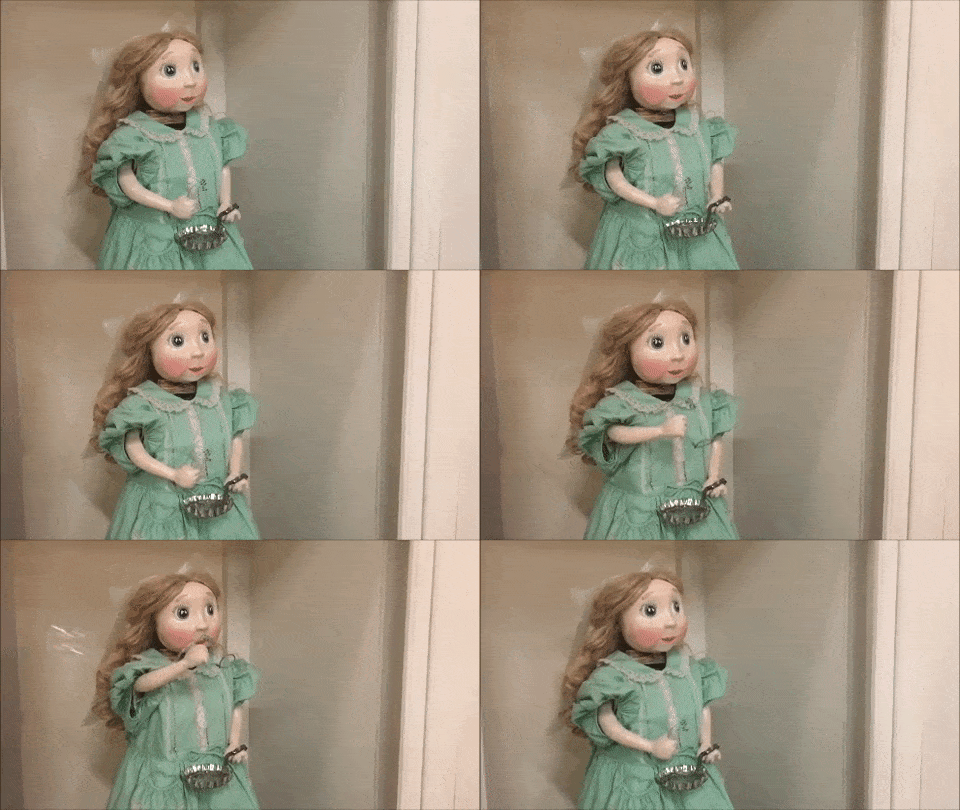
I put together a  video that describes how the final mechanisms work and that show the doll in motion.

Bubble Blowing Automata

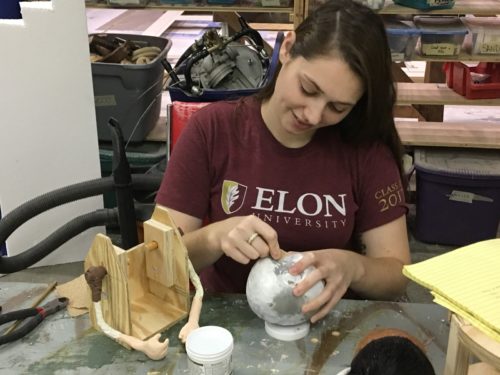
My apprentice, Shay, started off by sculpting the head and arms. The head was foam, while the arms were made of wire wrapped in tape. Everything was coated in Apoxie Sculpt. She mounted them to a “birdhouse” which would contain the mechanism.

Sculpting the doll parts

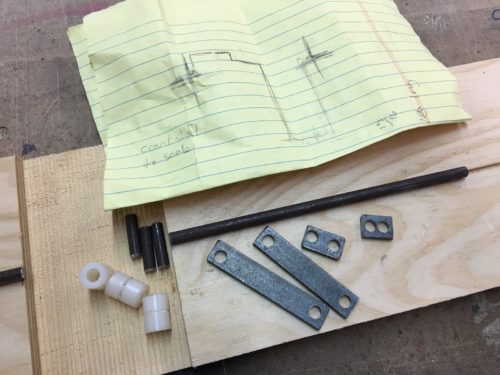
As explained in the video, all the movement was driven by a single crank shaft run by a motor. We prototyped the crank shaft with some bent wire, then transferred the measurements to a full scale drawing which I used to fabricate a more robust shaft from steel.

Laying out the crank shaft

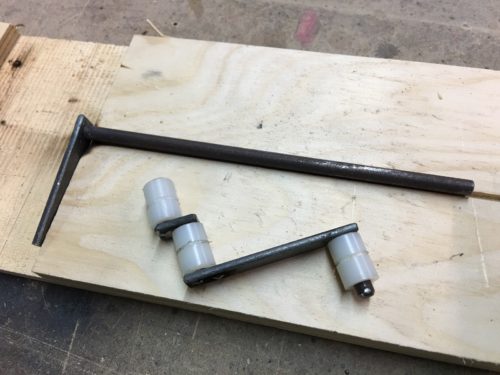
I used nylon spacers which were free to spin around the pieces of quarter-inch rod on the crankshaft. I cut a small groove around the center of the spacers to keep the string from slipping side to side. Everything was welded together to make a single piece.

Crank shaft near completion

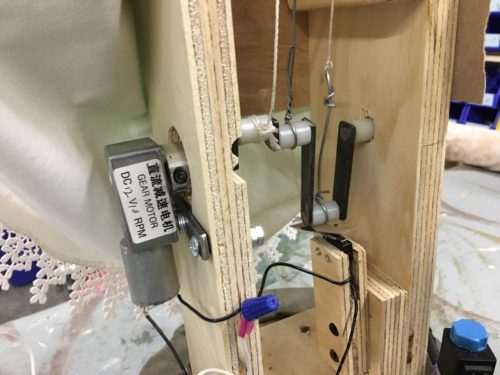
I began by using string to connect the crank shaft to the arms and head. It would frequently get caught by the spinning crank shaft, causing Fifi to stop working. I tried a number of ways to prevent the string from wandering far enough to the side to get caught, but nothing worked one hundred percent of the time. I wanted to use stiff wire, but the distance between the shaft and the doll’s arm changed as it spun, so I needed the string’s ability to go slack. Eventually, I realized I could use a piece of wire that was long enough to clear the crank shaft, and then attach it to a piece of string for the rest of the distance to the arm.

Motor and crank shaft

The motor was a basic hobby motor with an attached gear box that slowed it down to 12 revolutions per minute. The crank shaft was not perfectly straight, so the motor was mounted loosely, allowing it to “float” a little bit. The pneumatic portion of the prop is explained in the video; Fifi was attached to an air compressor backstage, with tubing running up her arm and aimed at the bubble wand. A solenoid valve was triggered by the crank shaft whenever her arm was raised, causing air to rush out for a brief moment.

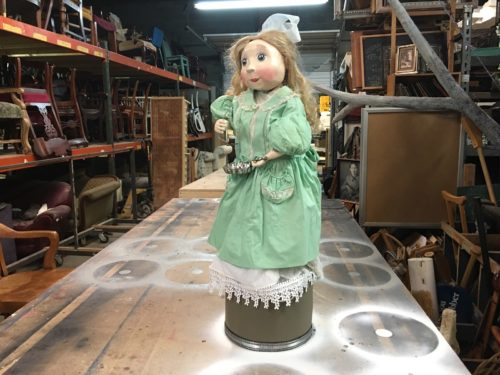
Fifi, the bubble blowing automaton

Though Fifi had a lot of challenges, once we got her working, she worked pretty flawlessly throughout the entire run.

Upholstering a Chaise

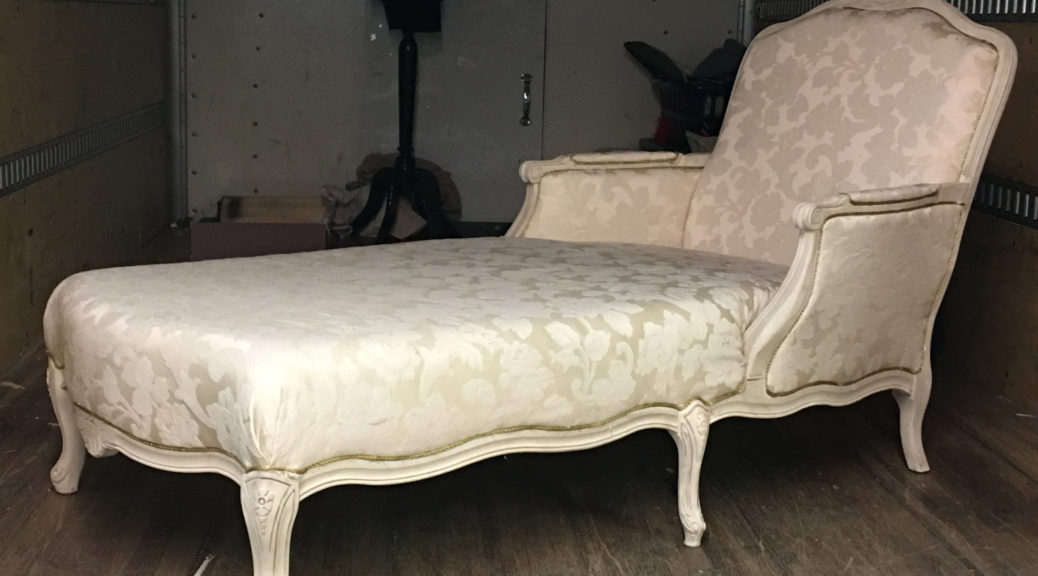
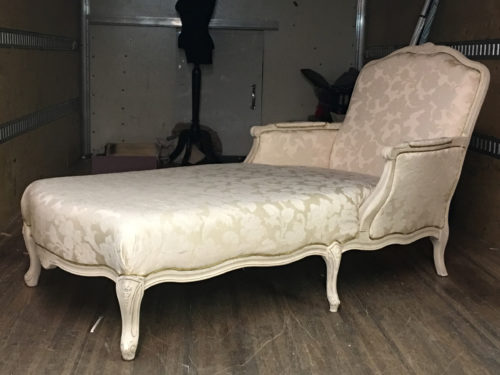
I just finished Buyer and Cellar at Triad Stage. We needed an all-white antique French chaise. I could not find any within our budget, especially since I knew I would need to reupholster anything I found.

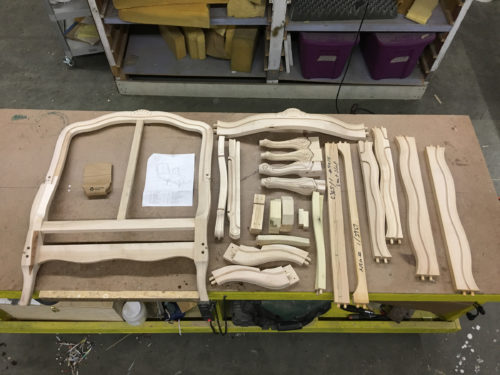
One of the great prop secrets is that you can order furniture frames from companies that sell to professional upholsters. I found a company that made a chaise in the style I needed. You can order a frame unfinished and knocked down, which means it arrives without any paint or stain, and it is completely unassembled. The cost is a fraction of a finished piece (and the shipping is far cheaper, too).

Unboxing the chaise
Unboxing the chaise

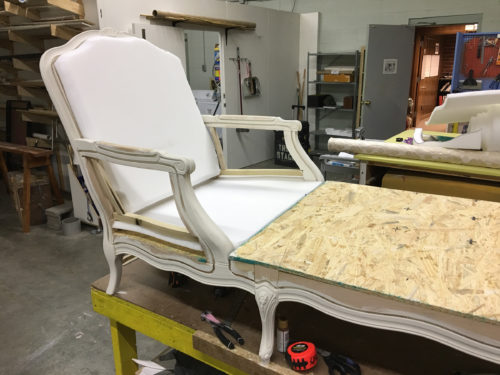
The frame came flatpacked just like a piece of IKEA furniture, only instead of allen keys, it fit together with glue and dowels.

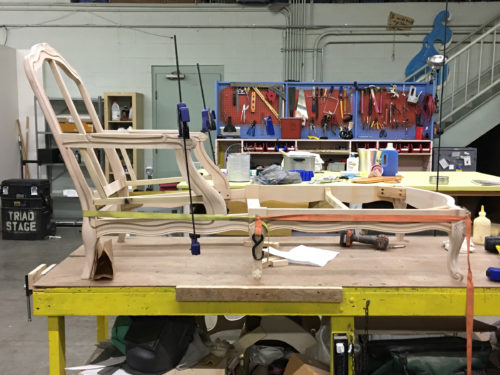
Assembling the frame

Other than a few extra (I hope) pieces, assembling the whole piece was easy to do with the provided instructions.

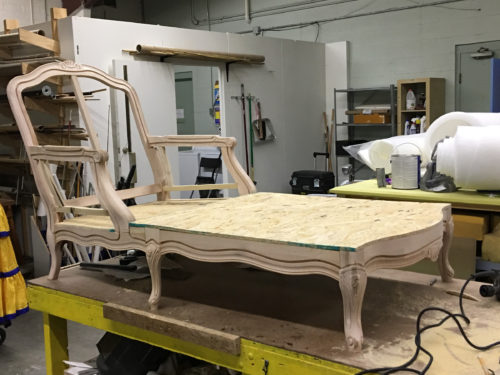
Adding the seat
Adding the seat

At this point, a real upholster would start adding webbing for the seat. I like to put a flat sheet good across the whole base. It makes it much more rigid, which a lot of actors prefer because they can get out of the chair much more quickly. It also provides support for when the director wants someone to stand on the chair, which will inevitably happen (and did indeed happen on this show).

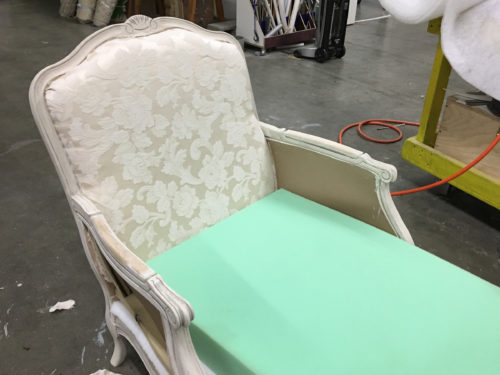
Foam cushions
Foam cushions

I painted the exposed wood before adding any fabric to avoid a mess. I upholstered the back and inner panels first, because the outer panels would block off where I needed to staple.

Seat cushion and side panels

The chaise has a groove routed along the edge, so I stapled the fabric into that and then trimmed the excess. My thought was that I could stick some 3/16″ decorative cording on top to hide the staples and give it a nice, clean edge.

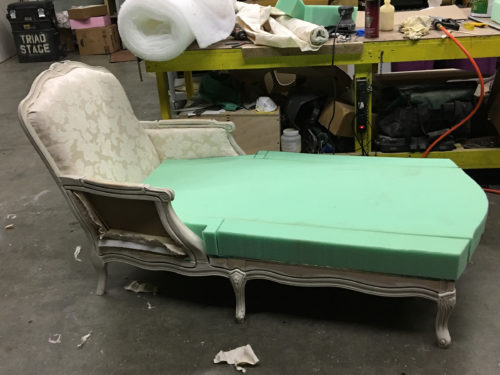
Final seat cushion shape

I covered the side panels in cardstock and put the cushion directly on that. I also tried to cover the back in cardstock, but that didn’t give enough support, so we needed to go back in and reinforce it with some webbing.

The seat is a luxurious piece of four-inch foam made possible by a 70%-off coupon from Jo-Ann Fabric.

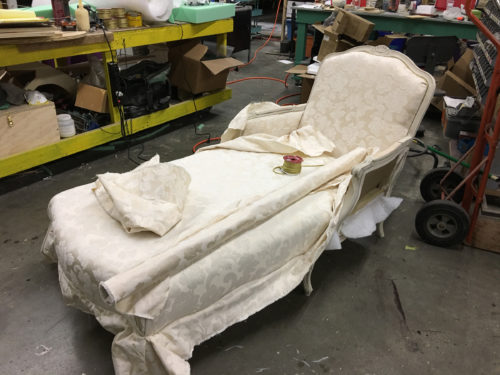
Stapling down the fabric

In the picture above, you can see the fabric before it was trimmed. I found an Olfa knife worked really well. We also found some gold cord in the Christmas aisle at the craft store that worked well to finish the edges.

Finished chaise
Finished chaise

The remainder of the upholstering was done by Keri Dumka and Shay Hopkins-Paine, who worked with me on this show. Overall, it was an interesting experience to upholster a piece of furniture totally from scratch. It also gave me some ideas on how to build upholstered furniture in the future.

Friday Prop Links

Summer at The Shop – The Triad Stage blog recently featured their production facilities, which is where I work. Check out my workshop, and get a sneak peek at some of the projects I’ve been working on, like some military radios for South Pacific.

Backstage at Signature: 100 Heads for Venus – Cassie Dorland had to make a hundred fake heads for the Signature Theatre’s production of Suzan-Lori Parks’ Venus. This video shows how her and over a dozen prop builders as they mold, cast, and paint all these heads.

Quiz: Can you guess the Shakespeare play just from its most memorable props? – As the title suggests, it’s just a fun little game to test your prop knowledge.

Watch Adam Savage Make His Own Excalibur in One Day – Adam Savage recreates this iconic movie sword in aluminum using an enviable array of belt sanders. It’s a lengthy video, but filled with lots of little tips and tricks if you are interested in metal working.

Photo-Etching and Soldering Your Own Brass Model Parts – Make Magazine highlights David Damek’s techniques for creating detailed parts out of brass. He uses it for making models, but you can easily adapt these methods for adding decorative brass details to props like treasure chests and jewelry.

Ancient Cherokee Box

Our final production of the season at Triad Stage was a new piece called And So We Walked. Written and performed by DeLanna Studi, it recounts her journey to walk the Trail of Tears with her father and rediscover her Cherokee roots. The show itself is traveling around the country for the next few weeks before another full production at Portland Center Stage next spring.

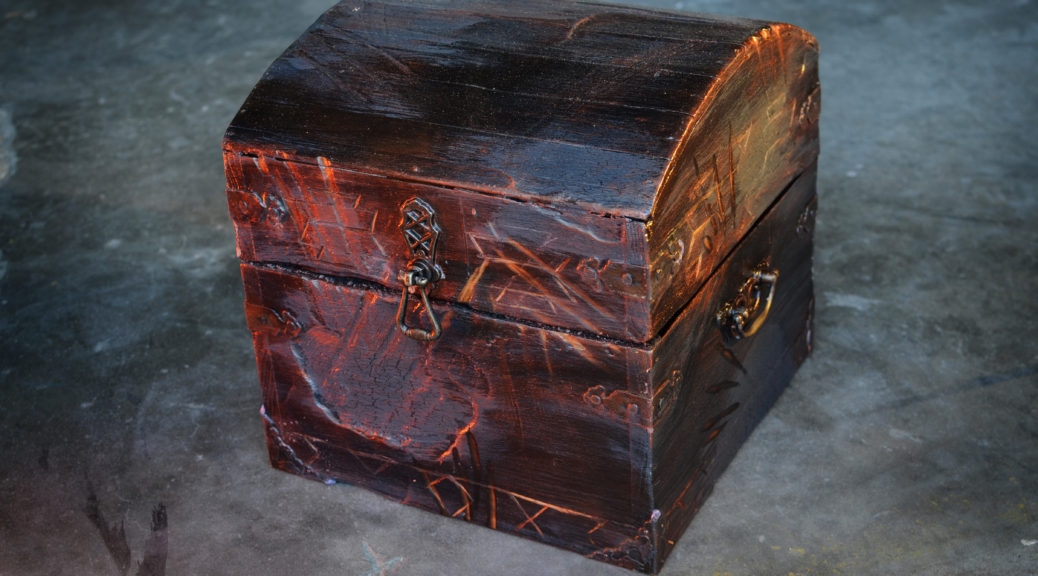
The show takes place in both the real world and a theatrical dream world, and one of the props I built was an ancient burned box which held secrets. We determined the size and shape in various devising sessions and rehearsals, so I simply made another box out of nice materials to match a rehearsal version I had already made.

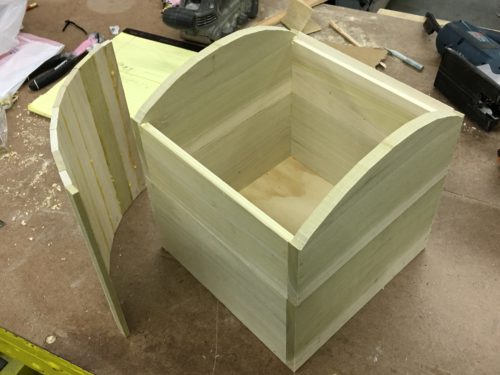
Constructing the box

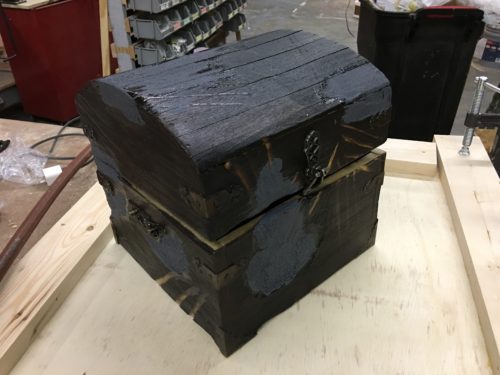
The carcass was constructed from half-inch poplar I bought at Home Depot (my planer was broke), with a piece of plywood for the bottom. The top wanted to be vaulted, so I ripped a number of slats from quarter-inch poplar, beveled the edges, and glued them together to make the vault shape.

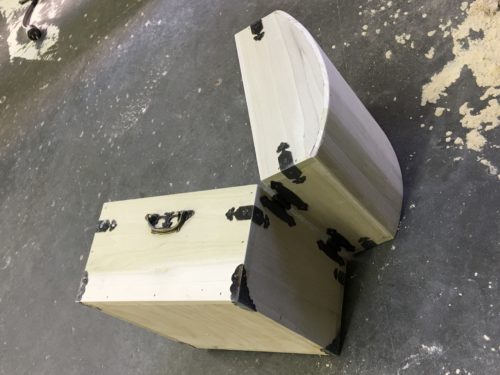
Attaching the hardware

Once the top was all glued together, I ran a belt sander over it to transform the faceted surface into a smooth curve.

The hardware was a mix of stuff from the hobby store and pieces I had in stock from other boxes I had built. A lot of this decorative brass box hardware comes straight from China, so you have to wait a few weeks or even months to get it shipped. Whenever I order some, I get several options and extras so that I slowly build up a stock to use on projects that have too tight of a deadline to wait for the shipping.

Burning the outside
Burning the outside

The box is described as “burnt”, so my next step was to burn it. I used a basic propane torch you can get at the hardware store. I charred the whole outside of the box, and allowed the flames to go to town on a few areas to really break up the surface.

Once it was cool, I removed all the charcoal with a wire brush. I sealed it with shellac to keep any charcoal remnants from staining the actress’ hands or white costume.

In the areas which burned away the most, I applied some grey crackle paint to simulate the charcoal I had just brushed away. The box is also described as having deep scratches, as if some mythical being had been trying to claw it open, so I added those with a grinder and Dremel.

Painting the inside
Painting the inside

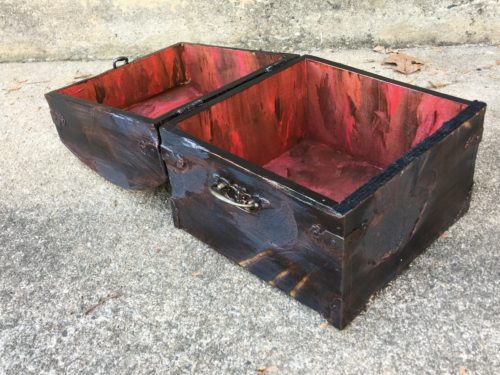
The inside received a wet blend of various acrylics to give it a deep red aged appearance that suggested blood. I dry brushed a few other colors, including some metallics, over the outside to help accentuate the imperfections and texture.

Ancient carved box
Ancient carved box

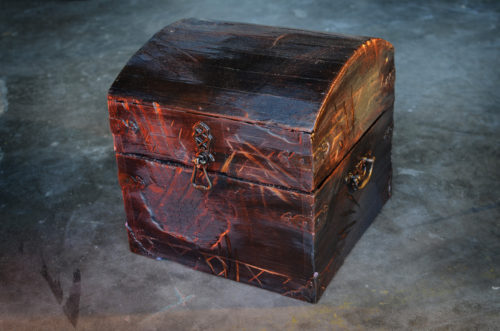
During tech, the director really liked the way the scratches looked on the box and wanted some more. She asked for some Cherokee patterns to be engraved around the edges as if some primitive creature had carved them in by hand. Once I added those, the box was complete.