Tag Archives: smooth-on

Fake Dead Lamb Part Two

(This is part two of a series. Read Part One to catch up).

If you remember the body I built for The Bacchae last year, you remember I used Dragon Skin for the majority of the project. At the time, we were using Dragon Skin Q, which was a formulation that set in 75 minutes. I discovered this year that they renamed all the products. Dragon Skin Q is now Dragon Skin 10 Fast. Regular Dragon Skin is now Dragon Skin 10 Medium. They also have Dragon Skin 20 and 30, which are new products to give different hardnesses. I learned all that at the Compleat Sculptor, which is a really great store here in NYC.

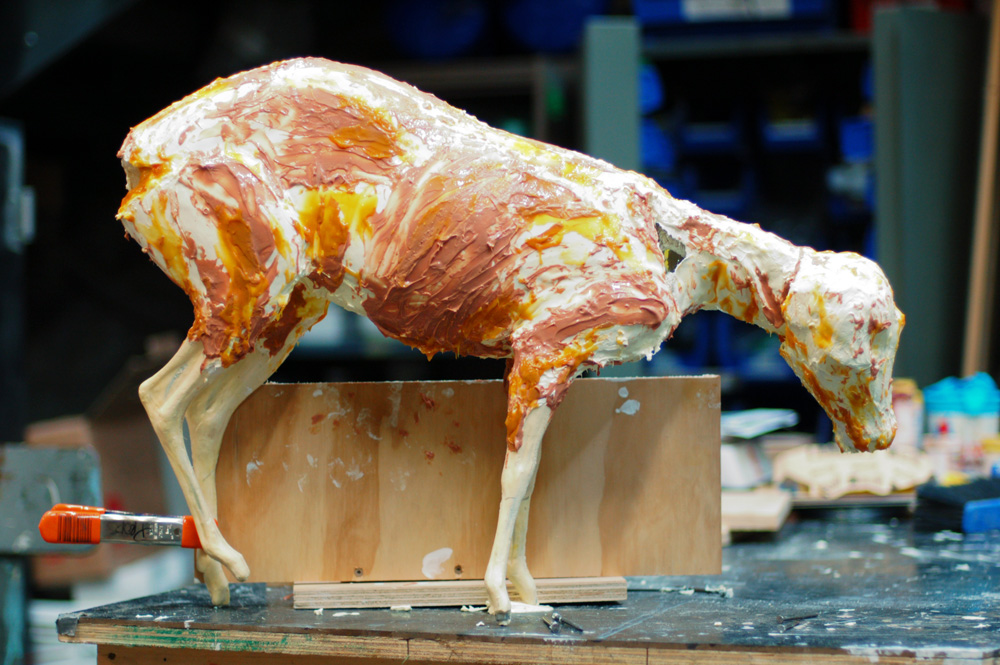
Anyway, after I coated the whole lamb with a skin of Dragon Skin, I began adding more layers with different colors. Silicone rubber sticks great to itself, and it’s easy to color with a number of pigments that they sell. You can also control the translucency and consistency of the Dragon Skin you’re putting on, which makes it possible to create a very dimensional and realistic coating.
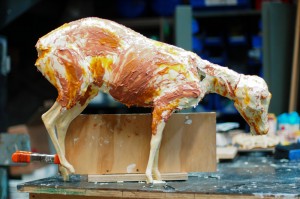
After two more coats of Dragon Skin were added

Again, it sets up in only 75 minutes. I was also adding Thi-Vex, another Smooth-On product which thickens the silicone rubber; just a few drops makes it possible to brush it onto vertical surfaces without oozing off. You can really build up a lot of layers quickly, which was vital for the short time-frame of this project.
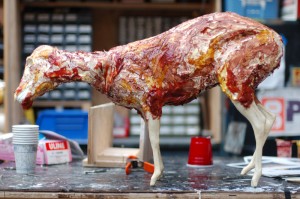
More color layers added

At this point, I needed to reshape some of the parts to match the research better. As I mentioned in the previous part, silicone rubber doesn’t actually stick to anything but itself. The reason it stays on the lamb is because it completely surrounds it and until you peel it away, it has a bit of surface tension and suction holding it on. I needed to slice my lamb open though, and the “skin” peeled right away, even though the body is made of fairly fragile urethane foam. Once I carved the foam into a more-correct looking shape, I folded and sort of tucked the skin back around. Some more Dragon Skin “glued” it back together, and after a few more coats, the colors blended together so well you couldn’t see the cuts anymore.
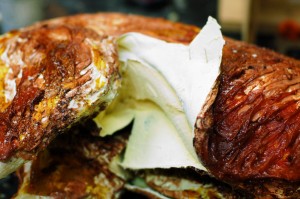
Removing the guts
Removing the guts

You’ll notice in the next picture I also cut the front legs down, so they would match the research better. In a bit, the back legs will be chopped in half as well. You’ll also notice the colors are fairly exaggerated. The reason is two-fold. First, once it gets on stage under lights, it will look less exaggerated. I found in making the body for The Bacchae that subtle effects disappear into a muddy mess on stage, and a bit of overemphasizing of colors and details is necessary to read from the audience. Second, the whole lamb is going to get a brown glaze over it, which will dull down the contrast and colors quite a bit.
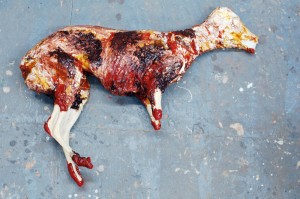
Looking crispy
Looking crispy

Now, one of the additional tricks to this prop is that the actors need to be able to pull chunks of meat off of it and eat it in front of the audience. To that end, I carved out a hunk in the front leg as a test. We had a chef who was working on a vegetarian fake meat substance to fill it with. My goal was to make it look like what would be left after the eating is finished.
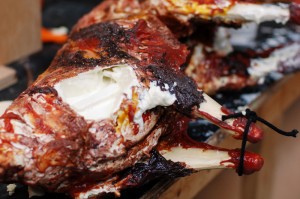
Adding a meat pocket

At this point, I was ready to start adding the final coats to bring the whole thing together. In the research, the outer skin looked like it was heavily seasoned. I found some coarse sand that resembled the crushed pepper in some of the photographs, and mixed it into a batch of brownish Dragon Skin. Platinum-cure RTV silicone rubber only reacts with a few things: sulfur and latex are some of the more common things to watch out for. Otherwise, you can kind of mix anything you want in there like it’s paint.
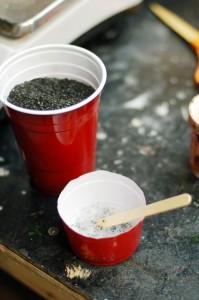
Adding seasoning to the mix

Here is a closeup of what the skin starts to look like after only a thin coat of the “glaze.”
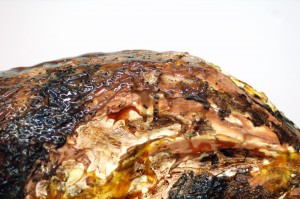
Close up of the seasoning

If you think he’s starting to look good now, wait until the thrilling conclusion in part three!
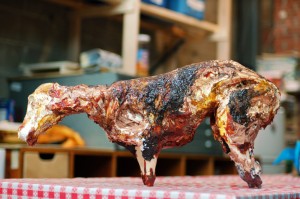
First coat of glaze
First coat of glaze

Fake Dead Lamb Part One

I was recently contacted about making a dead cooked lamb for The Little Foxes at New York Theatre Workshop. This was an interesting prop. The creative team made a film in which they slaughtered a lamb, cleaned and prepared it, and then roasted it on a spit. They played this video during the performance, and then the actors carried out a tray with what was supposed to be the same lamb. They then tear into it with their bare hands and eat parts of it. Obviously, they couldn’t use the same lamb as in the video, as it would only last one performance. Another curve ball was that some of the actors were vegetarian.

Thus, the idea was to construct a fake lamb which matched the appearance of the lamb in the video. This lamb would have “pockets” which could hold some kind of fake meat. Matt Hodges, the prop master, brought in a vegan chef to deal with the execution of a faux meat product. The whole thing would also need to be easy to clean, otherwise there would be serious hygiene and safety problems after a few performances.

I first mentioned Dragon Skin over a year ago on this blog, and used it extensively to build the body for our production of The Bacchae. You can reread part one and part two and see the various heads we had to make. If you are more interested in what it is or how to work with it, check those articles out. I decided on Dragon Skin for two reasons: first, I knew I could achieve the right look with it. Second, nothing really sticks to silicone rubber except silicone rubber, so it could be hosed down with water or washed in the sink with soap without worrying about it falling apart or dissolving. Finally, it is pretty fast to work with, and since I ended up with little over a week to turn this guy around, I couldn’t afford to work with something that took all day to dry.

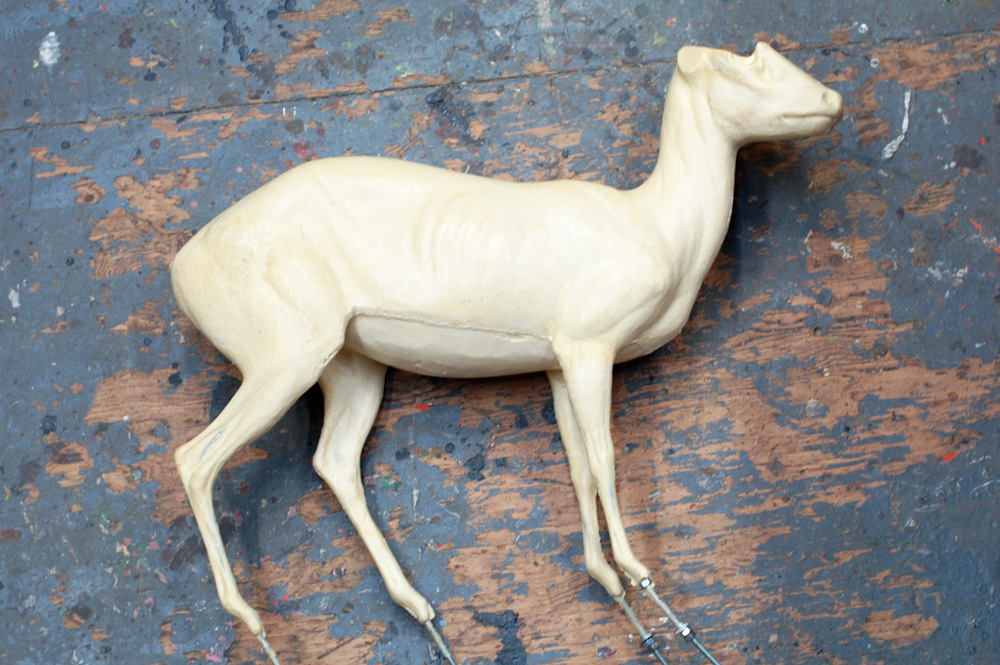
To save time, we started with a taxidermy form. Matt Hodges had measurements and photographs of the kind of lamb they would use, and found a small deer form from Van Dykes which was the closest facsimile. Also, I hope I don’t need to mention that I had a lot of reference photographs to work from, which is integral to this kind of project.

Taxidermy form of a deer

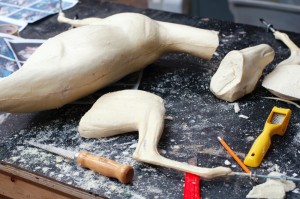
The first step was cutting it apart and reassembling it. First, it was not in the correct pose. Second, it would look ridiculous to have a stiff lamb on stage, especially with the actors tearing at it. It needed some movement, so I had to make the joints loose.

Cutting the form apart

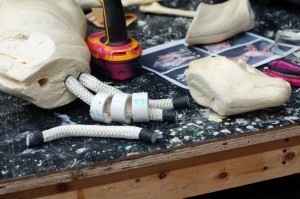
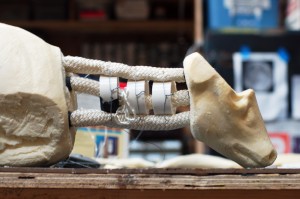
The neck was where the most movement was possible. I got rid of the entire foam piece, and replaced it with several pieces of thick rope. I also added some slices of PVC pipe to bulk it up and act as vertebrae.

Creating a movable neck

I wired the whole thing together when I was happy with it. I spent some time tweaking the lengths of the different rope pieces and the placement of the vertebrae until it had the kind of movement that looked realistic to me.

The interior of the neck

I decided I would wrap the whole neck with muslin dipped in Rosco FlexBond.  When you mix Dragon Skin, it’s fairly viscous and runny; you can add thickener to it to make it thick enough to brush on and stay on vertical surfaces. Either way, you need a surface for it to stick to. I suppose the “correct” way to construct a prop like this is to make a mold of the body, and suspend the armature inside, then cast the whole thing with Dragon Skin. It’s how they construct animatronic creatures. That way would be far to time and money intensive, though. In retrospect, I could have slipped pantyhose over the neck to achieve the same thing. Ah well, I’ll keep that in mind for the next dead lamb I make.

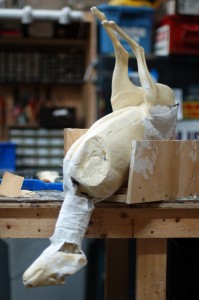
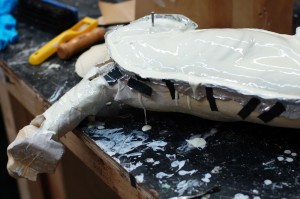
The legs were also reattached with strips of muslin dipped in FlexBond. I realized the FlexBond took far too long to dry, so when it came time to attach the front legs, I just used Gaffers tape. Really, I only needed to hold them in place until the whole piece could be coated in Dragon Skin.

Reattaching the pieces

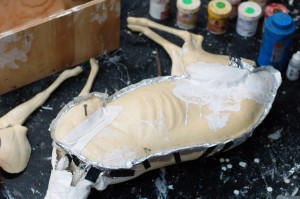
At this point I decided I would cover the whole lamb in sort of a “base coat” of Dragon Skin, and then brush on the various colors and lumps of flesh. As I mentioned above, silicone rubber only sticks to more silicone rubber, so you can peel it away from the foam which the lamb is made out of. The only way to keep that from happening is to cover the whole thing so it’s one continuous “shell”. I figured I would pour the first coat on rather than brushing it, so it could flow into every crack and crevice. I put up a “dam” with aluminum foil to keep it from running down the sides.

Creating a dam with metal foil

I made the base coat a very opaque off-white to match the foam. This would help give it a uniform color as well. In retrospect, I may reconsider these first few steps. It took a lot of Dragon Skin to cover up all the white Dragon Skin from the first coat. On the other hand, it’s always better to work from light to dark when building something up with many translucent layers. Again, maybe I can try something different when I build my next fake cooked lamb.

Pouring the first coat of Dragon Skin

You may have noticed in the first picture that the animal’s head isn’t quite right; it has a section cut out with a wood plate hidden inside. It’s where you are supposed to mount the antlers of the deer you are trying to recreate. I needed to fill that area in. I decided to try a product called Magic-Sculpt. I’ve always liked doing quick modeling with epoxy putty. It’s easy to work with, it adheres to many things, and when it sets, it’s rock hard. Magic-Sculpt is essentially epoxy putty formulated specifically for modeling. It doesn’t shrink or crack, and with a little bit of water, you can smooth it to a slick surface while you’re manipulating it. You can also buy large quantities of it for far cheaper than you can buy the same quantities of epoxy putty from the hardware store. Their website says you can work with it sans gloves; that is absurd. Epoxies are skin sensitizers, and with enough exposure, you can develop severe allergies. Wear nitrile gloves when working with it.

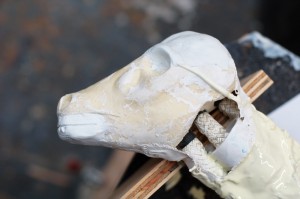
I shaped a chunk of it to fill out the top of the skull. I also added some in the mouth to sculpt out some teeth.

Molding the skull
Molding the skull

For now, let’s let this little guy dry before moving on. Continue on to the second part of this build.

Midweeks Link Dreams

Just a reminder that today at 2pm (EST), I’ll be taking part in a live chat interview at TheatreFace. Come join in the fun if you want to ask me a question.

I also have a fun new project I’ve been working on, and I might be posting photographs of it as early as next week, so stay tuned. Until then, here’s a fresh roundup of links for you to explore.

  • You know that Smooth-On has a plethora of videos and tutorials on their website, right? Well now, they also have a Mold-makers Exchange, where you can buy or sell molds and casts, or advertise your mold-making services. It’s like a Classifieds for all things moldmaking (or a “Craigslist” as the youngsters (and I) say). It’s very sparse at the moment, which is why I’m getting the word out about it.
  • The Library of Congress has a YouTube. With nearly 600 videos from their archives, there is a wealth of historical material available for free viewing. Many of these videos are great for research on the early twentieth century and thereabouts.
  • Check out these delicious fake food miniatures.
  • Erich Friend runs a Theatre Safety blog. Though focused more on theatre planning and operations, some of the information (I’m looking at you, hidden fire extinguishers) is relevant to props shops.
  • And finally, Volpin Props has made an awesome M8 Avenger Assault Rifle out of scrap materials he had sitting around in his shop.

A body for Bacchae: Part Two

In part one of “making a body for Bacchae“, we developed a series of samples and prototypes of dead body parts out of spray foam, Foam Coat, and Dragon Skin. Since then, we’ve been able to show the pieces to the whole production team; John Conklin, the scenic designer, and JoAnne Akalaitis, the director, gave us the go-ahead to continue on with the actual body pieces.

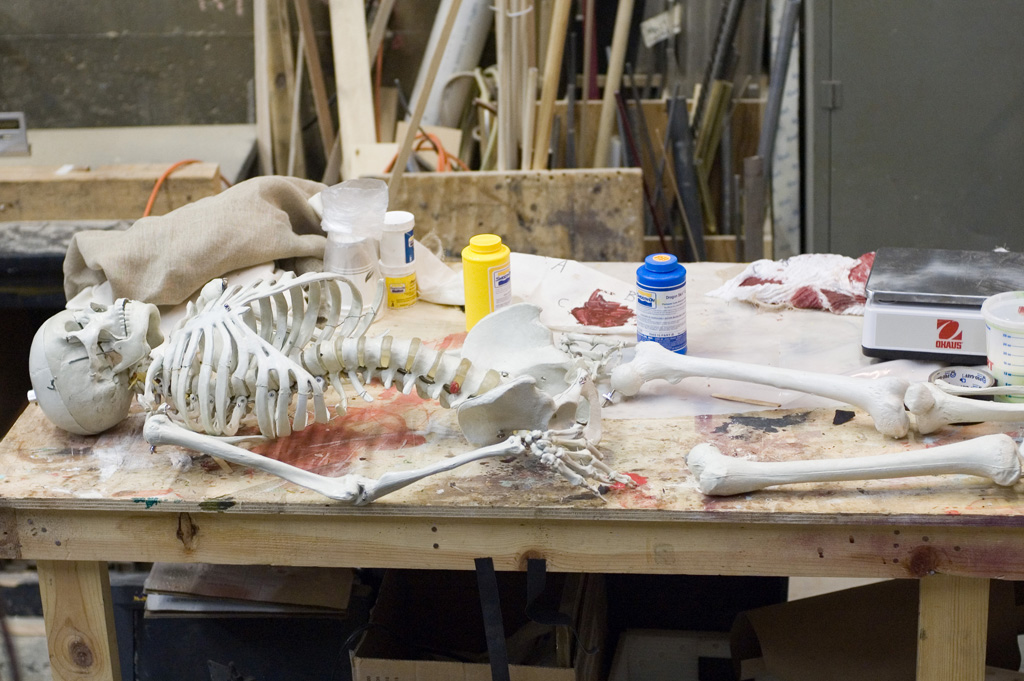
We started with a skeleton. We were originally going to get a skeleton from a medical supply store, but I found a corpsing tutorial at “Skull and Bones.com” which shows that you can get a “4th quality” skeleton from certain companies for a lot cheaper. It may be missing some hardware and fasteners, and the overall quality will be less, but all the pieces are there, and for our purposes, it was perfect.

The full skeleton laid out on a table

We broke the skeleton apart into several pieces. In the play, King Pentheus is killed through sparagmos, and we had to make the end result. The legs and skull were three separate pieces. We left one shoulder blade and upper arm on the torso, which left us with one complete arm, and one forearm.

The first steps in adding muscle to the bones

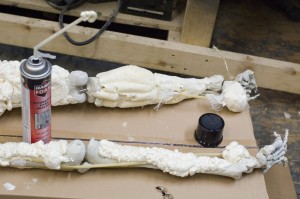
Like the sample pieces, we built the muscle up by spraying expanding foam onto the bones, carving it into muscles, and coating everything with Rosco Foam Coat.

Continue reading A body for Bacchae: Part Two

A body for Bacchae: Part One

For the upcoming production of The Bacchae at Shakespeare in the Park, we have to make a ‘meat suit’. In the play, King Pentheus is dismembered and has pieces of his flesh torn off by the Bacchants (the party-goers). This happens off-stage, but his torn-apart body is wheeled onstage, where his mother, Agavë, attempts to reassemble him.

The director envisioned a corpse covered in meat. We in the props shop needed to find a way to mimic that look. It also needed to hold up under the weather, as the Delacorte is an outdoor theatre.

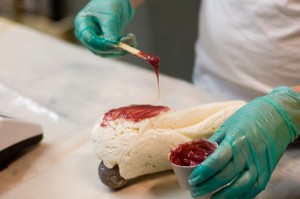
Jay Duckworth, the properties director at the Public Theatre, decided to use Dragon Skin, a silicone rubber product from Smooth-On, Inc. It comes in liquid form in two parts. You mix an equal amount of each part together, and you get a viscous liquid which can be cast or brushed on. After a little over an hour, it becomes a rubbery solid.

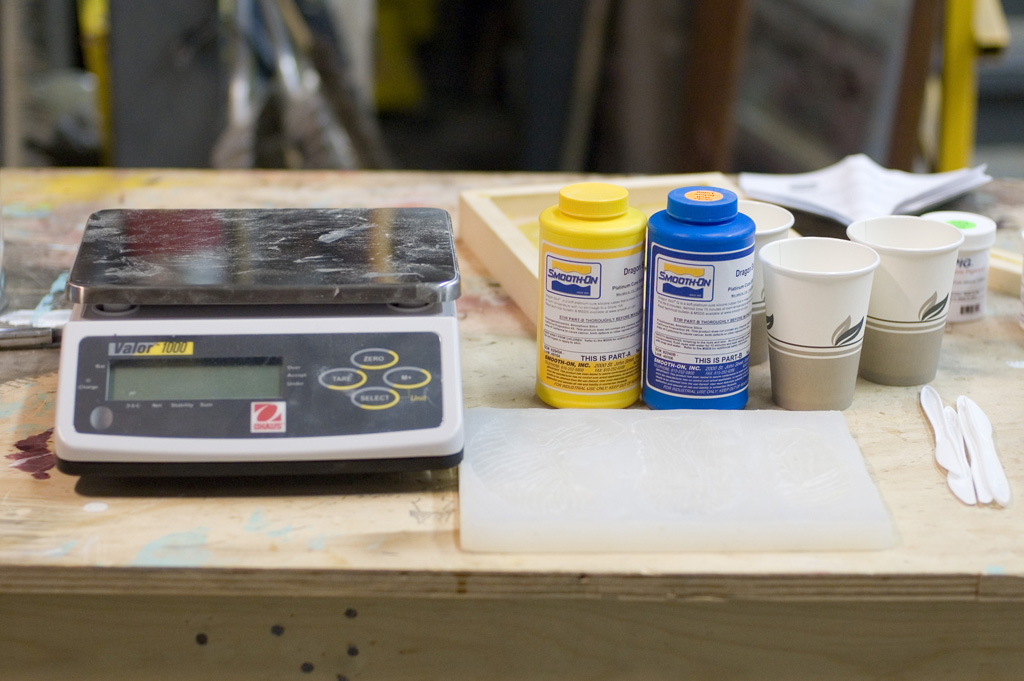
Getting ready to use Dragon Skin

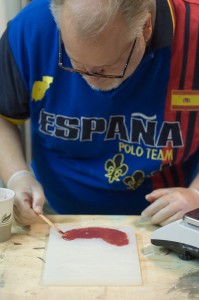
We began experimenting with casting these up into meat-shaped pieces. Dragon Skin can be colored with “Silc Pig”, a silcone pigment which comes in a number of colors. I found good results by mixing two batches up simultaneously with different levels of pigmentation. By pouring them into the mold at the same time, we could achieve random differences in color throughout the piece, which gave more realisic results.

Jay pours Dragon Skin into a mold

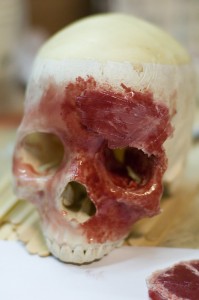
Jay found good results from painting the Dragon Skin directly onto the skeleton pieces.

Painting the Dragon Skin directly onto the skull

I suggested using spray-foam to build up chunks of muscle on the bones, and then painting the Dragon Skin onto that. Along with Michael Krikorian, we prototyped up a number of bones with a variety of techniques to compare them. We decided that overemphasizing the depth of the ridges and covering the foam with Rosco FoamCoat led to our favorite results.

Layering Dragon Skin on top of foam

“Silc Pig” comes in a number of different colors, so we mixed various batches of Dragon Skin to simulate fat, muscle, skin, and various other bits of chunky ooze on the bones.

There are a number of important things to keep in mind. First, silicone rubber reacts with certain chemicals, which keep it from curing. Most importantly is latex, so if you use latex gloves when working and touch the mixture, it will remain in liquid form. Use vinyl or nitrile gloves. We also found that hot glue will keep the Dragon Skin from curing. Also, use an accurate scale. The measurements need to be precise, and you cannot do it by sight alone.

Most importantly, as always, good research is the key to a realistic product. Everybody knows what muscle looks like until it comes time to actually carve it. Needless to say, doing research for this project was particularly vomit-inducting.

Now that we’ve come up with a repertoire of techniques to use, we can begin work on the actual prop. Keep watching this blog for more photographs of our progress.

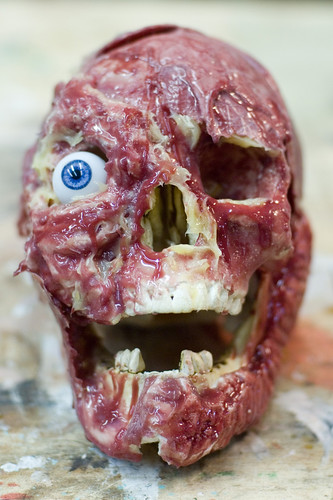
The final skull prototype. All photos by Eric Hart