Tag Archives: sculpt

Rebecca Akins: Surviving Forty Years of Making Props

On the second full day of this year’s S*P*A*M conference, we watched a presentation by Rebecca Akins. Ms. Akins has designed costumes for Childsplay Theatre (our host in Arizona) for the past twenty-five years, and has been constructing costumes, puppets, costume props and masks for at least that long as well. She divided her presentation in two parts. The first was on materials and methods she’s used in the past which she now knows to be hazardous to your health. The second was on “new good things”, which are less-toxic replacements for these.

A puppet couple by Rebecca Akins

One of her earlier shows was a production of Devils in 1971. She created latex masks, Celastic armor, and sprayed the costumes with aniline dyes. Anyone who has worn latex knows it does not allow the skin to breathe, and the latex masks were very uncomfortable to the actors with the heat and build-up of sweat underneath. Aniline dyes are extremely toxic, and spraying them is a great way to fill your lungs with poison, especially with little ventilation and no respirator.

Ms. Akins used Celastic a lot in those days, starting with Celastic mitres, crowns and wigs for The Balcony in 1969, through at least 1981 with masks for a production of The Pied Piper. For those who are unfamiliar, Celastic is a fabric impregnated with plastic. When you soak it in a solvent, it becomes soft and flexible, hardening to a stiff but lightweight shell when the solvent evaporates. The toxic part is not the Celastic itself, but the solvent used to soften it; common choices include acetone and methyl ethyl ketone (MEK). All solvents are harmful to humans, and can enter the body through the skin, lungs, stomach or eyes. Not all gloves will protect against them, and not all respirators are designed to filter out their vapors.

She mentioned a material I had never heard of called “blue mud cement”. It is a powdery mixture of asbestos fibers and “spackle-y” binders; when mixed with water, the paste will dry hard and lightweight (it was originally developed for plumbing pipe insulation). For a 1974 production of A Midsummer Night’s Dream, she created forms in chicken wire, wrapped them in plaster bandages, and coated the whole thing with blue mud cement. It sounds like a mix between Bondo and chopped fiberglass, except that it’s, you know, asbestos.

Cutting and carving Styrofoam with a hot knife or wire is another technique she described; the fumes created when Styrofoam melts are fairly toxic.

In 1984, Ms. Akins worked with fiberglass for the first time to create a mascot head for a Phoenix sports team. Fiberglass creates strong and lightweight shells, but she found the individual particles got into her skin and clothes and irritated her immensely, and the resins used give off a lot of fumes while curing; it is also an inhalation hazard when sanding the hardened fiberglass. She used fiberglass again in 2002 with more adequate protection (ventilation, a respirator and thick sleeves), but decided it was too much of a hassle to continue working with it.

The second half of her presentation dealt with “new good things”, that is, newer materials which attempt similar results with less toxicity. Examples include Fosshape, Thermaflex (or Wonderflex), leather, fabric, paper and silicone casting gels.

Paper, used in papier-mâché, is one of the oldest prop-making materials. Indeed, Ms. Akins has been using it since at least 1973 for a production of The Bacchae. She continues using it even today. She showed us a number of masks and puppet heads she has constructed over the years, many of them made with a mix of paper pulp, sawdust, and PVA glue. This gives her a material which she can sculpt and form like clay, but which dries to a lightweight and sturdy piece which is paintable and sandable. The fact that some of these pieces have been on tour since the mid-90s is a testament to their durability.

Fabric is another less-toxic material. She uses soft sculpture a lot for puppets; fabric, thread, fiber fill (stuffing) and paint are the only materials needed to make three-dimensional shapes.

soft sculpture

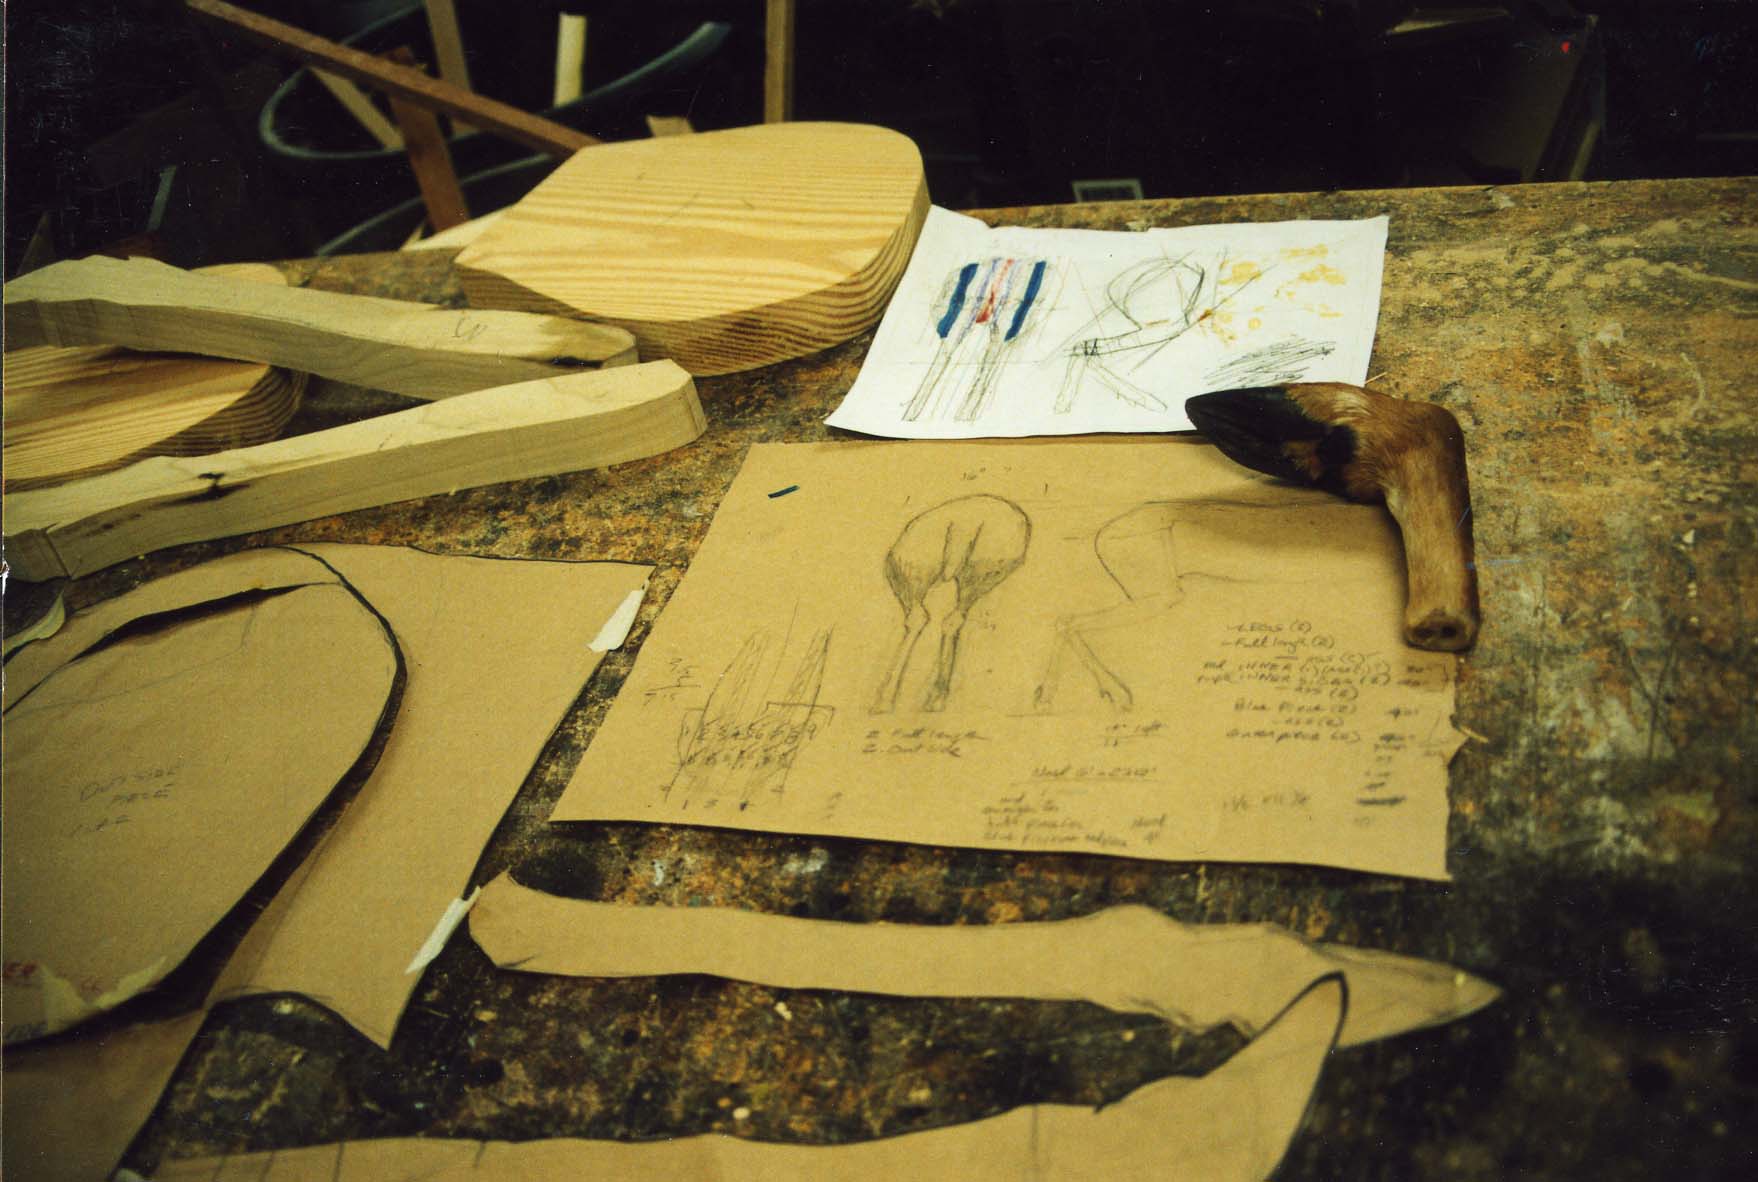
She showed us a number of examples of “found objects as materials”. An old leather handbag became a dog mask, a group of woven baskets transformed into a camel, and dryer hoses turned into snakes and an elephant’s trunk. Though using found objects has long been a staple of propmaking, Ms. Akins reminded us it remains a fairly non-toxic–and environmentally friendly–method, even today. Below is a photograph of a dog mask made out of wooden bowls.

dog mask made of wooden bowls

In 2004, she began using Fosshape to make a head for a production of Big Friendly Giant. Like Themaflex and Wonderflex, Fosshape is a plastic-impregnated fabric which becomes soft and pliable when heated, and retains its shape when cooled. In many ways, it is similar to Celastic, except you use boiling water or a heat gun to soften it, rather than a bucket full of solvents.

Big Friendly Giant mask

Finally, she described her first forays into using silicone mold materials. She would make a model in clay, mold it in silicone, and then cast it in resin. In one case, she mixed resin and Bondo together to make a puppet head; this gave her a translucent pinkish head which looked a lot like skin.

At the end of her presentation, Ms. Akins reminded us that whatever materials and methods you choose, you should endeavor to make the prop with as much care as possible. She left us with these closing words: “The more gorgeous a thing is, the more respect it is treated with.”

Sculptural Link-o-rama

Today I’ll be sharing some links that have to do specifically with sculpting. I’ve been feeling the itch to do some sculpting lately, and found these sites useful and inspiring, so perhaps you will too.

The website for Pop Sculpture, in addition to a blog, also features a short but really cool step-by-step pictorial showing an action figure being sculpted, cast and painted.

Here is a phenomenal step-by-step look at sculpting and painting a creature maquette by a ConceptArt user called Smellybug. Oodles of photographs illustrate each phase of the whole process. He has another great (but still unfinished tutorial) for a creepy baby maquette, as well as quick guide for sculpting realistic wrinkles in clay.

Finished "Stabby" creature maquette

Dan Perez is another great sculptor who has a series of step-by-step process shots of various sculptures on his website, as well as a number of tutorials on sculpting, mold-making and casting.

Finally, take the time to see what Randall Rosenthal can carve from a single piece of wood. It blows my mind.

Friday Link-astrophe

Here are some more proppy prop links I’ve rounded up for the week.

  • The Dark Power – A blog showing off various rubber monsters, sculpture, models, and special effects. Lots of great process photographs.
  • Consollection – A massive photo collection of video game consoles from throughout their brief history.
  • Production Illustration – A blog showcasing production illustrations from various Hollywood films, often comparing them to the final film. It’s great to know there are detailed illustrations for “Hotel for Dogs”.
  • My Imaginative Own – Though dealing with makeup effects, there is enough crossover with sculpting, carving and materials on this blog.
  • Antique Telephone History – The site itself is a bit of a throwback to late-nineties web design, but it has a great deal of pictures, dates and descriptions of telephones throughout history.

How to make a deer butt

In a previous post, we saw a deer butt which Natalie had built several years ago make a reappearance in a current production of A Lie of the Mind. I asked her to share how she constructed it.

Drawing and deer hoof

She began with research and preparation. Without that, you can easily waste your time building something which is not quite right. She found a taxidermist who agreed to let her come to his shop and show her some techniques. She was able to make a series of detailed drawings to work from; she also scored the back half of a deer hide (as well as the foot pictured above). As you can imagine, with all the deer heads you see mounted in hunting lodges and man caves, there’s bound to be some left over rear parts.

Layup of solid wood pieces

She decided to construct it out of a solid chunk of wood for strength, durability, and realistic weight. With her drawings, she cut the wood into their rough shapes before gluing them up layer by layer.

Cutting away at the wood

Once the form had dried together, she began rounding down all the edges to blend it into a  seamless piece. She also carved in musculature for added realism; since it would be covered with a hide, she exaggerated the lines so they would still show through the thickness of the material.

Completed wooden deer form

With the form completed, she tested it for strength. The legs are fairly skinny, so she added a bit of metal rods in the thinnest areas for reinforcement.

Painting the exposed parts of the deer

Natalie painted the hoofs and mangled parts because they would not be covered by fur. Again, the research and reference materials showed her exactly what it should look like. She had also spoke with the taxidermist about what colors would be showing on the exposed innards.

Attaching the deer hide

She began attaching the hide to the form using Barge. The hide came split down the bottom center so it was a flat piece. That meant it had a seam along the bottom and down each leg, which she had to treat carefully to keep it from becoming too prominent or noticeable.

Completed deer butt
Completed deer butt

With enough practice, you too can produce props as deer as this!

Gnome Building

For the upcoming production of “Broke-ology” at Lincoln Center, I was asked to build a three-foot garden gnome. They had a prop from the original production at the Williamstown Theatre Festival, but it was starting to break and crack in certain places. The gnome undergoes a lot of abuse during each performance, so they needed a new one with a better interior structure. So for the past two weeks, my wife and I have been gnome building.

Structure

The interior plywood structure of the gnome

The original gnome was a solid chunk of foam, with weights added in the base. Since it gets fairly thin around the ankles, it was beginning to separate at that point. My major concern with the interior skeleton was making sure there were no weak points on the gnome.

Additionally, while I had the original gnome with me, I took measurements and tracings directly off it to make several “slices” of the gnome’s shape to use as the structure. You can see what I mean in the photographs above. So the plywood would not only give me structure, it would also serve as a guide while adding and carving the foam.

Chunks of Styrofoam added to the skeleton

Carving

We couldn’t keep the gnome forever, so I took pictures of all four sides, plus the four in-between sides, as well as various views from above. It never hurts to have too many reference pictures. To remove large pieces of foam, we used either a knife or sometimes a reciprocating saw. If we needed a large amount of foam sculpted down quickly, we used a wire brush wheel hooked up to a cordless drill. We did the more precise and final carving and sculpting with a variety of rasps, knives, and sandpaper.  Sculpting and carving are very personal skills, so the best tools are often the ones you make yourself. Natalie made several tools just by gluing pieces of sandpaper to various shapes of wood.

Natalie uses a Dremel to carve details

You can see in the photograph above that we added auto-body filler (or Bondo) to fill in gaps, cover mistakes, or build up areas where we took too much off. You need a respirator when using it, but it hardens very quickly. You can use a rasp or knife on it after about ten minutes, and you can sand it after about an hour. We also used a Dremel tool for quickly carving out details.

Coating

I pontificated in an earlier post about various ways of coating foam. First, we wrapped the gnome in muslin strips which were soaked in glue. The process is very similar to papier-mache. We tore the muslin strips to give them a ragged edge which could be smoothed down over the previous pieces. After this dried, we covered the whole thing in Rosco Foamcoat, which we laid on like stucco to give it a bit of worn and weathered texture. After a light sanding, we painted on the various base coats.

Step-by-step process of coating the foam sculpture

The final step was coating it with epoxy resin. This gave it a very hard, smooth, and water-proof shell. It’s also fairly pricey, very toxic, and requires a lot of set-up. The exterior of the gnome was fairly solid with just the muslin and Foamcoat coverings, so for lower-budget shows and shorter runs, you may want to forego the epoxy resin. It’s a somewhat complex process, so I’ll address it in more detail in a future post.

Final Painting

After the epoxy had cured over night, we added the final paint layer. We used acrylic paint. We also dusted it with some black spray paint to weather and age it, as well as some dulling spray to get rid of the shininess from the epoxy.

Gnome for "Broke-ology"