Tag Archives: scenic art

Scenic Dope and Monster Mud

Scenic dope is a general term for a number of materials used for a number of techniques. In the late 19th and early 20th centuries, a ceiling paint known as calcimine was popular. It was essentially whiting mixed with animal glue and a bit of water. Whiting is powdered and washed white chalk, aka calcium carbonate. Set builders used it to prime flats for painting, or a thicker form to adhere muslin to flats. Along the way, it evolved into recipes and formulations which could be used for all sorts of texturing.

If you add linseed oil to whiting, you can make a simple caulk. If you mix whiting with casein (milk protein used as a binder in casein paint) and water (and borax if you want anti-fungal qualities) you can also make a simple joint compound. With the introduction of latex paint (really, acrylic paint, as it contains no actual latex), we now have the modern equivalents for the building blocks of scenic dope.

As it is a material which undergoes frequent experimentation and improvisation, no set recipe exists. A good place to begin your own experimenting is with a gallon of latex paint, 2–5 tubes of painter’s latex caulk, and 1–2 cups of joint compound. The thinner recipes (more paint, less caulk and joint compound) make good coatings for foam, while the thicker recipes (some push the ratio to equal parts paint and joint compound) can hold some heavy texture as it dries, almost to the point of being sculpt-able.

Note that the recipe calls for latex caulk and not silicone caulk. Silicone caulk is more common and easier to find in hardware and home improvement stores, but silicone does not bond with anything, which makes it impossible to mix into a recipe.

For a more flexible recipe, you can mix joint compound with glue (animal, or PVA). This is especially helpful when you are coating surfaces that have a bit of “give”. The harder dope recipes may crack under strain, whereas this one will bend.

You can add any number of additives to your recipe. Water putty and plaster allows it to dry harder but more brittle. Paper pulp really thickens the mix, and it can become almost like a thin clay, which is great for sculpting bark or rough stone on your surfaces. Sand can be added for a, well, sandy surface. Really, if you want a chunky texture, you can add almost anything chunky that you have laying around. In addition to mixing materials like sand into the mix, you can also sprinkle or dust it onto the surface while the dope is still wet. This will give it a coating, or crust, that you may find to your liking.

Theatrical suppliers make any number of products which mimic scenic dope, each with slightly different properties, but formulated to give consistent results. Rosco’s Foamcoat and Sculptural Arts’ Sculpt or Coat are just a few.

Because the recipe consists of latex paint and joint compound, both of which are water soluble, the resulting surface needs to be water-proofed if it will be outside or around moisture.

The properties of dope are similar to the wheatpaste used in papier-mache, and it is frequently used in conjunction with fabric. Strips of fabric are coated with dope and lain over a surface to create textures.

“Monster mud” is a term which began to appear in the late twentieth century to describe a mixture used frequently in the haunted house industry. You mix five gallons of joint compound with one gallon of latex paint. You can then submerge cloth—a large weave like burlap works best, though clothing or other fabric works as well—into the mixture, squeeze the excess mud out, and shape it. You may also spread the mud on straight to add texture. It may take up to several days to dry, but it becomes rock-hard (though not water-proof). It’s a clever way to mimic sculpted fabric, though any kind of flowing surface lends itself to this technique.

How to Gold Leaf

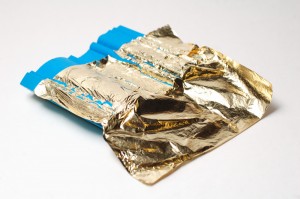
Gold leafing is one of the easiest and most common ways to give a prop a gilt look, or even to make it appear like a solid piece of gold. Real gold leaf is actual gold hammered into a sheet as thin as a piece of tissue. For theatrical purposes, we nearly always use metal leaf which replicates the look of gold. There exist more complicated and elegant ways to gild an object, but the quick and easy way I’m going to show you involves applying the leaf directly to an object which has been coated in gold size.

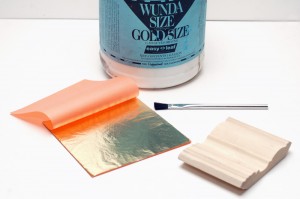
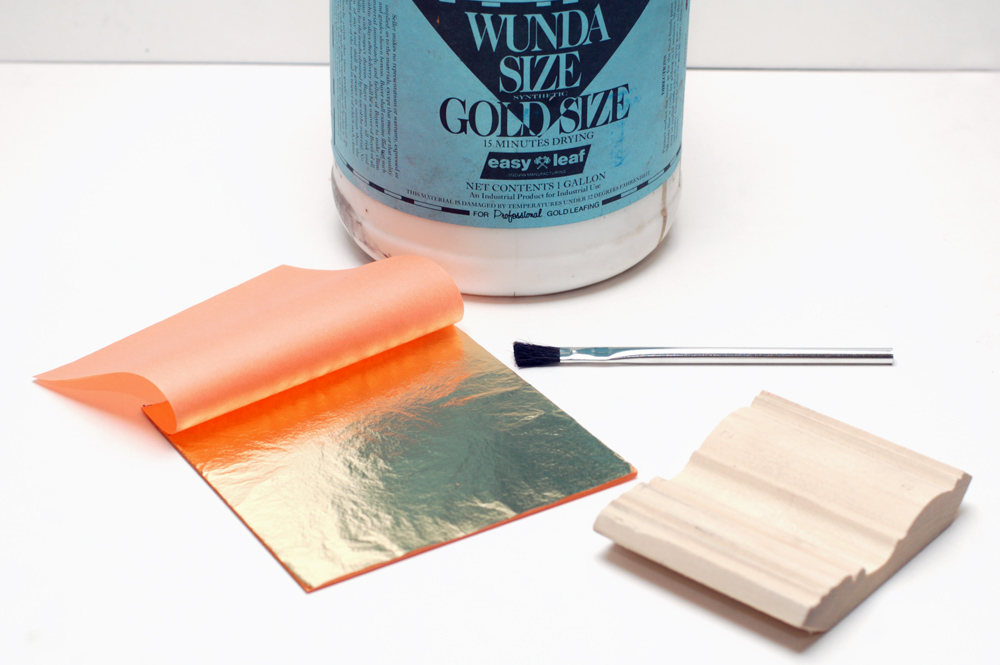
The materials you will need are the gold leaf, gold size, a brush for applying the size, another brush that will remain dry, and your object. The most common sizing I’ve seen in theatres is Wunda Size, which is one of the few water-based sizes, meaning easier clean-up and less fumes when wet. (You can read an interesting treatise on gold size if you’re interested in learning more.)

Supplies for gold leafing

You need to prepare the surface you are leafing. The leaf does not hide or fill imperfections; If you wait until after you’ve put the leaf on to sand the surface, you will simply sand the gold leaf off.

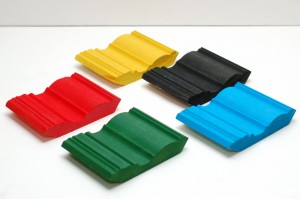
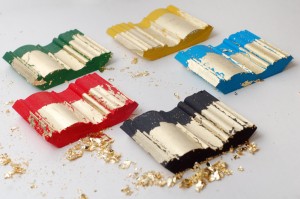
The color underneath the gold leaf is called the “bole” color. Traditionally, terra-cotta clay or red paint is painted underneath to give a warm feel to the gold. A yellow or golden bole gives an even, neutral look, and helps cover up any cracks or uncovered spots. These are the two most common boles you will find for theatrical purposes. A black bole gives a very cold look, and is good for imitating Art Deco pieces. Other boles you can experiment with are various greens or even blues.

Pieces with different boles painted on

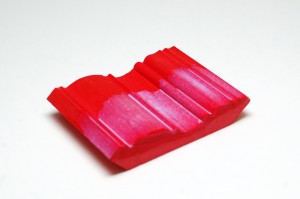
Once your bole is applied and dried, you brush on your sizing. You want to make sure you work it into every crack and crevice. You must wait for it to dry completely before you begin with the gold leaf. This can take anywhere from ten to twenty minutes depending on how much you put on, as well as the temperature and humidity. Technically it’s not “drying”, it’s becoming tacky. Size can remain tacky for hours, even days, before it dries, which is one of the properties that makes it desirable for gold leafing.

Applying the sizing
Applying the sizing

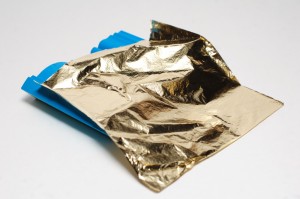
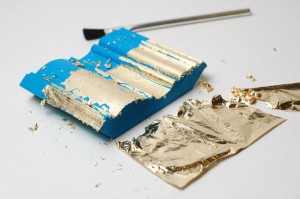
Now that the sizing is no longer wet, you can carefully take a sheet of gold leaf. Start smoothing it onto the surface with your fingers, and finish up with a clean and dry paintbrush to work it completely onto the surface. As you get overlapping and overhanging pieces, you can remove them by brushing really hard with the brush. At this point, it’s almost as if you’re burnishing the gold with your paintbrush; you want to rub it until there are no more gold flakes sloughing off of the piece.

Laying the leaf on
Laying the leaf on...
Working it in
... working it in...
Brushing it smooth
... and brushing it smooth.

I realize it may look like I misplaced the leaf, but I left the end bare to illustrate the differences in the boles as seen in the following photograph.

Examples of gold leafing on top of various boles

It is difficult  in a static photograph to make out the differences which the various boles give you. What makes gold leaf interesting is how the various surfaces catch and reflect light, and how that changes as either the object or the observer moves. The bole color you decide to use is dependent on the colors and tones of the set and costume, as well as the type of stage lighting used. Don’t lose too much sleep over it; the majority of items gold-leafed for theatre are either red or yellow depending on how much warmth or age you want to give the object.

You will notice gaps and cracks in your gold leaf where pieces failed to stick. You can take smaller flakes and apply them to these spots, again using your bristle brush to rub the leaf onto the surface. If you find particularly stubborn areas where the gold leaf won’t stick, it means you need more size. Go back and touch up the uncovered areas with a second coat. Once it has dried again in ten to twenty minutes, you may return for round two of applying the gold leaf.

Faux Oil Paintings

Our upcoming production of Bloody Bloody Andrew Jackson has a gallery in the audience of 19 portraits. These were described as oil paintings of “dead white guys”. We decided to begin experimenting with printing these portraits out and seeing how we can make them look more like a painted canvas.

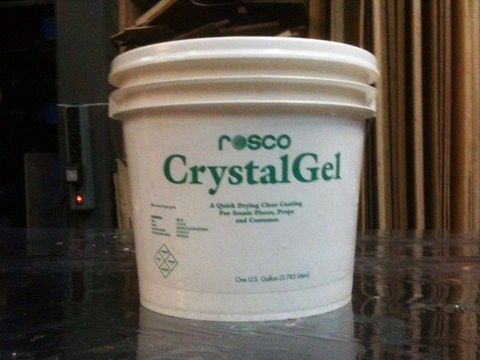
Rosco Crystal Gel
Rosco Crystal Gel

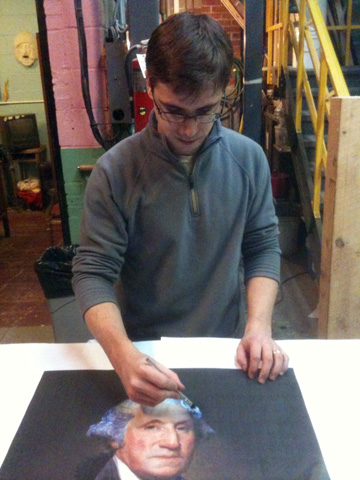
I decided to try some of the Rosco Crystal Gel we received a while back. Crystal Gel acts a little like “Sculpt or Coat”. You can brush it on in thin layers, and it will hold the texture you give it. It dries clear and hard, but it remains fairly flexible. My idea was to use it to add textural brush strokes over a picture we print out on our large plotter.

Eric Hart paints Crystal Gel onto a printed painting

The Crystal Gel has a consistency of mayonnaise. The instructions say you can thin it with water if you want. It starts out white, which makes it easier to see where you are applying it.

Jay Duckworth continues adding Crystal Gel

You can see in the above photograph that the painting is getting wrinkled. We weren’t really surprised by that; for our next test, we mounted the paper to a piece of foam core before painting.

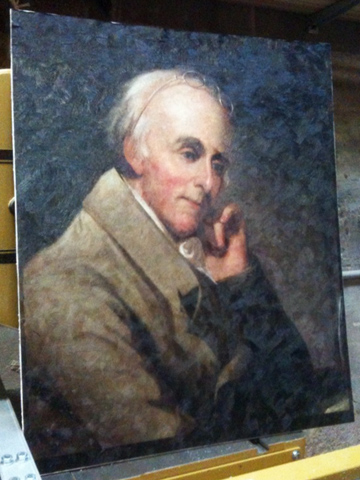
A real-life oil painting!

We were very happy with the final result. The photograph above doesn’t really convey the best part about this method. The texture of the dried Crystal Gel catches the light differently depending on where you stand, so as you walk by the painting, it appears to be made with thick layers of paint.

A Wall of Posters

Berkeley Rep is currently working on a new musical based on Green Day’s American Idiot album. The set will include massive walls completely plastered with band posters and fliers. On her blog, Lisa Lázár explains where these posters are coming from:

We all met up in front of a punk club in Berkeley (which is credited as being the place where Green Day got its start), and ripped posters off off telephone poles.

A lot of the posters on the set are being printed and photocopied by the scenic artists, but a good percentage is being augmented with found objects. Earlier this month, she actually put a call out for such posters:

Could you go out in the next few days and tear down some show posters, and mail them to me?

We’re covering the gigantic walls of our upcoming show with this sort of thing, and we would like as many real posters as possible.

Propping a show occassionally calls for finding an obscene amount of  one specific item. It always requires getting creative and thinking outside the box to avoid spending your entire budget.

Don’t forget to check out the rest of Lisa’s blog for more great stories and tutorials from the world of scenic art!