Tag Archives: process

Replica Chest from Game of Thrones

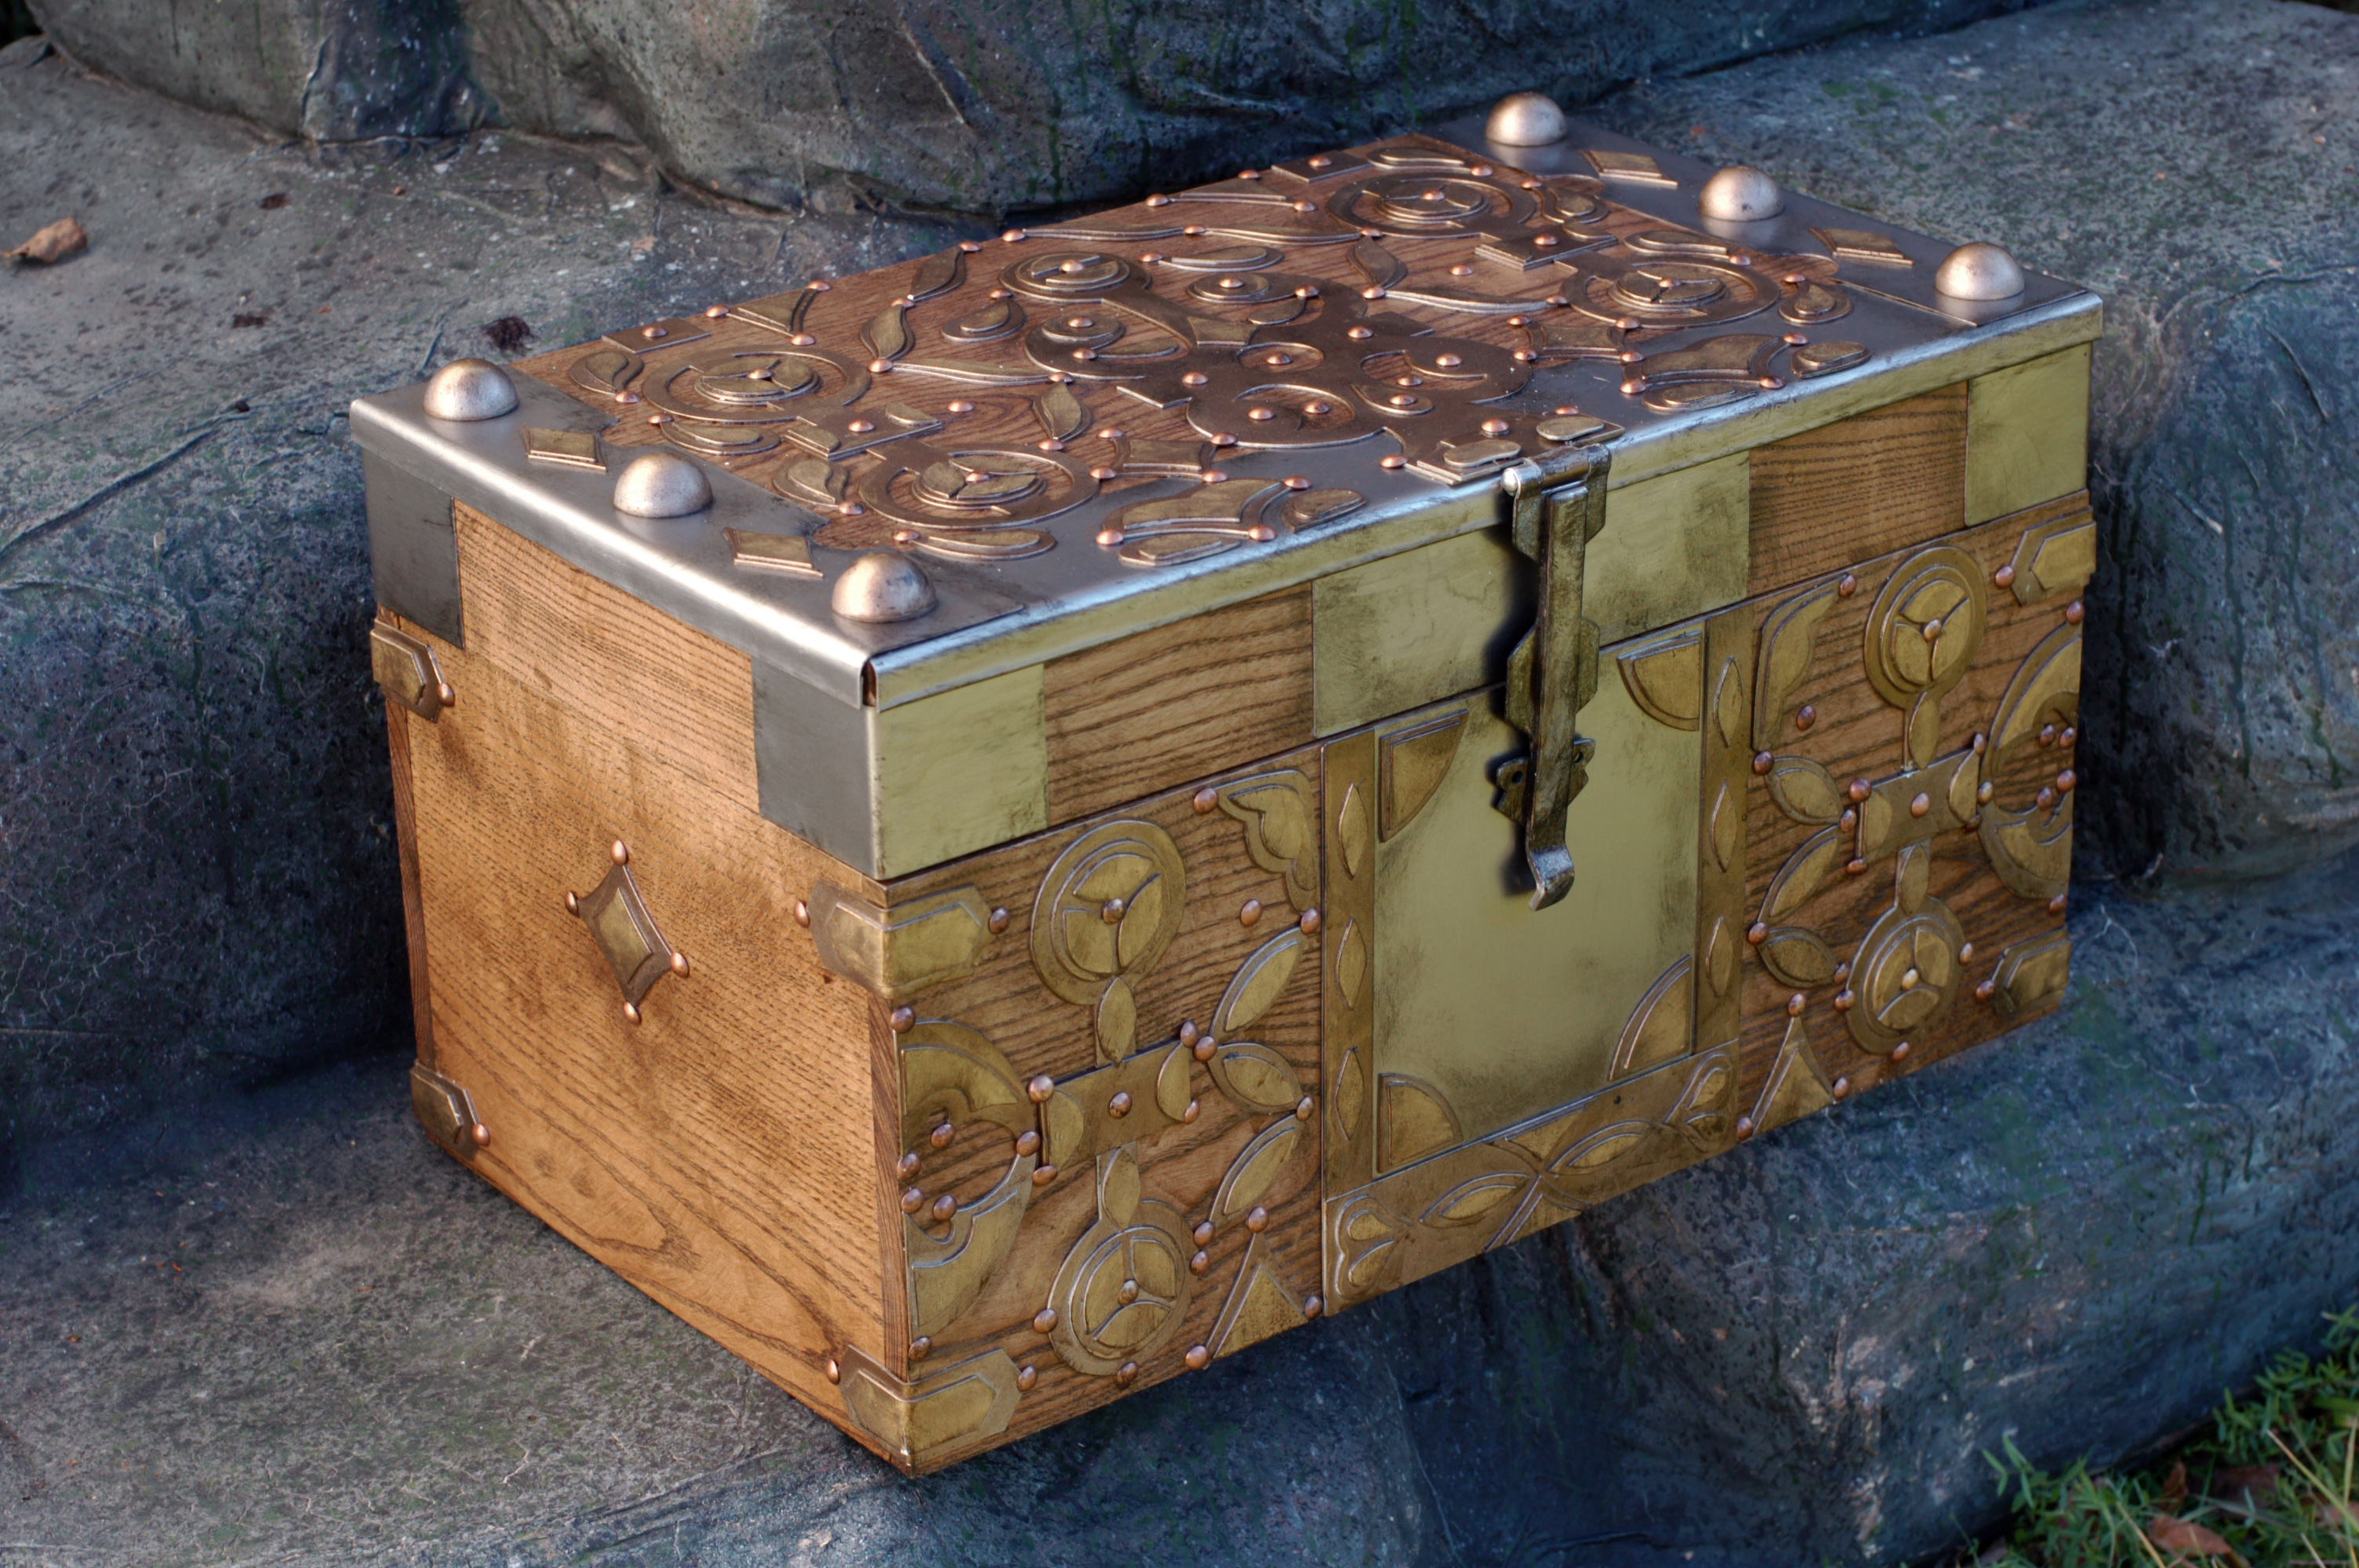
Usually, I am building props for a show or production I am working on. I rarely have time to work on my own projects. However, someone was interested to see if I could replicate a chest from the television show Game of Thrones. Now, I have nothing to do with the show itself, but it sounded like an interesting challenge to see if I could match something I could only see on screen. There wasn’t anything particularly tricky about this chest; it just had a lot of pieces and parts made of an assortment of materials, and some very time-consuming detail. For those who watch the show, this is the chest given to Daenerys in season one, which held her petrified dragon eggs.

I shot video of most of the build along the way and somehow edited several months of work into seven and a half minutes of video, giving an overview of the process.

If you are interested in more detail and photographs, read on!
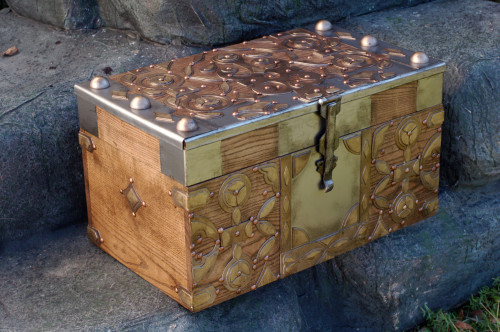
Daenerys' chest of dragon eggs
Daenerys’ chest of dragon eggs

The first part was the box itself. I worked out a quick mock-up of the whole piece in SketchUp to figure out the sizes and proportions of all the parts. I decided to use ash on this because it is hard and strong like oak, but I really hate working with oak. The grain pattern of ash was also a better match to the real chest than oak. We have a great local hardwood store that I visited, and I was able to find boards wide enough that I could build every side (except the top) from a single width of wood. The bottom was a piece of oak plywood.
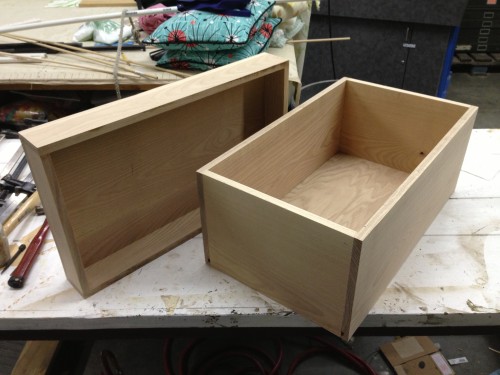
Wooden box
Wooden box

The chest has a number of areas covered in metal. I bought a sheet of 22 gauge steel and cut it up by hand with my airplane snips. I used my sheet metal bending brake on the corner pieces, while the rolled-over edges of the top pieces were bent by hand with sheet metal tools and pliers. Although I could have saved time by making these out of plastic and painting them to look like metal, the “roll over” parts would have ended up too fragile; on the very corners, you can see how thin the metal is, and any plastic that thin would flex whenever you touch it. The hasp on this chest also rests against a metal section, so it gives that solid metal-to-metal sound every time you open and close the lid.
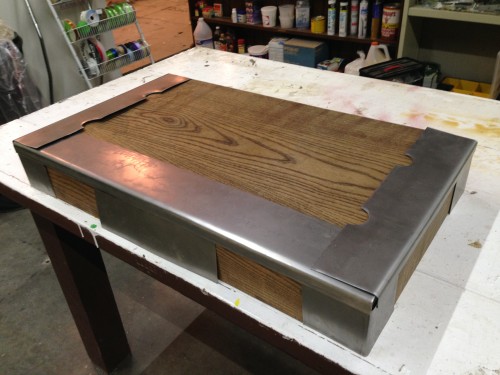
Sheet metal layers
Sheet metal layers

The most time-intensive part was the applied decoration. I used styrene plastic for this because using actual brass would have been prohibitively expensive and time-consuming, and a cheaper metal would have required just as much paint to match the appearance that the added labor was not worth it. I began by going through all the scenes in the TV show where the chest appeared and pulling out as many clear screen shots as I could, and then manipulating them in Photoshop to get a straight-on view. I scaled them up to full-size, printed them out and cut the pieces into patterns to trace on the styrene. Some parts of the design needed to be extrapolated slightly because I never got a clear view, but because it was symmetrical, repetitive and followed a certain logic, I was pretty confidant with how well my version matched the original.
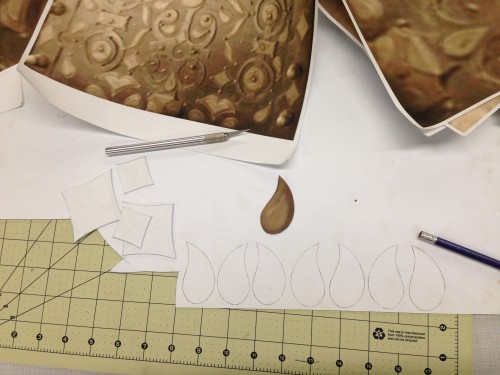
Patterns and reference

Nearly every element was made of at least two layers of styrene, so after cutting the several hundred pieces out, I began gluing them together using model airplane glue. I did not attach them to the box just yet, but I did lay them out to test fit everything.
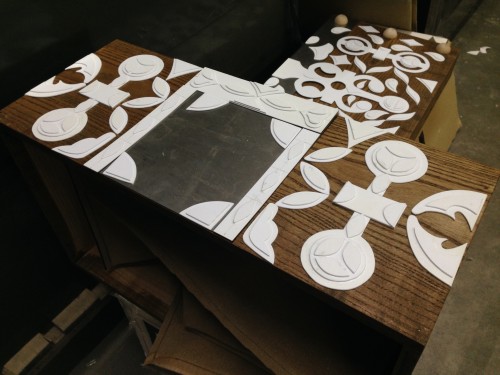
Unpainted decoration

With all the pieces ready, I began painting. They received a base coat of hammered silver spray paint, followed by a heavy dusting of hammered bronze spray paint. They would receive more paint later on, but at this point I began attaching them. Working on one side at a time, I first laid every piece out and used careful measurements to make sure everything was symmetrical and evenly-spaced. I then traced every single piece in place and labeled them by number before taking them off. I did some tests and found contact cement gave the strongest bond, though that meant I had to apply it to both the plastic piece and the box, and I could not apply it to the parts of the box where the wood was visible, so I had to carefully paint it within the traced outlines I had made. Luckily, the contact cement bonds almost instantly, so I could begin working on another side after one was completed.
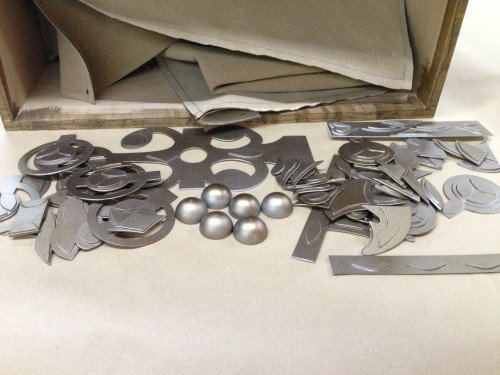
Spray painted pieces

The inside of the chest was leather, though I went with a slightly-more processed version which was already finished and could fit through my sewing machine. I stitched all the pieces together first, and then attached them in as a single unit. I used a bit of spray adhesive to keep them from shifting around, but they are mostly held in place with the visible upholstery tacks. I pre-drilled holes for the tacks so I could make sure the spacing was even, and also because the ash was too hard to just hammer the tacks straight in.
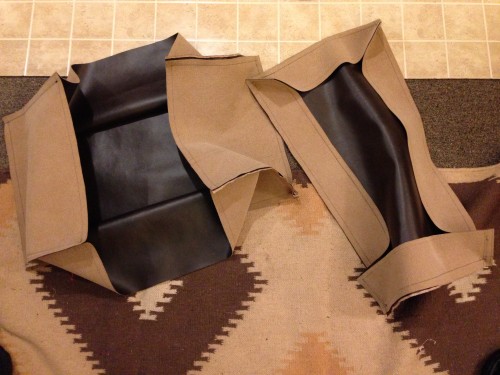
Leather interior
Leather interior

I found hinges online that were so close to the ones on the real chest that I wouldn’t be surprised if the prop makers bought theirs from the same supplier. I could not source the hasp though, so I had to fabricate it from scratch. I started with a basic hardware store hasp and cut notches in the edges. The tip was cut from another decorative gate hinge. I cut a bar of steel to length and bent a curl in the edge, than plug welded the whole thing together from behind and ground the welds flush to the surface.
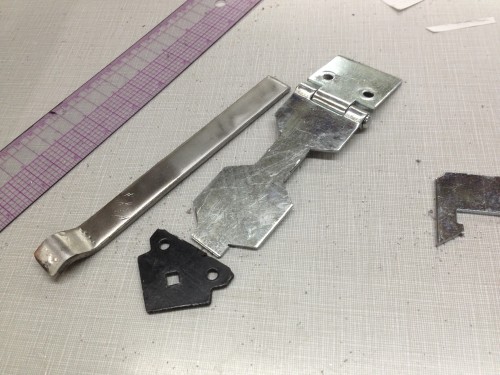
Pieces for the hasp
Pieces for the hasp

With all the pieces in place, all that was left was some painting and sealing. The top layers of all the decoration were sponged with a lighter brass color to set them off, and the whole chest was washed down with some dark browns and blacks to age and weather it. Finally, everything was coated in a clear satin Polycryclic.
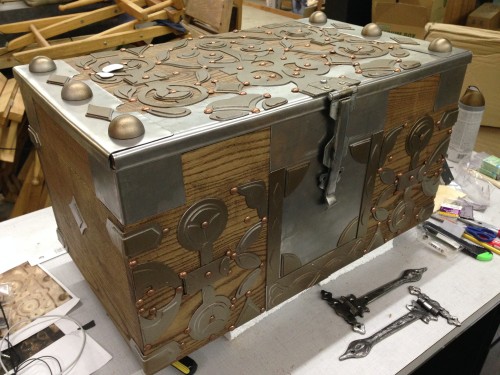
Pristine and unsealed chest

I hope you enjoyed this as much as I did!

The Luck of the Links

Happy Friday the 13th! While the rest of the day may be unlucky, at least with this blog, you’re lucky to get a great list of things to read today.

Kamui Cosplay has a great tutorial on using expanding foam for prop making. You can find this stuff in a can at home improvement stores, with names like “Great Stuff” (it’s used to seal and insulate cracks in houses). While it is certainly “great stuff” for some applications, it is a polyurethane foam, so you should only use it in a well-ventilated area and it should be allowed to cure in an area with separate ventilation from where you are working. If you work at home, you especially should not let this stuff cure in your house, where it will off-gas toxic and irritating fumes for 24 hours or more.

Over at Theatre Projects, Jesse Gaffney makes a half-eaten chicken carcass. With just bits of wood, some Model Magic, muslin, and a few coats of latex and Glossy Wood Tone, she comes up with a pretty convincing prop that looks like it came straight from someone’s fridge.

Here’s a great tutorial on turning clear glass into tinted glass. It is not useful for glass jars that need to be filled with water, but it uses nothing more than Mod Podge, food coloring and an oven.

Make Magazine reminds us that it is not only useful, but vital, that we document the process of building our props. Taking process shots is useful not only for your own portfolio, but it can help with the creative process itself. It is also helpful with sharing your work with others, since others can learn from your process, even when you think what you have done is simple or common knowledge.

A book called 507 Mechanical Movements has been around for awhile, and a number of reprints can be found at bookstores and online. Now, you can view all 507 mechanical movements online as well. The website is great because it has animated some of the movements, and has plans to animate more of them. These movements are useful when building moving or trick props, and you need to figure out, say, how to make a prop spin when you pull a string, or how to make a rod move in a straight line using a spinning motor.

A Papier Mache Chair from 1854

The following comes from “The Illustrated Magazine of Art”, Volume 4, Number 24, page 344, published in 1854. I thought the process they described was interesting. First, it is the first time I’ve heard of using metal molds for papier maché; second, they let each layer dry fully before applying the next (I learned to lay up each layer while the previous is still damp).

The polished French claim the honour of being the original inventors of the papier maché. In Paris the manufacture of the article is carried on very extensively; but far beyond the articles produced there—articles both of utility and ornament—stand those of the Birmingham manufacturers.

The old method of manufacturing papier maché is as follows:

—The paper for use is gray in colour, but similar in texture to ordinary blotting paper. Prior to using it, the paper is well saturated with flour and glue mixed with water, in about equal proportions, and is then laid on the mould of the article intended to be produced. These moulds are of iron, brass, or copper. The mould, coated with the first layer of paper, is then dried for twelve hours. A careful smoothing by a file follows, after which another deposit of paper is made. The processes of drying and smoothing are successively repeated with each additional layer of paper, until the article assumes the required strength and thickness. When the newly-formed article is taken from the mould, the several parts are planed, filed, and trimmed, so as to be quite correct and level. The process of stoving then follows; after which the varnish is laid on, and brought to a smooth, hard, brilliant surface. The article is then coated with several layers of shell-lac varnish, coloured, which, after being hardened, are scraped quite level. The different varnishings and smoothings are carried on for a period varying from twelve to eighteen days, according to the purpose for which the article is required. The exquisite surface is produced by manual polishing with rotten stone and oil; but the finish is obtained by the process of handling alone.

Various alterations and improvements have been made from time to time in the manufacture of papier maché; and sometimes the paper is reduced to pulp, cast to the form required, and then rendered compact and solid.

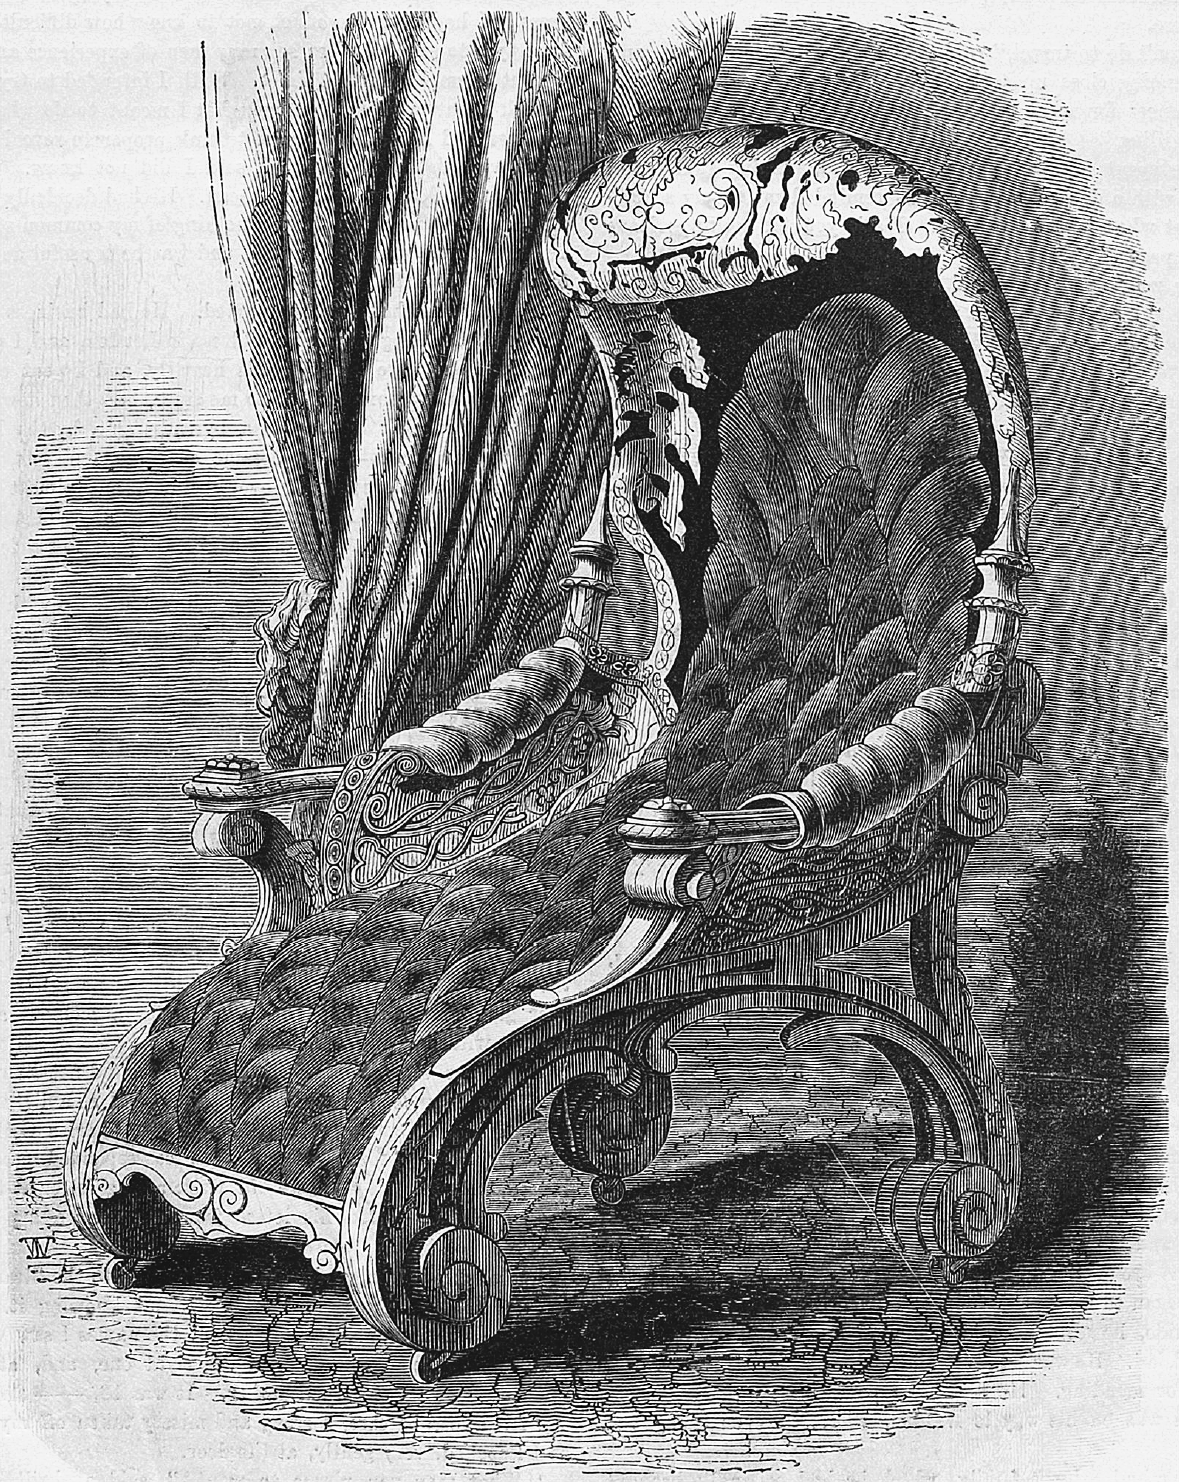
The specimen which we present is of a chair in papier maché; the grace and elegance of the design deserve especial attention.

Papier Mache Chair
Papier Mache Chair

Papier Mache Chair. The Illustrated Magazine of Art, Vol. 4, No. 24 (1854), p. 344

The Carpentry of the Musical Show, 1910

The following article was first published in The San Francisco Call, August 28, 1910, page 14. It is excerpted from a larger article called “The Carpentry of the Musical Show”, by Garnet Warren, and describes the process a Broadway show travels from inception to opening night.

The gentleman of theatrical properties has also had pressed into his hands that universal scenario, with rough sketches of furniture by the scenic artist. The stage managers have been conferring, too, with the busy author as to the lists of properties required. Rough instructions are all that are sufficient for most of these.

So away goes the propertyman to his workshop among the dust and cobwebs. It is large and has rough, red bricked walls. Fifteen to eighteen men work here in the busy summer season—fellows in blue shirts and overalls and the clothing of toil. The floors are bare and loaded up with dust, shavings, paint, unfinished carpentry, finished chairs and statues. The practical propertyman would seem able to construct most things. He makes machines for wind effects; he paints the odds and ends of scenery; he builds furniture and electric light fixings and makes rugs and carpets and door knobs and even paper mache statues from his own designs. In the six busy weeks before a production begins, too, his work is of a feverish description. About 3,000 separate pieces are sometimes required. The busy bee would appear to come a disastrous second to the propertyman.

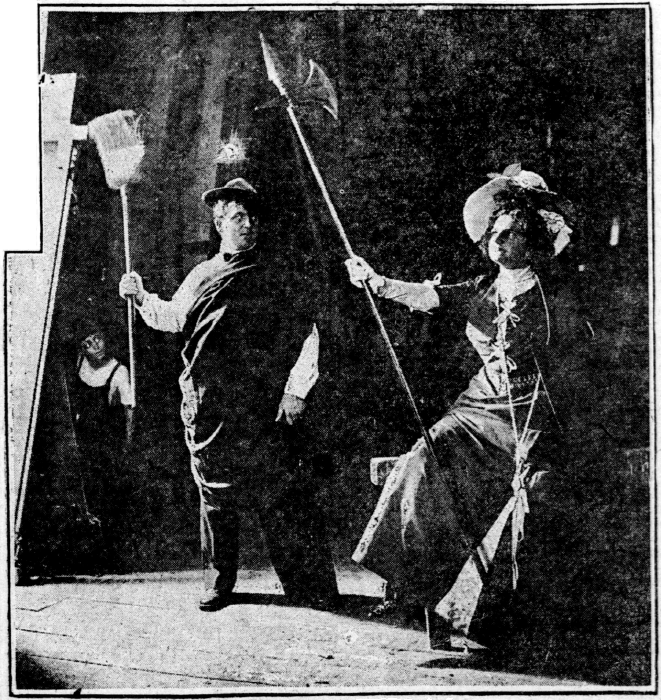
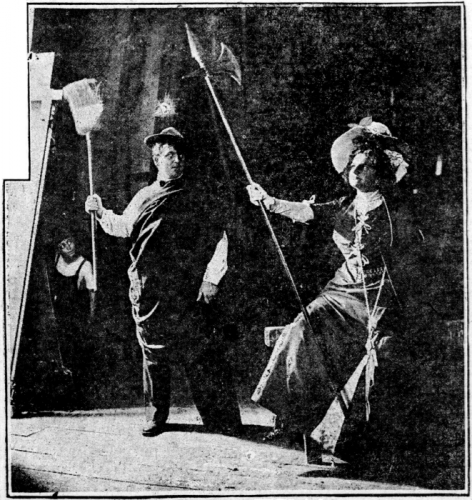
The First Rehearsal of Principals. Photo by Byron.

Editor’s note: Notice how the photograph above shows the use of rehearsal props and costumes.

Excerpted from “The Carpentry of the Musical Show”, by Garnet Warren, first published in The San Francisco Call, August 28, 1910, page 14.

How David Belasco shops for props, 1919

The following is an excerpt from “The Theatre Through its Stage Door”, written by David Belasco, and published in 1919.

During all the time that rehearsals have been in progress—and perhaps for many weeks or even months before the first reading—other preparations for the production have been going on. Carpenters have been building the scenery in my shop, artists have been painting it at their studios, electricians have been making the paraphernalia for the lighting effects, property men have been manufacturing or buying the various objects needed in their department, and costumers and wig-makers have been at work. All these adjuncts to the play have been timed to be ready when they are needed. At last comes the order to put them together. Then for three or four days my stage resembles a house in process of being furnished. Confusion reigns supreme with carpenters putting on door-knobs, decorators hanging draperies, workmen laying carpets and rugs, and furniture men taking measurements.

Everything has been selected by me in advance. My explorations in search of stage equipment are really the most interesting parts of my work. I attend auction sales and haunt antique-shops, hunting for the things I want. I rummage in stores in the richest as well as in the poorest sections of New York. Many of the properties must be especially made, and it has even happened that I have been compelled to send agents abroad to find exactly the things I need. For instance, I sent an agent to Bath, England, to buy all the principal properties for “Sweet Kitty Bellairs.” It was necessary, also, to send to Paris to obtain many of the objects which fitted into the period of “Du Barry.” I purchased the old Dutch furniture I used in “The Return of Peter Grimm” fully two years before I had put the finishing touches on the writing of that play, and most of the Oriental paraphernalia of “The Darling of the Gods” I imported direct from Japan.

When I produced “The Easiest Way” I found myself in a dilemma. I planned one of its scenes to be an exact counterpart of a little hall bedroom in a cheap theatrical boarding-house in New York. We tried to build the scene in my shops, but, somehow, we could not make it look shabby enough. So I went to the meanest theatrical lodging-house I could find in the Tenderloin district and bought the entire interior of one of its most dilapidated rooms—patched furniture, thread-bare carpet, tarnished and broken gas fixtures, tumble-down cupboards, dingy doors and window-casings, and even the faded paper on the walls. The landlady regarded me with amazement when I offered to replace them with new furnishings.

While the scenery and properties are being put together I lurk around with my note-book in hand, studying the stage, watching for defects in color harmonies, and endeavoring to make every scene conform to the characteristics of the people who are supposed to inhabit them. However great the precaution I may have observed, I generally decide to make many more changes. Then, when the stage is furnished to my satisfaction, I bring my company up from the reading-room and introduce them to thme scenes and surroundings in which they are to live in the play.

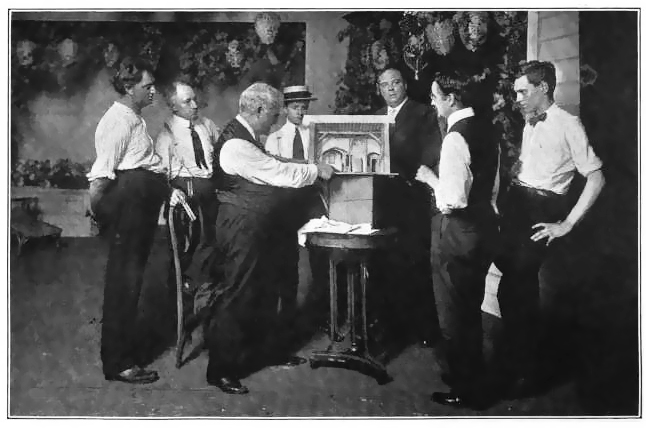
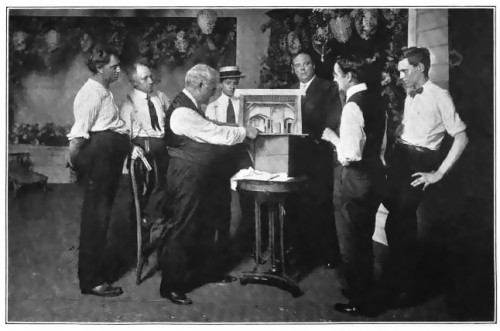
David Belasco with the Heads of His Artistic and Mechanical Departments

In the above photograph, “they are building a miniature stage-setting of the play, ‘Marie-Odile.’ Every stage-setting used at the Belasco Theatre is built from an exact miniature model which is fully equipped, even to the lighting.”

Text and photograph originally published in “The Theatre Through its Stage Door”, written by David Belasco, and published in 1919.