We are still about a year away from the release, but I just turned in my last chapters for the second edition of The Prop Building Guidebook: For Theatre, Film, and TV. I am very excited about this book. The first edition filled a void in the props world, and continues to be a great success. Now that it has been out for a few years, I can take everything I learned from it and incorporate that into a new edition.
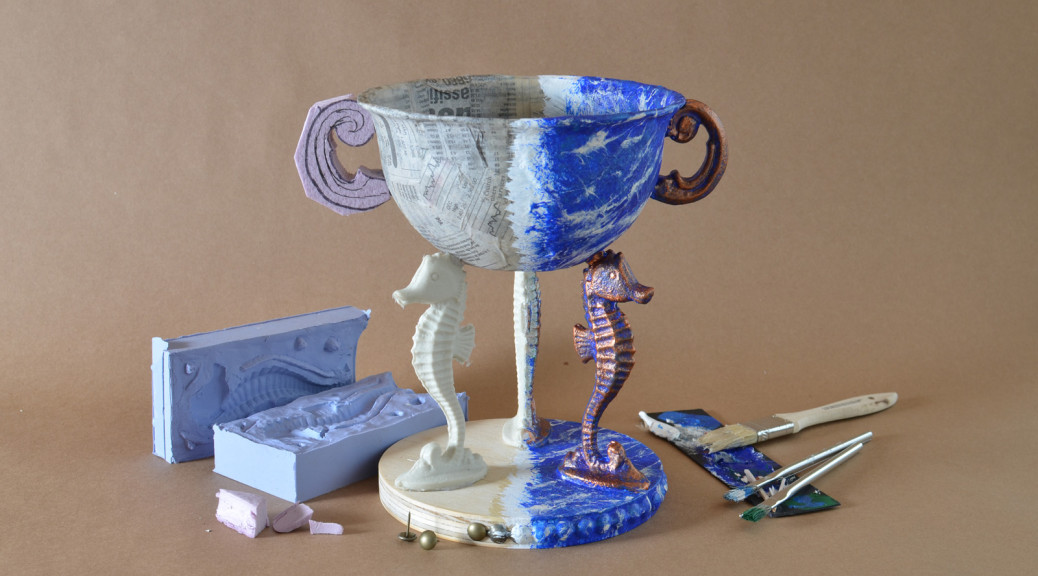
But let’s skip all that for now; I really want to talk about the cover. I always wanted to do a custom setup showing a prop being built, but did not have time during the first edition.
Coming up with a cover idea for prop building is tricky. Most finished props just look like a regular object. If you have a picture of a chair, people will think it’s a book about chairs. A picture of a treasure chest will make it look like a book about treasures. I needed a process shot. I did not want a collage or series of images for the cover, so I realized I would need to build some weird hybrid prop where half of it was finished, and the other half was still raw materials.
I wanted to incorporate the “most proppy” kinds of materials and techniques into the cover. I knew I wanted foam carving, molding and casting, paper mache, and a cool paint job. I would have loved to get some metal and thermoplastics in too, but I only had a weekend to plan, build, and photograph this. I did manage to get some plywood and found-object decorating in though.
Figuring out the prop itself took some thinking. It would have to be something that could conceivably come from a show; something you would not just buy or adapt from existing items. With the different materials I wanted to show off, I realized it would need to be quite fanciful. It would be the proppiest prop that ever propped.
I also needed it to fill the square cover. I could not make anything long, like a staff or wand. I did not want to stick a gun or other weapons on the cover either. I dug back into my opera roots and decided some kind of chalice or vase would be best; a bowl with carved handles, held by three sculpted figures.
First I had to find the sculpted figure that I would mold and cast. I had nothing in stock and I did not have the time to sculpt something. I headed out to the stores and looked high and low. I needed something that would be easy to mold and cast, but that looked cool enough to warrant molding and casting. I finally found a little seahorse figurine. My prop would now have an underwater theme.
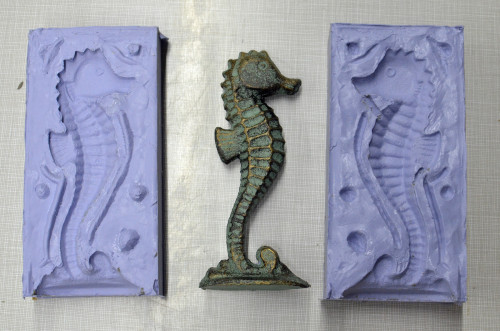
I made a two-part mold using Smooth-On Oomoo 30. I realized using $20 in materials to make three copies of a $3 figure was silly, but hey, he’s going to be a star.
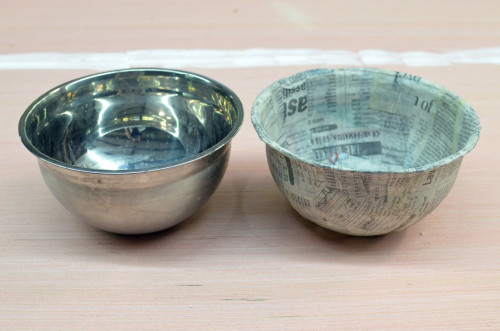
With the seahorse in place, I searched for a bowl that would look good on top. A stainless steel mixing bowl in stock fit the bill perfectly; it was also a good shape to use as a form for the paper mache. I cheated a bit here; I did not have time to actually paper mache a bowl and wait for it to dry. I molded a piece of Wonderflex over the bowl first, then added a single layer of paper mache to the inside and outside of that. So now my prop was actually a prop version of a prop.
With these in place, all that remained were the handles and the base. I carved a piece of foam into a handle, and cut another one out so it looked like it was about to be carved. I cut a circle of plywood and nailed some upholstery tacks along the edge for decoration.
I painted half of the prop with a faux marble treatment and a drybrushed brass. All that was left now was to pop it onto some butcher paper in my “photo studio” and artfully arrange the various materials, tools, and molds around the prop.
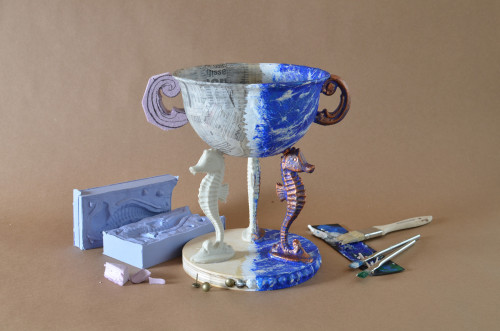
Ta da! I feel like I have an image that better captures what the book is about. And now I have a weird half-finished seahorse trophy I can carry around with me.

