Tag Archives: Natalie Taylor Hart

A Wild Bar for a Wild Party

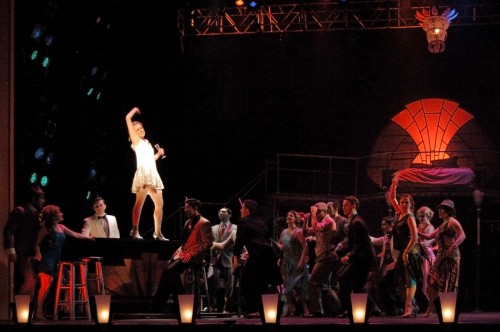
It is a little over a week since Elon University’s Wild Party closed, so I thought I would share some of the props I built while working as the props master on it. First is the sleek Art Deco bar. This production featured a lot of dancing and movement (in fact, the show was more of a dance piece with singing than a traditional musical) and the bar was key in a lot of the dancing. Actors jumped up and down off of it constantly and danced on top of it. Needless to say, it had to be sturdy.
Wild Party
Wild Party

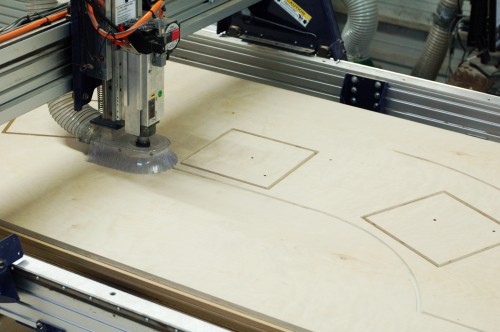
The other hurdle was that I only had a bout a day to build the bar to a point that they could use it in rehearsal; it did not have to be finished, just usable. The bar had a sort of boomerang or banana shape to it. I knew it would take awhile to layout the shape, not to mention all the pieces I would need to cut that followed the shape but were inset or offset by varying amounts. Since the scenic designer, Natalie Taylor Hart, already had the footprint of the bar drafted in CAD, we decided to CNC these pieces and save some time.
CNC the top
CNC the top

The top was two layers of plywood. We were putting lights in the bar that would shine upward, so the top also had squares to hold three pieces of 3/4″ plexiglass; the squares on the top piece were large enough to fit the plexiglass, while the squares on the bottom piece were a touch smaller to create a lip for the plexiglass to sit on.
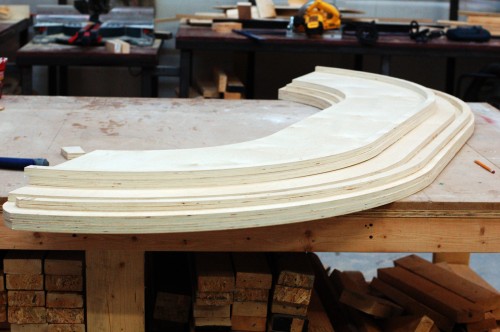
Pile of CNC pieces
Pile of CNC pieces

I also cut the footrest, a piece for a shelf in the middle, and some formers to nail the wiggle wood to. This pile of pieces would have taken awhile to draw and cut by hand, but with CAD, Natalie just had to copy the same shape over and over again, insetting the front curve by whatever measurement I gave. With this pile of pieces, I just had to cut a bunch of formers and uprights to connect them all together.
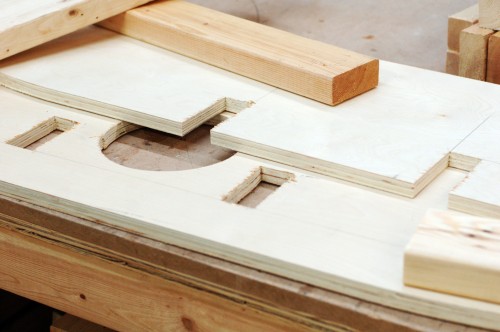
Notches and holes
Notches and holes

I decided I wanted some supports to run unbroken from the top to the bottom of the bar for strength, which meant I had to cut some notches and holes in the plywood that they could run through. If I had more time to figure the whole thing out ahead of time, I would have drawn these into the CAD. Since the pieces were already cut, I needed to measure and cut them by hand. See, even with fancy fabrication machines, you still need a solid grasp of traditional tools to build things.
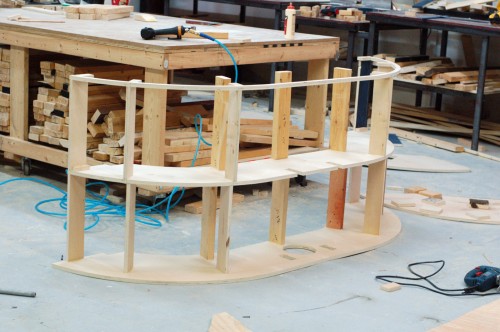
 

Two levels complete
Two levels complete

I built the bar up one level at a time, marking carefully to keep the whole thing square and straight. I positioned the supports so they were nearly above the support below them; they were offset just a bit so I would be able to drive a nail in.
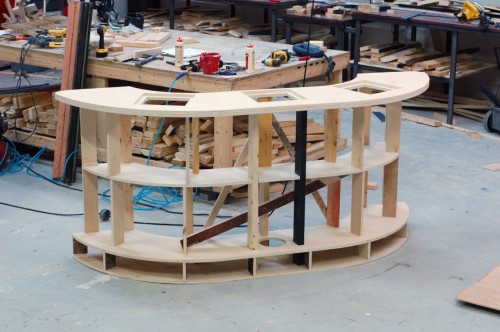
Bar skeleton
Bar skeleton

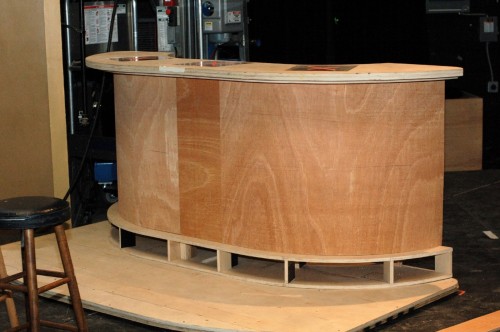
The supports along the front of the bar did double duty as formers, providing a nailing surface for the wiggle wood I would add later. I tried to keep the back as open as possible so it could be used as shelving to store all the props; the set was fairly open and skeletal, so the bar served as a place for a lot of the hand props to appear and disappear. The diagonal braces in the photograph above are just to keep the bar sturdy as they use it in rehearsal. Once the wiggle wood was added, I removed them, because the wiggle wood acted as one large piece of diagonal bracing.
Wiggle Wood
Wiggle Wood

I finished the bar onstage in between rehearsals. The curve was longer than eight feet, so I could not cover it with just one piece of wiggle wood. The center is relatively flat, so I placed a small piece directly in the center; I have found it easier to fill and sand seams between wiggle wood when they are on flat areas. The footrest also got a small strip of wiggle wood after the bar was secured to the wagon underneath it. All the faces got a thin coat of joint compound and a light sanding, and then it was on to painting.
Wild Party Bar
Wild Party Bar

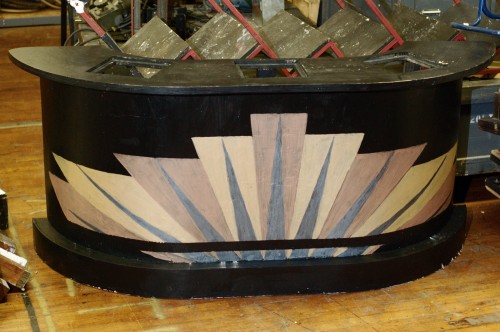
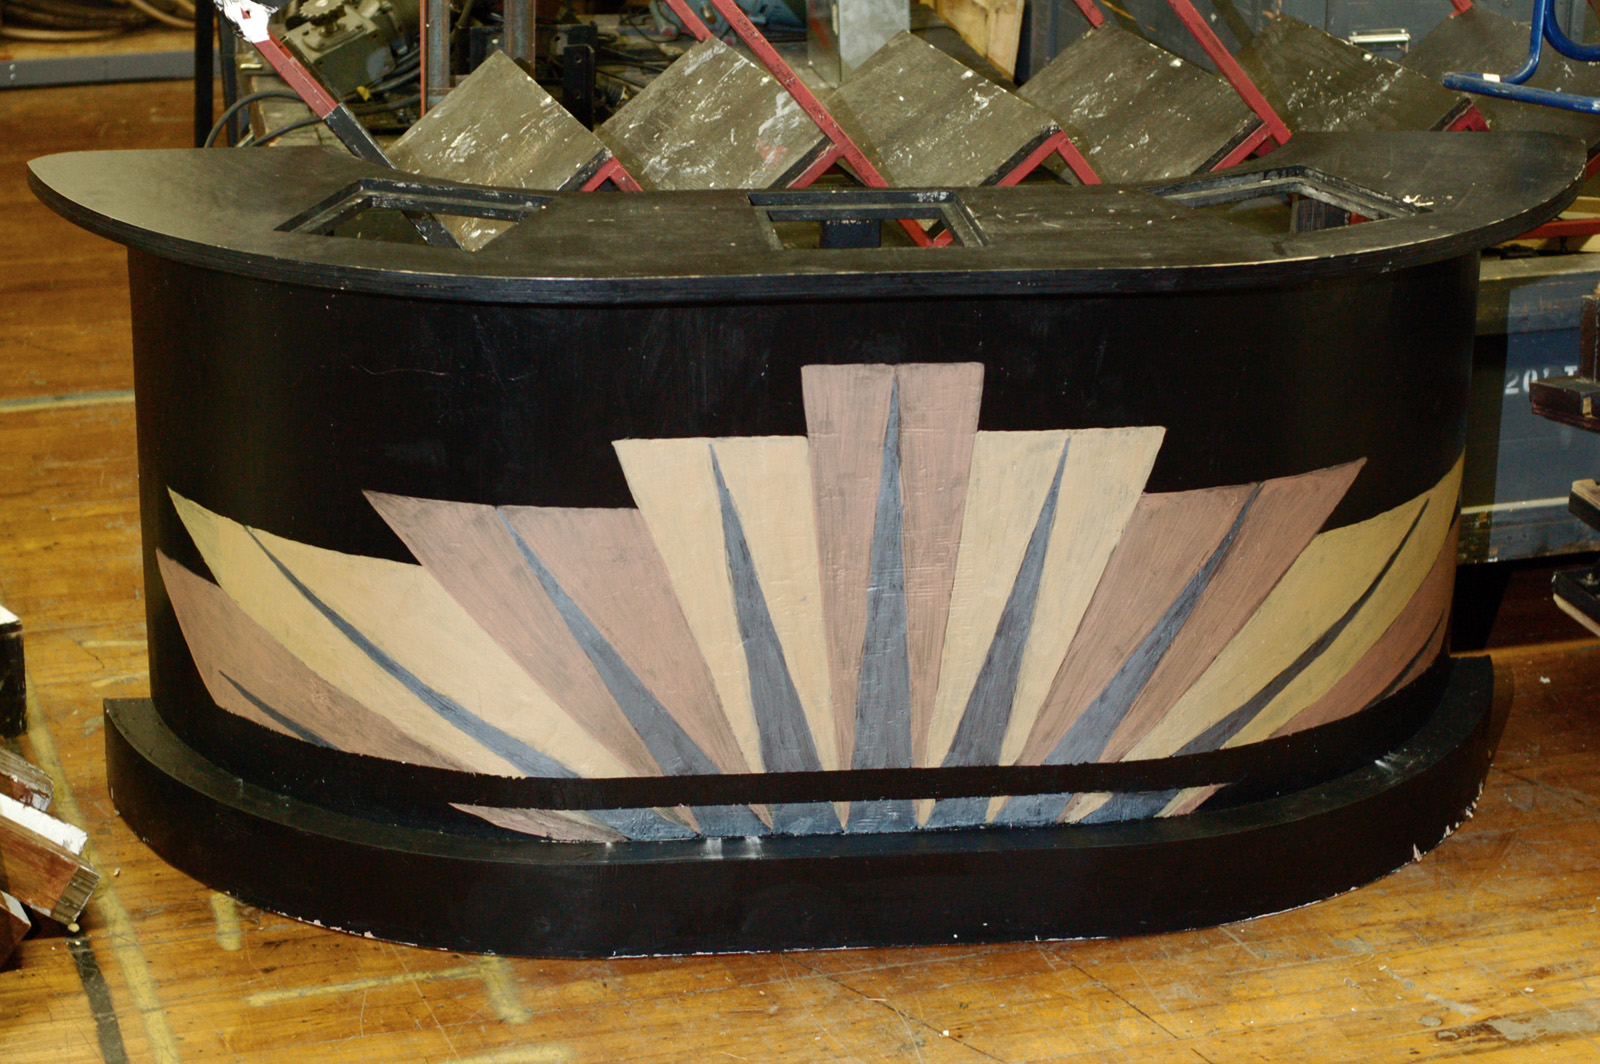
You can see the bar is a bit rough around the edges in the photograph above since I did not have time to take a picture until after strike. The Art Deco design painted on the front was a great touch added by Natalie and her crew. As she also pointed out, despite all the climbing and dancing done on this bar, she never saw it sag or wobble.

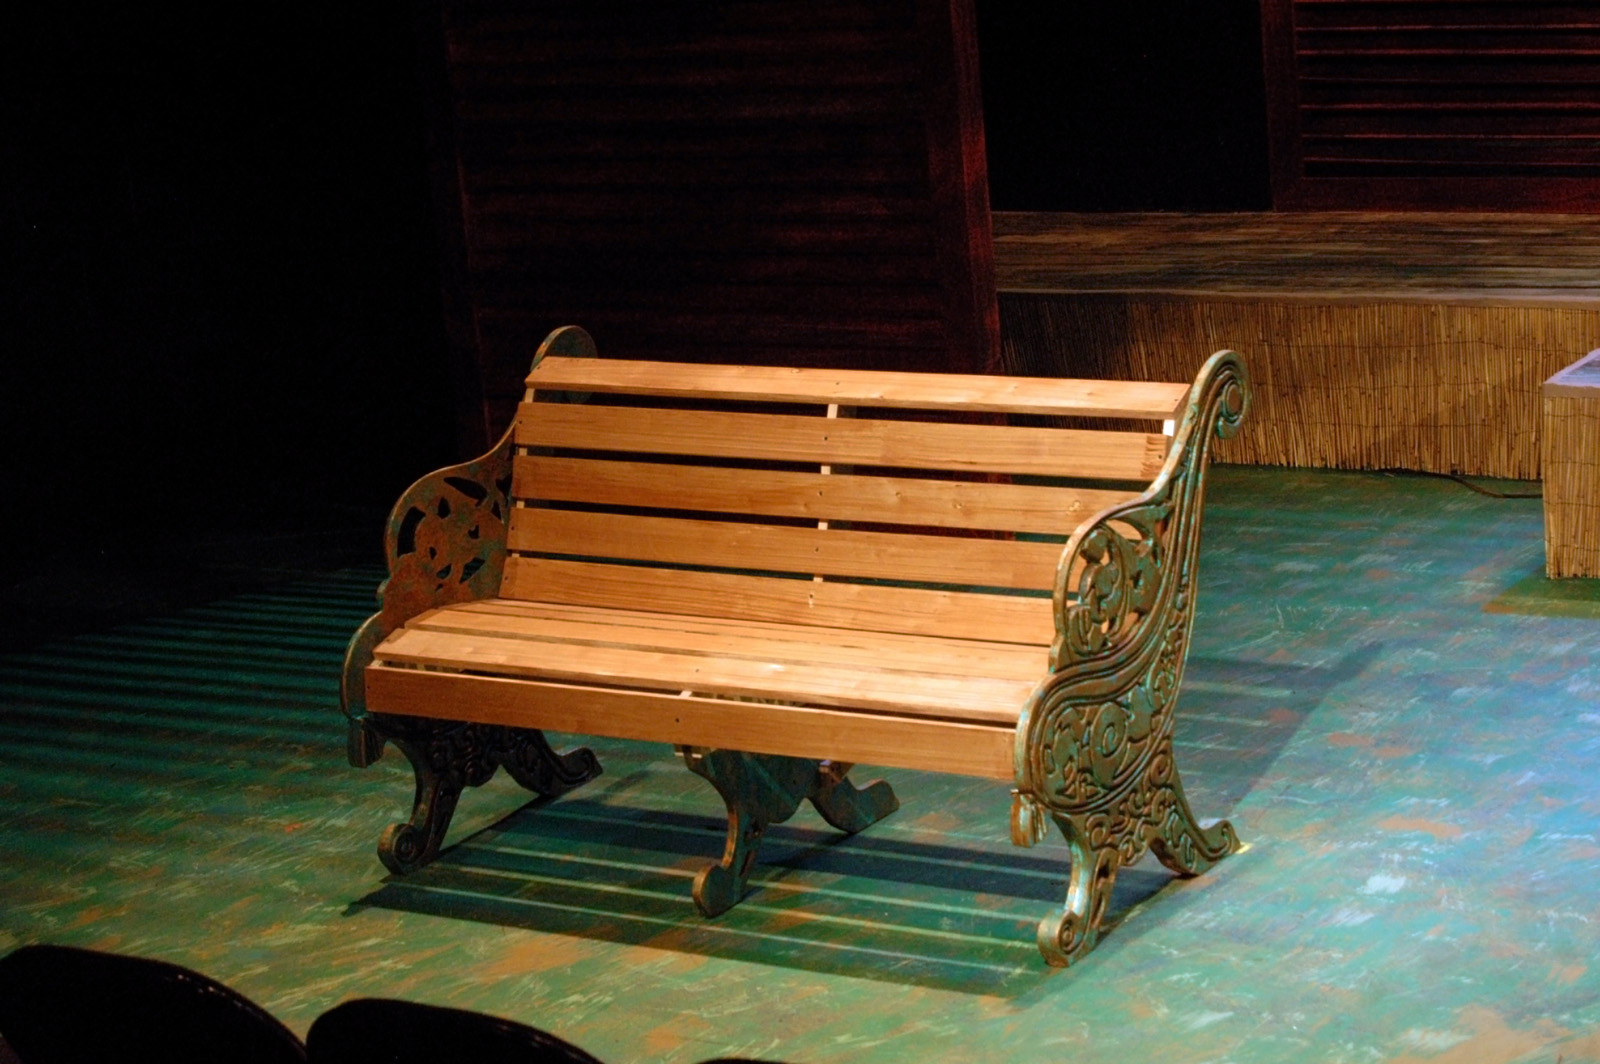
CNC Cast Iron Park Bench

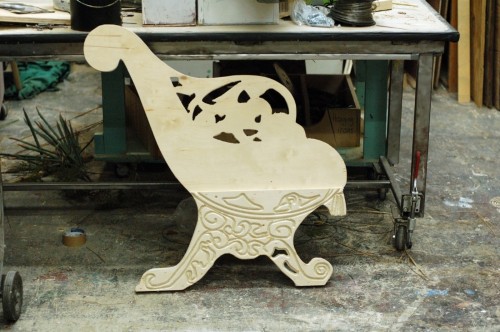
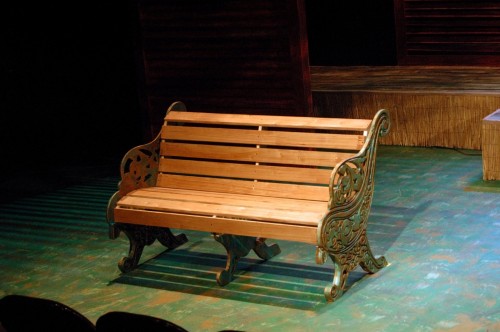
Yes, I built this exact same cast iron park bench seven years ago. I even used the same research image you see in the link. I couldn’t build it the same way, though. The first time around, I used a lot of found pieces and details which I did not possess this time. I also needed to build three matching benches, which warranted a different approach then building a single one. I was building and buying all the props for Elon University’s production of Cloud 9, and the whole second act takes place in an English park; the director was keen on basing it off of Kensington Park. We decided to cut and carve the ends on the scene shop’s CNC router.

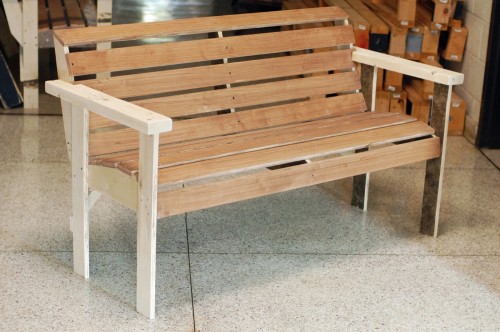
Rehearsal bench
Rehearsal bench

First I built the seats themselves with some stand-in legs and arms. I arranged some slats I had cut into a shape that was comfortable to sit in, than I screwed them together onto supports which kept the whole thing sturdy. The stand-in legs held it all up at the correct height so they could rehearse with the benches while we worked on the real ends. The idea was that when the real ends were ready, we would just unscrew the fake legs and pop on the real ones without having to take apart and reattach all the original slats. This also ensured that the curve and depth of the seat they were using in rehearsal would be exactly the same on the performance benches.

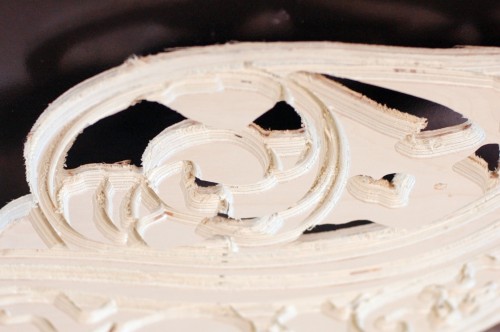
I began by making a line drawing of the bench in Inkscape, an open source vector graphics editor. I drew three layers; the first was a line showing where all the inside “holes” should be cut and the second showing where the outermost profile should be cut. The third layer showed where all the engraving would go. Rather than cutting all the way through the plywood, the router would only cut partway down, and it would use a v-shaped cutting bit (this technique is known as “v-carving”).

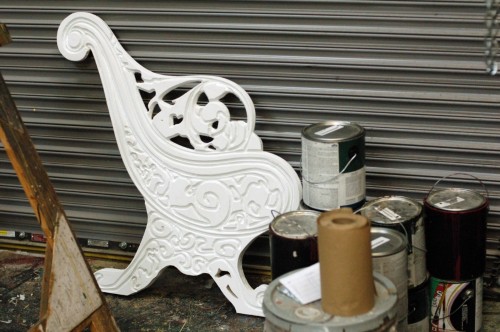
Primed bench end
Primed bench end

With the drawings finished, I gave them to the Natalie Hart, the scene designer (also my wife), to import into AutoCAD. I’m sure you can use the Inkscape drawings directly, but I have no experience with CNC file formats, and Natalie has already successfully used her CAD drawings on the CNC machine. The curves I drew in Inkscape turned into a series of many tiny lines in AutoCAD; this meant when they printed, they looked like many tiny lines rather than a single smooth curve. The curves she redrew in AutoCAD printed as smooth curves, however. I’m not sure I will use Inkscape again to draw for a CNC; if I find myself using the CNC a lot in the future, I may just spring for one of the less-expensive CAD drawing programs out there.

Closeup of CNC V-carving

The final piece of the puzzle was getting the drawings into PartWorks, which is the CNC machine’s software that generates the instructions it uses in cutting. Our production manager/lighting designer Bill Webb happily took that on, since the machine is second-nature to him by now. In about three hours, we had all the pieces we needed for all three benches.

You can see in the photograph above that the CNC left a lot of cleanup work to do. I experimented with a number of abrasive flap and wire wheels to see if there was a quick way to sand the whole thing, but it ended up requiring hitting every nook and cranny with a Dremel tool.

Inside of bench end
Inside of bench end

We had taken measurements off the rehearsal benches and put them into AutoCAD so the CNC parts would line up exactly with the existing structure. For the inside of the end, we only printed the bottom half and attached it to the outside part. This gave a bit of a lip for the existing bench seat to rest on, while also providing a lot of surface area to screw into from the side. It also helped line up the bench seat to the ends at the correct height.

The faux-verdigris paint treatment was developed by one of the students (good job, Vee Bland!). Natalie and I painted them up, and I quickly assembled them so they would be ready mere minutes before photo call.

Finished bench
Finished bench

Naturally, I would have loved to play around with the software and the drawing to develop a more realistic carving, as well as spend some time learning to run the CNC machine on my own. The time frame on this production was just too intense; 15 days between the first day of rehearsal and opening night, and these benches were but a small part of all the props and furniture I had to build and acquire. Still, it gave me a good idea of how I can integrate CNC fabrication into my prop work when it can come in handy.

Crazy for You Props

I have already shown off some of the props in the recent production of Crazy for You which I prop mastered, but I thought I would show a bit more of what I did on that show.

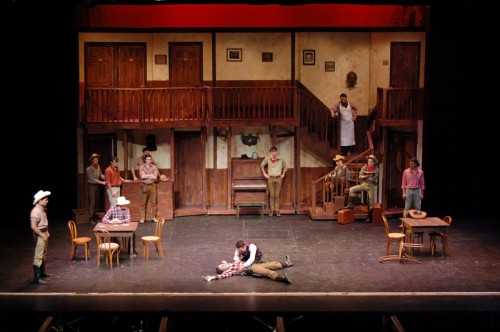
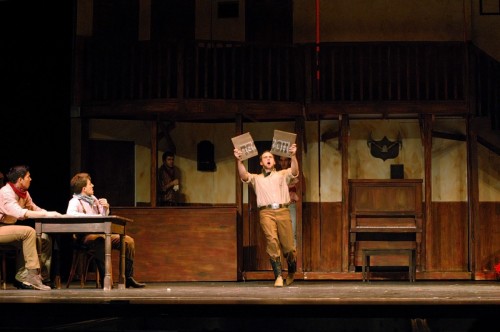
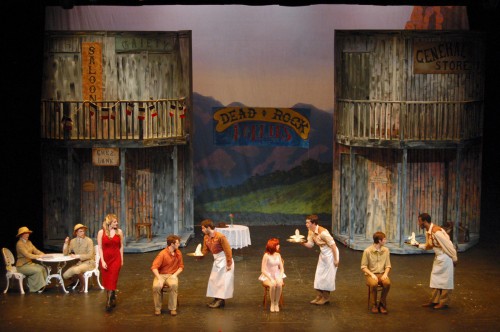
The saloon in "Crazy for You"
The saloon in “Crazy for You”

The saloon was one of the larger set pieces in this production. I dressed it out with photographs, plaques, signs and other items. Several of the objects were rigged for “tricks”, including the cuckoo clock on the second floor above the man in the apron, the antlers above the piano, and the jar on top of the piano (I highlighted the piano in a previous post). I also built the two tables you see above.

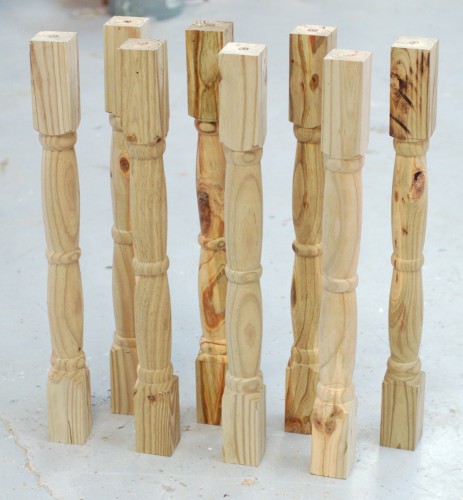
Turned table legs
Turned table legs

I turned the legs on a lathe to match a table the set designer and I both liked. Even though the scope and scale of this show was already pretty huge, taking the time to turn these legs really helped transform the scene.

Breaking the hotel sign

The saloon also had a “hotel” sign hanging throughout the show. In the second act, the hotel’s proprietor finally grabs the sign and smashes it over his head. I made a new sign for every performance. It was a piece of lauan with grooves scored in the back with a Dremel to make it easy to break. The front was painted with a quick wash and then the letters were spray-painted on with a stencil I made.

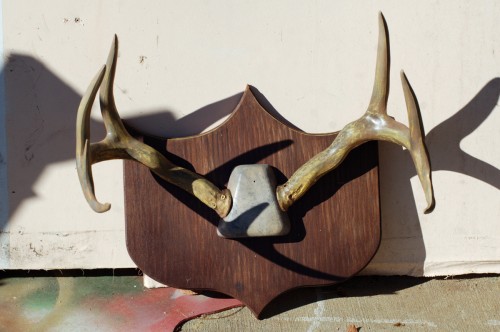
Antlers
Antlers

I needed to find a set of antlers for one of the tricks, but had no such luck. I ended up buying some fake antlers; these are meant to simulate the sound of real antlers hitting each other and are used by hunters to draw out deer. I cut out a plaque with a routed edge, mounted the antlers, and painted everything.

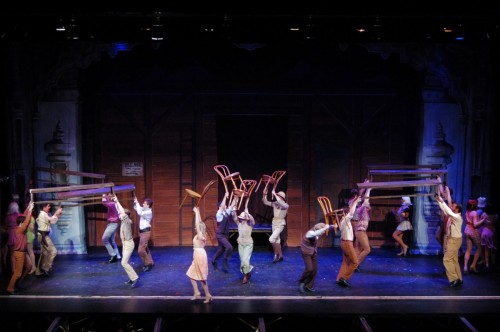
Dancing benches
Dancing benches

Several other scenes used a number of benches which saw some heavy-duty use. These benches were carried around (sometimes with people on them), danced on, tapped on and walked on. We had three benches in stock that they liked (from a previous production of The Crucible), so I constructed three more to match.

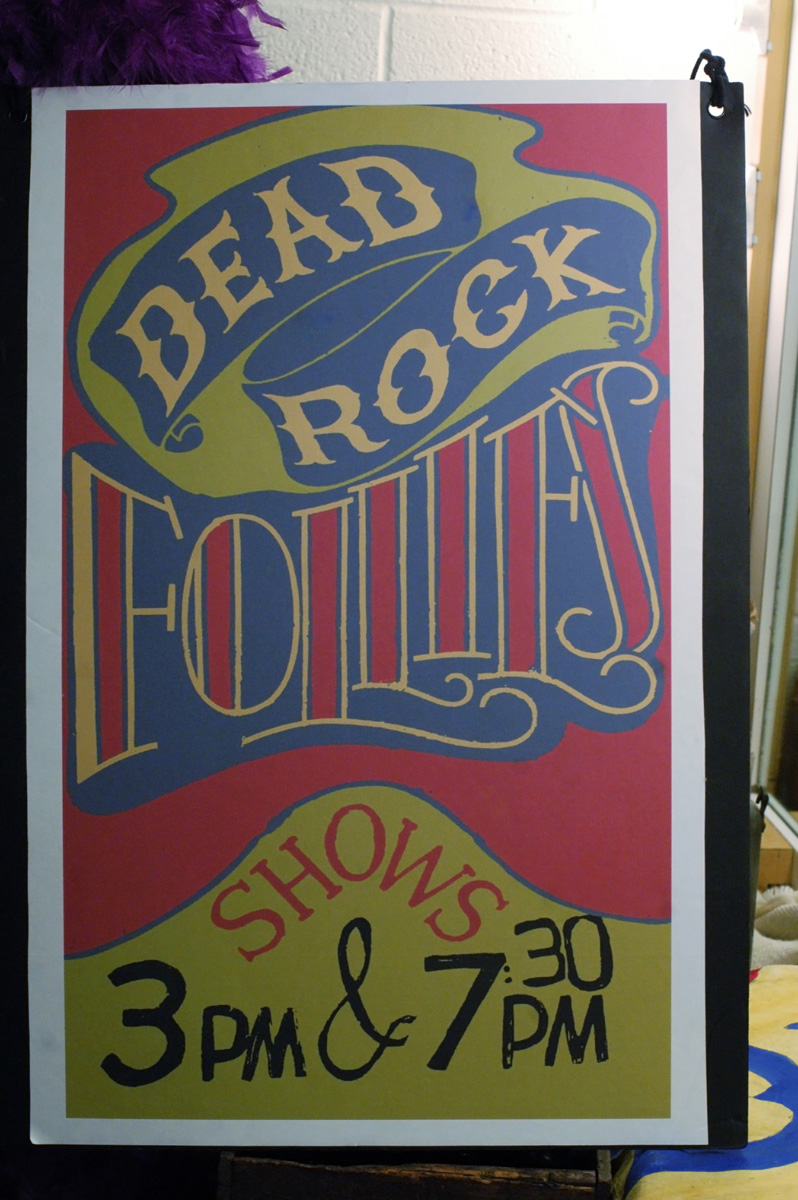
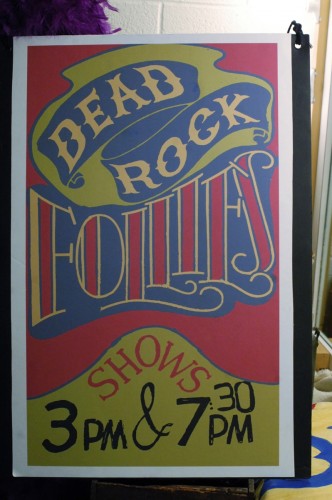
Dead Rock Follies poster

I did some graphic design on this show as well. The set designer found a great research image for the signs, which were meant to invoke a community vaudeville show performed out West in the 1930s. I mimicked the colors and layout of the research, changing the words on the poster to match what was in the script. The poster above was printed out three feet tall. I also adapted the size and scale of the poster so a similar image could be used on the flyers and programs that were also props in this show.

Chez Lank
Chez Lank

The penultimate scene in the play takes place in the Main Street of the town. Though this set piece appears throughout the play, it has been transformed for this last scene into a more fancy French-inspired café. The waiters bring out trays with fancy napkins on them during a brief musical number. The set designer and I decided it would be a nice touch if the napkins would be folded rather than just draped over their arms, so we found instructions for folding a napkin into a fleur-de-lis shape. A prop master is always finding little touches like that to shape the details in the props.

Credits:

Crazy for You, Elon University.

Directed by Catherine McNeela.

Choreography by Linda Sabo.

Set Design by Natalie Taylor Hart.

Lighting Design by Bill Webb.

Costume Design by Jack Smith.

Sound Design by Michael Smith.


Midsummer Errata

Tonight and tomorrow night finally see the official openings of our two Shakespeare in the Park shows done in repertory: A Winter’s Tale and Merchant of Venice. I’ve been working on these shows since February, so it’s a bit strange at the moment to think of them as “done”.

Merchant received a particularly glowing review in the New York Times. It spends a bit of time discussing the set, and even goes so far as to point out particular props, something which is exceedingly rare in reviews at this level.

A spotlighted ticker-tape machine sits commandingly center stage as the play begins, right across from a manual exchange board.

That ticker-tape was made by the very talented Natalie Hart. The body was re-purposed from the inside of the gramophone machine which also appears on stage; the plastic dome had to be custom made by a plastics company she found. It seems one company in America used to make acrylic bell jars like the one we needed; I remember buying one for a ticker-tape machine I had to build back in 2002. When Natalie contacted them and told them it was for a theatre show, the owner asked, “Is it for Beauty and the Beast“? It would seem many productions of that show eventually find this same company. Unfortunately, they have ceased manufacturing them, and the only options these days is to have one custom-built like we did, find a used one, or go with the dangerous option of using a glass one on stage.

I’ll be remiss if I don’t thank all the other artisans, shoppers and interns who worked so hard on these two shows and helped create something so wonderful and amazing. I’ll be sure to go into more depth of what I’ve experienced and learned from these once I get some rest and some photographs.

Later this month, I’ll be attending my first S*P*A*M conference in the Bay Area. S*P*A*M (The Society of Properties Artisan Managers) includes the heads of properties departments at most of the countries regional theatres, educational theatre programs, and many other theatres of comparable size. Every year they have a conference to network, share stories and experiences, and take part in some activities. This is my first time going since I’ve joined, and I’m really excited to both meet so many people I’ve heard about and communicated with through email, and to visit San Francisco for my first time.

We will be touring the prop shops of Berkeley Repertory Theatre and American Conservatory Theater, as well as the Pixar Studios. In addition, we will be participating in a workshop by Monona Rossol, the President and founder of Arts, Crafts and Theater Safety, Inc. Those of you who’ve spent a summer at the Santa Fe Opera know her from the annual Safety Day which all artisans and employees are required to attend every two years. I’ve been through her seminar twice as a properties carpenter; it will be interesting to attend as a properties master.

On a final note, if you visit this website regularly, you may notice it undergoing various tweaking and modifying. If you have any comments or suggestions on how to make it more useful in terms of organization, or more pretty in terms of… prettiness, please feel free to share them with me.

How to make a deer butt

In a previous post, we saw a deer butt which Natalie had built several years ago make a reappearance in a current production of A Lie of the Mind. I asked her to share how she constructed it.

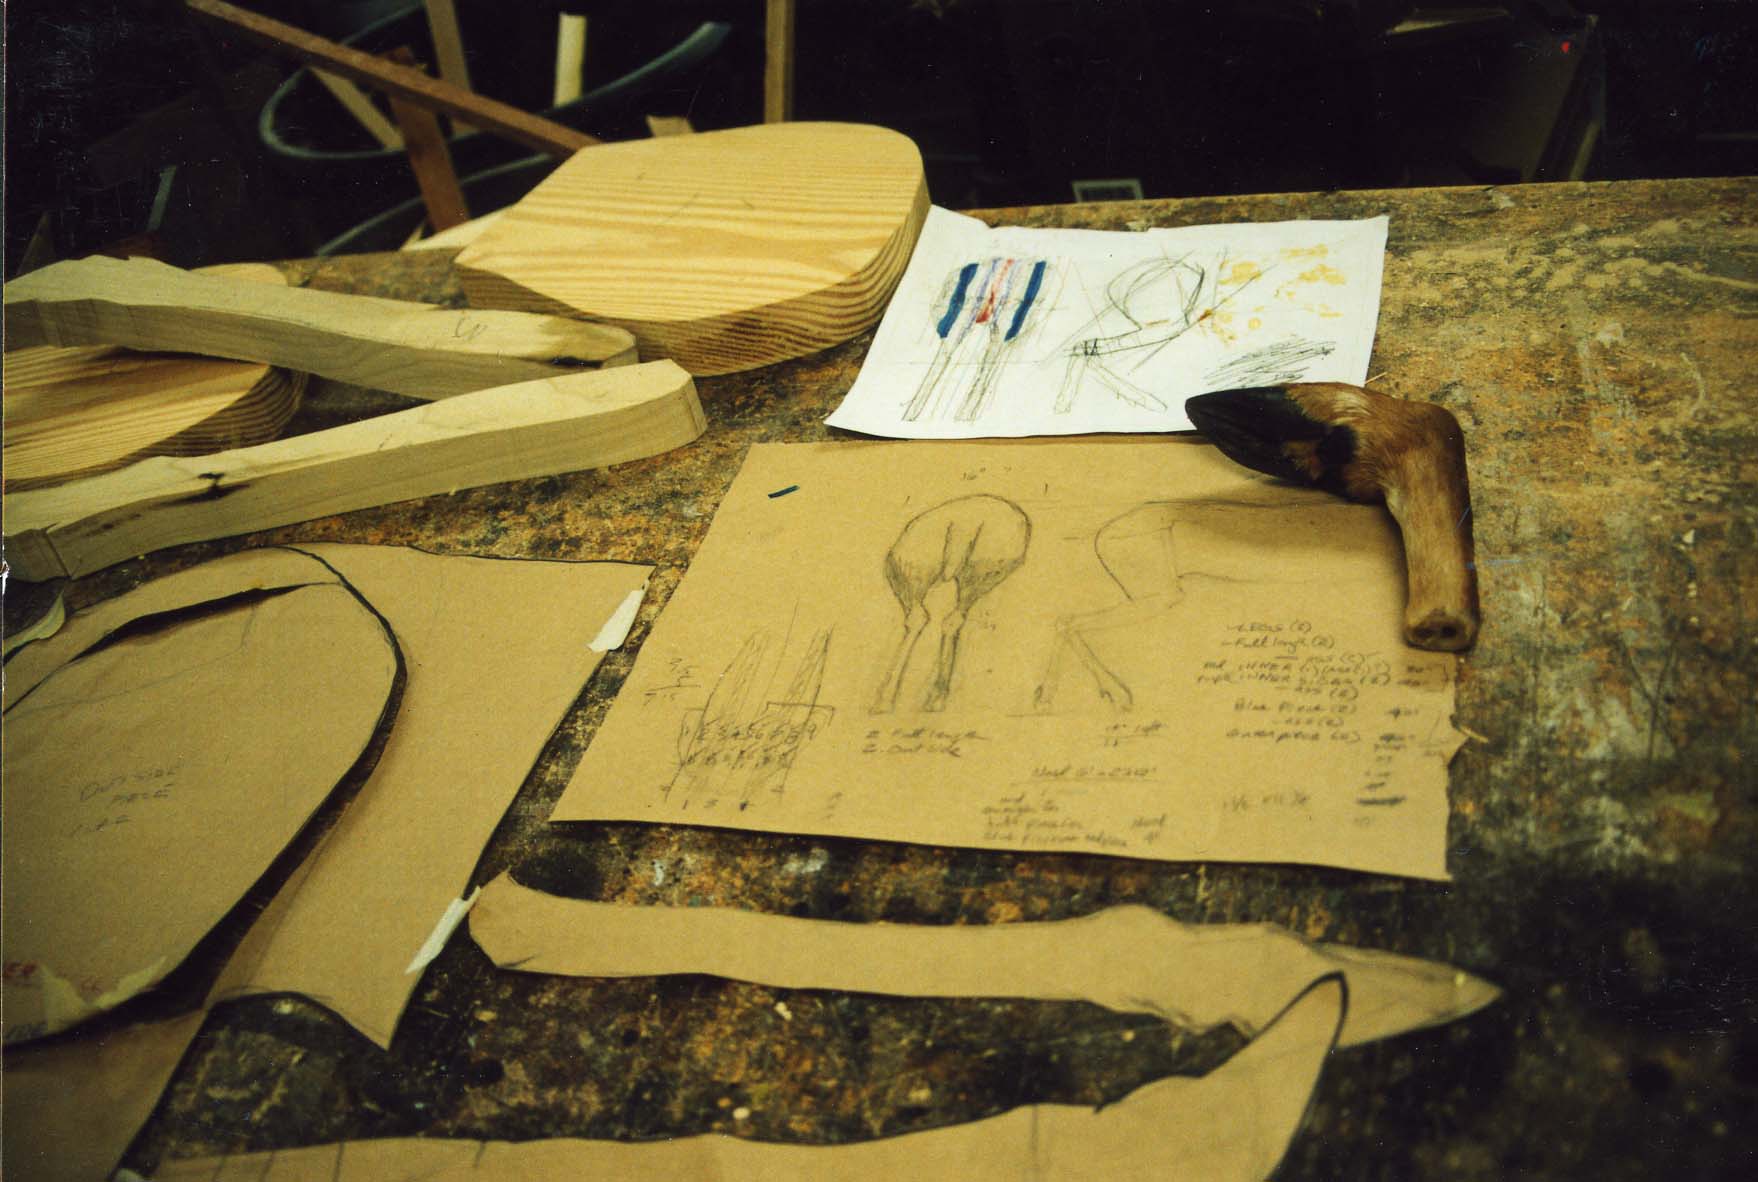
Drawing and deer hoof

She began with research and preparation. Without that, you can easily waste your time building something which is not quite right. She found a taxidermist who agreed to let her come to his shop and show her some techniques. She was able to make a series of detailed drawings to work from; she also scored the back half of a deer hide (as well as the foot pictured above). As you can imagine, with all the deer heads you see mounted in hunting lodges and man caves, there’s bound to be some left over rear parts.

Layup of solid wood pieces

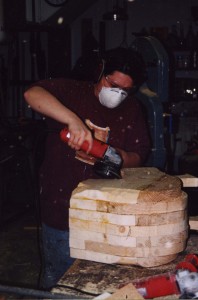
She decided to construct it out of a solid chunk of wood for strength, durability, and realistic weight. With her drawings, she cut the wood into their rough shapes before gluing them up layer by layer.

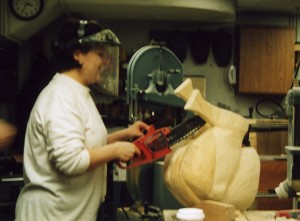
Cutting away at the wood

Once the form had dried together, she began rounding down all the edges to blend it into a  seamless piece. She also carved in musculature for added realism; since it would be covered with a hide, she exaggerated the lines so they would still show through the thickness of the material.

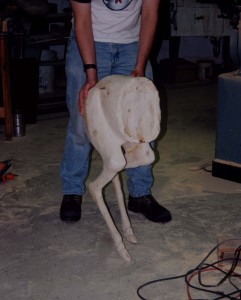
Completed wooden deer form

With the form completed, she tested it for strength. The legs are fairly skinny, so she added a bit of metal rods in the thinnest areas for reinforcement.

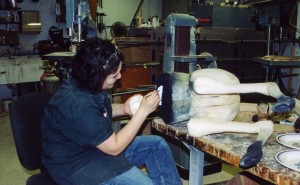
Painting the exposed parts of the deer

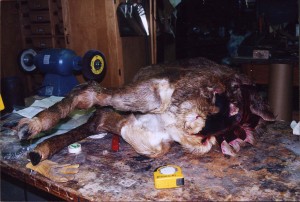
Natalie painted the hoofs and mangled parts because they would not be covered by fur. Again, the research and reference materials showed her exactly what it should look like. She had also spoke with the taxidermist about what colors would be showing on the exposed innards.

Attaching the deer hide

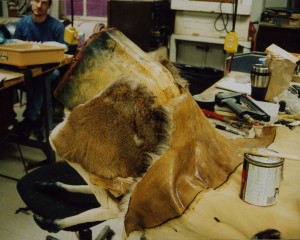
She began attaching the hide to the form using Barge. The hide came split down the bottom center so it was a flat piece. That meant it had a seam along the bottom and down each leg, which she had to treat carefully to keep it from becoming too prominent or noticeable.

Completed deer butt
Completed deer butt

With enough practice, you too can produce props as deer as this!