Tag Archives: molding

Magic Seashell

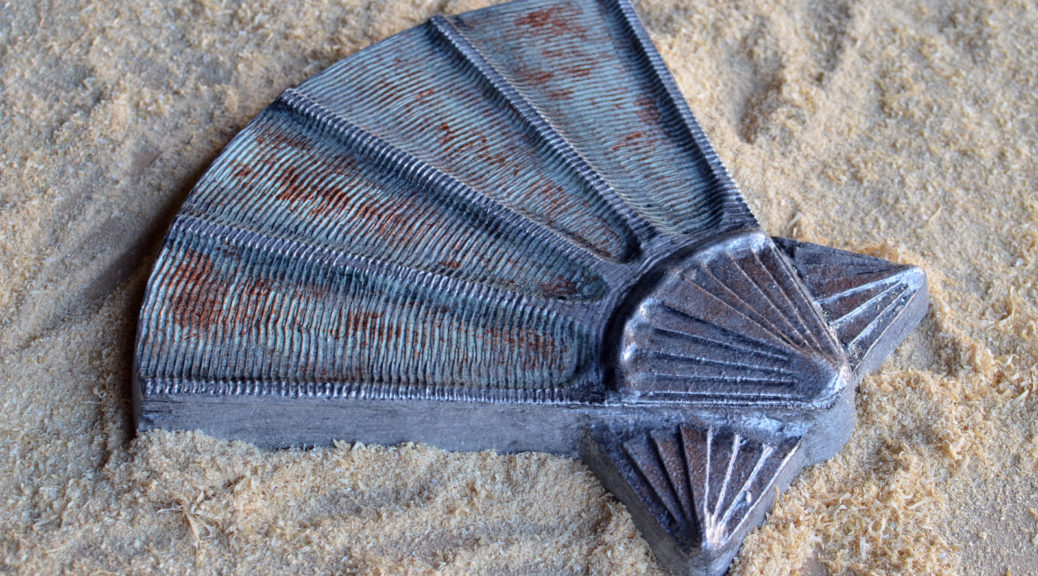
When I was a kid, I played a video game called Faery Tale Adventure that was filled with all sorts of magical items. I started making replica props of these items; I needed projects to show off various techniques for the second edition of The Prop Building Guidebook, and I wanted some props I could trot around to Maker Faires. The first one I have finished is a magic seashell, used in the game to summon a friendly turtle.
Seashell Model
Seashell Model

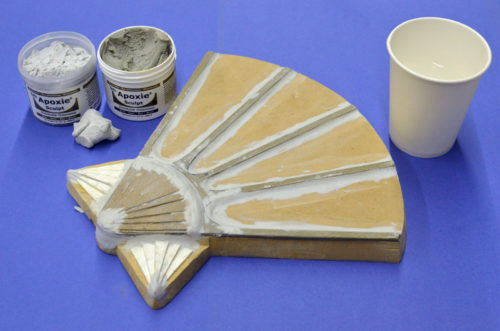
The model was cut out of MDF and layered with pieces of cardstock. I used some Apoxie Sculpt to further refine the shape. I coated it to give it a bit of texture, then spray painted it gloss pink to seal it all together and make it shiny.
Clay covered model
Clay covered model

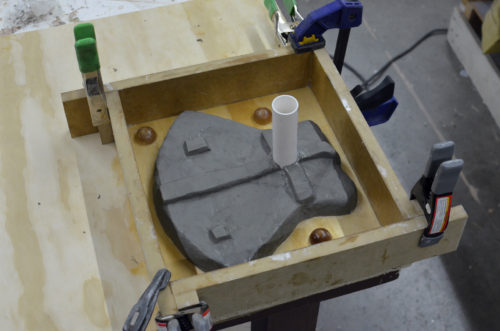
Next I made a matrix mold of the shell. I’ll describe it briefly here, but I have a lot more information in my upcoming book. I also shot a video which I promise will be up later this summer. Basically, you cover the model in a half-inch of clay, build a box around it, and fill it with plaster.
After the plaster is poured

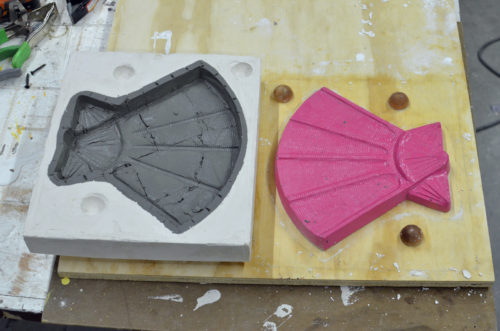
When the plaster is set, you remove the clay and put the plaster mother mold back. This leaves you with a half-inch air gap between the plaster and the model; fill this with silicon rubber.
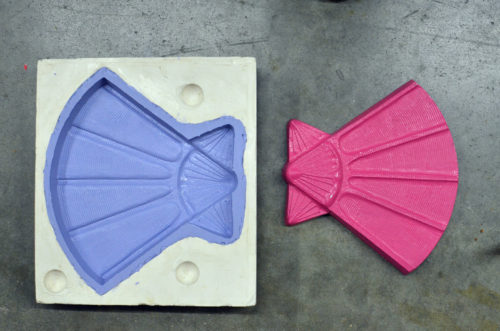
After the rubber is poured

The silicone rubber mold ends up supported by the plaster, and I used the smallest amount of silicone rubber possible. Matrix molding takes a lot more prep work, but it leaves you with very clean-looking results, and saves you money on materials.
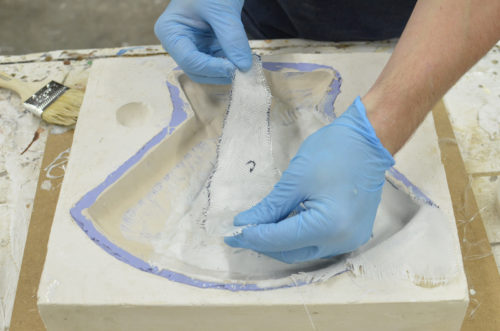
Laying in fiberglass cloth

To make the finished piece, I used fiberglass with Aqua Resin. Again, this was for the book; I will have a video of the entire process later this summer. I had never actually fiberglassed a piece from a mold before, so I learned a lot; the final seashell  was actually the fourth one I attempted, and the first I completed without anything going wrong.
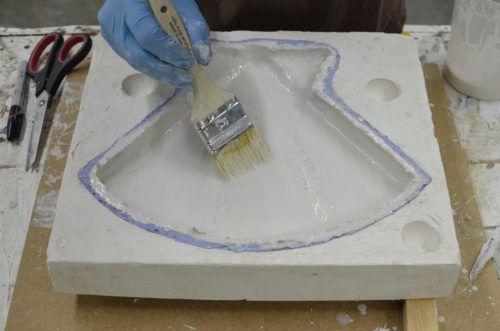
Coating with Aqua Resin

Using Aqua Resin with fiberglass is similar to using polyester resin, but a whole lot less toxic. The end result is a bit more like plaster rather than plastic, but it is still fairly strong and lightweight. I have a few more alternatives to polyester resin that I’ve been wanting to try so I can compare the results.
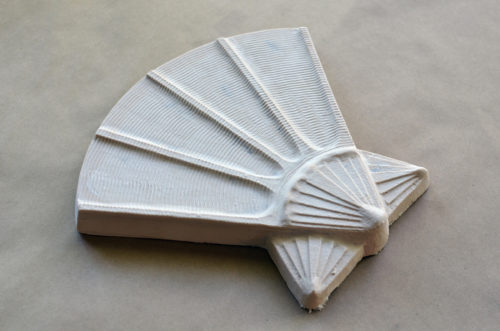
Finished piece before paint

This was not really that great of a piece to demonstrate the advantages of using fiberglass. It is very flat; you can easily create it using sheet goods, such as lauan, and still have it remain strong but lightweight. Fiberglass becomes more useful when you need an undulating skin, like a mask, that needs to be hollow but retain a consistent thickness throughout. But these are things I think about long after I have begun a project, when it is too late to start a new one from scratch. I say this for those of you who will look at this prop and ask, “Why did he bother with fiberglass? Why not just cut it out of thin plywood?”
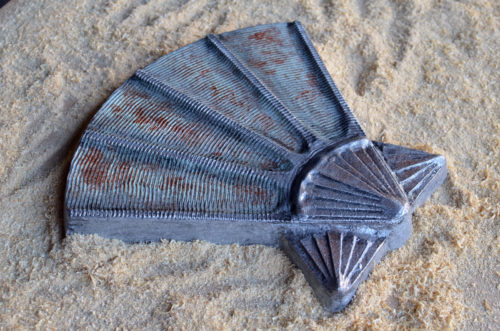
Seashell
Seashell

With the piece finished, I painted it with a number of metallic paints, as well as a dark wash for the cracks and crevices, and some Rub’n Buff for highlights along the edges.
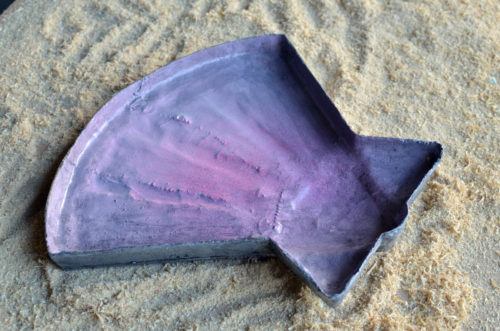
Back of seashell
Back of seashell

It’s magic! Good enough to sell on the seashore.

To the Weekend and Beyond

Bill Doran shows us how to mold and cast tiny parts, which often have their own set of challenges distinct from molding larger pieces. One word: bubbles.

Modern-Day Gepettos Keep Marionette Making Alive – Make Magazine introduces us to Mirek Trejtnar, a puppet-maker who not only carefully researches traditional methods of building marionettes, but shares his techniques on his blog.

Most explosive squibs used on film sets contain lead, which spreads lead all over the film crew. A new report highlights the potential dangers and asks if your film crew is being poisoned. It came to no surprise to me that Monona Rossol was behind this report; she often appears to be solely responsible for pointing out the toxic dangers hidden in the entertainment industry. Many of us have learned safer practices either from one of her classes or from her essential book, The Health and Safety Guide for Film, TV, and Theater.

Propnomicon points out that the New York Public Library has a great collection on old apartment buildings. They have detailed floor plans from the early Twentieth Century, as well as common plumbing and bathroom fixtures. It’s great research for any play from this time period.

New Cover for The Prop Building Guidebook

We are still about a year away from the release, but I just turned in my last chapters for the second edition of The Prop Building Guidebook: For Theatre, Film, and TV. I am very excited about this book. The first edition filled a void in the props world, and continues to be a great success. Now that it has been out for a few years, I can take everything I learned from it and incorporate that into a new edition.

But let’s skip all that for now; I really want to talk about the cover. I always wanted to do a custom setup showing a prop being built, but did not have time during the first edition.

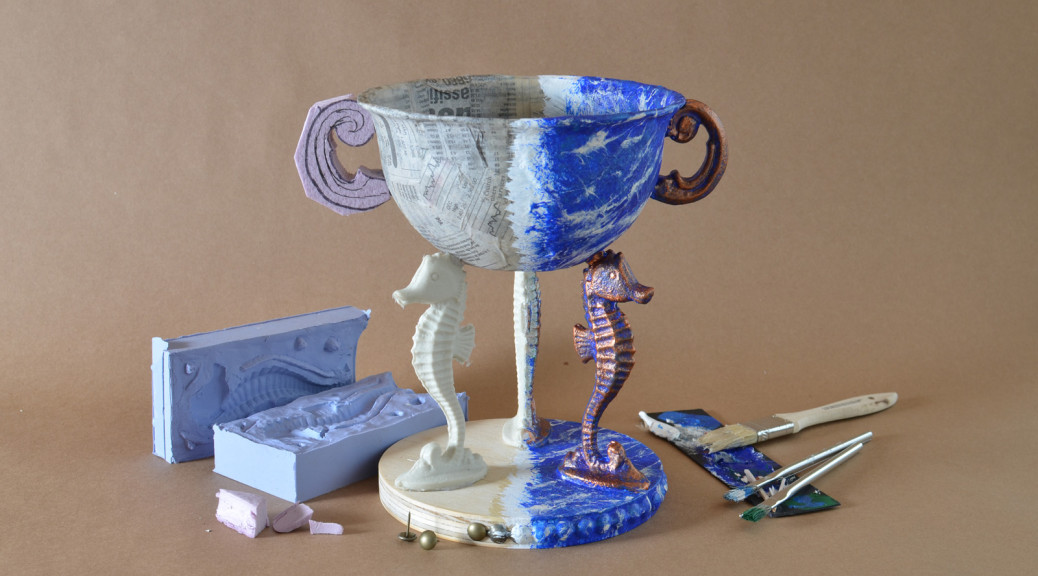
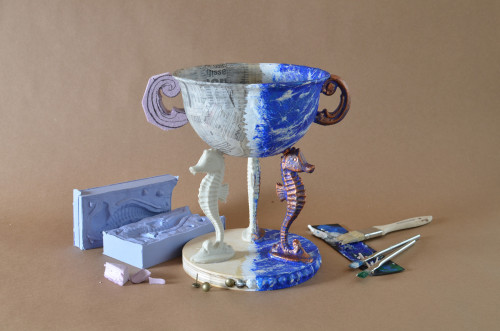
Coming up with a cover idea for prop building is tricky. Most finished props just look like a regular object. If you have a picture of a chair, people will think it’s a book about chairs. A picture of a treasure chest will make it look like a book about treasures. I needed a process shot. I did not want a collage or series of images for the cover, so I realized I would need to build some weird hybrid prop where half of it was finished, and the other half was still raw materials.

I wanted to incorporate the “most proppy” kinds of materials and techniques into the cover. I knew I wanted foam carving, molding and casting, paper mache, and a cool paint job. I would have loved to get some metal and thermoplastics in too, but I only had a weekend to plan, build, and photograph this. I did manage to get some plywood and found-object decorating in though.

Figuring out the prop itself took some thinking. It would have to be something that could conceivably come from a show; something you would not just buy or adapt from existing items. With the different materials I wanted to show off, I realized it would need to be quite fanciful. It would be the proppiest prop that ever propped.

I also needed it to fill the square cover. I could not make anything long, like a staff or wand. I did not want to stick a gun or other weapons on the cover either. I dug back into my opera roots and decided some kind of chalice or vase would be best; a bowl with carved handles, held by three sculpted figures.

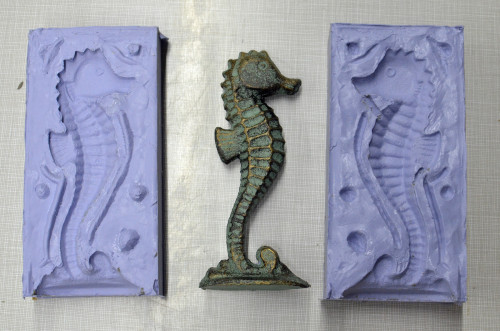
First I had to find the sculpted figure that I would mold and cast. I had nothing in stock and I did not have the time to sculpt something. I headed out to the stores and looked high and low. I needed something that would be easy to mold and cast, but that looked cool enough to warrant molding and casting. I finally found a little seahorse figurine. My prop would now have an underwater theme.

Seahorse mold
Seahorse mold

I made a two-part mold using Smooth-On Oomoo 30. I realized using $20 in materials to make three copies of a $3 figure was silly, but hey, he’s going to be a star.

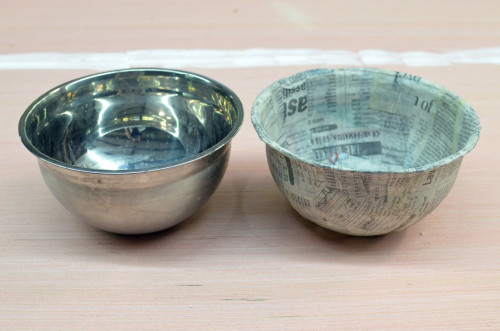
With the seahorse in place, I searched for a bowl that would look good on top. A stainless steel mixing bowl in stock fit the bill perfectly; it was also a good shape to use as a form for the paper mache. I cheated a bit here; I did not have time to actually paper mache a bowl and wait for it to dry. I molded a piece of Wonderflex over the bowl first, then added a single layer of paper mache to the inside and outside of that. So now my prop was actually a prop version of a prop.

Bowl
Bowl

With these in place, all that remained were the handles and the base. I carved a piece of foam into a handle, and cut another one out so it looked like it was about to be carved. I cut a circle of plywood and nailed some upholstery tacks along the edge for decoration.

I painted half of the prop with a faux marble treatment and a drybrushed brass. All that was left now was to pop it onto some butcher paper in my “photo studio” and artfully arrange the various materials, tools, and molds around the prop.

Cover photo for The Prop Building Guidebook

Ta da! I feel like I have an image that better captures what the book is about. And now I have a weird half-finished seahorse trophy I can carry around with me.

Props is Tops

American Theatre has highlighted 6 Theatre Workers You Should Know, and one of them is props designer Noah Mease. Yay Props!

Brandon Alinger at Prop Store has a fantastic history on the making of the Dewback creatures from the original Star Wars film. Some of the photographs detailing their fabrication are being shown here for the first time.

This link is almost ten years old, but I just found it, and it’s a good one. The forums at RC Groups have a ton of information on working with foam in terms of sculpting, gluing and coating. This thread has collected dozens of the most useful sites in one place.

The Stan Winston School had a Halloween Costume Contest. Check out the photographs of the winner and several runner ups. They will convince you that your homemade Halloween costume is shameful and you should just give up forever.

Make Magazine has a quick tutorial on making molds for jewelry. It shows how to make molds out of vulcanized rubber, which is not a process you see much in prop shops.

Legend of Zelda Master Sword Take Two

About a year and a half ago, I worked with The League of Extraordinary Thespians to make a Master Sword for their Legend of Zelda musical. It was a fun project, but I had very little time or money to do it; I thought it was a bit blocky, and the paint treatment was very rudimentary. Since I gave all the original swords away, I decided I would make a new one with some improvements for myself.

I filmed nearly every step of the process and edited it into a six-minute video.

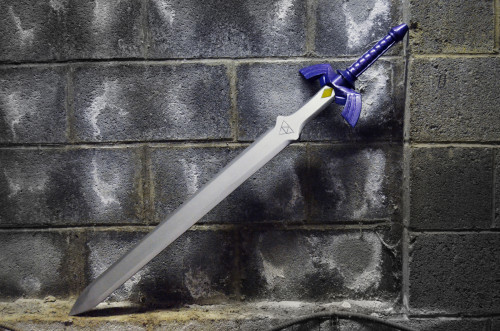
I made the blade out of wood again; on the original swords, I used plywood, which does not really make a convincing faux metal. This time I went with a solid piece of oak. After priming and sanding it, I used some Krylon Stainless Steel spray paint, which, after rubbing it with some steel wool, makes a very convincing metallic finish.

Legend of Zelda Master Sword

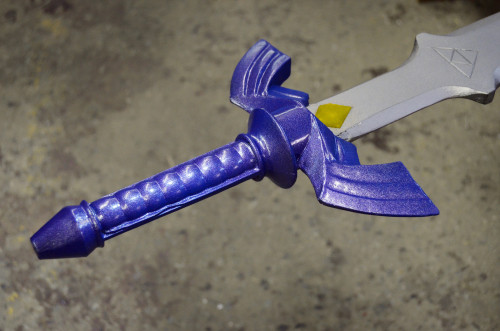
I decided I would make the hilt as a separate piece, then mold it and cast it directly onto the blade. I wanted a strong connection between hilt and sword that would not break when you played with it. Another reason was that the hilt was a very time-consuming piece, and I wanted the option of making more swords in the future.

Legend of Zelda Master Sword

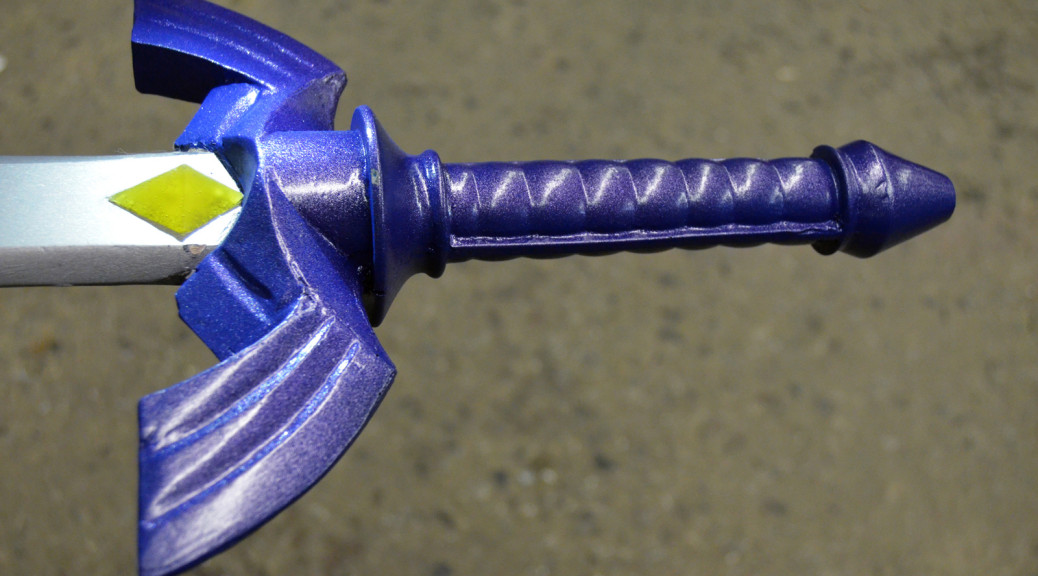
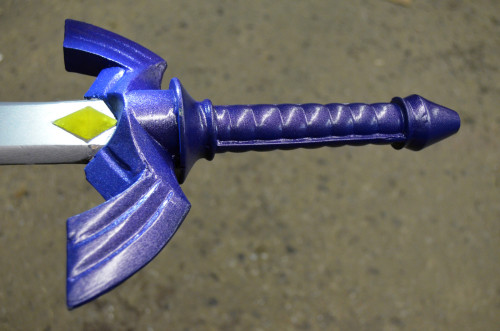
Casting the hilt directly onto the blade was a very challenging and hairy process for me. Despite how awesome I seem, I do not have much experience with molding and casting. The process was far from perfect, but the end result was pretty satisfactory (though you can see some wibbly defects in the picture below).

Legend of Zelda Master Sword

I also tried sculpting the quillons out of clay, which is not something I typically do. I used an air-drying clay that was way too soft; if I were to try this again, I would look for a much harder clay. In fact, I would probably be tempted to carve most of it from a solid chunk of wood.

The yellow jewels were a separate piece which I cast in tinted epoxy. I made a video showing the mold-making process on that a few weeks back.

I finished off the hilt with a purple shimmering metallic spray paint. All in all, I was happy with how this sword turned out, and I learned a lot from the process.