Tag Archives: mechanism

Umbrella Gun

The umbrella gun scene in Who’s Afraid of Virginia Woolf? is one of the most visually memorable in the play. George, tired of his wife Martha’s insults in front of their guests, exits offstage. He sneaks back wielding a shotgun aimed at her head. The guests see him and scream as he pulls the trigger. Instead of the loud report of a bullet, though, a brightly-colored umbrella emerges from the barrel. Hilarious, right?

The original production was written to use a trick umbrella they already had in stock, but every production since has given the props master a headache as they try to figure out the gag. I initially checked with other theaters who had done this show, but theirs had either broken or been disassembled. The rental options out there were either too expensive or looked unrealistic. I decided I needed to build my own.
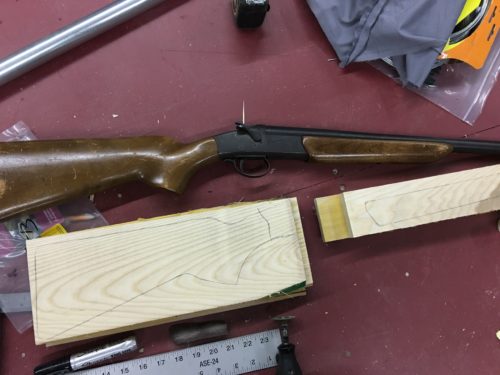
Drawing the stock and fore-end

I needed a pretty thick barrel to fit an umbrella inside. It would look out-of-proportion if I just stuck it on a regular shotgun body. I scaled up the stock and fore-end to cut and shape out of oak.
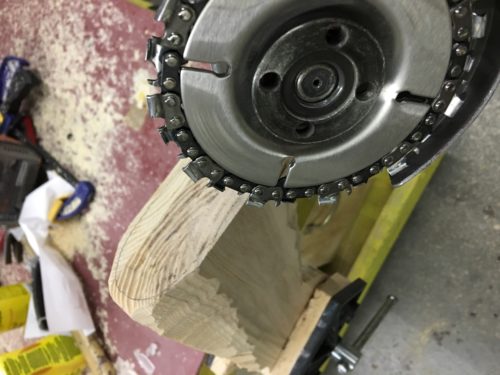
Chainsaw disc shaping the wood

I bought a chainsaw grinding disc for this project because I had always wanted to try one. It was amazing; it acted like a wood eraser. I just pointed it to the wood I didn’t need and it made it disappear. I will never attempt wood carving without one of these again.
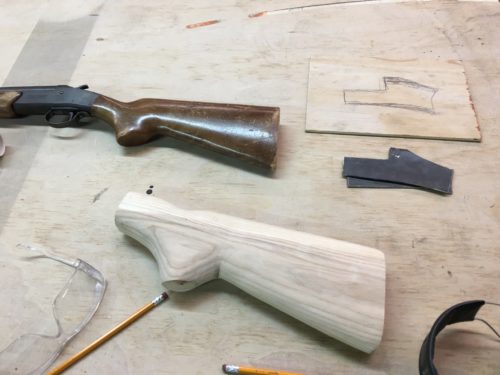
Scaling the receiver to match the stock

The receiver would need to hold all the parts of the shotgun together and hide all the mechanisms inside of it I cut out several pieces of flat steel stock to weld a hollow container.
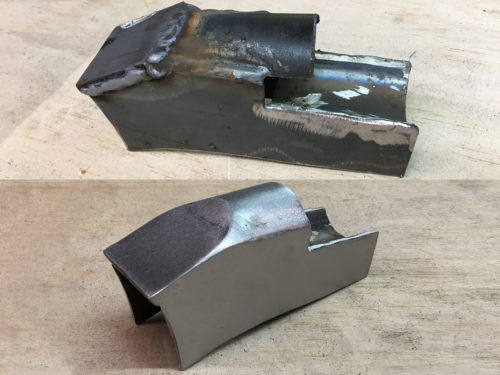
Welding the receiver from steel

With just a welder, angle grinder, and belt sander, I was able to fabricate a decent looking receiver.
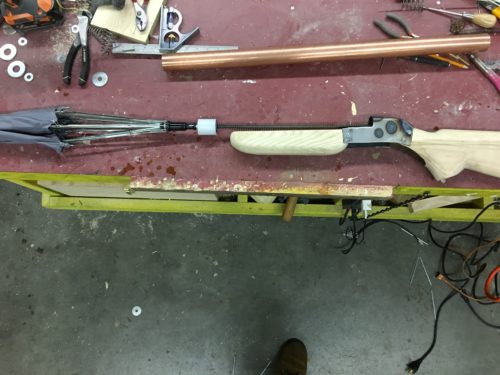
Spring mechanism for umbrella

I took an existing umbrella from stock which had its own spring mechanism to make it pop open. I cut off the handle but left the hollow shaft in place. I welded a steel rod to the shotgun that the umbrella could sleeve onto and travel back and forth. To minimize binding, I put a bit of UHMW rod on the end of the umbrella that was slightly smaller than the inner diameter of the copper tube I was using for the barrel. I used copper tube because it was the most rigid tube I could find with the thinnest walls.
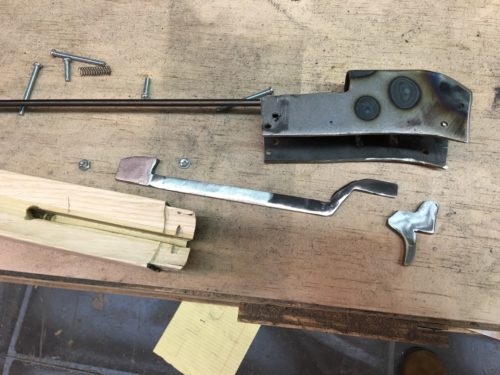
Pieces of the trigger mechanism

I drew up a full scale trigger mechanism in cardstock to figure out what would fit within what I had built. It was just two pieces: a trigger that rotated on a pin, and a long lever with a latch on the end that held the umbrella against a spring until the trigger was pulled. I traced the pieces to steel and cut them out. I slipped a small piece of spring into the fore-end to return the trigger after it is pulled. I slid a long spring over the metal rod in the barrel to actually propel the umbrella after the trigger is pulled.
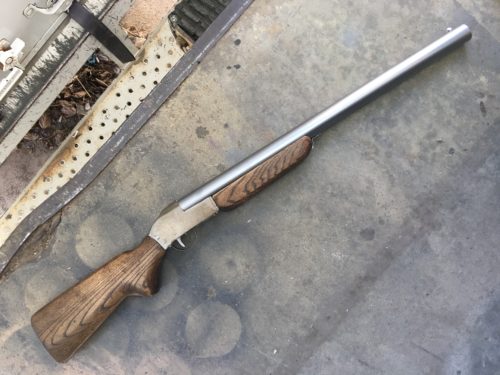
Finished trick shotgun

I painted the barrel to match the receiver and stained the wood pieces darker before sealing them. I coated all the static pieces of interior and exterior steel with shellac to prevent rust. Any pieces of steel which moved against another part was coated with dry lube. I built the gun for easy disassembly in case any future users needed to fix or replace a part.

Umbrella Gun

I have a video which shows all the parts as they are assembled. You can see the various inner mechanisms in more detail if you are interested in how it all works, and if you wanted to see it actually fire.




Bubble Blowing Automaton

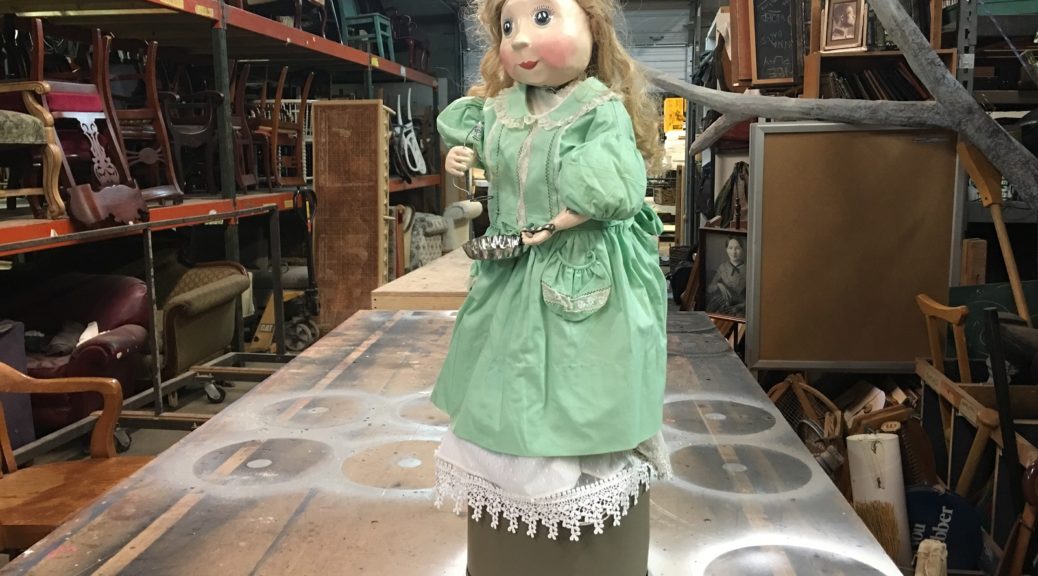
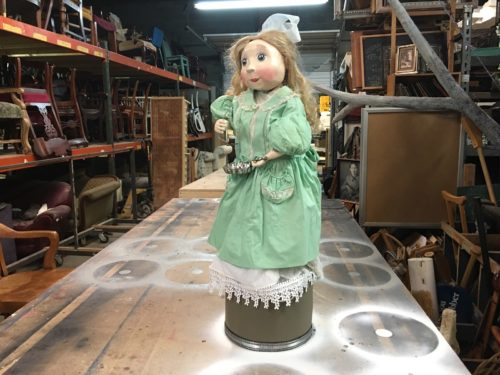
If you’ve ever seen the play Buyer and Cellar, you know that a key scene revolves around the description of “Fifi”, an antique bubble blowing automaton. An automaton is a mechanical device that repeats a series of predetermined motions; think of a wind-up toy, or a cuckoo clock. They were really in vogue in the 16th through 18th centuries, when clock makers made all sorts of intricate moving automata in the shape of humans and animals playing out various whimsical scenes.

Most productions of Buyer and Cellar imply the existence of Fifi. The whole set is usually quite minimal, and the props are limited to a chaise and a book. For Triad Stage’s production, the director wanted to know if we could actually have a doll that dipped a wand into soap and blew bubbles out of it. She felt the audience, like herself, may not know what an automaton was, and this pivotal scene would be confusing without some visual reference.

I told the team it would be no problem to make an automated doll that moved by itself, and then I feverishly racked my brain as to how I was going to pull this off. I have been reading The Automata Blog for years, so I had a good mental catalog of potential solutions (anyone interested in automata should definitely dig through the archives on that site).

I put together a  video that describes how the final mechanisms work and that show the doll in motion.

Bubble Blowing Automata

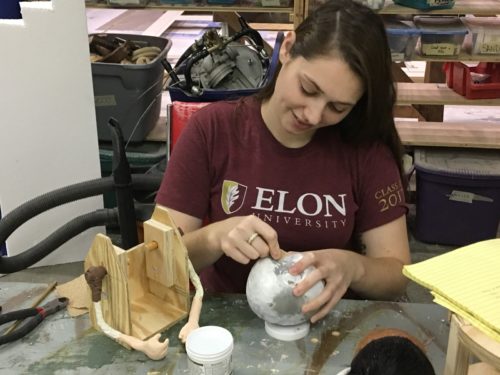
My apprentice, Shay, started off by sculpting the head and arms. The head was foam, while the arms were made of wire wrapped in tape. Everything was coated in Apoxie Sculpt. She mounted them to a “birdhouse” which would contain the mechanism.

Sculpting the doll parts

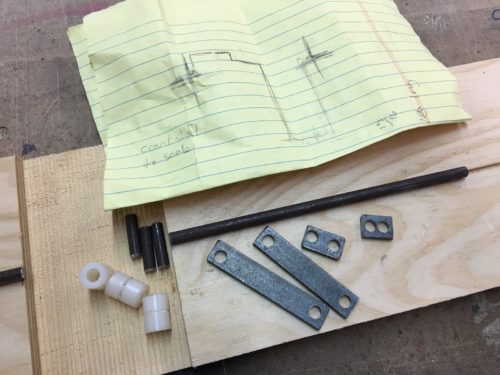
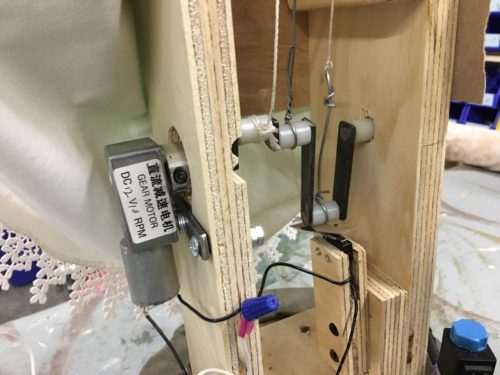
As explained in the video, all the movement was driven by a single crank shaft run by a motor. We prototyped the crank shaft with some bent wire, then transferred the measurements to a full scale drawing which I used to fabricate a more robust shaft from steel.

Laying out the crank shaft

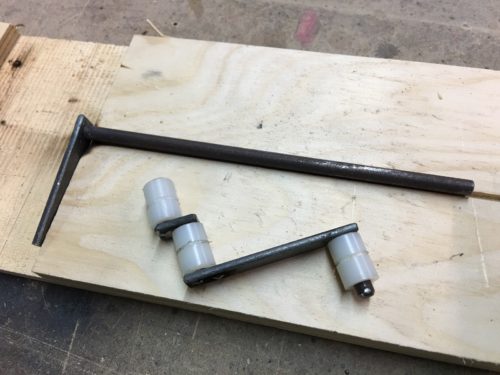
I used nylon spacers which were free to spin around the pieces of quarter-inch rod on the crankshaft. I cut a small groove around the center of the spacers to keep the string from slipping side to side. Everything was welded together to make a single piece.

Crank shaft near completion

I began by using string to connect the crank shaft to the arms and head. It would frequently get caught by the spinning crank shaft, causing Fifi to stop working. I tried a number of ways to prevent the string from wandering far enough to the side to get caught, but nothing worked one hundred percent of the time. I wanted to use stiff wire, but the distance between the shaft and the doll’s arm changed as it spun, so I needed the string’s ability to go slack. Eventually, I realized I could use a piece of wire that was long enough to clear the crank shaft, and then attach it to a piece of string for the rest of the distance to the arm.

Motor and crank shaft

The motor was a basic hobby motor with an attached gear box that slowed it down to 12 revolutions per minute. The crank shaft was not perfectly straight, so the motor was mounted loosely, allowing it to “float” a little bit. The pneumatic portion of the prop is explained in the video; Fifi was attached to an air compressor backstage, with tubing running up her arm and aimed at the bubble wand. A solenoid valve was triggered by the crank shaft whenever her arm was raised, causing air to rush out for a brief moment.

Fifi, the bubble blowing automaton

Though Fifi had a lot of challenges, once we got her working, she worked pretty flawlessly throughout the entire run.

Breakaway Window Pane

A few months back, I did the props for Arms and the Man at Triad Stage. Set during the 1885 Serbo-Bulgarian War, the first scene revolves around a Swiss soldier breaking into the bedroom of a Bulgarian woman. The war rages around them, and at one point, a bullet shatters through the glass of her balcony door. That’s a prop.

We not only needed to make a breakaway window pane that would fit the decorative transom, but I had to come up with a way to break it. Obviously, we couldn’t fire a bullet through it; we couldn’t fire any projectile through it because it was facing the audience. I needed something that could be triggered from offstage and remain hidden both before and after the trick. Luckily, the audience could not see the upstage side of the door unit. The video below shows the mechanism in action.

Essentially, I took a mousetrap and tied a nut to it. When triggered, the mousetrap flung the nut into the window, breaking it, and then it hung out of sight. The rest of the mechanism is simply to keep the mousetrap secure so it will not trigger prematurely, but also to make it easy to pull the string when the cue is called.

The Bedroom, Act One

The photo above shows the window in the context of the set. Somehow this is the best photo I could find.

Glass mold
Glass mold

The window pane itself was made from isomalt, a sugar substitute which works a lot better for breakaways than traditional sugar glass. I get mine from Make Your Own Molds, but you can find it at many baking and confectioners shops since it is used for sugar sculpture on cakes.

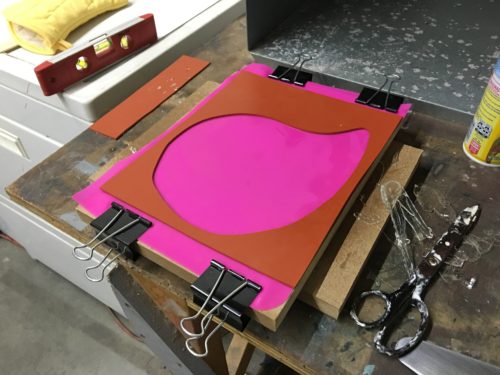
For the mold, I cut the shape of the pane I needed out of a sheet of silicone rubber, and placed it on a silicone baking pad.

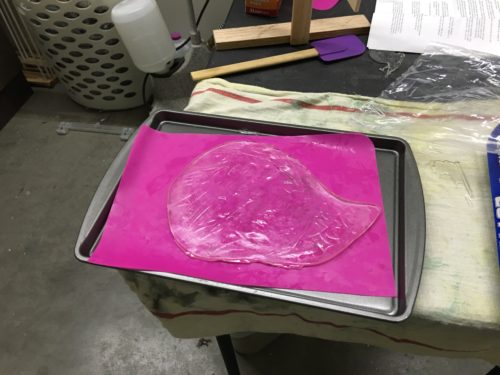
Breakaway glass pane

Above is one of my first attempts. The panes became a little clearer and smoother as I made more of them and experimented with the process. Below is a behind the scenes video put out by Triad Stage for this production. It has a bit of footage showing me making the breakaway window panes.

The effect was eventually cut during tech. The scene was rather dark, so the audience could not see the glass breaking. The setup and cleanup of the effect was not worth the little it added to the scene, so it was replaced with a sound and lighting effect.

Friday Link-a-Dink

As you may have noticed, articles on this blog have been appearing a little less frequently than before. I have decided to drop down to only two posts per week, rather than three. New articles will now be appearing every Tuesday and Friday. I have some ongoing family issues that take a lot of my time, and this seemed like a good way to ease the pressure without just totally dropping the blog altogether.

That being said, on to the links!

Volpin Props has a step-by-step guide up for his latest prop creation, a Magister’s staff from the Dragon Age video game. I’ve been following the progress of this piece on his Twitter and Facebook, and it’s great to see the whole thing finally come together. And, it’s a nice introduction to matrix molding.

I don’t know the source of this, but this video showing the inner workings of animatronic heads recently surfaced on the Internet. I find it fascinating to see all the mechanisms and bits that go on the inside, and how it all comes to life when the skin goes on top.

This comes from last July, but I never actually posted it: Ten Props that Have Been Used in More than One Movie. One day, I want to do this for my own shows, because some props in my stock seem to be trotted out for every other production.

Do you need a “Do Not Disturb” sign for your show? How about 8700 of them? Collector’s Weekly looks at the “Do Not Disturb” collection of Edoardo Flores, who has accumulated that many from hotels around the world.


Crow Puppet Revisited

For the holiday show at Triad Stage in Greensboro, we remounted the production of Snow Queen we made last year. I had built a number of puppets for the show which only requited minor adjustments and maintenance, but I wanted to completely rebuilt the crow puppet. He went through so many iterations and modifications last year as we tried to discover what worked best, so the end result was a hodge-podge of cobbled-together parts and mechanisms. He was difficult to maintain and he broke frequently.  When I knew we were remounting this production, I budgeted in a complete rebuild of the crow.This time around, I was able to order more appropriate and precise materials, rather than assembling it with whatever I could find at the Home Depot.

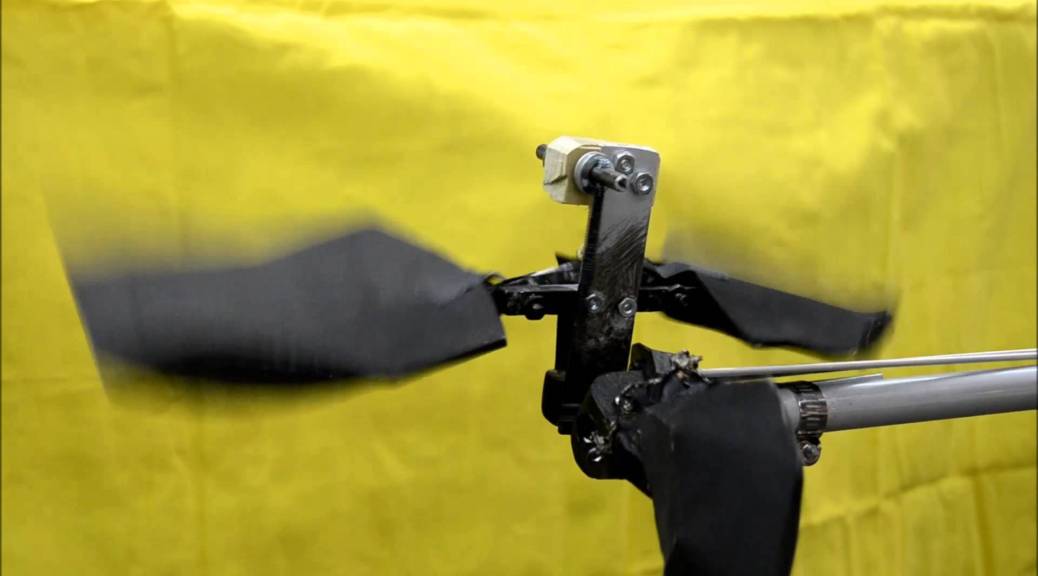
I made a video showing the inner mechanisms of the puppet and how it is operated:

You can compare that to the puppet I made last year. The rod is now two pieces of aluminum which sleeve together, rather than two pieces of PVC pipe which bend and wobble. I abstained from using any string this year, which always stretched and lost tension, or broke completely. Most importantly, I planned the construction out so the parts were completely modular, and everything could be taken apart with bolts, screws or Velcro. The crow last year was a bit of a nightmare when it came to maintenance, because a lot of the pieces were permanently attached to each other, so it practically required laparoscopic surgery to fix anything that broke.