Tag Archives: me

Friday Links on Display

It’s another Friday, and another September. This always seems like the busiest time of the year for the whole entertainment industry. Some of you may have gotten a four-day week this past week, but for most of us, it was an eight-day week. So take a seat, relax, and enjoy these links for a few minutes:

Huffington Post has an interview with props master Peter Bankins. Bankins has been a prop master in film for the past 25 years, working on movies such as Young Guns, Grumpier Old Men, Erin Brockovitch and many more.

On the other side of the pond, Farfetch has a short photo essay called “Our Day With Thomas Petherick“. Petherick is a young prop maker and set designer working mainly on fashion photography shoots.

Bill Doran and his wife created a fairly detailed set of armor and weapons from the video game Skyrim for this year’s Dragon Con. He details the lengthy build process as they fashion parts out of wood, EVA foam, Worbla, resin and more.

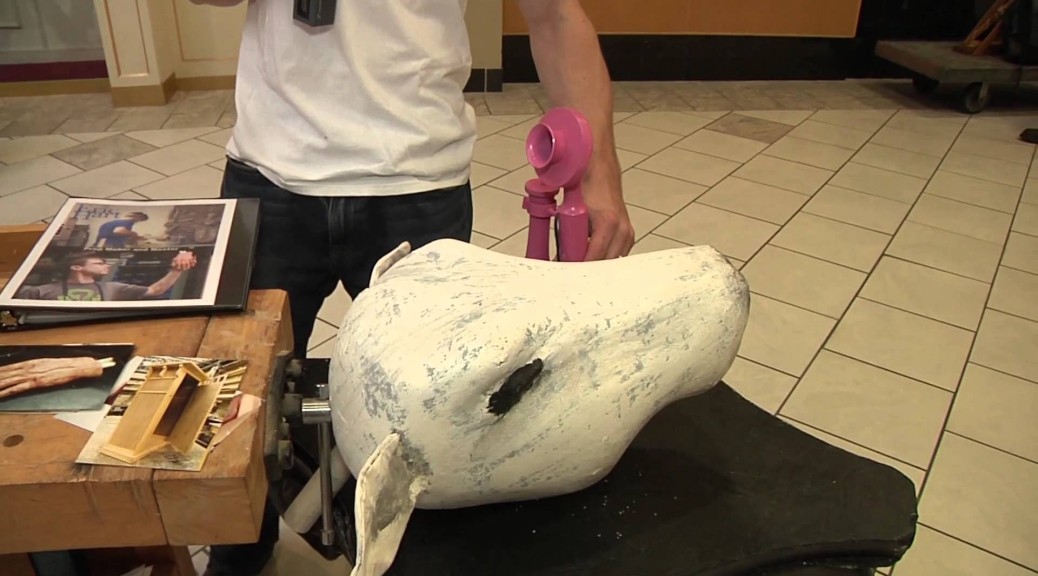
Finally, here is a familiar face; I was displaying some of my props at last month’s Burlington Mini Maker Faire. Coffey Productions was going around filming the various exhibits, and shot this video of me talking about my props and my book. Check it out!

Giant Champagne Bottles

With this summer’s season at the Santa Fe Opera at an end, I can begin to show off some of the props I’ve built there. First up is a giant champagne bottle.

We needed four champagne bottles of a very specific size; they were going to be the barrels of cannons that I would also build. Nobody manufactures champagne bottles that large, so we had to make them. Since we would vacuum-form them from plastic, I began by making a solid foam bottle.

Blank and pattern
Blank and pattern

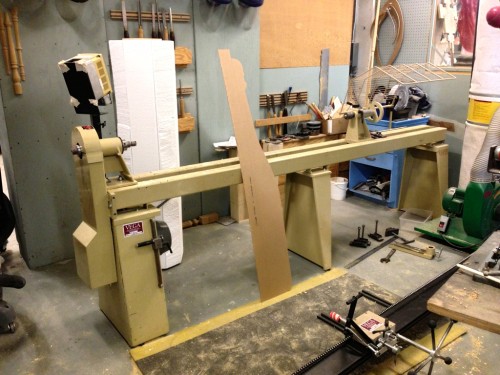
I drew out half the shape at full-scale on a piece of plexiglass. We have a duplicator on our lathe, which allows us to rough out the shape by directly following a pattern like this. I also got the block of foam ready. This piece was so wide, it barely fit on the lathe; I had to take most of the attachments off and round off the foam by hand before there was enough room to put the attachments back on.

Turning foam
Turning foam

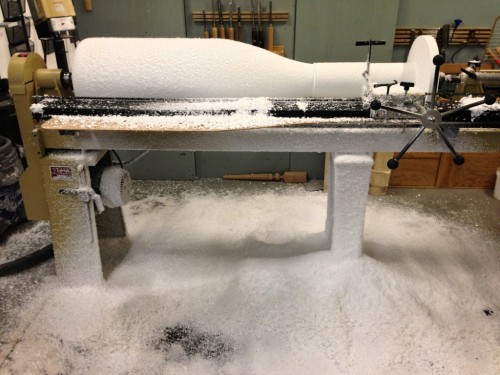
As you can imagine, turning a block of foam this large creates quite a bit of debris. I am still finding bits of foam in my clothes to this day.

Splitting the foam in half

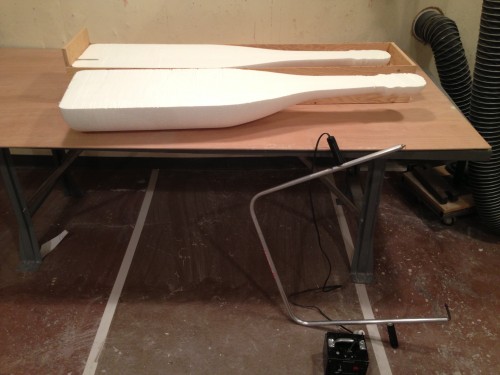
To vacuum form this piece, I only needed half of the bottle. I built a box so I could hold the bottle straight. The top of the box reached the exact middle point of the bottle, so when I ran a hot wire along it, it sliced the foam bottle directly in half.

Vacuum formed half
Vacuum formed half

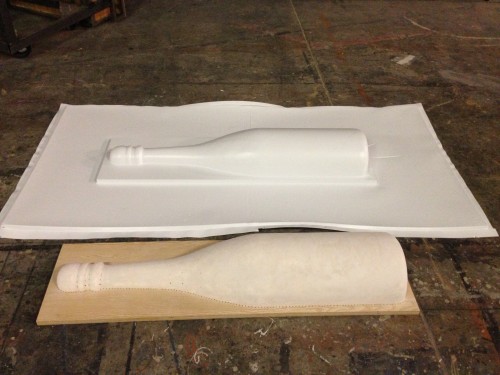
I mounted the foam onto a board and drilled holes all around the circumference, as well as holes in the concave portions to ensure the plastic would be sucked all the way down. I also coated the foam with Aqua Resin and sanded it smooth. I posted a video a few weeks ago showing the vacuum forming machine in action; check it out if you want to see how I made the piece in the photo above.

Painting the halves
Painting the halves

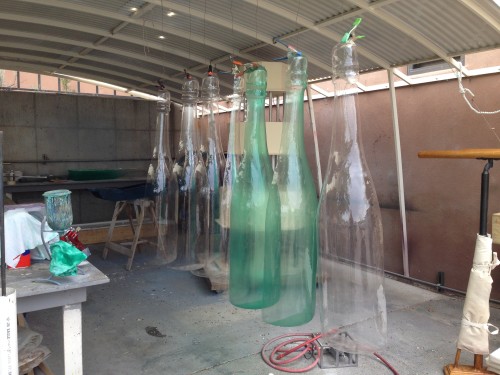
With a successful pull on the vacuum former, this project was turned over to the crafting department, and my work on it ended. They began manufacturing clear plastic halves like you see above, and spraying them down with green dye to match the color of a real champagne bottle.

Finished bottles
Finished bottles

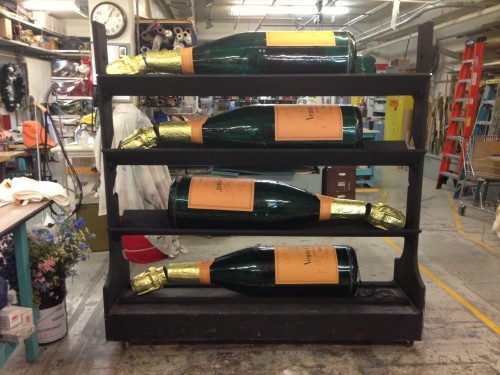
They glued the halves together and added some labels and gold foil to complete the look. The final bottles were over four feet tall.


Circus Platform

One of my recent projects was a circus platform (though its more of a stool). It’s a very simple-looking shape, but it’s a little tricky to pull off. Think of the bottom half of a cone and that is what I had to build.

Platform structure
Platform structure

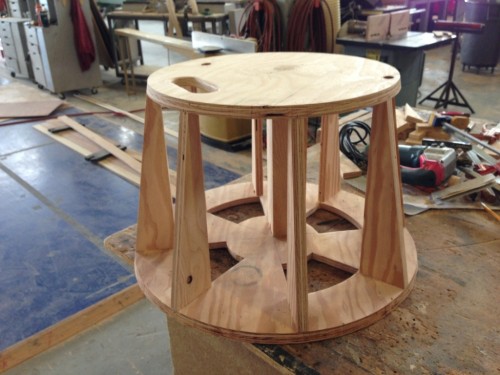
I started off making the structure for the platform. It had two circles of plywood, joined by a few lengths of plywood cut at a taper. The circles also had their edgers beveled to match the angles of the taper.

Attaching the wiggle wood

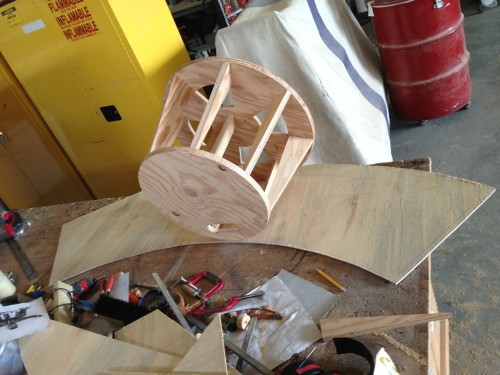
Adding the wiggle wood skin was one of the tricky parts. With a tapered shape like this, you can’t just wrap the wiggle wood straight around it. It actually requires a radiating arc shape like in the photograph above. I only rough cut the shape above, leaving a bit of extra all around that I can trim off once it is attached.

Trimming the bottom
Trimming the bottom

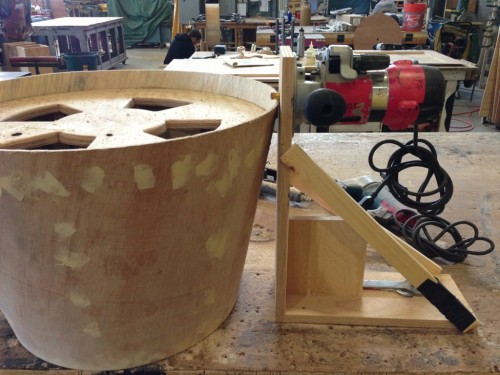
The top was easy to trim, as it wanted to be flush to the plywood circle seat. The bottom was a different matter; it needed to extend past the bottom circle, since it was getting castered, and the wiggle wood would hide the casters. I set up a horizontal routing jig so I could cut the wiggle wood to a consistent height all around its circumference.

Casters
Casters

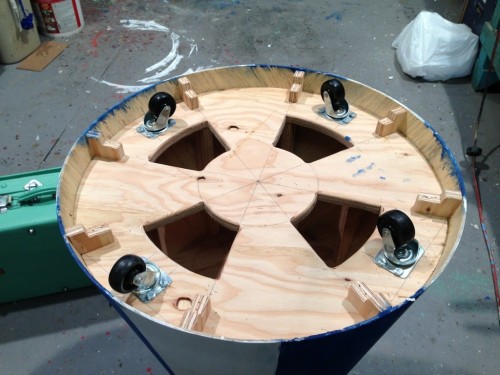
I had cut four wholes in the bottom of the stool, and now that it was time to attach the casters, I had access to get my hand inside and bolt them on. That’s planning ahead!

Final platform
Final platform

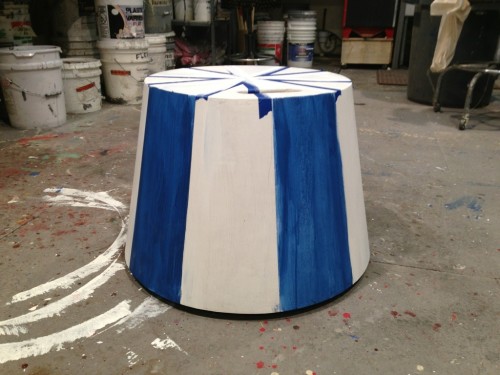
And that’s my circus platform! The photo above already has some paint on it, though the final prop will have much more.

How I Became a Prop Maker

Put ten prop makers in a room and you’ll get ten different stories of how they became a prop maker (you’d also get one hell of a party). I thought I would share my own convoluted path of how I have gotten here.

My parents are both artists: potters by trade. They fed my brother and I a steady diet of art supplies growing up. We would transform all sorts of boxes and other random objects into vehicles and machines for our stuffed animals to use. One of our favorite toys was He-Man. I remember desperately wanting the Castle Grayskull playset when it first came out. Of course, a toy that large was far too expensive; nonetheless, we kept pleading. Finally, my dad started building his own version of Castle Grayskull for us. I think he used chicken wire over a wooden base, coated with a mix of papier-mâché and plaster.

They often gave us bits of clay to sculpt and shape on our own. When I got old enough and wanted a job, my dad put me to work making production molds for his cast pieces, and then casting the pieces.

In junior high school, we still had this class called “Industrial Arts”, in which twelve-year-old children are allowed to cut wood on a bandsaw and squirt hot plastic into injection molds. I remember the feeling that was awakened in me when I cut a fancy letter “E” out of a piece of pine in that class. It was a two-part revelation; first, I discovered how these wooden objects were created, and second, that I possessed the ability to create them. I also cast a piece of iron in green sand, doing every part of it except the actual pouring of the molten metal. It gives a kid a lot of confidence to have a cast iron object and be able to say “I made that.”

In my first year of high school, after choosing all the necessary classes for my preparation to be a college student, I found one free period. A buddy and I convinced each other to take wood shop. During the first half of the year we studied and practiced drafting. The second half, we built a bookcase. From scratch. We had to draft the piece out and make a cut-list, select and buy our lumber, plane the surfaces, join the edges, cut the pieces to size, make the joinery, assemble it, and apply the finish. It was all pine wood, with no plywood or MDF; the back was made with a whole bunch of boards tongue-and-grooved together. I still have that bookcase.

I began my undergraduate career as an engineer, but grew bored with the lack of hands-on work I thought it would entail. I was living and working with a lot of the theatre and film kids. We had a film club, which consisted of a bunch of us running around filming goofy things with a camera. I thought some theatre classes would help me make better films. Along the way, I grew to appreciate theatre more than film, and ended up graduating with a degree in theatre and an emphasis in scenic design.

After a few years of working as a stagehand, carpenter and electrician, I went back to graduate school for scenic design. After the first year, I got a summer job at the Santa Fe Opera as a props carpenter, building furniture and other large items. That was when it kind of clicked in my head that making props was what I really loved. It was the combination of technical skills and creative thinking in the context of a collaborative art form that really drew me in. The variety of daily tasks kept me engaged in a way that a job where I built the same thing over and over again would leave me bored.

Piano for Wild Party

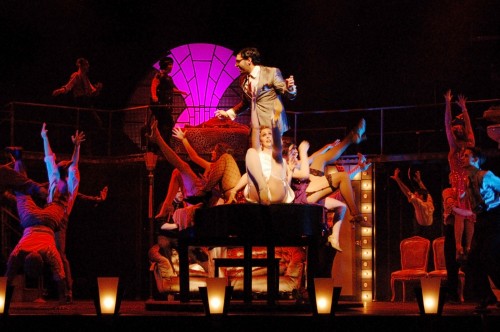
Every musical needs a piano, right? Of course, if you have a piano on stage and people are dancing, you’re going to want the people to dance on the piano as well. Such is the prop master’s life. I had to build a dance-able piano for Elon University’s production of The Wild Party, which closed a few weeks ago.

Appropriated Piano Parts

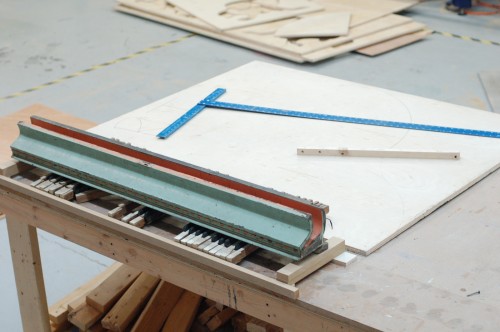
As it turns out, my father has taken apart a piano or two and kept the pieces in his barn. When I was visiting over Christmas, I picked up some of these parts, including the keyboard lid and a partial keyboard. While I probably could have faked the keys, the lid was a real find; it’s two pieces of solid oak cupped along the entire length. This shape would be hard to fake on my own, and it would be nowhere near as sturdy as the piece I found, which could support a person’s weight in the center without bending.

Shape and Structure
Shape and Structure

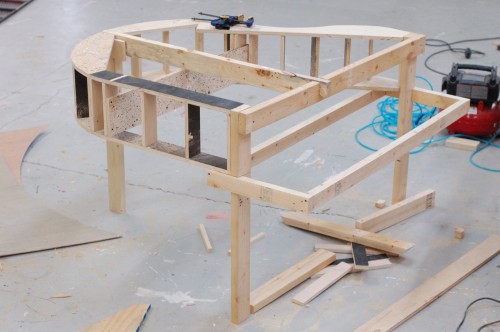
It needed to be strong and sturdy, but lightweight enough that it could be quickly turned and moved throughout the musical by the actors. The photograph above shows the beginning stages. I had to make the shape also serve as the structure, because there was not a lot of room to hide cross bracing or reinforcements.

Unpainted Piano
Unpainted Piano

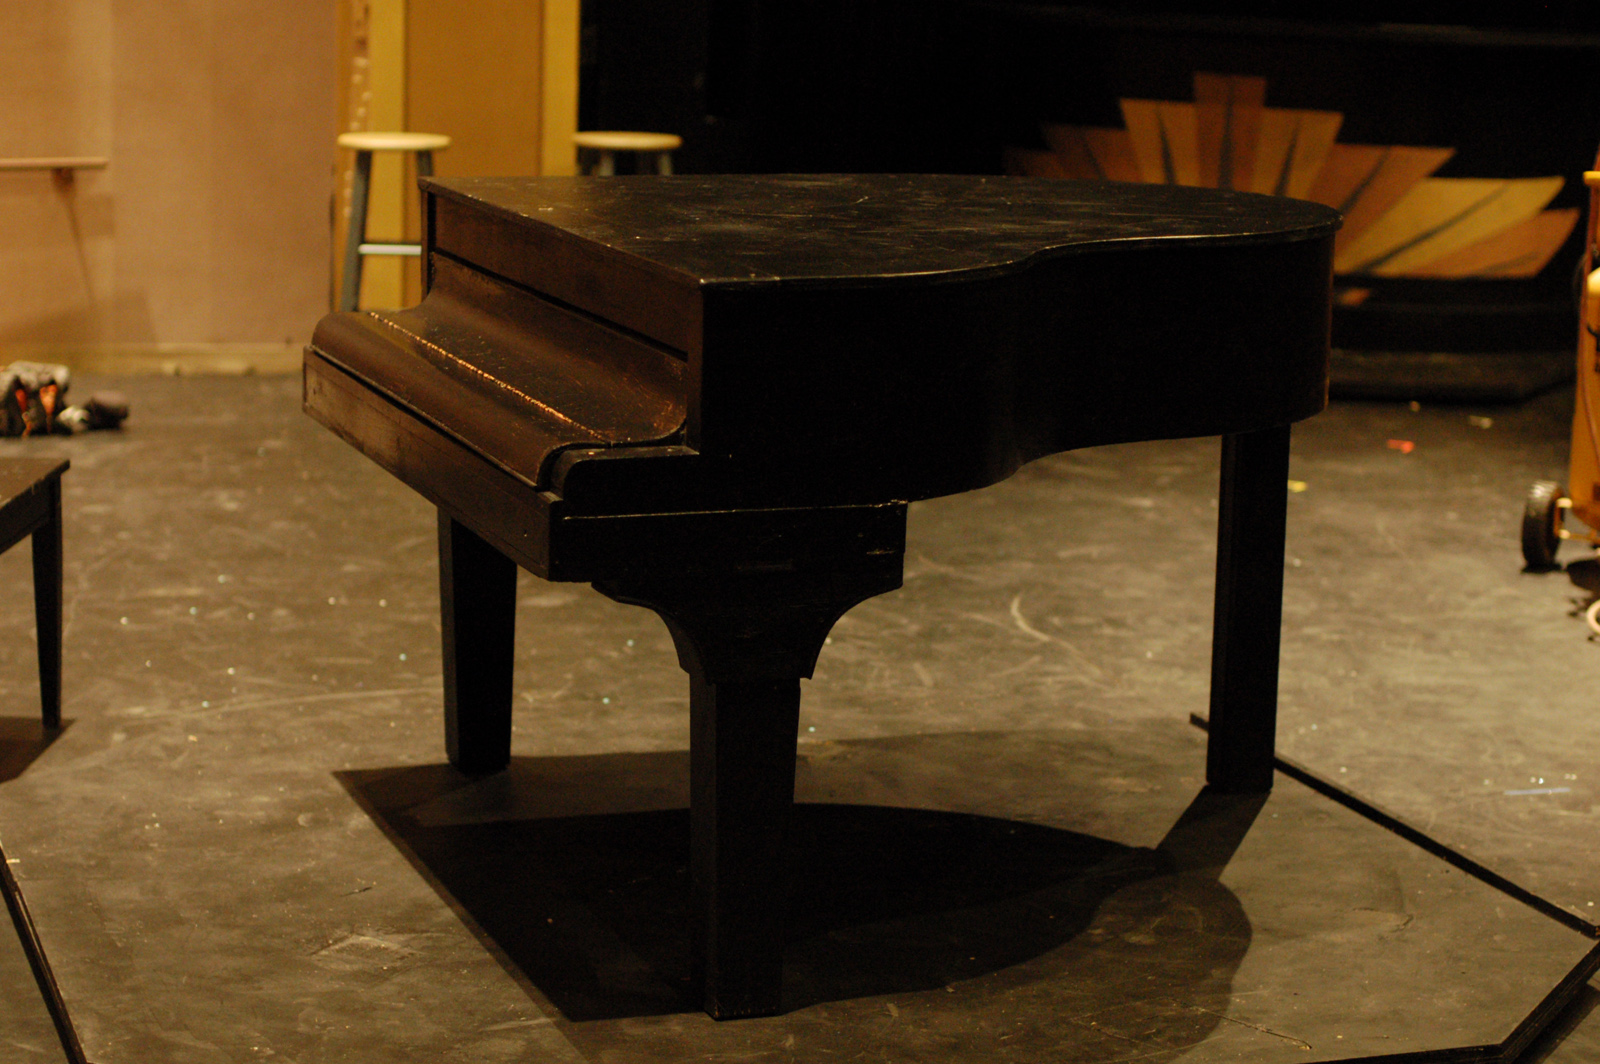
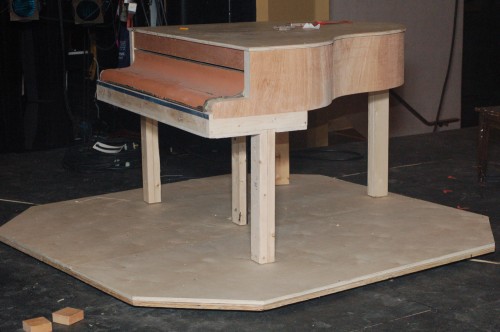
The two-by-four in the center of the piano hides a pipe that leads down into the platform itself. This gave a pivot point to the piano so when the actors spun it around on the wagon, it would rotate on a fixed point.

Painted Piano
Painted Piano

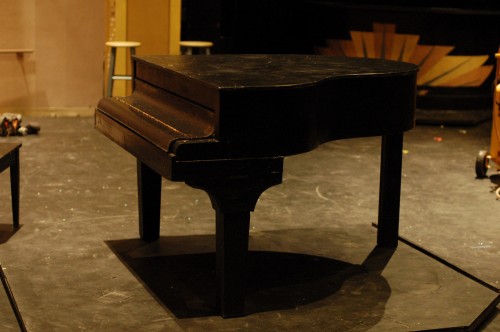
The piano received a coat of black paint followed by a few coats of Sculptural Arts’ Plastic Varnish Gloss (one of my wife’s favorite products). You can see in the photo above that I added more facing to the front legs to make them appear like more traditional piano legs. On a real piano, these would be cut from solid wood, but on my prop piano, they are pieces of quarter-inch plywood and wiggle wood over top a leg made from two two-by-fours.

Wild, Wild Party
Wild, Wild Party

There are six people dancing on the piano in the photograph above. It featured throughout the musical, with people dancing on top, jumping up and off of it, and generally subjecting it to all sorts of abuse. I’m happy to say it sat there like a rock, never sagging or shaking no matter how hard they tapped or how much shimmy was in their shake.