Tag Archives: How-to

When to give real props to actors

When should you begin providing the real props for a production? At the very latest, the actors should have the final versions by the first day of tech. If the size or weight will change, the actor may not feel comfortable using it without adequate preparation. If the color is going to change, the lighting designer may have to adjust the light cues.
When you can’t provide the final prop, the rehearsal prop should be as close to the real one as possible. Depending on what kind of prop it is, the properties you need to match need not be replicated in exact detail. For example, a rehearsal table can simply be a piece of sheet goods cut to the correct width and depth and set on a base of the correct height.

One type of prop you should not hesitate in introducing is weapons. Stage combat items should be provided as soon as the actors begin fight rehearsals. Swords, especially, can be very particular, and a slight difference in weight or balance can alter even simple choreography.

So why wouldn’t you provide all the real props by the first rehearsal? The main reason is simple logistics. You cannot buy, borrow or buid all the props for a show between the time you receive the designs and rehearsals begin. You need to prioritize what props they need to practice with and which can wait. In addition, the designs (especially for props) can be late, and may not come in until after rehearsals have begun. Some directors prefer not to have final props before rehearsal; they use rehearsal time to work out what they want the props to be. It helps to build a rehearsal prop which can be adapted easily. There are some directors we work with where we give them a rehearsal prop right away, even before he or she requests it; we know they will not make a decision until they have something tangible in their hand which they can compare against (“it should be bigger than this”, or “more purple please”).

Another reason you may not want to provide the real thing is when it is a large set prop, or it is built into the set somehow. If it’s a rental and you need to save money by only renting it for the minimum amount of time, you might also keep it out of rehearsals until closer to tech. Breakaways should be saved for tech. You can arrange for a special breakaway rehearsal to allow the actor to see what they should be mimicking during regular rehearsals. This is true of other special effect and trick props which the show might call for. Actors and stage management are being introduced to a lot of elements on the first day of tech, so the more props you can show them beforehand, even if only once, the better.

Sometimes, you can provide the real prop but in an unfinished form. It may be unpainted or needs to be reupholstered, or it just needs more details and decoration unrelated to its function. In these cases, you can allow the actors to rehearse with the unfinished prop for awhile and then take it away to finish it on their days off.
I’ve only provided what I know on this subject. What are your insights or opinions on the matter?

A wooden table

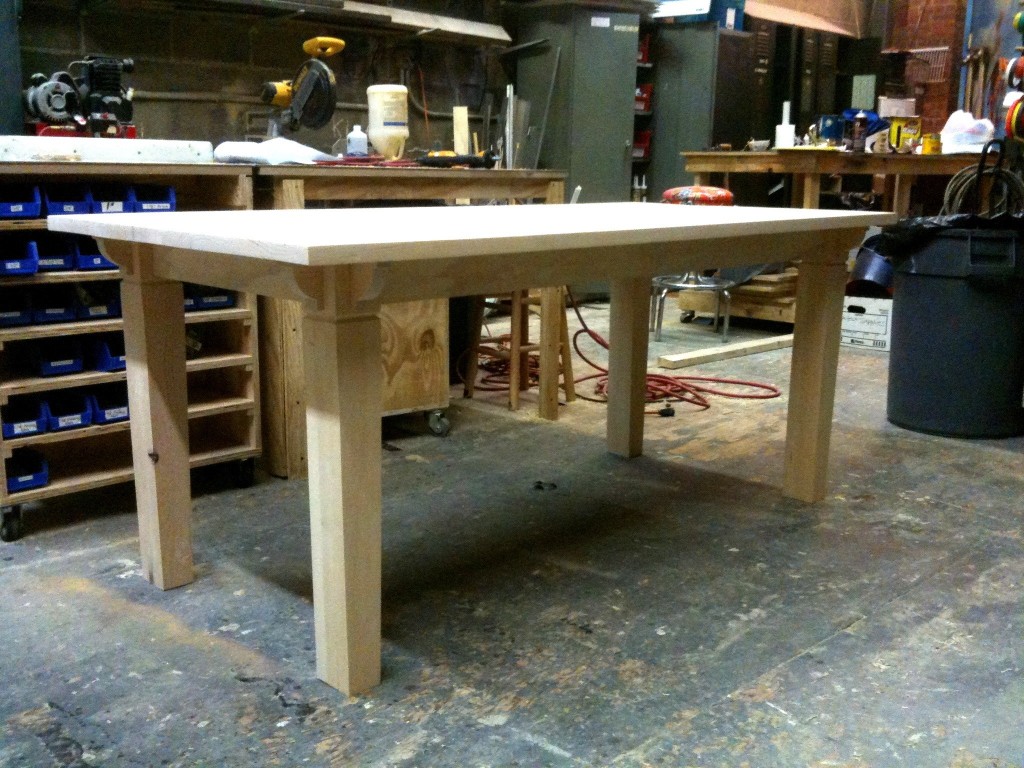
The last show for the calendar year at the Public Theatre is Mike Daisey‘s “The Last Cargo Cult”. We needed to construct a new table to match the design of the world. The design called for a solid, fairly sturdy-looking wooden table, which showed some character and a lot of age.

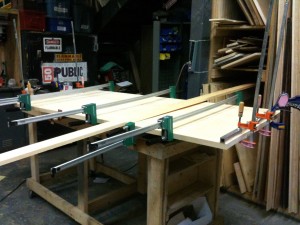
The boards for the table top are clamped together

The table top was made of four planks of equal length. I connected them using a biscuit joiner. I was able to borrow the scene shop’s new Woodcraft bar clamps for this. You alternate whether the clamps go over top or underneath the surface to keep it from bowing. I also clamped a metal bar on either end as an additional way to keep the planks level with each other. You can ignore the random one by four in the photograph; I’m not sure why that was there.

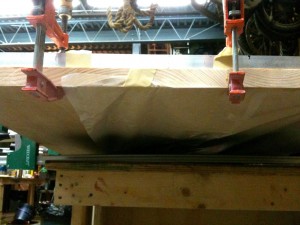
Wax paper to catch excess glue

I used wax paper to keep the glue from squeezing out and adhering the wood to the work table, or worse, dripping onto the clamps. If you wipe the excess glue away, you will smear it into the wood. It may look like it’s gone, but when you go to stain the piece, it will not accept the stain and you will be left with light-colored spots. Wait until the glue dries and then scrape it off. If you are painting the table, or the glue is in a hidden place, then by all means, wipe away while wet.

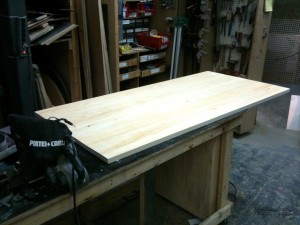
Finished table top
Finished table top

Here is the final table top. I used a belt sander, starting with a 50 grit belt, then skipping straight ahead to 12o grit, and finishing with 320 grit. I then hit it with a random orbital sander at 400 grit. Peter Ksander, the set designer, wanted to bring out the grain and accentuate the pattern. I wiped the surface with a wet rag. This causes the dark grain to raise up from the lighter grain; if you were aiming for a smooth surface, you can then sand the higher grain down, but in this case, I left it alone.

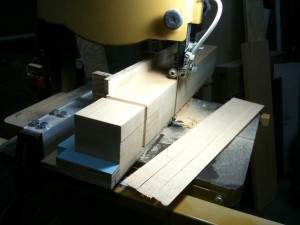
Taper jig on the bandsaw

Karen Cahill, the properties manager at George Street Playhouse, was on hand for a bit to help out. She glued the boards together to make the blocks for the legs. I made a taper jig to quickly replicate a taper onto all four legs. I used the band saw as the table saw could not raise high enough to cut it in one pass.

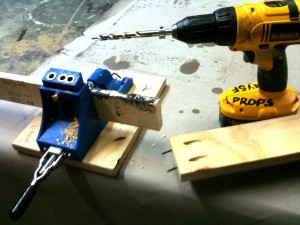
Kreg Pocket Hole Jig

Easily one of my favorite new tools of the year is the Kreg Pocket Hole Jig. You can see in the photograph above how it allows you to drill holes so the screws exit the center of the end grain. For prop carpentry, the speed and strength of the joints it creates have replaced many of the joints I use regularly. For tables, I use them to attach the apron to the legs, followed by the apron to the top. This allows me to keep the top of the table free from screw or nail holes.

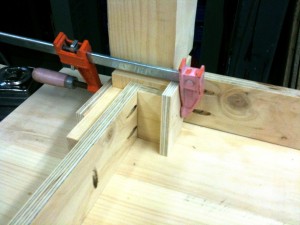
Lining up apron and leg for attachment

You need to clamp the pieces well to keep them from drifting; the pocket hole jig creates a hole at a slight angle, so the screw will want to push the wood back as it drives in. Above, you can see the various pieces of wood we used to not only hold the apron in place while we attached it to the leg, but also to space it consistently on all the legs. Jay Duckworth was on hand for much of this part as well. He also routed the groove you see in the legs below and stained the table at the end of the day.

Final table before staining

Slave Shack hand props

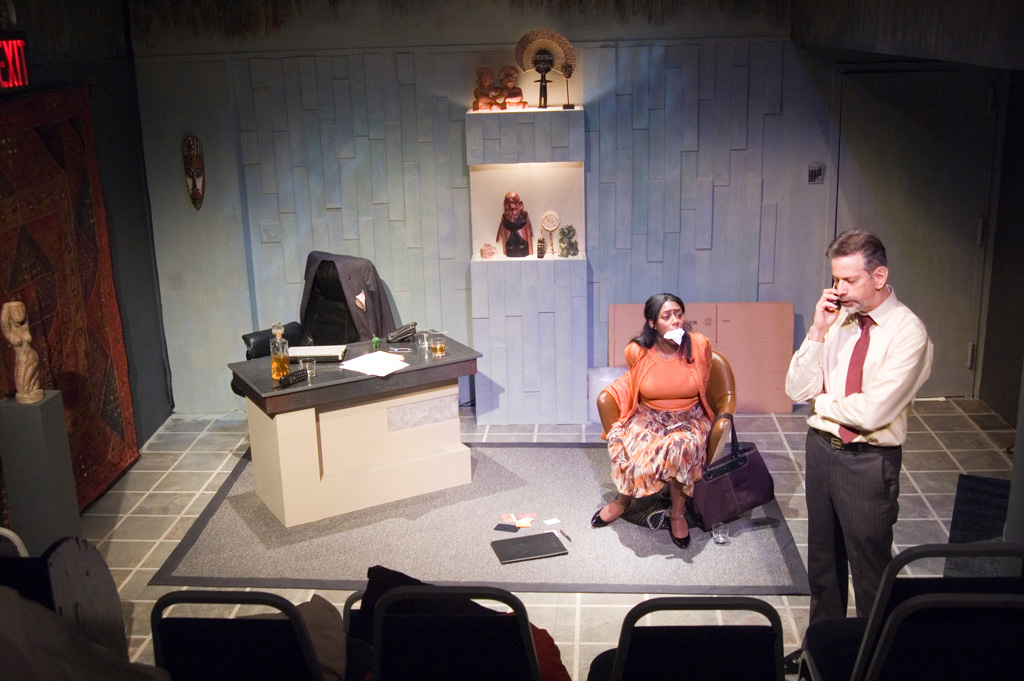
A week and a half ago, I wrote about the set props for Slave Shack, a show I prop-mastered at the Algonquin Theatre. Now that the show has closed, I can talk about the hand props (the hand props give away several key plot points, which is why I held off until the show closed). There were several interesting challenges with the hand props for Slave Shack

Slave Shack, end of Act One

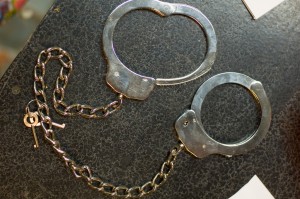
Handcuffs

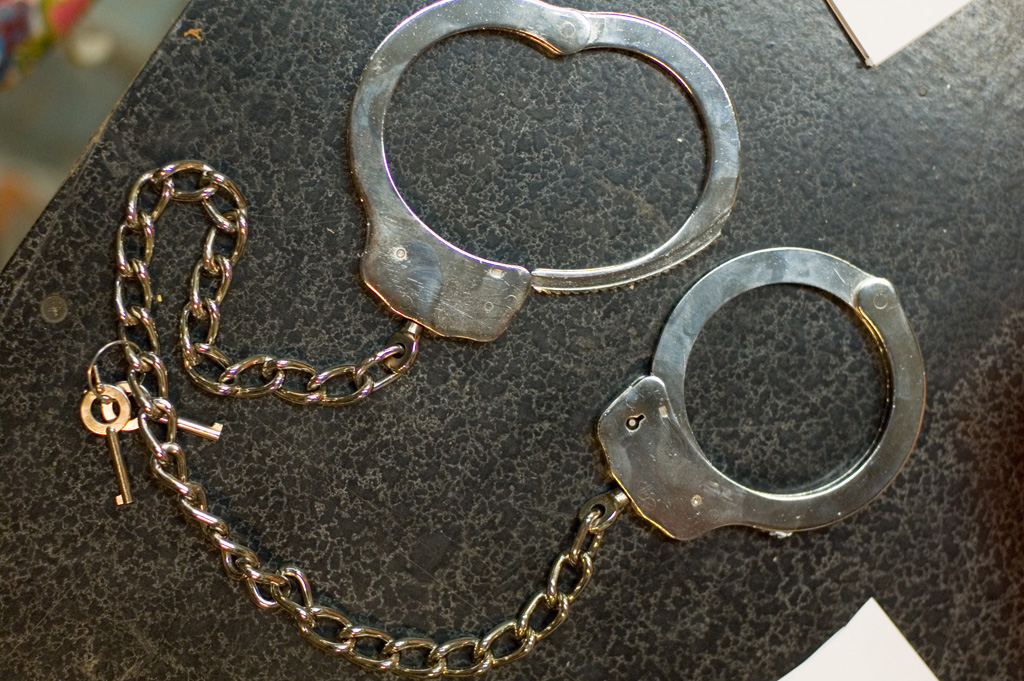
Leg Cuffs
Leg Cuffs

The “handcuffs” actually needed to be leg-cuffs, as you can see in the first photograph. They also needed to be trick cuffs, with the ability to come apart without a key at any time. We couldn’t find any leg cuffs with that ability, so we had to invent them. The first thing we tried was grinding down the teeth; this would allow  Candice LaGia Lenoir, the actress who played Janice, to pull the handcuffs apart as easily as they could be pushed together.

During the play, however, Janice jumps out of her seat a couple of times. When she did this, the handcuffs would pop open. My first idea was to rig some sort of latch on the handcuffs, which could hold the handcuff jaws together. This created more problems than it solved, as Candice needed to undo the handcuffs in the dark and get off stage at the end of Act One. It introduced a whole lot of fumbling whenever the handcuffs needed to come on or off.

I got another set of cuffs which still had un-ground teeth. I put the key in the hole and covered the slot so the key remained inside permanently. I then cut the end of the key off and replaced it with a less visible lever to operate it. Basically, I turned the leg-cuffs into a set of trick cuffs. This seemed to work for the most part.

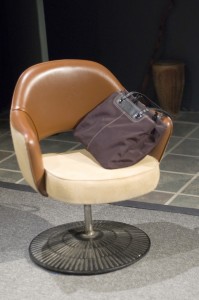
Chair

Swivel chair on pedestal

The play called for a large sofa in the middle of the office. Jack handcuffs Janice’s leg to one of the sofa’s legs. There is a line about the sofa being so heavy “it took five guys to carry it up here.” The implication is that Janice cannot simply lift the sofa and slide the cuff out from underneath to free herself.

Unfortunately, the stage at the Algonquin is 12′ by 15′, and a sofa of any significant size would fill the entire set. Natalie (the set designer, and my wife) designed a swivel chair with a heavy pedestal as pictured above. Unfortunately, such a thing does not exist; the only chairs close are designer mid-century pieces which cost thousands of dollars.

We found the top part of the chair on Craigslist, and was able to get it delivered. It originally had a rolling base. I removed that and replaced it with the base you see above, which was taken from an outdoor pedestal table. It was extremely heavy, which was good, since we needed to sell the idea that Janice could not simply sneak off with the entire chair, and also so the chair would not tip over during the violent scufflings which occurred throughout the performance.

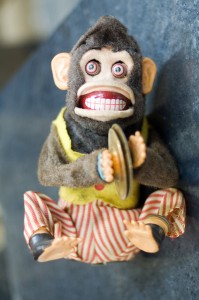
Monkey

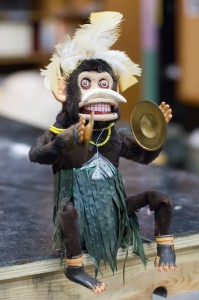
One of the major plot points of Slave Shack involves a racist monkey cartoon which appeared on a company brochure to depict Africa. Jack Blake, the main character was held responsible for it and forced to retire. During the play, Warren, his underling, gives Jack a going-away present – a stuffed toy which resembles the racist monkey cartoon described earlier. Debra Whitfield, the director, wanted something creepy-looking, like the cymbal monkey toys from the 1950s.

original monkey toy from eBay

I found a significantly creepy version of this toy on eBay; it was fairly cheap, as the moving parts were broken. I removed the clothes and added a grass skirt, feather headdress, a bone in its nose, and some decor around his neck.

monkey toy used in Slave Shack

I had to add some additional fur as removing the clothes revealed the metal skeleton underneath.

Breakable Statue

You may recall my earlier post on how to make a breakable glass. When we tested it in the space, it was still too dangerous. The space is so small that any breakable item had the potential of throwing shards into the audience. The space was also completely enclosed, so no matter how you blocked the action, the pieces would eventually ricochet off a wall and head toward the audience.

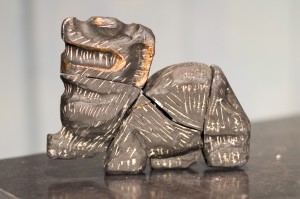
A breakable wooden statue

The only safe alternative on our budget (short of cutting the moment) was a wooden statue which could be pre-broken and reassembled with hot glue every night. Once again, Natalie decided to carve one herself rather than buy one. Though more labor-intensive, this gave us one distinct advantage. We cut the block of wood into five pieces and reassembled it with hot glue before carving it. This gave us nearly invisible break lines. If we cut a statue that had already been carved, the kerf, or thickness of the cutting blade, would have kept the seams from lining up completely.

Finding photographs for props

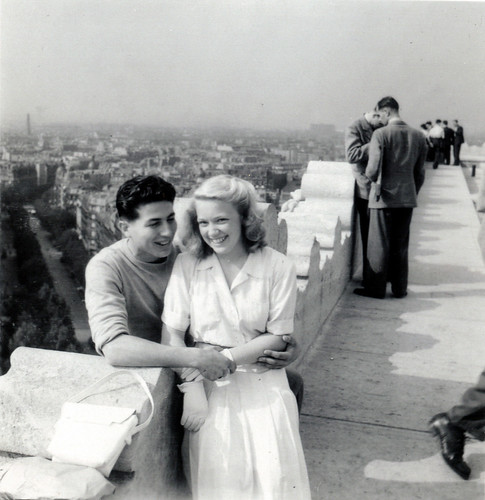
originally uploaded by teotwawki

It happens in a lot of plays. You need a photograph, either in a frame or not. Maybe it’s part of the story, or the designer just wants it as set dressing. First you need to do all your homework on the photograph, just as you would any other prop. Look for all the clues you can in the script; you don’t want to bring the perfect picture of a child on a beach only to have the actor in the following scene recite the line, “he used to love going to the mountains.”

Is the photograph of someone in the cast or someone who never appears? You have more options if the person in the photograph never appears on stage, and you don’t have to match his or her appearance to an actors. Either way, you have a number of options for getting a photograph onto the stage.

Have one of the actors bring a photograph in

If the photograph is supposed to be of the actor as a younger person, the most realistic option is to have the actor bring an older photo of him or herself. If possible (and it should be possible in your prop shop), you should scan the original photograph and make your own prints. This will keep the actor’s irreplaceable memories from becoming damaged or lost during the production, and will give you the option of resizing it if necessary.

Using an actor’s photograph will also work if the photograph needs to be of the character’s close relative. An older photograph of the actor can be his child or younger brother. Likewise, an actor can use a photograph of her own father for the character’s father.

Take your own photograph

If you know early enough in the process that you will need a photograph of one or more of the actors, you can schedule a photo shoot with them. You can even work with the costume designer and other production people. You will need to talk to your production manager about this, since it will involve other departments, and there are rules governing the photographing of Equity actors during a production.

You can also take pictures of other people at the theatre or your friends and family if they have the right look. You may also wish to approach strangers you see or hire someone to pose for you, though for most productions, this does not make the most sense of time and money.

Use a found photograph

You can find old and anonymous photo albums at flea markets, on eBay, or any of the other usual sources for abandoned objects. Books and magazines are other great sources. Just like borrowing an actor’s photograph, it is a good idea to scan these and print new copies for your play.

You can also, obviously, search for images online. I described a lot of these techniques in my previous article, “How to research.” Found photography can be tricky. The problem is you often want amateur photography rather than professional photography. You also don’t want to use famous or well-known people in a photograph if the subject is meant to be unknown. Amateur photographs of unknown people are much less organized and searchable. In a lot of cases, you just have to luck onto a huge group of potential images and browse through every single one to find the perfect shot.

If you search for “found photographs” on Google, you can easily get sucked in for hours looking at pictures from all decades. At this point I should remind everyone that I am not a lawyer, and while this article tells you how you can find images for your production, I make no claim as to whether you can use them or not. Defer to your production manager, or whoever is in charge of the legal aspects of the show.

Create a composite

If you can’t find or make the perfect photograph for your production, you can combine two or more photos together. You can combine two or more people together, or put people in front of a different background. Before computer-editing software, you could literally cut and paste the photographs together, and then rephotograph the result. It is much more elegant and efficient to do this nowadays on a computer, and it will behoove you to learn how or find people you can delegate this to.

Alter any of the above

If you scanned in the photograph you made or acquired from any of the above methods, you can manipulate it in the computer. You can turn it into black and white or sepia-toned. You can also print it out and use any of your favorite paper-ageing or distressing techniques.

Gnome Building

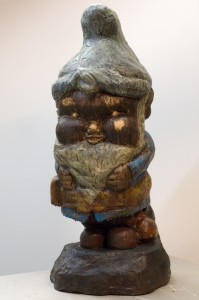
For the upcoming production of “Broke-ology” at Lincoln Center, I was asked to build a three-foot garden gnome. They had a prop from the original production at the Williamstown Theatre Festival, but it was starting to break and crack in certain places. The gnome undergoes a lot of abuse during each performance, so they needed a new one with a better interior structure. So for the past two weeks, my wife and I have been gnome building.

Structure

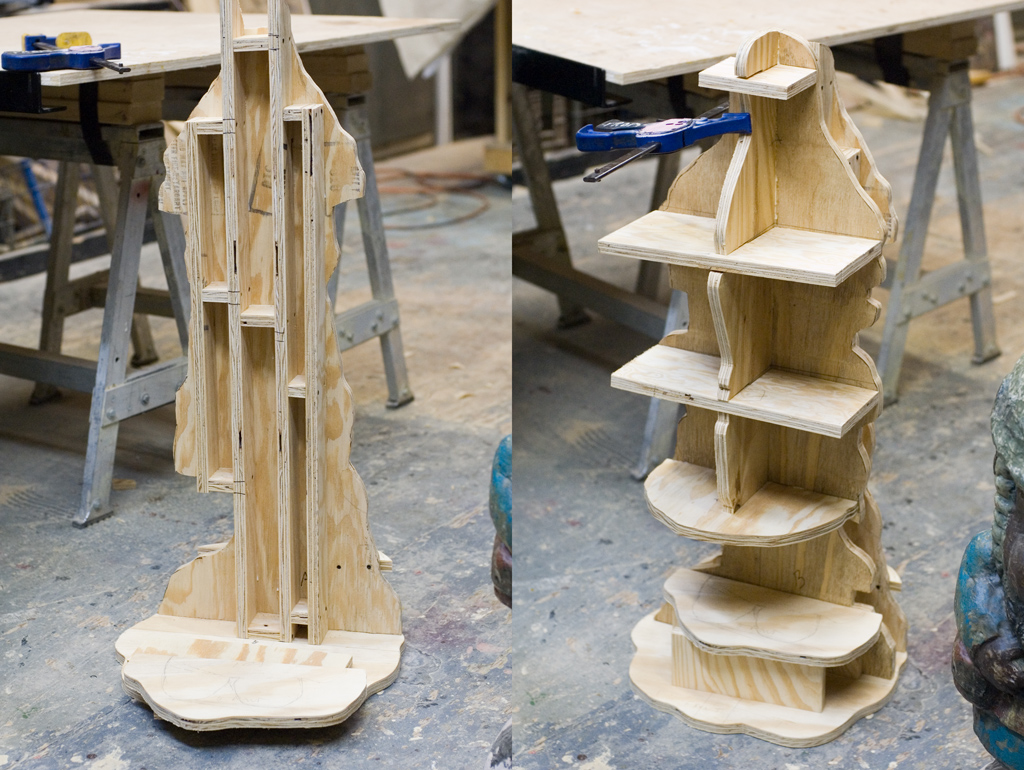
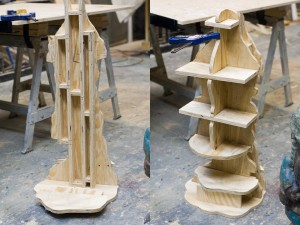
The interior plywood structure of the gnome

The original gnome was a solid chunk of foam, with weights added in the base. Since it gets fairly thin around the ankles, it was beginning to separate at that point. My major concern with the interior skeleton was making sure there were no weak points on the gnome.

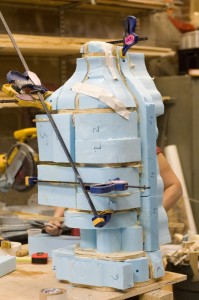
Additionally, while I had the original gnome with me, I took measurements and tracings directly off it to make several “slices” of the gnome’s shape to use as the structure. You can see what I mean in the photographs above. So the plywood would not only give me structure, it would also serve as a guide while adding and carving the foam.

Chunks of Styrofoam added to the skeleton

Carving

We couldn’t keep the gnome forever, so I took pictures of all four sides, plus the four in-between sides, as well as various views from above. It never hurts to have too many reference pictures. To remove large pieces of foam, we used either a knife or sometimes a reciprocating saw. If we needed a large amount of foam sculpted down quickly, we used a wire brush wheel hooked up to a cordless drill. We did the more precise and final carving and sculpting with a variety of rasps, knives, and sandpaper.  Sculpting and carving are very personal skills, so the best tools are often the ones you make yourself. Natalie made several tools just by gluing pieces of sandpaper to various shapes of wood.

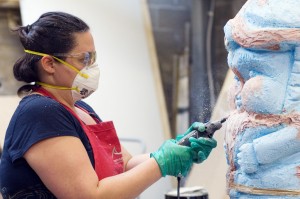
Natalie uses a Dremel to carve details

You can see in the photograph above that we added auto-body filler (or Bondo) to fill in gaps, cover mistakes, or build up areas where we took too much off. You need a respirator when using it, but it hardens very quickly. You can use a rasp or knife on it after about ten minutes, and you can sand it after about an hour. We also used a Dremel tool for quickly carving out details.

Coating

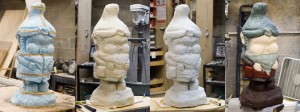
I pontificated in an earlier post about various ways of coating foam. First, we wrapped the gnome in muslin strips which were soaked in glue. The process is very similar to papier-mache. We tore the muslin strips to give them a ragged edge which could be smoothed down over the previous pieces. After this dried, we covered the whole thing in Rosco Foamcoat, which we laid on like stucco to give it a bit of worn and weathered texture. After a light sanding, we painted on the various base coats.

Step-by-step process of coating the foam sculpture

The final step was coating it with epoxy resin. This gave it a very hard, smooth, and water-proof shell. It’s also fairly pricey, very toxic, and requires a lot of set-up. The exterior of the gnome was fairly solid with just the muslin and Foamcoat coverings, so for lower-budget shows and shorter runs, you may want to forego the epoxy resin. It’s a somewhat complex process, so I’ll address it in more detail in a future post.

Final Painting

After the epoxy had cured over night, we added the final paint layer. We used acrylic paint. We also dusted it with some black spray paint to weather and age it, as well as some dulling spray to get rid of the shininess from the epoxy.

Gnome for "Broke-ology"