Tag Archives: How-to

Behind the Scenes of an Opera-House, 1888: Constructing a God

The following is an excerpt from “Behind the Scenes of an Opera-House”, written in 1888. The author, Gustav Kobbé, tours the backstage of the Metropolitan Opera in New York City. Be sure to check out the previous excerpt when you are finished here! The following details the construction of a large idol for the Met’s 1888 production of “Ferdinand Cortez”. As an added bonus, you can read the original New York Times’ review of that production.

Behind the Scenes of an Opera-House, by Gustav Kobbé.

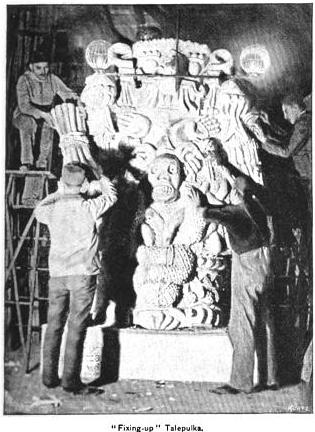
[T]he property-master had made out a list of the articles to be manufactured in his department. He had not been hampered by the problem of historical accuracy. He found drawings of Mexican antiquities from which he made sketches of the Mexican implements of war and peace to be used in the opera, and from a genuine Mexican relic of that period, seen by chance in the show window of a store, he obtained his scheme for the principal property in the work, the image of the god Talepulka. He found he could have all these historically correct, except that he did not think it necessary to go to the length of decorating the idol with a paste made from a mixture of grain with human blood. A problem arose, however, when he considered the construction of the idol. He ascertained from the libretto that the idol and the back wall of the temple are shattered by an explosion, and that, just before the catastrophe, flames flash from the idol’s eyes and mouth. He consulted with the gas-engineer, who had already considered the matter, and concluded that it would be most practical to produce the flames by means of gas supplied through a hose running from the wings.

The property-master then made the following note in his plot book: “Flames leap up high from the heathen image—the gas-hose must be detached and drawn into the wings immediately afterward so as not to be visible when the image has fallen apart.” The necessity of having the gas-hose detached determined the method of shattering the idol. It is a theatrical principle that a mechanical property should be so constructed that it can be worked by the smallest possible number of men. This principle was kept in view when the method of shattering Talepulka was determined upon. The god was divided from top to bottom into two irregular pieces. These were held together by a line, invisible from the audience, which was tied around the image near the pedestal. Another line, leading into the wings, was attached to the side of the top of one of the pieces. At the first report of the explosion a man concealed behind the pedestal, whose duty it also is to detach the gas-hose, cuts the line fastened around the idol, and the pieces slightly separate, so that the image seems to have cracked in two jagged pieces. At the next report a man in the wings pulls at the other line and the two pieces fall apart.

The manner in which the effect of flames flashing from the eyes and the mouth of Talepulka was produced was only outlined in the statement that it was accomplished by gas supplied through a hose. The complete device of the gas-engineer, a functionary who in a modern theatrical establishment of the first rank must also be an electrician, was as follows: Behind the image the flow of gas was divided into two channels by a T. One stream fed concealed gas-jets near the eyes and mouth, which were lighted before the curtain rose and played over large sprinkler burners in the eyes and mouth. These burners were attached to a pipe fed by the second stream. When the time arrived for the fire to flash, the man behind the pedestal turned on the second stream of gas, which, as soon as it issued from the sprinkler-burners, was ignited by the jets. By freeing and checking this stream of gas the man caused the image to flash fire at brief intervals. Thus only two men were required to work this important property.
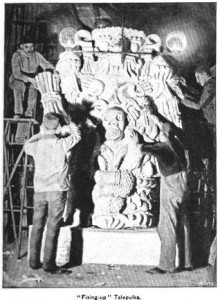
Constructing the "Talepulka" prop

The idol was but one of four hundred and fifty-six properties which were manufactured on the premises for the production of “Ferdinand Cortez,” and when it is considered that the average number of properties required for an opera or music-drama is three hundred and fifty, it will be understood that the yearly manufacture of these for an opera-house which every season adds some three works to its repertoire is an industry of great magnitude. For instance, one ton and a half of clay was needed for modelling the Mexican idol, and that property represents three months’ work. It was first sketched in miniature, then ”scaled”—that is, projected full size on a huge drawing-board—next modelled in clay, and then cast in plaster. The modelling and casting of properties are done in a room in the basement of the building, on the o-p-side [Eric: opposite-prompt side, in this case, stage-left] of the stage. The idol was cast in twenty pieces. These were transferred from the modelling-room to the property workshop on the third floor of the building, prompt side, where are also several other rooms in which properties are made, the two armories, the scenic artist’s studio, and the property-master’s office. In the workshop the properties are finished in papier-maché, the casts being used as moulds. They are not filled with pulp, which is one method of making papier-maché, but with layers of paper. The first layer is of white paper, moistened so that it will adapt itself to the shape of the cast. Layer after layer of brown paper is then pasted over it. The cast having been thus filled is placed in an oven heated by alcohol, and baked until the layers of paper form one coherent mass the shape of the cast. Properties thus manufactured have the desirable qualities of strength and lightness.

First printed in “Behind the Scenes of an Opera-House”, by Gustav Kobbé. Scribner’s Magazine, Vol. IV, No. 4, October 1888.

How to Gold Leaf

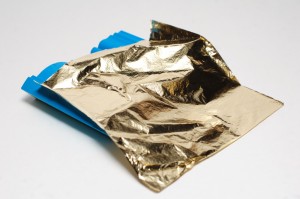
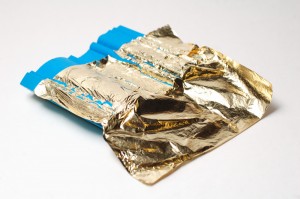
Gold leafing is one of the easiest and most common ways to give a prop a gilt look, or even to make it appear like a solid piece of gold. Real gold leaf is actual gold hammered into a sheet as thin as a piece of tissue. For theatrical purposes, we nearly always use metal leaf which replicates the look of gold. There exist more complicated and elegant ways to gild an object, but the quick and easy way I’m going to show you involves applying the leaf directly to an object which has been coated in gold size.

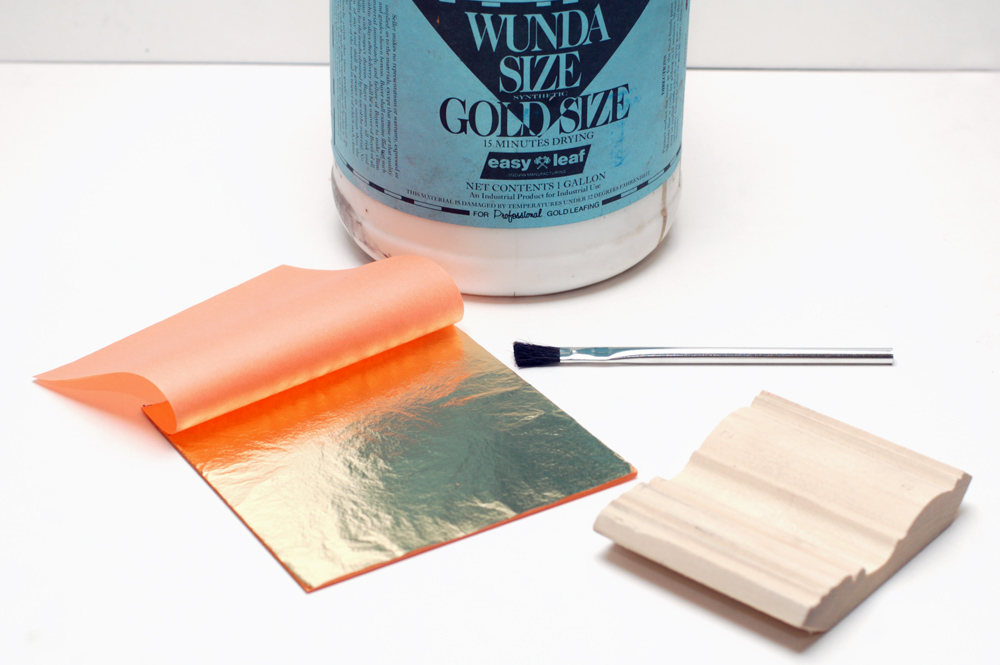
The materials you will need are the gold leaf, gold size, a brush for applying the size, another brush that will remain dry, and your object. The most common sizing I’ve seen in theatres is Wunda Size, which is one of the few water-based sizes, meaning easier clean-up and less fumes when wet. (You can read an interesting treatise on gold size if you’re interested in learning more.)

Supplies for gold leafing

You need to prepare the surface you are leafing. The leaf does not hide or fill imperfections; If you wait until after you’ve put the leaf on to sand the surface, you will simply sand the gold leaf off.

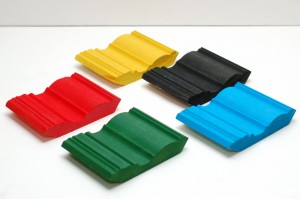
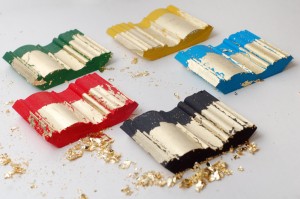
The color underneath the gold leaf is called the “bole” color. Traditionally, terra-cotta clay or red paint is painted underneath to give a warm feel to the gold. A yellow or golden bole gives an even, neutral look, and helps cover up any cracks or uncovered spots. These are the two most common boles you will find for theatrical purposes. A black bole gives a very cold look, and is good for imitating Art Deco pieces. Other boles you can experiment with are various greens or even blues.

Pieces with different boles painted on

Once your bole is applied and dried, you brush on your sizing. You want to make sure you work it into every crack and crevice. You must wait for it to dry completely before you begin with the gold leaf. This can take anywhere from ten to twenty minutes depending on how much you put on, as well as the temperature and humidity. Technically it’s not “drying”, it’s becoming tacky. Size can remain tacky for hours, even days, before it dries, which is one of the properties that makes it desirable for gold leafing.

Applying the sizing
Applying the sizing

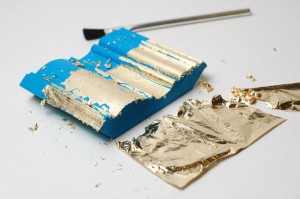
Now that the sizing is no longer wet, you can carefully take a sheet of gold leaf. Start smoothing it onto the surface with your fingers, and finish up with a clean and dry paintbrush to work it completely onto the surface. As you get overlapping and overhanging pieces, you can remove them by brushing really hard with the brush. At this point, it’s almost as if you’re burnishing the gold with your paintbrush; you want to rub it until there are no more gold flakes sloughing off of the piece.

Laying the leaf on
Laying the leaf on...
Working it in
... working it in...
Brushing it smooth
... and brushing it smooth.

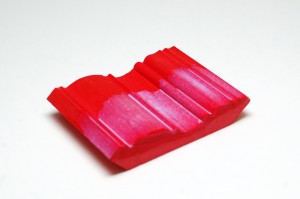
I realize it may look like I misplaced the leaf, but I left the end bare to illustrate the differences in the boles as seen in the following photograph.

Examples of gold leafing on top of various boles

It is difficult  in a static photograph to make out the differences which the various boles give you. What makes gold leaf interesting is how the various surfaces catch and reflect light, and how that changes as either the object or the observer moves. The bole color you decide to use is dependent on the colors and tones of the set and costume, as well as the type of stage lighting used. Don’t lose too much sleep over it; the majority of items gold-leafed for theatre are either red or yellow depending on how much warmth or age you want to give the object.

You will notice gaps and cracks in your gold leaf where pieces failed to stick. You can take smaller flakes and apply them to these spots, again using your bristle brush to rub the leaf onto the surface. If you find particularly stubborn areas where the gold leaf won’t stick, it means you need more size. Go back and touch up the uncovered areas with a second coat. Once it has dried again in ten to twenty minutes, you may return for round two of applying the gold leaf.

Blood Sponge Bag

I touched briefly on the idea of blood sponges in a short video from last summer; we were preparing to use them for The Bacchae, but the scene was re-blocked in a way that negated their necessity. A “blood sponge bag” is an extension of that idea. This effect allows you to produce blood on cue with an easily-hidden apparatus.

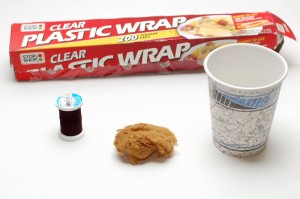
Supplies I used
Supplies I used

You need some cling wrap (aka “clear plastic wrap” or “Saran wrap”), thread, blood, and a sponge. Don’t be fooled by the preceding photograph; even though I’m using a fancy natural sponge, cutting a chunk off a regular kitchen sponge will serve you just as well.

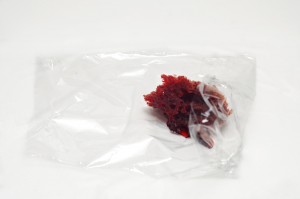
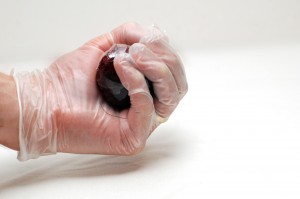
Wrap the sponge in saran wrap

Soak the sponge in your blood and wrap it up in the saran wrap. You can fill the saran wrap with extra blood so the sponge is swimming in it if you want.

Wrap the sponge in saran wrap

In lieu of cling wrap, you can also use plastic sandwich bags; your end goal is to create an impermeable membrane which is easily burst by squeezing. Balloons and Ziploc may prove too tough, and paper or fabric will allow the blood to seep through and spoil the surprise.

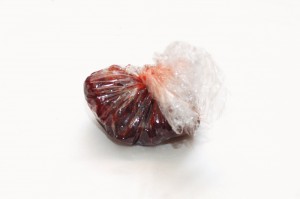
Tie the end up with thread

Tie it all up by wrapping thread around the end. You don’t even need to tie any special knots; just wrapping it a couple dozen times should hold it. You can wrap tightly to put the bag under pressure; this will make it easier to burst.

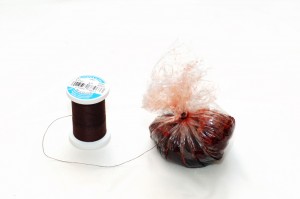
Concealing the prepared blood bag

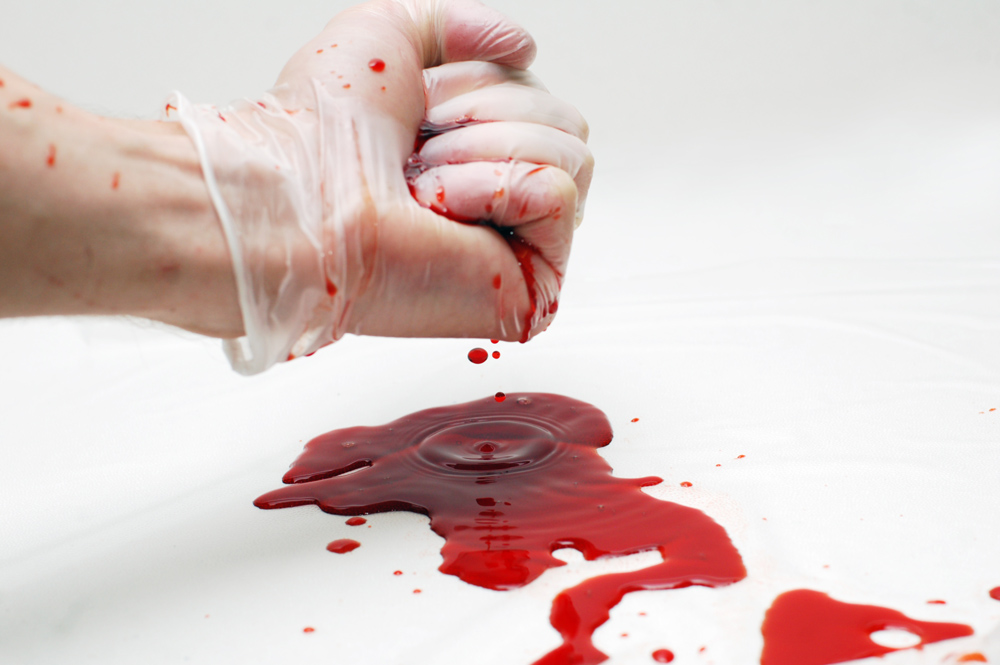
You can now conceal the completed blood bag on your person until the blood is needed. Just give it a squeeze and out it comes. There is, of course, the possibly noticeable sound of the bag bursting; usually this can be covered through the fight choreography. Because the blood is being held by a sponge, you can speed up or slow down the rate of blood flow by altering the pressure with which you squeeze it.

Squeeze to burst
Squeeze to burst

Getting the Shape you Want

Last year, I presented a paper called Devising a Mental Process for Approaching a Prop. In it, I theorized about a method to discover which properties a prop required in order to better determine how to construct it. In this article, I will delve into how to get the shape you need.

When thinking about the construction of a prop, you can consider two things: the shape and the surface treatment. These are not mutually exclusive. Certain materials influence certain surface treatments, through physical or even chemical reactions, or through varying levels of translucency which reveal some of the material beneath. For now, let us focus solely on the shape.

Making a three-dimensional object can be done in a number of ways. You can add material together to create your shape. You can subtract material to reveal your shape. You can also bend (or twist or stretch or somehow manipulate) your material into a new shape. Carpentry can be considered an additive process. You glue or nail or screw pieces of wood together to create a piece of furniture. Carving comes to mind when you think of a subtractive process. You remove smaller pieces from a larger chunk of foam or another material until it becomes the shape you want. Many processes are actually a combination of these two processes. Returning to our carpentry example, before you can add your various pieces together, you need to subtract material from the individual pieces to make them the correct width and length and give them the grooves and tenons and dovetails necessary for joinery.

A third process is what I call manipulation, where you take a material and reshape it. The traditional way to do this in the theatre prop world is with papier-mâché. The flat sheets of newspaper are soaked in a glue and water mixture and draped over a form. When it dries, it retains its new shape rather than return to a flat sheet. The same is true of other materials and processes, such as buckram, fiberglass, carbon fiber, Wonderflex and Varaform. Vacuforming can also be placed in this category. The bending, stretching, twisting and hammering of metal into new shapes would be considered manipulation as well. Again, some materials lend themselves to more than one category. If you are making a shape with plastiline clay, you can build the shape up by adding material, you can subtract material by carving away, or you can manipulate it by squishing or stretching or rolling it around.

A fourth way to create shapes is through the hardening of liquids (or semi-liquids or pastes) into a solid. This can be through drying, such as joint compound, Sculpt or Coat, or clay et al; through a chemical reaction, such as resin or other mold-making and casting compounds; or by heating and cooling, such as metal, wax or Friendly plastic.

The prop-maker can use these four meta-techniques to replicate nearly anything. Besides choosing the technique, one must choose the material. There are several categories of raw materials one can choose from. Wood (lumber, plywood, MDF, chip-board), metal (steel, aluminum, brass, tin), plastic (styrene, PVC, ABS, acrylic, Plexiglas, Stryrofoam, beaded foam), textiles (fabric, buckram, carbon fiber), ceramic (clay, plastiline). There are of course, several other categories and far too many materials to name, but you’ll find yourself returning to many of the same ones for prop-making. As I mentioned above, many materials can be shaped by more than one of the four categories I’ve described.

In addition to raw materials, you can use any number of found objects and parts. Model-makers use the term “kit-bashing”, which means taking pieces from commercially-available models, such as the tires from a car or the fuel yank from a jet, to use in a scratch-built model as a way to save time in creating complex shapes. For the prop-maker, the world is their kit to bash.

This is not meant to be an exhaustive list, nor is it meant to be a series to be memorized. As I hinted above, the boundaries between the meta-techniques become nebulous when you get into specifics. Rather, it is intended as a guide to consider when you are figuring out what materials and techniques to build your prop out of. For example, building a table with a straight and flat top and straight legs is far easier to make by adding together straight and flat pieces of wood. Making a hard shell, like armor, is easier by bending a sheet of a material like Wonderflex, which can hold its new shape when cooled.

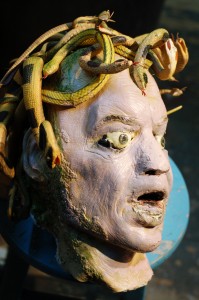
Medusa Head

I was contacted to make the head of Medusa for a show. An actor would pull it out of a bag, but it did not have to stand up on its own. The face did not need to match any of the actresses in the cast, so that freed me up in my options. It needed to be inexpensive too, so I used as many store-bought items as I could.

Supplies for the Medusa head

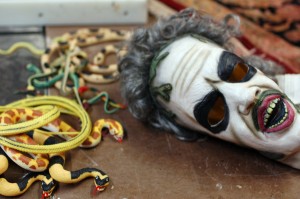
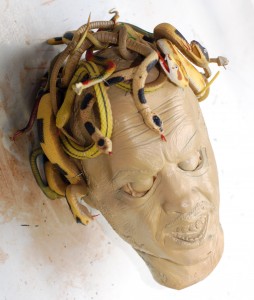
I bought a Beetlejuice mask and some rubber snakes from Halloween Adventure, a year-round costume store in the East Village. His hair turned out to be a wig which pulled right off.

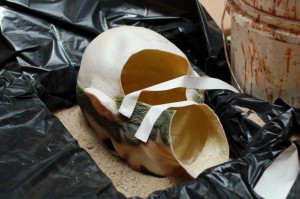
Filling the face with foam

I filled the inside of the mask with a layer of expanding foam insulation. In order to keep the foam from distorting the shape of the face as it expanded, I buried the face in a tray of sand. Expanding foam gives off harmful vapors when curing, so use in a well-ventilated area, preferably in a spray-booth or near some kind of system that can pull the air away from you. Expanding foam does not cure properly when you put it on too thick, so fill the mask one layer at a time. I ended up rotating the mask after each coat and putting only a single layer on each side. The mask remained hollow but the sides were strong enough to hold the shape.

Snakes
Snakes

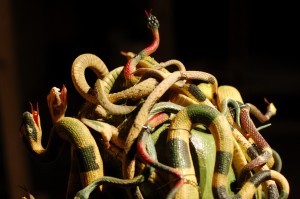
I used wire to hold the snakes on the head. I arranged it so it would be easy to grasp Medusa from the top. I had printed out some pictures of various depictions of Medusa in art through history, and that gave me a good reference on how to arrange the snakes so they would look the most “Medusa-like”.

Basecoated mask
Basecoated mask

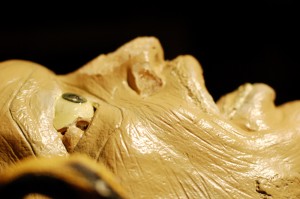
I made eyes out of epoxy putty. Epoxy putty comes in tubes, and you simply break a piece off and mix it around in your hands until it is a uniform color. It has the consistency of a clay like Sculpey, and hardens over time (depending on which kind you get, that can be anywhere from five minutes to an hour). Epoxy can be absorbed through the skin and you can become sensitized to it over time, so where disposable gloves when working with it. I had set the eyes in place before filling the mask with the expanding foam, which held them in place when it dried. I sprayed a coat of paint over the entire mask (I actually did this before putting on the snakes).

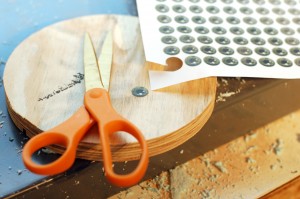
Cutting the eyes out of paper

I found a picture of an iris and pupil and printed it out to the appropriate size. I cut two of them out and used five-minute epoxy to attach them; I coated the entire eyeball with the epoxy to make it glossy, and lay the paper iris on top of that. After the first coat dried, I covered the entire eyeball with another coat of epoxy. This made it appear like the iris and pupil were behind the cornea.

Don't look into her eyes

At this point, I also cut off some of the nose and upper lip and carved it down to look less like Michael Keaton and more like Medusa. Once happy with the new shape, I re-coated the foam with automotive filler (Bondo). This is also toxic and requires a well-ventilated area. The advantage is that it dries very quickly; if you have more time, you can use something far more innocuous, such as Foam Coat.

Face painting
Face painting

The next several steps involved painting the face with acrylics and spray paints.

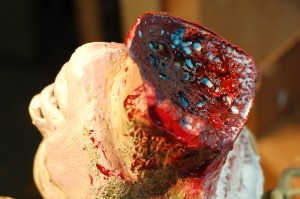
Filling in the neckhole
Filling in the necknole

I filled in the bottom of the neck with a chunk of blue foam carved to fit. I spray painted it with red, and then blasted it with a hot air gun to create the above effect. Again, you need a well-ventilated area for this, preferably a spray booth.

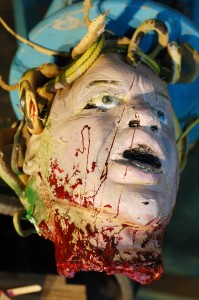
Covering the head with blood

I thought the head needed some splattered blood. I mixed up some more five-minute epoxy, and then stirred in some paint. I had some red paint and some black paint. I did not mix it to a uniform color, but rather swirled it so the parts had differences in both translucency and tint. I filled the rest of the neck hole, smeared a lot around the bottom of the neck, and then splattered and flung some upwards so it would look like her head was sliced off in one swipe.

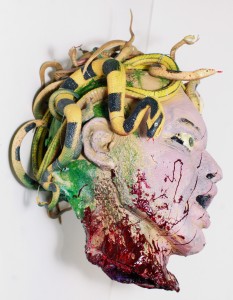
The head of Medusa
The head of Medusa

Now that you know how to make your own head of Medusa, get Kraken!