Tag Archives: furniture

Art Deco Liquor Cabinet

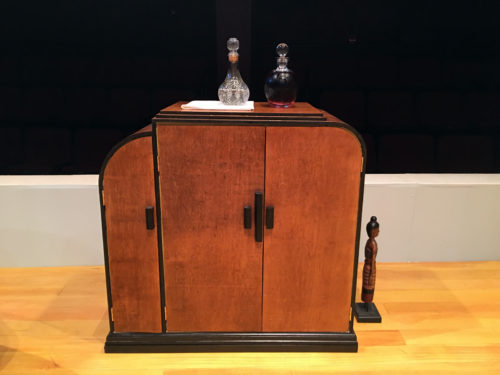
The set for Triad Stage’s And Then There Were None called for a posh, but stark, Art Deco design. One of the key furniture pieces is a liquor cabinet, since each of the ten characters has at least three drinks through the course of the play.

I had no luck sourcing an Art Deco liquor cabinet in this part of the country, so I decided to build it. Having a very distinctly Deco piece on stage would help the other less-distinctly Deco pieces feel at home in the period. Robin Vest (the scenic designer), and I passed around some research images and landed on a piece that had all the right elements but was still achievable with my equipment and time.
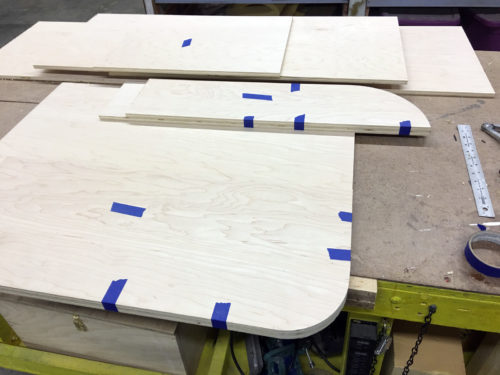
Making the cuts
Making the cuts

One defining element for this style of furniture is the bold, sweeping curves. These were traditionally made by bending thin sheets of wood and laminating them together to create a curved piece of plywood, then adding a highly-figured veneer on top. That was beyond my budget, but I had previously bent plywood by cutting kerfs, and thought I could do it again. The design of the cabinet was specifically chosen to easily hide the kerf cuts.

I chose some nice maple plywood from the big box store. The back of the cabinet and the doors would establish the curves, so I taped them together when gang-cutting them on the band saw.
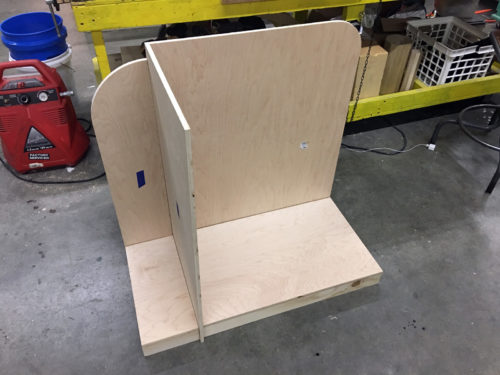
Assembling the carcass

When all the flat, fixed pieces were cut, I assembled it together without glue to make sure everything was measured correctly. The cabinet was basically two parts with a door on each side.
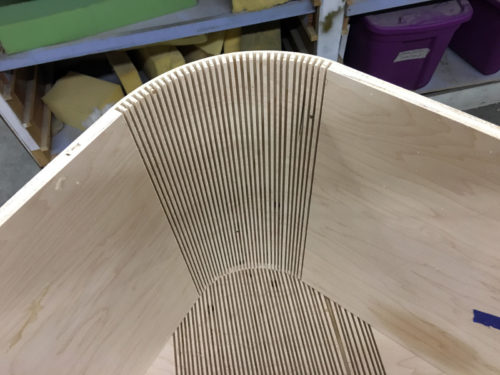
Cutting the kerfs
Cutting the kerfs

To cut the kerfs, I first measured where the curve would begin and where, roughly, it would end. I left the piece a bit long, intending to trim it to the exact size once the kerfs were all cut. You can never calculate exactly how long a piece should be when you add a curve to it; the material behaves differently than how the math predicts.

I set the blade height on the table saw so it would cut through all but the last layer of ply on my plywood. I used a sled to cross cut the groove through the length of the wood. I had a marking on the table saw so that after each cut, I could slide the wood down to make the next cut, and each cut would be evenly spaced.

I’m sure there is some formula to calculate how far apart each cut should be, but I just used a test piece of wood to make sure I was achieving the curve I needed.
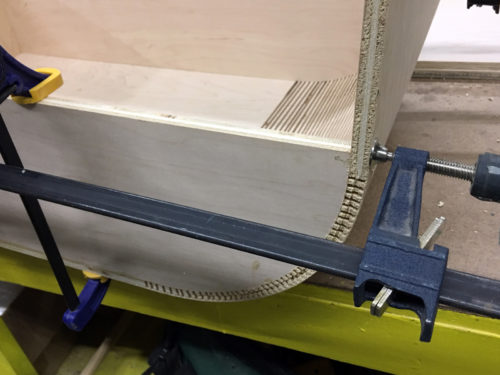
Attaching the curved pieces

When all the kerfs were cut, I was ready to attach the bent pieces to the frame. They were glued to the back of the cabinet, while the front would be open for the doors. I clamped the doors in place so the plywood was held in the correct shape while the glue dried.

While everything was still clamped, I filled the kerf cuts with a mix of sawdust and wood glue to sort of “lock” it in place. A curved piece of wood like this can move if it is not fully supported.
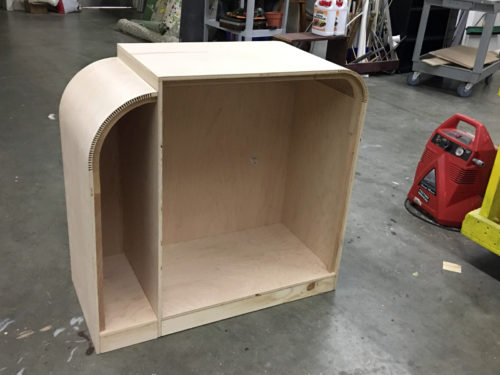
The cabinet body
The cabinet body

The curved pieces were a bit springy without any front supports, so I added an oak frame. It was inset so the doors would still be flush with the front when mounted; it also helped serve as a door jamb to prevent the doors from swinging inside.
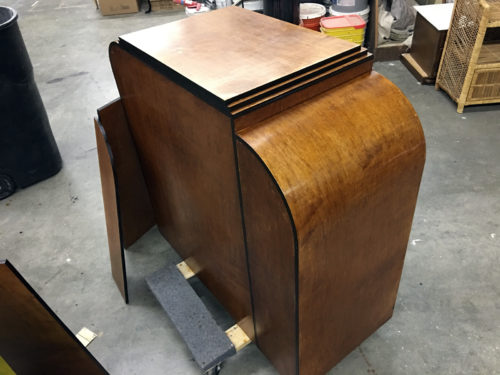
Stained and shellacked

I stained the outside of the cabinet with one coat of English Chestnut stain. All the plywood edges were sanded smooth and filled, then painted black. The curved edges needed a lot of filling to close the gaps from the kerfs. Everything then got two coats of amber shellac, sanded down with some #000 steel wool after each coat.
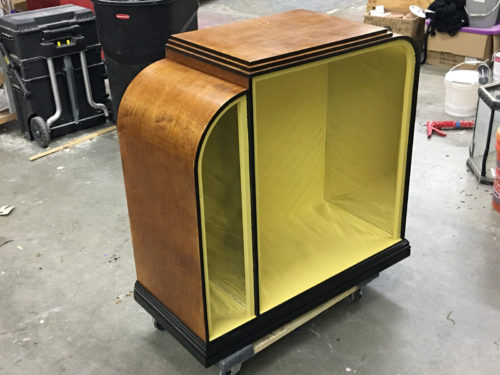
Painted interior
Painted interior

For the sides of the interior, I laid in some thick mirrored mylar I had left over from another project. A lot of liquor cabinets in this style had mirrored interiors. It also allowed me to cover the kerfs on the inside of the curves, which would have taken forever to sand smooth. The remaining interior surfaces were painted with some bright yellow I had gotten for another 1930s-inspired piece.

I also added some molding to the bottom and two more panels to the top to create the stepped design that is another characteristic of this style.
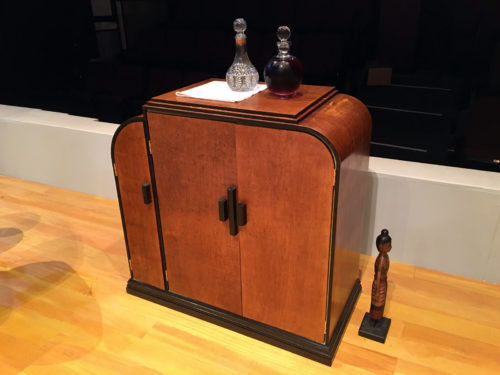
Art Deco Cabinet
Art Deco Cabinet

After mounting the doors, the final step was adding the handles. I cut and shaped some basic handles out of a piece of two-by-four. I added them after the doors were mounted because they all needed to line up visually with each other, even if the doors were not precisely straight and even.
Cabinet front view
Cabinet front view

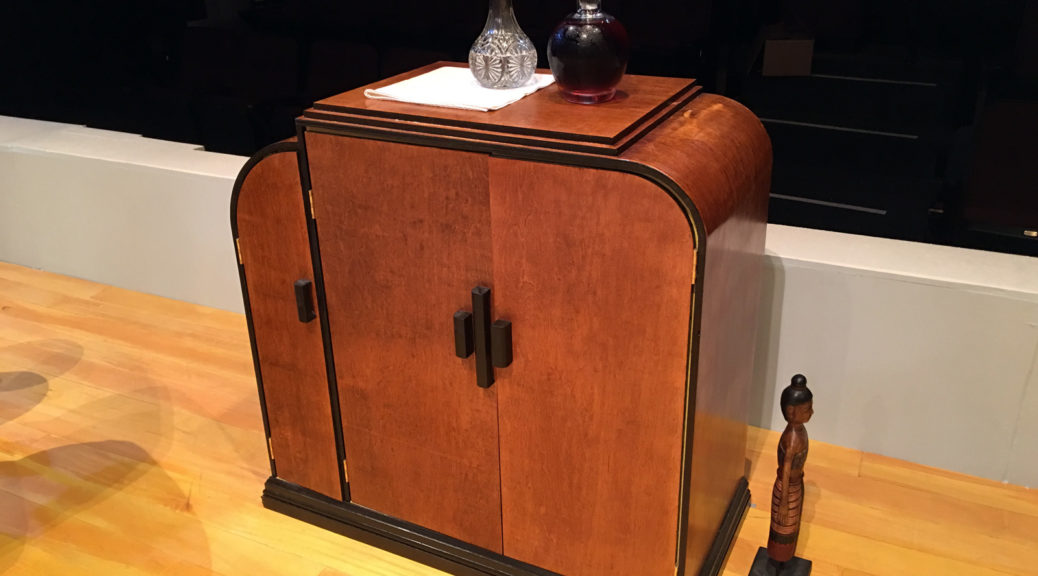
I was very proud of this piece. Even though its flaws and theatrical construction were apparent up close, it looked stunning from only a few feet away.

Try Your Luck With These Prop Stories

Interview: Rob Kyker - Lilja’s Library, a site dedicated to Stephen King, sits down for an interview with Rob Kyker, the prop master on Mr. Mercedes. Rob was also prop master on shows like Lost and Castle.

Making Your Own Foam Cutting Table – Make Magazine brings us this how-to video explaining how to build a hot wire cutting table for foam. Don’t forget the ventilation!

Kansas City Rep Theatre, Prop & Costume Auction – The Kansas City Rep is losing their storage space and moving to a smaller warehouse, so a large portion of their collection is being sold off. This auction includes items that have been bought throughout their 30 year history, so it is a rare opportunity to acquire many hard-to-find items.

Pocket Screws for Chairmaking? (Yes) – Chris Schwartz shows us how he uses pocket screws as a way to clamp pieces that are otherwise difficult to attach a clamp to. I’ll admit to having done this in the past; pocket screws create a very strong connection.

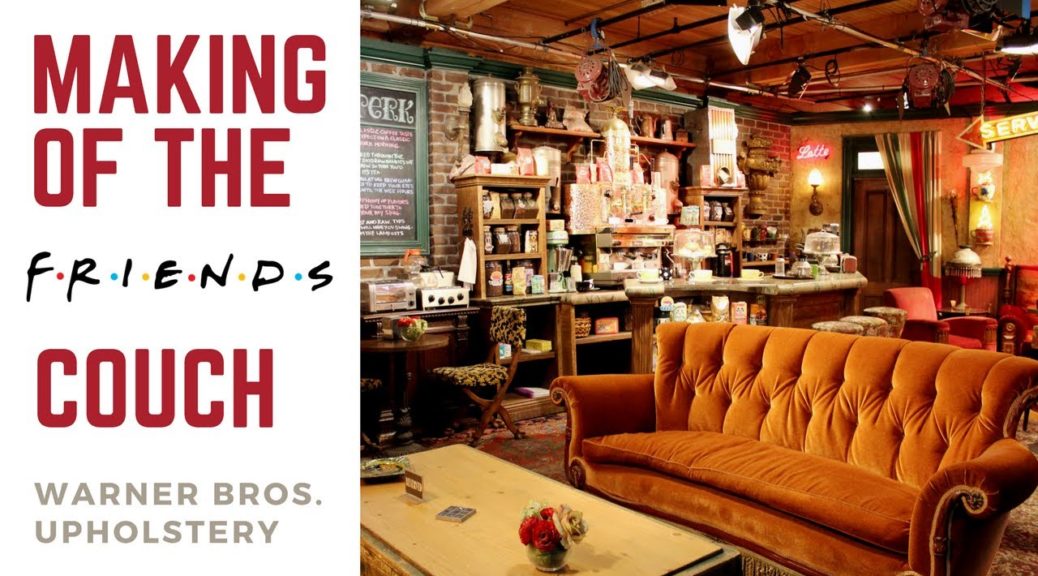
The making of the Central Perk couch on Friends – This video shows the Warner Brothers Upholstery Department building the iconic orange couch from Friends. I think it is a recreation of the original couch, but I still find it fascinating that they build the entire couch from scratch.

Benches from Beautiful Star

A few months ago, Triad Stage put on their Christmas show, Beautiful Star. Though it was a remount, it had some major design changes this year. For the props shop, we needed to build six church benches that could be rearranged throughout the show to create various “locations.”

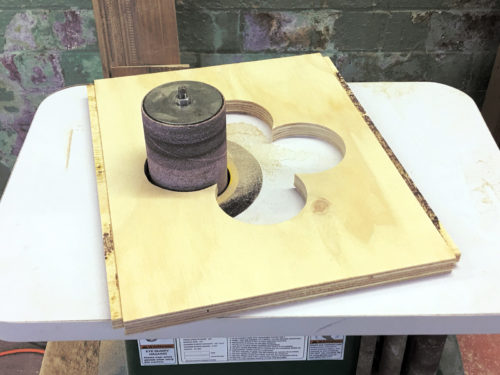
For the quatrefoil cut-out, I laid out the pattern with a compass and cut it with a jigsaw. I sanded it smooth using a sanding drum that was nearly the same diameter as the individual circles in the pattern.

Cutting the quatrefoils

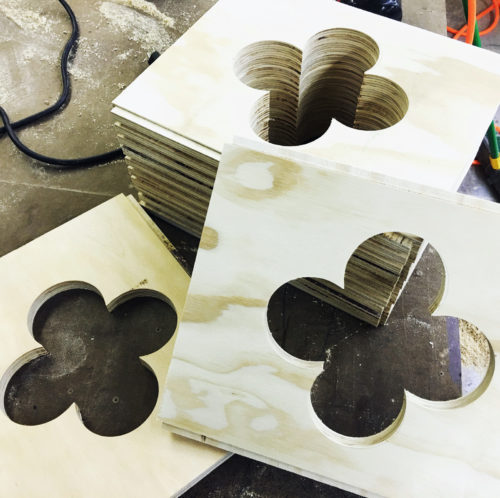
I took the time to make one of the quatrefoils as perfect as possible, and then used a pattern cutting bit on my router to cut the rest of the side panels. I needed twelve panels for the six benches I was making.

So many panels
So many panels

The team wanted the benches to be able to stack on top of each other, sit up on their sides, and otherwise act as instant scenery. They also needed to support the weight of actors standing on them, but be lightweight enough for children to carry them.

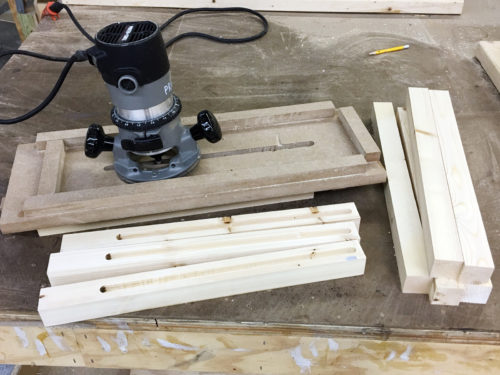
I routed a groove down the sides of all the legs. My jig kept the groove in the center of the leg and set stop points for the top and bottom as well. I also cut a tongue on the side panels, which you can see in the previous photos.

Routing the joints
Routing the joints

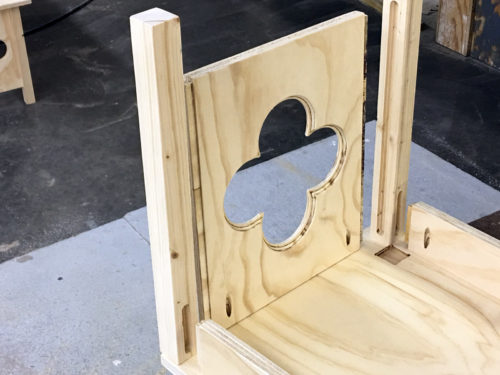
In the picture below, you can see I also cut a mortise and tenon for the apron to connect to the leg, and a notch for the leg to fit up into the seat. Additionally, the aprons and side panels were attached to the seat with pocket hole screws. This sucker was going to be strong.

Fitting it together
Fitting it together

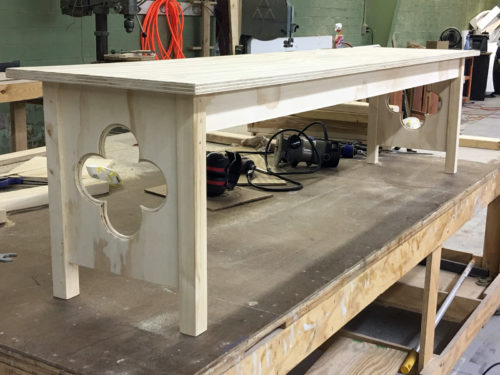
The joints made the whole bench pretty sturdy even without glue, but once it was glued and screwed together, it was rock solid.

The unpainted bench
The unpainted bench

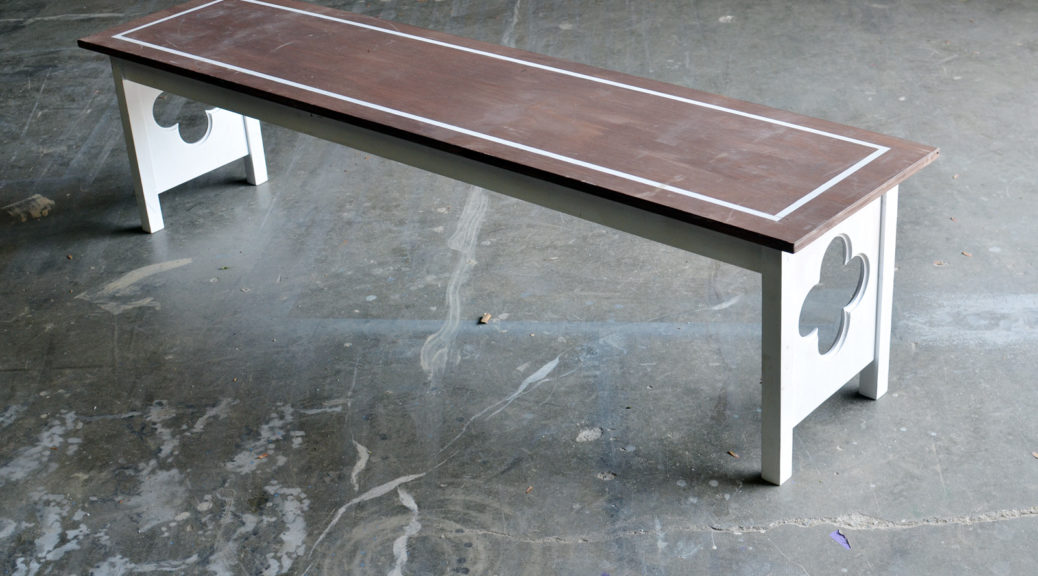
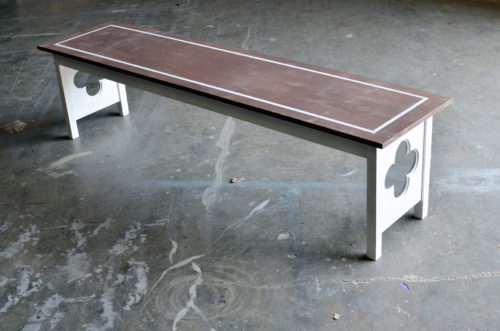
We glazed the seat with a dark brown and painted the sides white. During tech we added the white border around the seat to finish off the look. Now we have six lightweight church benches that can be used in a whole host of shows.

Beautiful Star bench

Tangible Tables and Chairs, 1916

The following comes from a 1916 book and describes the evolution of furniture on the theatrical stage:

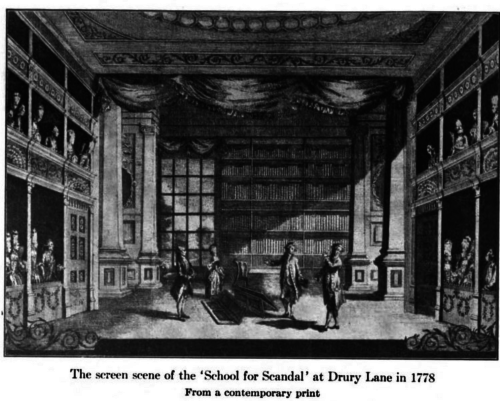
When the modern play calls for an interior this interior now takes on the semblance of an actual room. Apparently the “box set,” as it is called, the closed-in room with its walls and its ceiling, was first seen in England in 1841, when ‘London Assurance’ was produced; but very likely it had earlier made its appearance in Paris at the Gymnase. To supply a room with walls of a seeming solidity, with doors and with windows, appears natural enough to us, but it was a startling innovation fourscore years ago. When the ‘School for Scandal’ had been originally produced at Drury Lane in 1775, the library of Joseph Surface, where Lady Teazle hides behind the screen, was represented by a drop at the back, on which a window was painted, and by wings set starkly parallel to this back-drop and painted to represent columns. There were no doors; and Joseph and Charles, Sir Peter and Lady Teazle, walked on thru the openings between the wings, very much as tho they were passing thru the non-existent walls. To us, this would be shocking; but it was perfectly acceptable to English playgoers then; and to them it seemed natural, since they were familiar with no other way of getting into a room on the stage.

School for Scandal, 1778

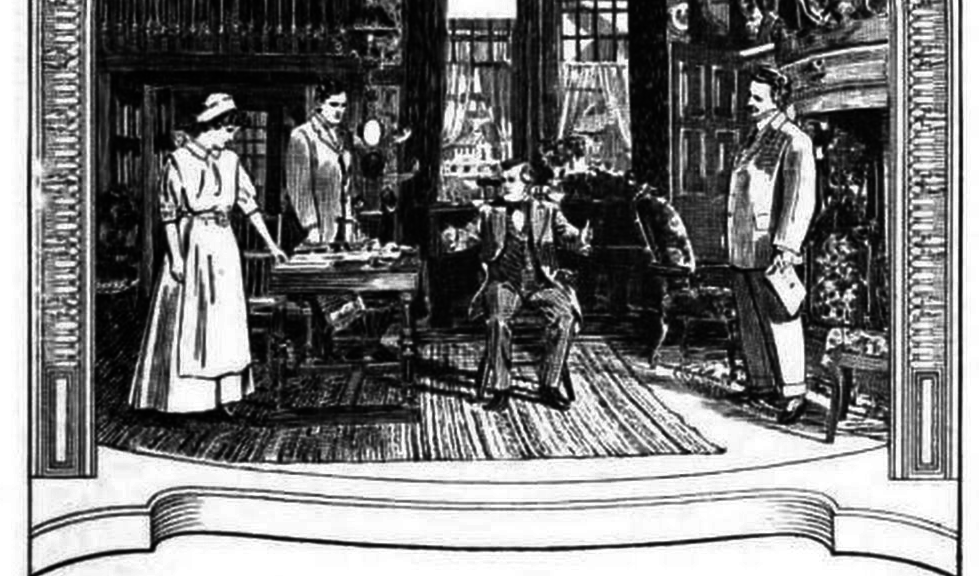
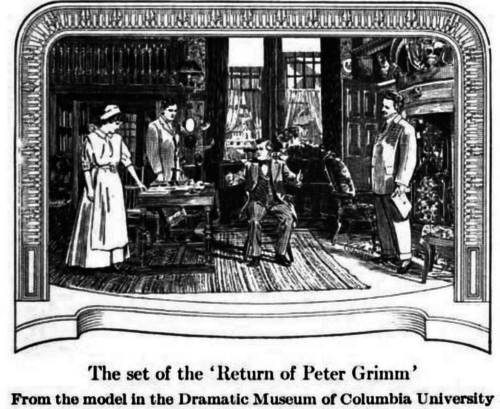
The invention of the box-set, of a room with walls and ceilings, doors and windows, led inevitably to the appropriate furnishing of this room with tangible tables and chairs. Even in the eighteenth century the stage had been very empty; it was adorned only with the furniture actually demanded by the action of the drama; and the rest of the furniture, bookcases and sideboards, chairs and tables, was frankly painted on the wings and on the back-drop by the side of the painted mantelpieces, the painted windows, and the painted doors. In the plays of the twentieth century characters sit down and change from seat to seat; but in the plays produced in England and in France before the first quarter of the nineteenth century all the actors stood all the time—or at least they were allowed to sit only under the stress of dramatic necessity—as in the fourth act of ‘Tartuffe,’ for instance. In all of Molière’s comedies there are scarcely half a dozen characters who have occasion to sit down; and this sitting-down is limited to three or four of his more than thirty pieces. Nowadays every effort is made to capture the external realities of life. Sardou was not more careful in composing his stage-settings in his fashion than was Ibsen in prescribing the scenic environment that he needed. The author’s minute descriptions of the scenes where the action of the ‘Doll’s House’ and of ‘Ghosts’ passes prove that Ibsen had visualized sharply the precise interior which was, in his mind, the only possible home for the creatures of his imagination. And Mr. Belasco has recently bestowed upon the winning personality of his ‘Peter Grimm’ the exact habitation to which that appealing creature would return in his desire to undo after death what in life he had rashly commanded.

The set of the 'Return of Peter Grimm'

“Evolution of Scene-Painting.” A Book About the Theater, by Brander Matthews, Charles Scribner’s Sons, 1916, pp. 144–146. Google Books, books.google.com/books?id=89gUAAAAYAAJ.

Beg, Borrow, Buy, or… (1948)

The following first appeared in a 1948 issue of Players Magazine:

By Joe Zimmerman. Temple University. Philadelphia, Penna.

For most educational theatres, borrowing properties is the most expedient method of securing properties, and the one by which the greatest number and variety of items are made available. Most non-commercial theatres rely primarily on borrowing for their properties. But a good many designers find that borrowing is a good deal of work, and at least in their experience, seems to require a lack of dignity and “professional manner” that is no great argument in its favor.

Borrowing, however, may also be handled as a self-respecting manner of securing properties, with dignity and some pride, if it is done properly. The “art of borrowing” is both a concept and a fairly specific technique. Continue reading Beg, Borrow, Buy, or… (1948)