Tag Archives: foam

Good Friday Links

David Neat starts us off with making smooth shapes from Styrofoam. He’s dealing with the real-deal Styrofoam here, not that white bead foam stuff. And sure, this article is over a year old, but it has some really useful techniques.

Bill Doran has a helpful video on adding rust to your props. Ninety percent of the time when I show a completed prop to a designer, they say, “that’s great… once we age it down a bit.” Knowing how to weather, age, distress or generally tone down props is an essential skill for a props person, and adding rust is one of the ways to do this.

Make Magazine takes a look at some Maker-Friendly hardware stores from around the US. It’s a fascinating look at the vast array of materials a store might choose to stock, as well as a sobering reminder of how awesome hardware stores used to be to those of us whose only local options are Lowes and Home Depot.

I covered some basic stitching for fabric in my Prop Building Guidebook, but if you get into embroidery and ornamental stitching, there is a whole other world of ways to manipulate needle and thread. Tipnut has some great vintage illustrations of ornamental borders and the basic stitches to make them happen.  It’s a relaxing project for when you are bored in tech and the designer wants the napkins to be “fancier”.

Finally, here is an article called “The Most Important Lessons in Woodworking“. Robert Lang uses his experience cutting plugs as a lesson in woodworking in general, and I think this lesson can be expanded out to prop making in general. It’s not just about how to use specific tools or techniques, but how to approach your whole project in the most efficient and easiest manner possible.

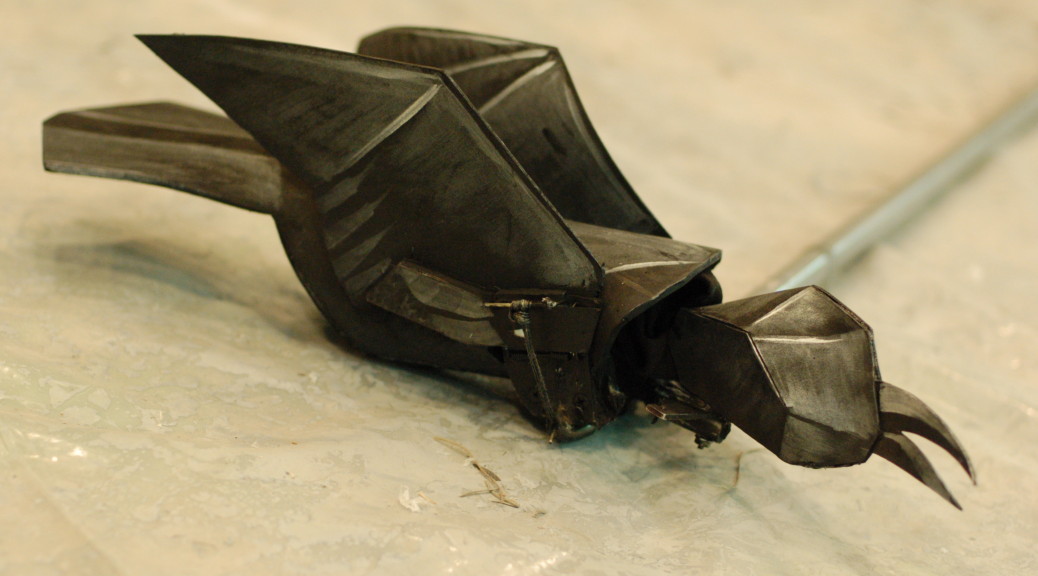
 

Crow Puppet

My major project for the past few months involved engineering and constructing a number of animal puppets for Triad Stage’s production of “Snow Queen”. I wrote about the white-tailed stag last week. One of the most complicated puppets in terms of motion and movement was the crow. He also had the most stage time out of all the puppets, appearing on his own in several scenes. I began work on him shortly after beginning the stag, so that I could have plenty of time to develop the means to have a single puppeteer perform all the actions he needed to perform.

You can see a bit of the “evolution” of the puppet’s mechanisms in this video.

The major difference between the prototype puppet in the video and the final puppet was that I switched the pole to connect on the side rather than from behind. It gave the puppeteer much more control over the puppet by letting him manipulate the orientation of the crow’s body by twisting the main control pole, rather than having to stoop and squat.

Head and neck mechanism

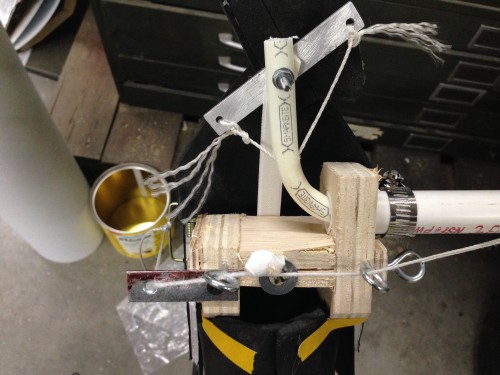
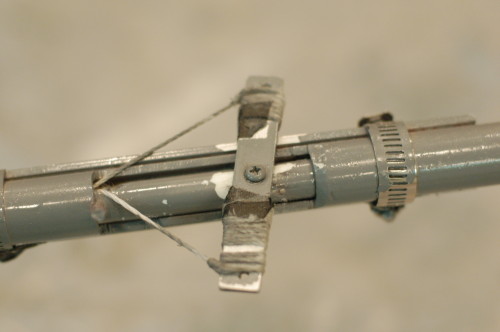
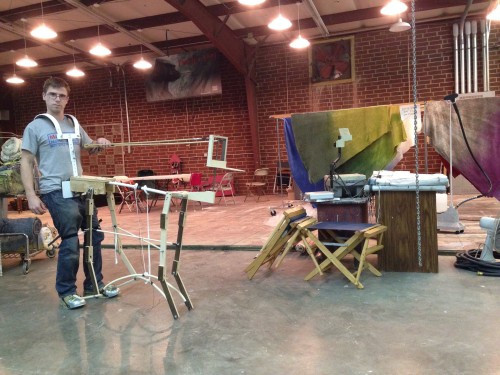
As you saw in the video, the head and neck were controlled by an inner pole which was free to rotate on its own. Strings ran inside which could turn a bar that held the head.

Hand controls
Hand controls

At the other end of the control bar was a similar bar that held the other ends of these strings. The puppeteer could both swing the bar back and forth and rotate the inner pole with just one hand. The other hand was free to flap the wings.

Wing mechanism
Wing mechanism

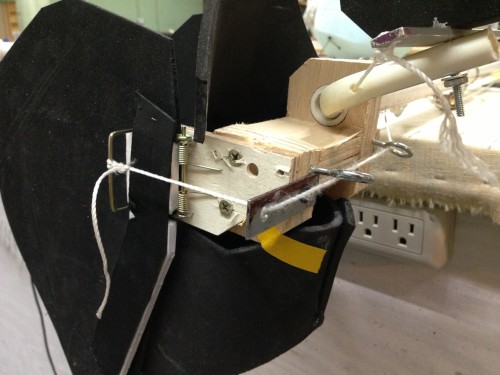
If you look closely, you will see the wings were actually attached to mousetraps. Pulling a string moved the wings down, and the springs in the mousetrap moved the wings back up when the string was released.

Bird pattern
Bird pattern

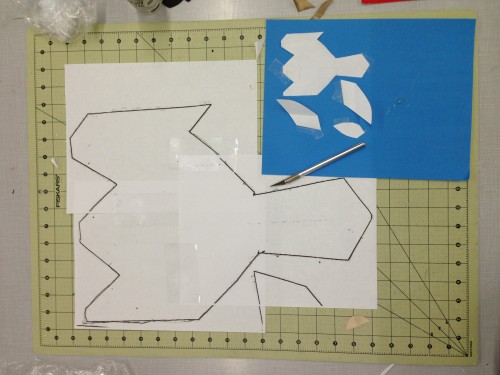
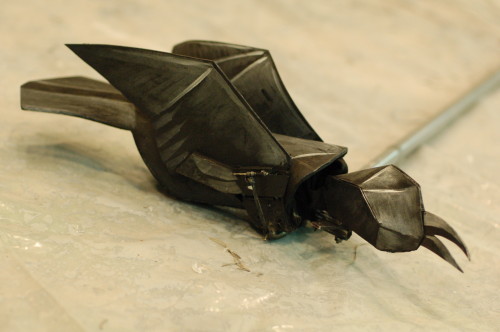
The pattern for the crow’s body was developed in a small prototype by the puppet designer, Bill Brewer. I enlarged this pattern and cut it out of black EVA foam sheets. I came up with a pattern for the head and beak to match the look; like the other puppets in the show, the appearance was not meant to be realistic, but was stylized to make the crow look like he was cut and folded out of sheets of paper.

Crow puppet
Crow puppet

The solid black crow tended to disappear when on stage, so he was given a final paint job by the scene designer, Howard Jones. He accentuated the flat planes and folds on the crow with white and silver paint, helping make the crow “pop” against the background.


White-tailed Stag

The majority of my time this past autumn was spent working on puppets for Triad Stage’s production of “Snow Queen”. The play is an original retelling of the Hans Christian Anderson tale, set in the Appalachian Mountains with bluegrass music.

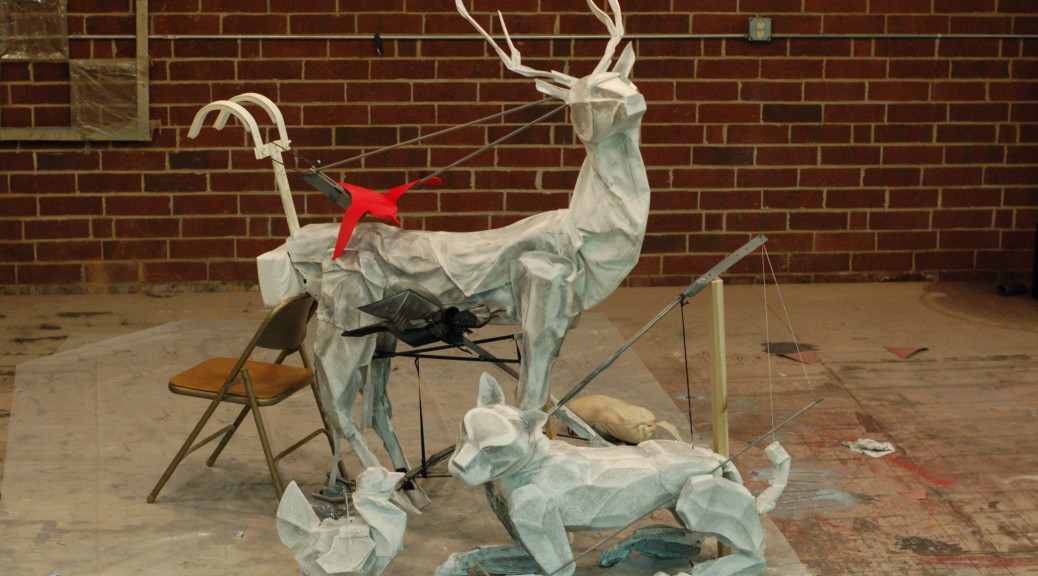
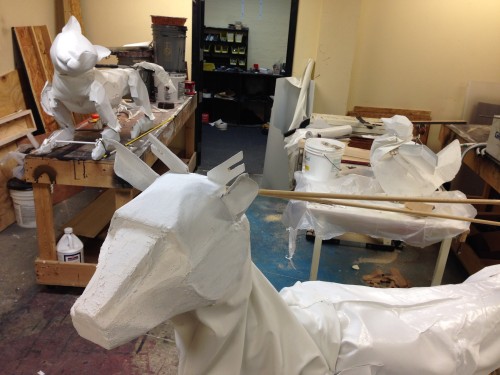
The animals (other than the two birds) were designed to look like they were constructed from cut and folded paper. Bill Brewer, the puppet designer, came up with the range of motions he wanted the puppets to have. Each puppet only had one puppeteer to operate it, which is tricky when the puppets are this large and manipulated by actors rather than trained puppeteers. We worked together to distill their movements down to the simplest motions so their moments on stage would be evocative and magical.

Puppets from Snow Queen

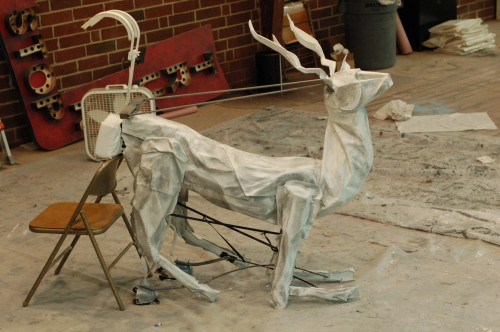
The stag had the most logistical challenges, so I began work on him first. The main challenge was that the lead actress rides him around on stage, so it needed to support her weight and remain comfortable for the operator to carry her while still working the puppet. I used a marching band snare drum harness to attach the puppet to the operator. We used these out at the Santa Fe Opera this past summer for a similar purpose, so I already knew it was the best option for comfortably distributing the weight over the operator’s body while keeping a strong and stiff connection to the puppet. 

You can watch the evolution of the skeleton and mechanisms in the video below:

It took me about a month and a half to get the movement right (I was working on the other puppets at this time as well, and we produced a whole other show within that time frame as well). My goal was to have this skeleton ready for the first week of rehearsal so the actors could begin working with it and discovering what it could do.

Skeleton and mechanisms

When the puppets were not being used in rehearsal, I took them back to start adding the three-dimensional bodies. It was vital that the actors used the puppets in rehearsal; the evolution of the puppet scenes was shaped dramatically by the discoveries of how the puppets moved and reacted.

Adding the foam
Adding the foam

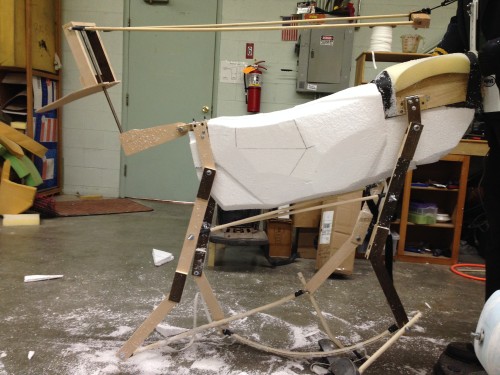
For the solid parts, I attached chunks of EPS foam and carved them into shape.

To get the “folded paper” appearance, I laid some pieces of Wonderflex over top of the foam. Wonderflex is a plastic sheet which becomes formable at a very low temperature; you can let it drape or fold it like fabric, and when it cools, it retains that shape.

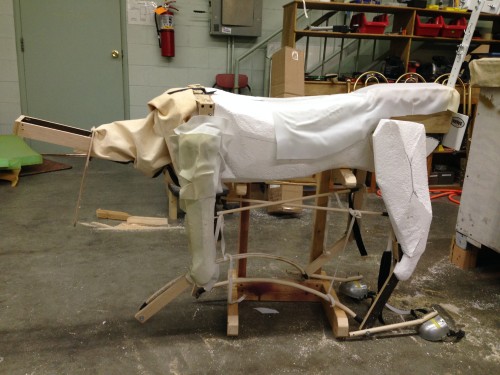
Fabric and Wonderflex

For the neck, I needed a much more flexible material, and after some experimentation, found a type of fabric which matched the appearance of the rest of the stag, but would allow the puppet to retain its full range of motion.

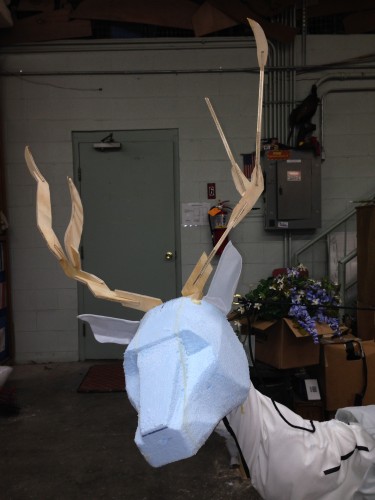
Head and antlers
Head and antlers

The head itself was carved by Brewer. We played around with a few designs for antlers, and ended up making them out of several interlocking segments. The ears were cut and shaped from more Wonderflex.

Painting and filling

By that point, we were already loading into the theater, so the long task of filling, sanding and priming was done there. After  base-coating the puppets to a uniform white color, they were shaded with grey and silver paint to accentuate the flat plains and folds. Most of this was done by Howard Jones, the scenic designer on the show.

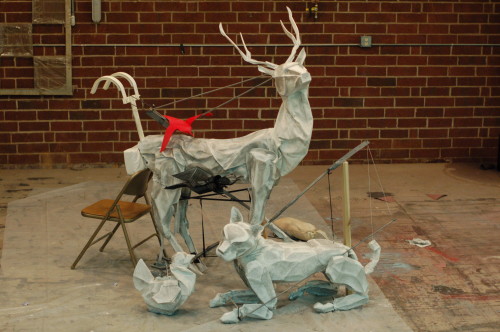
White-tailed stag
White-tailed stag


Prop Rehearsal Notes

Happy Friday, everyone! I have a short, but sweet, list of links today:

This should keep you busy for awhile: 110 Best DIY Tips Ever. Popular Mechanics magazine is celebrating its 110th anniversary, and to celebrate, they have looked through the pages of all their old issues to find all the best tips and tricks they have ever printed. Whether you are a beginner or an old pro, you are sure to learn something new here.

Tested has a great feature on how foam latex spawned a horror makeup revolution. They touch on the history of makeup and prosthetics in film, looking at some of the pioneers of the craft.

This next article comes from an interior designer, but it’s really about the secrets of a prop stylist. She lists some ways to improve your ability to dress and style a set (though she is actually talking about applying those tips to your own home).

Foam Cannon Barrels

Last week, I showed off some giant champagne bottles I made, and mentioned that they would act as the barrels of some cannons I was also building at the Santa Fe Opera. Today, I will show you the actual cannon barrels I made. We needed four cannons, so that meant four barrels.

Bandsaw Cutting Jig
Bandsaw Cutting Jig

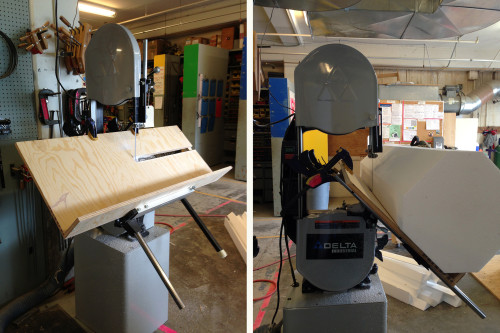
I made the barrels out of foam to keep them lightweight; the Santa Fe Opera runs their shows in repertory, so any savings in weight is much appreciated by the running crew, who have to move all the props from the basement to the stage on a daily basis. I whipped up a quick jig for the bandsaw to cut the corners from the blocks of foam I got. This meant less time turning, less dust, and it allowed the foam to actually fit on the lathe.

Turned barrels
Turned barrels

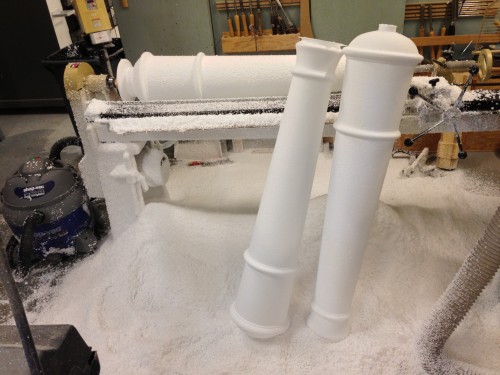
I designed a full-size template of the shape of the barrels based on the designer’s sketches and my own research. I could also use this template as a pattern on the lathe to make all four barrels exactly the same as each other. Turning foam on the lathe is fun and easy, but it makes a gigantic mess.

Coating and sanding
Coating and sanding

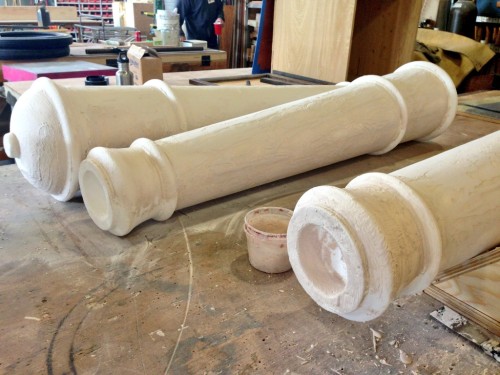
After the barrels were taken off the lathe, I began the long and laborious process of coating and sanding them. The designer wanted them to look like smooth brass without any distressing, so they needed to be absolutely flawless. I used Aqua Resin, which provided a sandable hard coat with far less toxicity than Bondo. I spent nearly a week just coating and sanding all these guys.

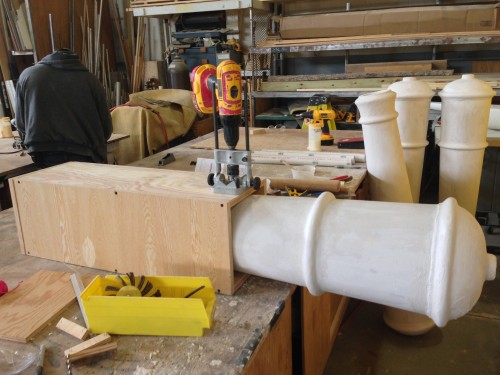
Drilling straight through

I built a jig so I could hold the barrel and a cordless drill perpendicular to each other. This provided a pilot hole for the trunnion I would add; the trunnion would be a piece of PVC pipe which would hold the cannon on the carriage and allow it to pivot up and down.

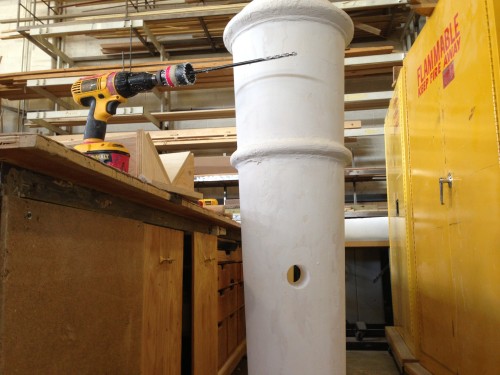
Hole
Hole

With the pilot hole drilled, I switched to a hole saw that was closer to the size of the PVC pipe. You can see in the photo above that I have an extra long pilot bit on the hole saw. This bit was long enough to pop out the other side of the barrel so I could be sure that the hole saw would exit in exactly the right place.

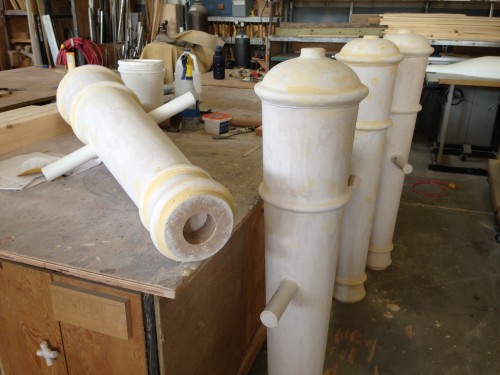
Finished Barrels
Finished Barrels

I pushed the sections of PVC pipe through the hole and capped off the ends to make them look like a solid bar. I also added some lauan rings to the ends of the barrels to help reinforce them when they were standing up.

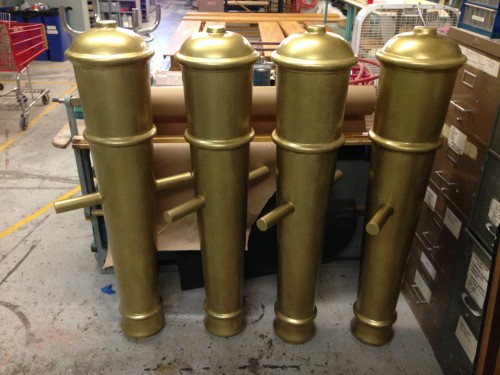
Painted Barrels
Painted Barrels

With the barrels finished, I handed them off to the painters, who gave them the great brass paint treatment that you see above. In a few days, I’ll post about how I built the carriages to these cannons, and you can see pictures of the final piece.