Tag Archives: foam

Rebecca Akins: Surviving Forty Years of Making Props

On the second full day of this year’s S*P*A*M conference, we watched a presentation by Rebecca Akins. Ms. Akins has designed costumes for Childsplay Theatre (our host in Arizona) for the past twenty-five years, and has been constructing costumes, puppets, costume props and masks for at least that long as well. She divided her presentation in two parts. The first was on materials and methods she’s used in the past which she now knows to be hazardous to your health. The second was on “new good things”, which are less-toxic replacements for these.

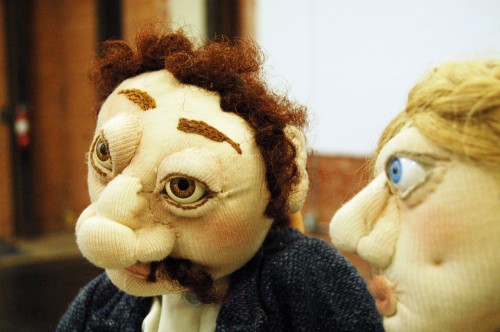
A puppet couple by Rebecca Akins

One of her earlier shows was a production of Devils in 1971. She created latex masks, Celastic armor, and sprayed the costumes with aniline dyes. Anyone who has worn latex knows it does not allow the skin to breathe, and the latex masks were very uncomfortable to the actors with the heat and build-up of sweat underneath. Aniline dyes are extremely toxic, and spraying them is a great way to fill your lungs with poison, especially with little ventilation and no respirator.

Ms. Akins used Celastic a lot in those days, starting with Celastic mitres, crowns and wigs for The Balcony in 1969, through at least 1981 with masks for a production of The Pied Piper. For those who are unfamiliar, Celastic is a fabric impregnated with plastic. When you soak it in a solvent, it becomes soft and flexible, hardening to a stiff but lightweight shell when the solvent evaporates. The toxic part is not the Celastic itself, but the solvent used to soften it; common choices include acetone and methyl ethyl ketone (MEK). All solvents are harmful to humans, and can enter the body through the skin, lungs, stomach or eyes. Not all gloves will protect against them, and not all respirators are designed to filter out their vapors.

She mentioned a material I had never heard of called “blue mud cement”. It is a powdery mixture of asbestos fibers and “spackle-y” binders; when mixed with water, the paste will dry hard and lightweight (it was originally developed for plumbing pipe insulation). For a 1974 production of A Midsummer Night’s Dream, she created forms in chicken wire, wrapped them in plaster bandages, and coated the whole thing with blue mud cement. It sounds like a mix between Bondo and chopped fiberglass, except that it’s, you know, asbestos.

Cutting and carving Styrofoam with a hot knife or wire is another technique she described; the fumes created when Styrofoam melts are fairly toxic.

In 1984, Ms. Akins worked with fiberglass for the first time to create a mascot head for a Phoenix sports team. Fiberglass creates strong and lightweight shells, but she found the individual particles got into her skin and clothes and irritated her immensely, and the resins used give off a lot of fumes while curing; it is also an inhalation hazard when sanding the hardened fiberglass. She used fiberglass again in 2002 with more adequate protection (ventilation, a respirator and thick sleeves), but decided it was too much of a hassle to continue working with it.

The second half of her presentation dealt with “new good things”, that is, newer materials which attempt similar results with less toxicity. Examples include Fosshape, Thermaflex (or Wonderflex), leather, fabric, paper and silicone casting gels.

Paper, used in papier-mâché, is one of the oldest prop-making materials. Indeed, Ms. Akins has been using it since at least 1973 for a production of The Bacchae. She continues using it even today. She showed us a number of masks and puppet heads she has constructed over the years, many of them made with a mix of paper pulp, sawdust, and PVA glue. This gives her a material which she can sculpt and form like clay, but which dries to a lightweight and sturdy piece which is paintable and sandable. The fact that some of these pieces have been on tour since the mid-90s is a testament to their durability.

Fabric is another less-toxic material. She uses soft sculpture a lot for puppets; fabric, thread, fiber fill (stuffing) and paint are the only materials needed to make three-dimensional shapes.

soft sculpture

She showed us a number of examples of “found objects as materials”. An old leather handbag became a dog mask, a group of woven baskets transformed into a camel, and dryer hoses turned into snakes and an elephant’s trunk. Though using found objects has long been a staple of propmaking, Ms. Akins reminded us it remains a fairly non-toxic–and environmentally friendly–method, even today. Below is a photograph of a dog mask made out of wooden bowls.

dog mask made of wooden bowls

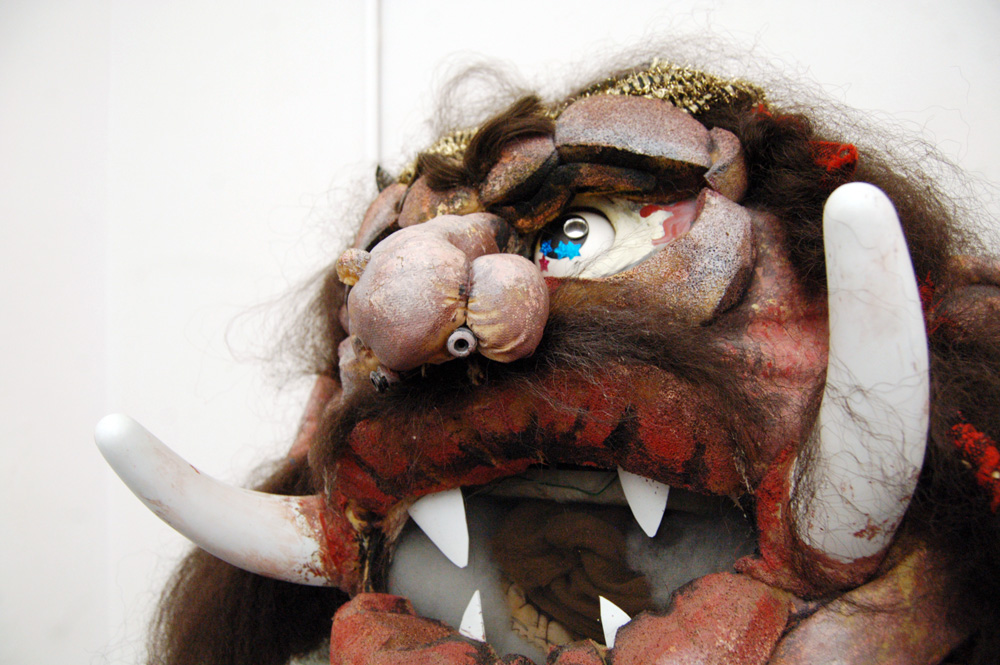
In 2004, she began using Fosshape to make a head for a production of Big Friendly Giant. Like Themaflex and Wonderflex, Fosshape is a plastic-impregnated fabric which becomes soft and pliable when heated, and retains its shape when cooled. In many ways, it is similar to Celastic, except you use boiling water or a heat gun to soften it, rather than a bucket full of solvents.

Big Friendly Giant mask

Finally, she described her first forays into using silicone mold materials. She would make a model in clay, mold it in silicone, and then cast it in resin. In one case, she mixed resin and Bondo together to make a puppet head; this gave her a translucent pinkish head which looked a lot like skin.

At the end of her presentation, Ms. Akins reminded us that whatever materials and methods you choose, you should endeavor to make the prop with as much care as possible. She left us with these closing words: “The more gorgeous a thing is, the more respect it is treated with.”

Using soft materials to mimic hard details

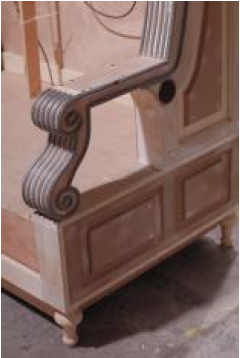
Every once in a while you come across some curved or otherwise intricate detail on a prop you wish to recreate that seems far too intense and labor-intensive to undertake by hand. Take, for instance, the curved ridges running along the front of the arm in the picture below (the parts in grey).

Ethafoam on a decorative arm

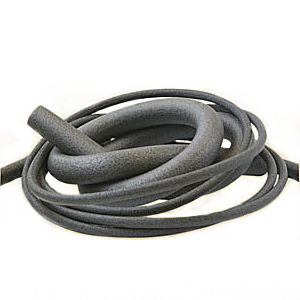
Rather than spending two weeks carving these out by hand, I made them out of Ethafoam. Ethafoam is a actually a trademark of DOW Chemical for their spongy, cushiony polyethylene foam used for packaging and wrapping pipes. It’s great for theatre because it also comes in rods, which can be cut in half to make flexible half-round molding.

Ethafoam rod
Ethafoam Rod

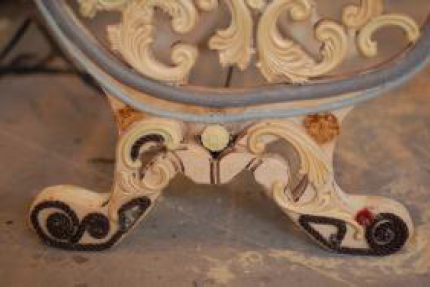
Now, this is not an article about the wonders of Ethafoam, but rather the idea of using soft and flexible materials to simulate hard and rigid objects. Ethafoam is just one of the many materials used in theatre for such purposes. You can see another example in the photograph below.

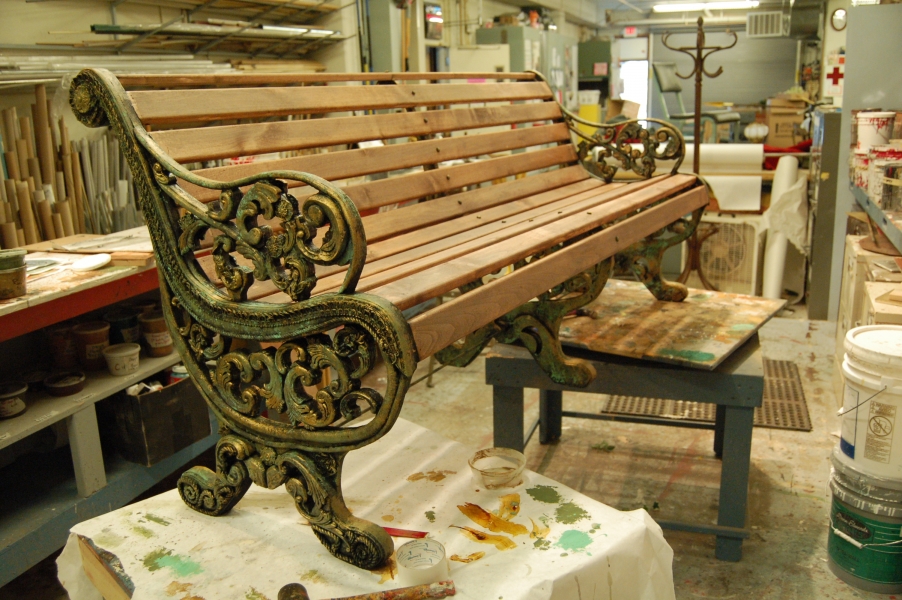
Closeup of cast iron bench

You can also see yarn used at the very bottom. This was a replica of a cast iron bench I made for the Santa Fe Opera a few years back. The research called for a very ornate and detailed-looking bench, and the short time-frame I had to build it meant I had to use a lot of found objects and unconventional materials to pull off the look.

painted cast iron bench

On closer inspection, you can see more materials, such as fabric fringe were used. Once it was artfully painted, the illusion was pretty convincing, especially under stage lighting and seen from a distance. The painting of soft materials like Ethafoam or fabric can be one of the trickiest parts of this process. Either they soak up all the paint or the paint simply will not stick to it. You usually need to coat it with something first, though that can be tricky as well; because the material is flexible, you need to use a coating which also remains flexible, otherwise it may chip and flake away. Brushing on watered-down PVA glue or a coating of something like Jaxsan is usually sufficient.

When you look through older texts dealing with props, you can find numerous examples of using industrial felt, upholstery trim, or any number of other fabrics and soft materials to mimic solid decorations. If you ask prop artisans about it, you will get some mixed responses. Some love the versatility it gives them, especially on a budget. Others abhor it as an amateurish “proppy-prop” trick. In my own opinion, I try to avoid it if I am making a prop that gets handled by an actor. Nothing looks sillier than when an actor picks up a supposedly marble vase only to have the decorative ridges squish under his hands. It also threatens to break the actor out of character even if it is not noticeable by the audience. If, on the other hand, you need to add ornamentation on set dressing or on the parts of a prop that are unlikely to be touched during the performance, than it’s a great trick to use, especially when you are on a tight budget or tight deadline.

Choosing the right disposable glove

First, I wish to offer a caveat; I don’t write much about safety, because it’s a highly complex area, especially once you start talking about safety around chemicals. I’m not an expert, and if you are in a workplace situation, there are actual regulations, standards and laws that need to be followed. The last thing I want is someone’s sum total of knowledge about safety coming from “Eric Hart’s Props Blog.” Still, the home hobbyist may not know where to look for information, and the prop shop employee may not know what questions to ask their employer, or what their employer is responsible for providing. Thus, what follows is not a guide for choosing the right disposable glove; rather, it is a guide to what questions to ask and what information to look up to learn which disposable gloves are best for each situation. All the safety data in the world is useless if we don’t know what information we are trying to find, or even that we need to find certain kinds of information. Often, we don’t know what we don’t know.

Dozens of companies make disposable gloves, offering hundreds of combinations of materials, thicknesses and liners. You need to find the permeation data for the specific gloves you are using. This will tell you how long it takes for specific chemicals to work their way through the glove and onto your skin.

No single glove will protect you against every chemical. There were approximately 50,000,000 chemicals registered by the CAS on September 7, 2009, with more being added at the rate of twenty-five per minute. Luckily in theatre, we only use a small percentage of those chemicals. If you work at a theatre or shop in the USA that employs ten or more people (that’s counting the whole theatre, not just the prop shop), then it is subject to OSHA regulations, and your employer is required to inform you of any toxic chemicals you may be using.

As a general rule of thumb, you should be wary of rules of thumb when it comes to safety. But a good rule of thumb to follow in safety is “don’t get stuff on you, and don’t breathe anything that isn’t air.” Choosing the right glove falls under the “don’t get stuff on you” part of the rule. Gloves are necessary because many chemicals can be absorbed through the skin. Chemicals commonly used in prop shops that can be absorbed through the skin include solvents and epoxies. Solvents don’t just include pure solvents like acetone, xylol and mineral spirits, but also any product that includes solvents: spray paints, cleaners, adhesives, etc.

Another good rule of thumb is that latex gloves don’t stop any chemicals. They can keep your hands dry, and they’re great for keeping blood and other bodily fluids from getting on your hands. They’re also useful for the reverse: keeping your own sweat and oils from getting onto your work surface. But as far as working with any sort of industrial or household chemicals, they may as well be invisible.

Notice how I mentioned household chemicals above. Just because you can buy something in a grocery or drug store doesn’t make it safe to work with without proper protection. For example, many cleaners like Windex, 409 and Simple Green use a chemical called 2-Butoxyethanol. The toxic exposure level of 2-Butoxyethanol is less than that of acetone and hexane, placing it in the category of “highly toxic” chemicals. When you start looking at permeation charts for popular glove brands, you see a trend; latex gives you no protection, while neoprene and vinyl will offer only several minutes before exposure begins. If you are using anything other than nitrile, you are exposing yourself to a highly toxic chemical.

If you are using a glove and the substance is splashing or spilling onto your bare arm, it defeats the purpose. Make sure you are wearing sleeves that offer similar chemical protection, or use longer gloves.

Many chemicals we use for prop making are toxic through skin absorption. An example is any of the two-part epoxies we use: sticks of epoxy putty, five-minute epoxy glue, epoxy coatings for fiberglass and carbon fiber, epoxy resin for casting. Epoxy is a sensitizer, which means our bodies do not react to it on the first exposure. Rather, it is on the second or subsequent exposures where we develop what is essentially an allergic reaction. It can even be after decades of using a product before one reacts to it. But reaction can be severe. Here is a chilling but not uncommon description of a reaction:

Open, oozing, and itching insanity hives virtually all over my body and my eyes literally were swollen shut for a week on two separate occasions. Recovery, each time, took better than a month.

Once developed, it is not reversible, and occupational physicians may advise you to not only never use epoxy again, but none of the “two-part” chemicals in that category. No more Smooth-On products, Great Stuff, A-B foam, etc. If you make your living as a props artisan, you pretty much have to do all your molding and casting out of plaster.

It is important to note that permeation data charts tell how long it takes for a chemical to permeate through a glove. This implies that no glove will offer permanent protection; they are called “disposable” for a reason. In fact, the most a glove gets tested is for 6 hours. If you use a pair of gloves all day, don’t set them aside for the next day. In fact, you should throw the gloves away. Trying to stretch the use of a pair of gloves to save money may seem thrifty, but it is actually counter-intuitive. The same is true of any safety measures and products you use. If you use or reuse them improperly, you get the worst of both worlds; you are spending money but not keeping yourself safe. If you feel you are spending to much money on safety equipment to make props, the best solution is to stop making props. You don’t go scuba diving without an air tank. We often get in situations where the easiest solution seems to be to continue on and finish a prop; it’s late and you’ve run out of gloves, and all the hardware stores are closed, and all you need to do is get one more coat of epoxy on so it can cure by the morning and they can use the prop in rehearsal. When you get to those situations, remember this: Your goal in life is not to finish that single prop. Your goal in life is to build props for the rest of your life. Taking shortcuts now will affect your health later on. No prop in the existence of humankind has ever been more important than your health.

A good shop foreman will be consistent in his or her purchasing of disposable gloves, so you don’t have to hunt down the permeation data every time he or she buys a new brand.

In conclusion, don’t get stuff on yourself. You should know what is present in any material or substance you are working with. If it includes chemicals that can be absorbed through your skin, you need to find out what glove will offer protection from that chemical, and how long it will offer that protection. Remember that gloves from different companies may differ in their permeation data, even if all the stats on the box seem the same.

Medusa Head

I was contacted to make the head of Medusa for a show. An actor would pull it out of a bag, but it did not have to stand up on its own. The face did not need to match any of the actresses in the cast, so that freed me up in my options. It needed to be inexpensive too, so I used as many store-bought items as I could.

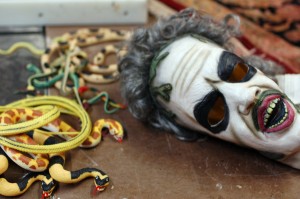
Supplies for the Medusa head

I bought a Beetlejuice mask and some rubber snakes from Halloween Adventure, a year-round costume store in the East Village. His hair turned out to be a wig which pulled right off.

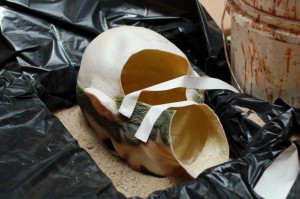
Filling the face with foam

I filled the inside of the mask with a layer of expanding foam insulation. In order to keep the foam from distorting the shape of the face as it expanded, I buried the face in a tray of sand. Expanding foam gives off harmful vapors when curing, so use in a well-ventilated area, preferably in a spray-booth or near some kind of system that can pull the air away from you. Expanding foam does not cure properly when you put it on too thick, so fill the mask one layer at a time. I ended up rotating the mask after each coat and putting only a single layer on each side. The mask remained hollow but the sides were strong enough to hold the shape.

Snakes
Snakes

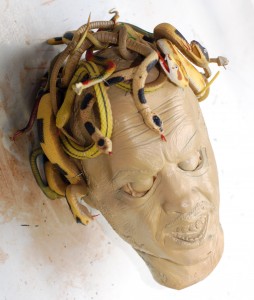
I used wire to hold the snakes on the head. I arranged it so it would be easy to grasp Medusa from the top. I had printed out some pictures of various depictions of Medusa in art through history, and that gave me a good reference on how to arrange the snakes so they would look the most “Medusa-like”.

Basecoated mask
Basecoated mask

I made eyes out of epoxy putty. Epoxy putty comes in tubes, and you simply break a piece off and mix it around in your hands until it is a uniform color. It has the consistency of a clay like Sculpey, and hardens over time (depending on which kind you get, that can be anywhere from five minutes to an hour). Epoxy can be absorbed through the skin and you can become sensitized to it over time, so where disposable gloves when working with it. I had set the eyes in place before filling the mask with the expanding foam, which held them in place when it dried. I sprayed a coat of paint over the entire mask (I actually did this before putting on the snakes).

Cutting the eyes out of paper

I found a picture of an iris and pupil and printed it out to the appropriate size. I cut two of them out and used five-minute epoxy to attach them; I coated the entire eyeball with the epoxy to make it glossy, and lay the paper iris on top of that. After the first coat dried, I covered the entire eyeball with another coat of epoxy. This made it appear like the iris and pupil were behind the cornea.

Don't look into her eyes

At this point, I also cut off some of the nose and upper lip and carved it down to look less like Michael Keaton and more like Medusa. Once happy with the new shape, I re-coated the foam with automotive filler (Bondo). This is also toxic and requires a well-ventilated area. The advantage is that it dries very quickly; if you have more time, you can use something far more innocuous, such as Foam Coat.

Face painting
Face painting

The next several steps involved painting the face with acrylics and spray paints.

Filling in the neckhole
Filling in the necknole

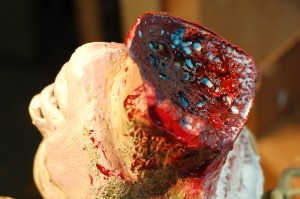
I filled in the bottom of the neck with a chunk of blue foam carved to fit. I spray painted it with red, and then blasted it with a hot air gun to create the above effect. Again, you need a well-ventilated area for this, preferably a spray booth.

Covering the head with blood

I thought the head needed some splattered blood. I mixed up some more five-minute epoxy, and then stirred in some paint. I had some red paint and some black paint. I did not mix it to a uniform color, but rather swirled it so the parts had differences in both translucency and tint. I filled the rest of the neck hole, smeared a lot around the bottom of the neck, and then splattered and flung some upwards so it would look like her head was sliced off in one swipe.

The head of Medusa
The head of Medusa

Now that you know how to make your own head of Medusa, get Kraken!

Gnome Building

For the upcoming production of “Broke-ology” at Lincoln Center, I was asked to build a three-foot garden gnome. They had a prop from the original production at the Williamstown Theatre Festival, but it was starting to break and crack in certain places. The gnome undergoes a lot of abuse during each performance, so they needed a new one with a better interior structure. So for the past two weeks, my wife and I have been gnome building.

Structure

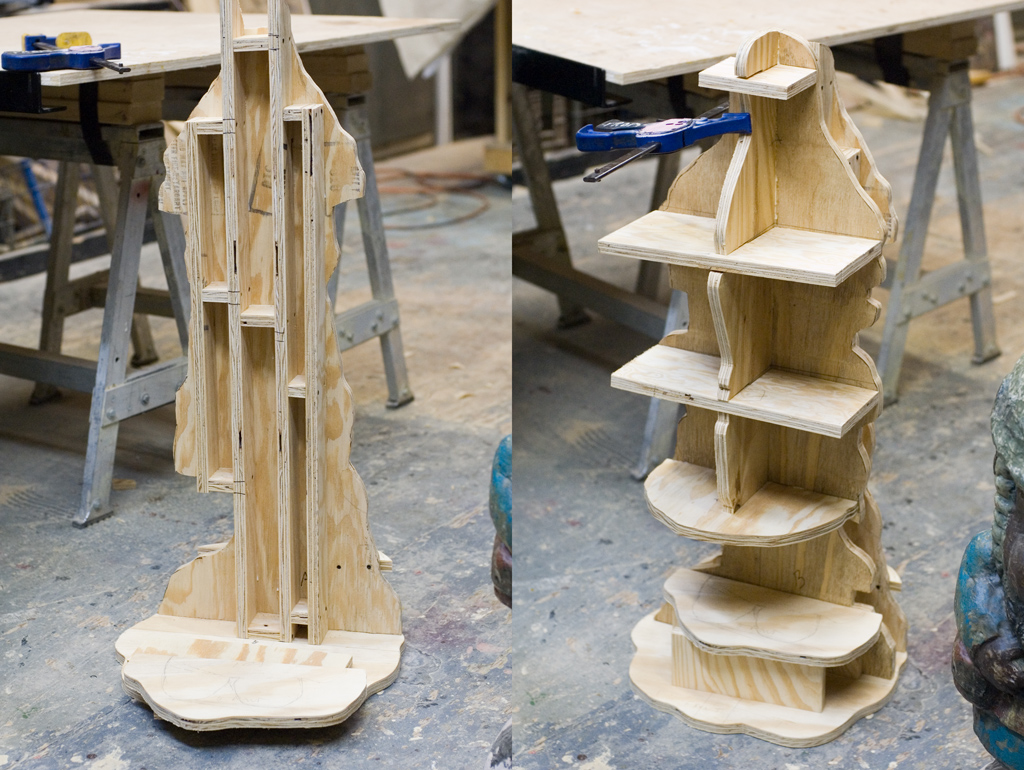
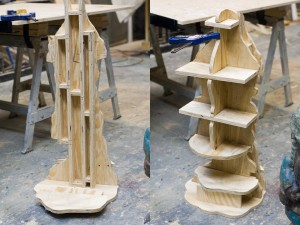
The interior plywood structure of the gnome

The original gnome was a solid chunk of foam, with weights added in the base. Since it gets fairly thin around the ankles, it was beginning to separate at that point. My major concern with the interior skeleton was making sure there were no weak points on the gnome.

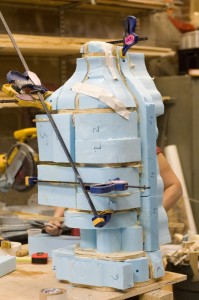
Additionally, while I had the original gnome with me, I took measurements and tracings directly off it to make several “slices” of the gnome’s shape to use as the structure. You can see what I mean in the photographs above. So the plywood would not only give me structure, it would also serve as a guide while adding and carving the foam.

Chunks of Styrofoam added to the skeleton

Carving

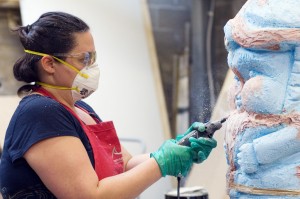
We couldn’t keep the gnome forever, so I took pictures of all four sides, plus the four in-between sides, as well as various views from above. It never hurts to have too many reference pictures. To remove large pieces of foam, we used either a knife or sometimes a reciprocating saw. If we needed a large amount of foam sculpted down quickly, we used a wire brush wheel hooked up to a cordless drill. We did the more precise and final carving and sculpting with a variety of rasps, knives, and sandpaper.  Sculpting and carving are very personal skills, so the best tools are often the ones you make yourself. Natalie made several tools just by gluing pieces of sandpaper to various shapes of wood.

Natalie uses a Dremel to carve details

You can see in the photograph above that we added auto-body filler (or Bondo) to fill in gaps, cover mistakes, or build up areas where we took too much off. You need a respirator when using it, but it hardens very quickly. You can use a rasp or knife on it after about ten minutes, and you can sand it after about an hour. We also used a Dremel tool for quickly carving out details.

Coating

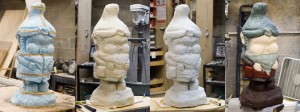
I pontificated in an earlier post about various ways of coating foam. First, we wrapped the gnome in muslin strips which were soaked in glue. The process is very similar to papier-mache. We tore the muslin strips to give them a ragged edge which could be smoothed down over the previous pieces. After this dried, we covered the whole thing in Rosco Foamcoat, which we laid on like stucco to give it a bit of worn and weathered texture. After a light sanding, we painted on the various base coats.

Step-by-step process of coating the foam sculpture

The final step was coating it with epoxy resin. This gave it a very hard, smooth, and water-proof shell. It’s also fairly pricey, very toxic, and requires a lot of set-up. The exterior of the gnome was fairly solid with just the muslin and Foamcoat coverings, so for lower-budget shows and shorter runs, you may want to forego the epoxy resin. It’s a somewhat complex process, so I’ll address it in more detail in a future post.

Final Painting

After the epoxy had cured over night, we added the final paint layer. We used acrylic paint. We also dusted it with some black spray paint to weather and age it, as well as some dulling spray to get rid of the shininess from the epoxy.

Gnome for "Broke-ology"