Tag Archives: fabricate

A Wild Bar for a Wild Party

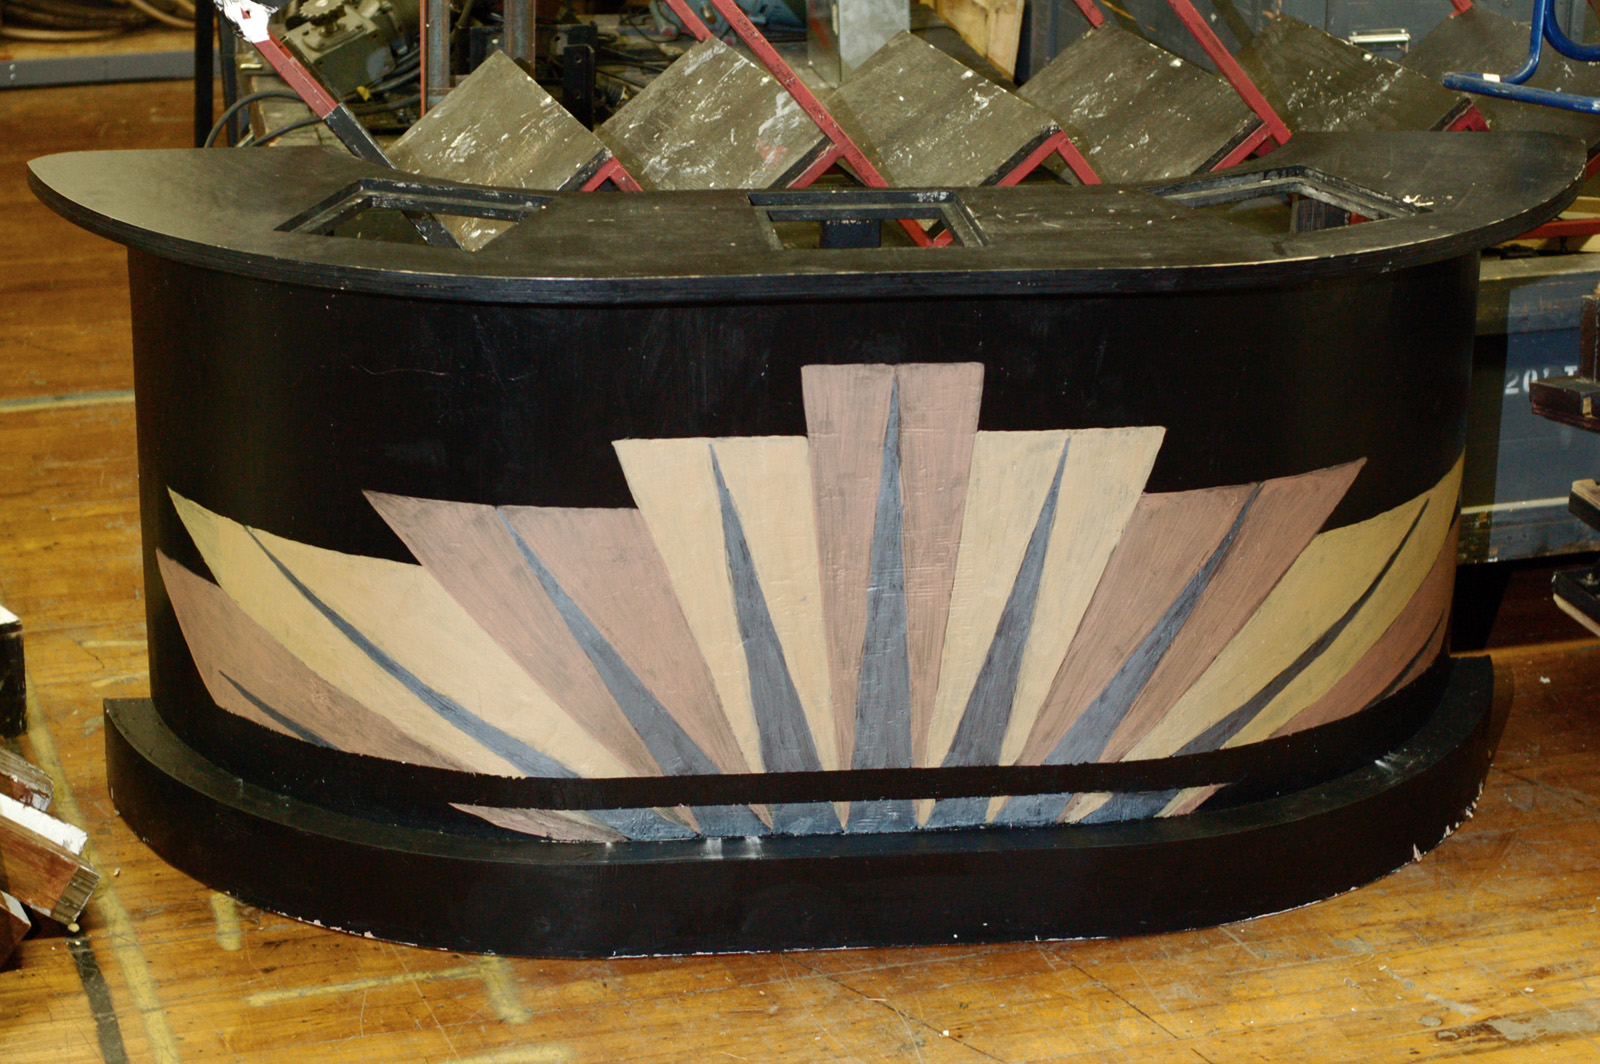
It is a little over a week since Elon University’s Wild Party closed, so I thought I would share some of the props I built while working as the props master on it. First is the sleek Art Deco bar. This production featured a lot of dancing and movement (in fact, the show was more of a dance piece with singing than a traditional musical) and the bar was key in a lot of the dancing. Actors jumped up and down off of it constantly and danced on top of it. Needless to say, it had to be sturdy.
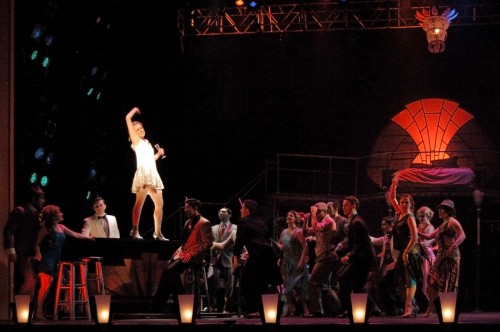
Wild Party
Wild Party

The other hurdle was that I only had a bout a day to build the bar to a point that they could use it in rehearsal; it did not have to be finished, just usable. The bar had a sort of boomerang or banana shape to it. I knew it would take awhile to layout the shape, not to mention all the pieces I would need to cut that followed the shape but were inset or offset by varying amounts. Since the scenic designer, Natalie Taylor Hart, already had the footprint of the bar drafted in CAD, we decided to CNC these pieces and save some time.
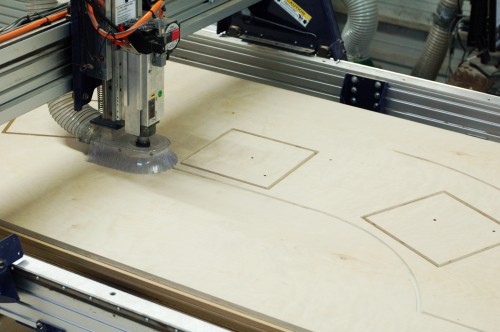
CNC the top
CNC the top

The top was two layers of plywood. We were putting lights in the bar that would shine upward, so the top also had squares to hold three pieces of 3/4″ plexiglass; the squares on the top piece were large enough to fit the plexiglass, while the squares on the bottom piece were a touch smaller to create a lip for the plexiglass to sit on.
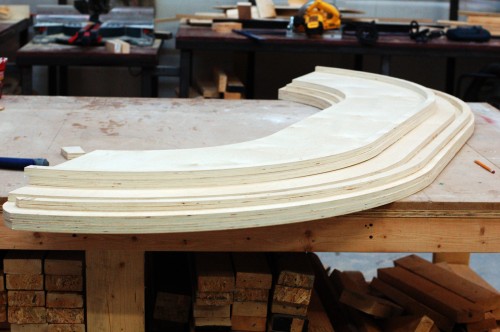
Pile of CNC pieces
Pile of CNC pieces

I also cut the footrest, a piece for a shelf in the middle, and some formers to nail the wiggle wood to. This pile of pieces would have taken awhile to draw and cut by hand, but with CAD, Natalie just had to copy the same shape over and over again, insetting the front curve by whatever measurement I gave. With this pile of pieces, I just had to cut a bunch of formers and uprights to connect them all together.
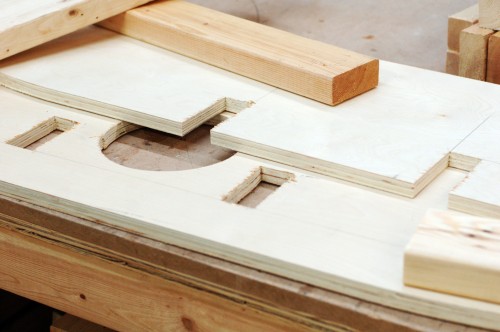
Notches and holes
Notches and holes

I decided I wanted some supports to run unbroken from the top to the bottom of the bar for strength, which meant I had to cut some notches and holes in the plywood that they could run through. If I had more time to figure the whole thing out ahead of time, I would have drawn these into the CAD. Since the pieces were already cut, I needed to measure and cut them by hand. See, even with fancy fabrication machines, you still need a solid grasp of traditional tools to build things.
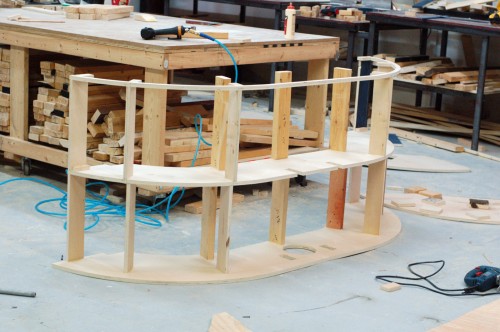
 

Two levels complete
Two levels complete

I built the bar up one level at a time, marking carefully to keep the whole thing square and straight. I positioned the supports so they were nearly above the support below them; they were offset just a bit so I would be able to drive a nail in.
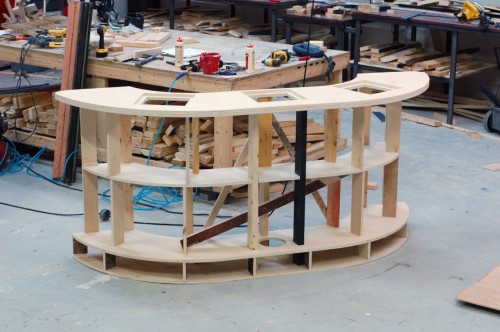
Bar skeleton
Bar skeleton

The supports along the front of the bar did double duty as formers, providing a nailing surface for the wiggle wood I would add later. I tried to keep the back as open as possible so it could be used as shelving to store all the props; the set was fairly open and skeletal, so the bar served as a place for a lot of the hand props to appear and disappear. The diagonal braces in the photograph above are just to keep the bar sturdy as they use it in rehearsal. Once the wiggle wood was added, I removed them, because the wiggle wood acted as one large piece of diagonal bracing.
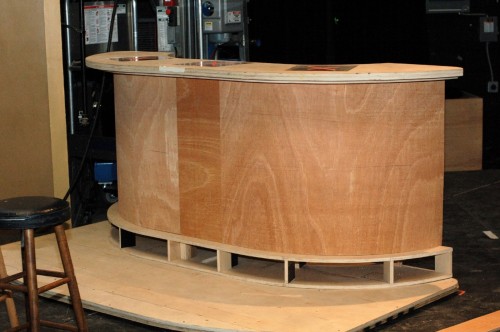
Wiggle Wood
Wiggle Wood

I finished the bar onstage in between rehearsals. The curve was longer than eight feet, so I could not cover it with just one piece of wiggle wood. The center is relatively flat, so I placed a small piece directly in the center; I have found it easier to fill and sand seams between wiggle wood when they are on flat areas. The footrest also got a small strip of wiggle wood after the bar was secured to the wagon underneath it. All the faces got a thin coat of joint compound and a light sanding, and then it was on to painting.
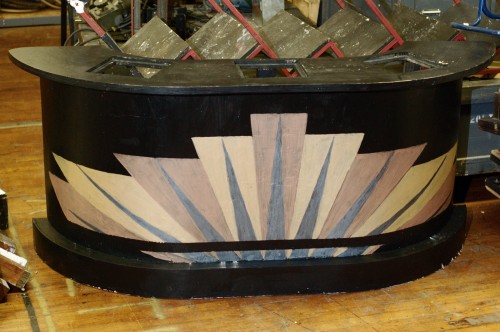
Wild Party Bar
Wild Party Bar

You can see the bar is a bit rough around the edges in the photograph above since I did not have time to take a picture until after strike. The Art Deco design painted on the front was a great touch added by Natalie and her crew. As she also pointed out, despite all the climbing and dancing done on this bar, she never saw it sag or wobble.

Better Proud than Shy

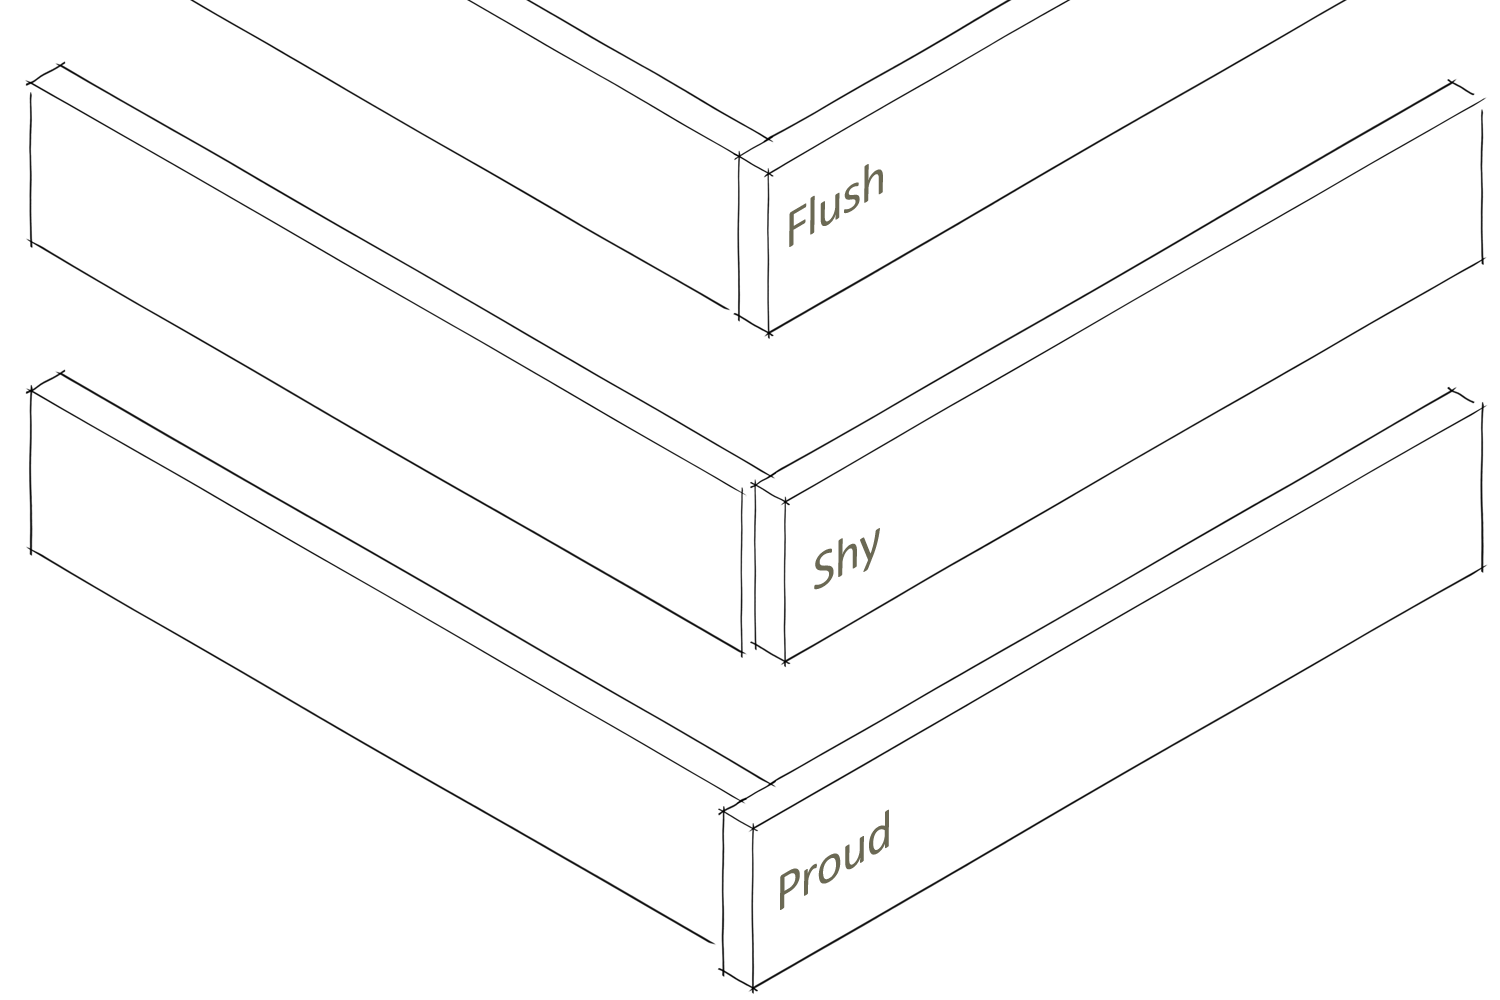
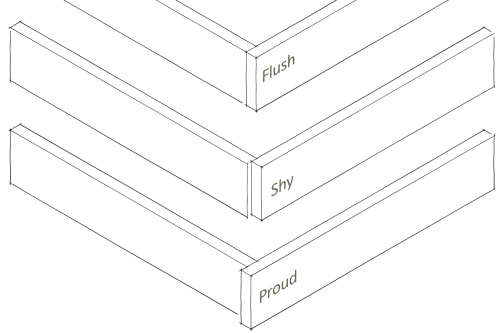
When you have to line up two pieces of material to create a corner, your pieces may be either flush, shy or proud. The illustration below shows what I mean:

Flush, Shy and Proud

A piece is flush when it lines up with the outside face of the other piece. A piece is shy when it is inset from the outside face, and proud when it sticks out a bit.

While your goal is to be flush, it is often better to be a little proud. A proud piece can be trimmed or sanded so it is flush. If you try to line your pieces up exactly flush, you may end up shy. When you’re shy, it is harder to make it flush after the glue has dried; you either have to use filler (which is often too fragile to hold a good corner) or sand the long piece of material on its entire face.

So, in fabrication at least, it is better to be proud than shy.

La Boheme Crepe Cart

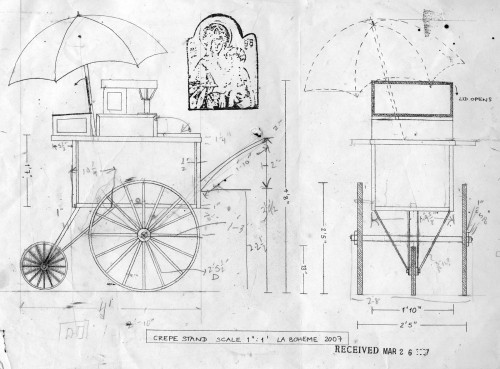
Today I thought I would go retro and show you a cart I built back in 2007. La Boheme at the Santa Fe Opera required a whole bunch of push carts during the outdoor scenes, so the other prop carpenter and I set to work constructing them.

Drafting for "La Boheme" crepe cart

The first one I built was a crepe cart. The structure was simple enough, but the wheels were all custom-sized, so the first thing I had to do was fabricate the wheels and the axle system.

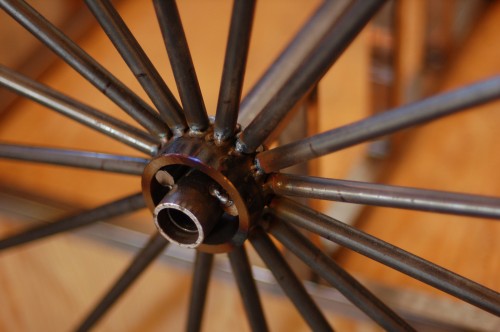
Closeup of wheel
Closeup of wheel

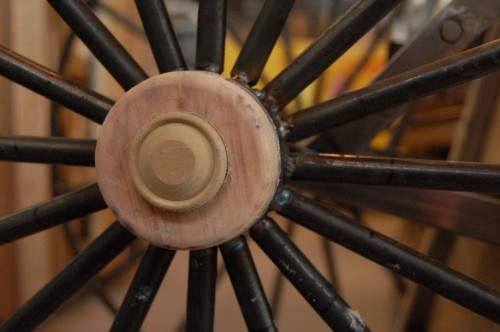
I built the wheels out of metal because the diameter of the spokes and the rim in the drawing was small enough that I was afraid wood might not be strong enough. I TIG welded the rods to the hub to keep the welds as visually-unobtrusive as possible. The rim of the wheel was a length of bar stock bent into a circle and welded together. It also had a strip of rubber glued along the outside to cut down on noise and keep it from tearing up the stage floor.

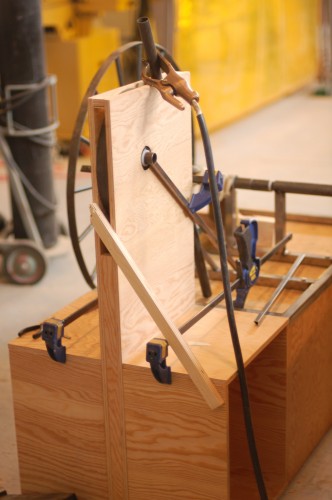
Jig for positioning front wheel

The front wheel stuck way out to the front of the cart. I first assembled a jig to hold it in position. I then cut the four bars that held it in place and welded them to the axle while the wheel was in position. This ensured that the wheel was centered, at the correct height, and completely parallel with the direction the cart traveled. I thought I was very clever until it came time to remove the jig and I realized I had built the cart around it; I had to cut the jig apart to get it off.

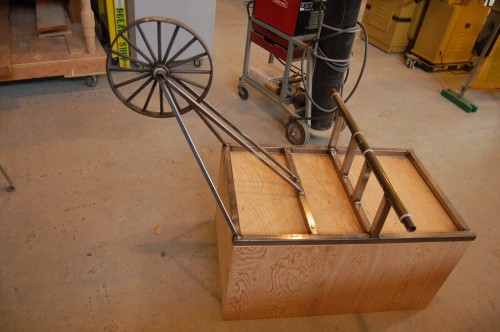
Bottom of the cart
Bottom of the cart

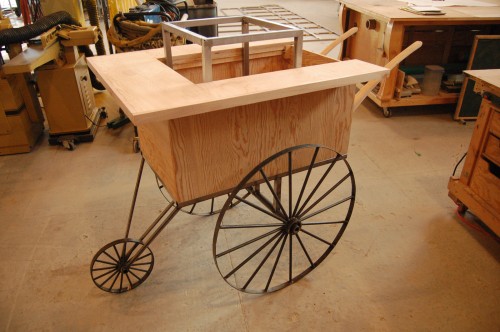
Above is a picture showing the bottom of the cart with the front wheel in place and the axles for the back wheels. If you look close, you can see the back axle is actually separated in the middle; when the cart is turned, the wheel on the inside of the turn spins more slowly than the one on the outside, so they need to be able to spin independently of each other.

Adding the decorative hub

I added a circle of wood and a decorative rosette we had in stock to cap off the hub.

Top of the cart
Top of the cart

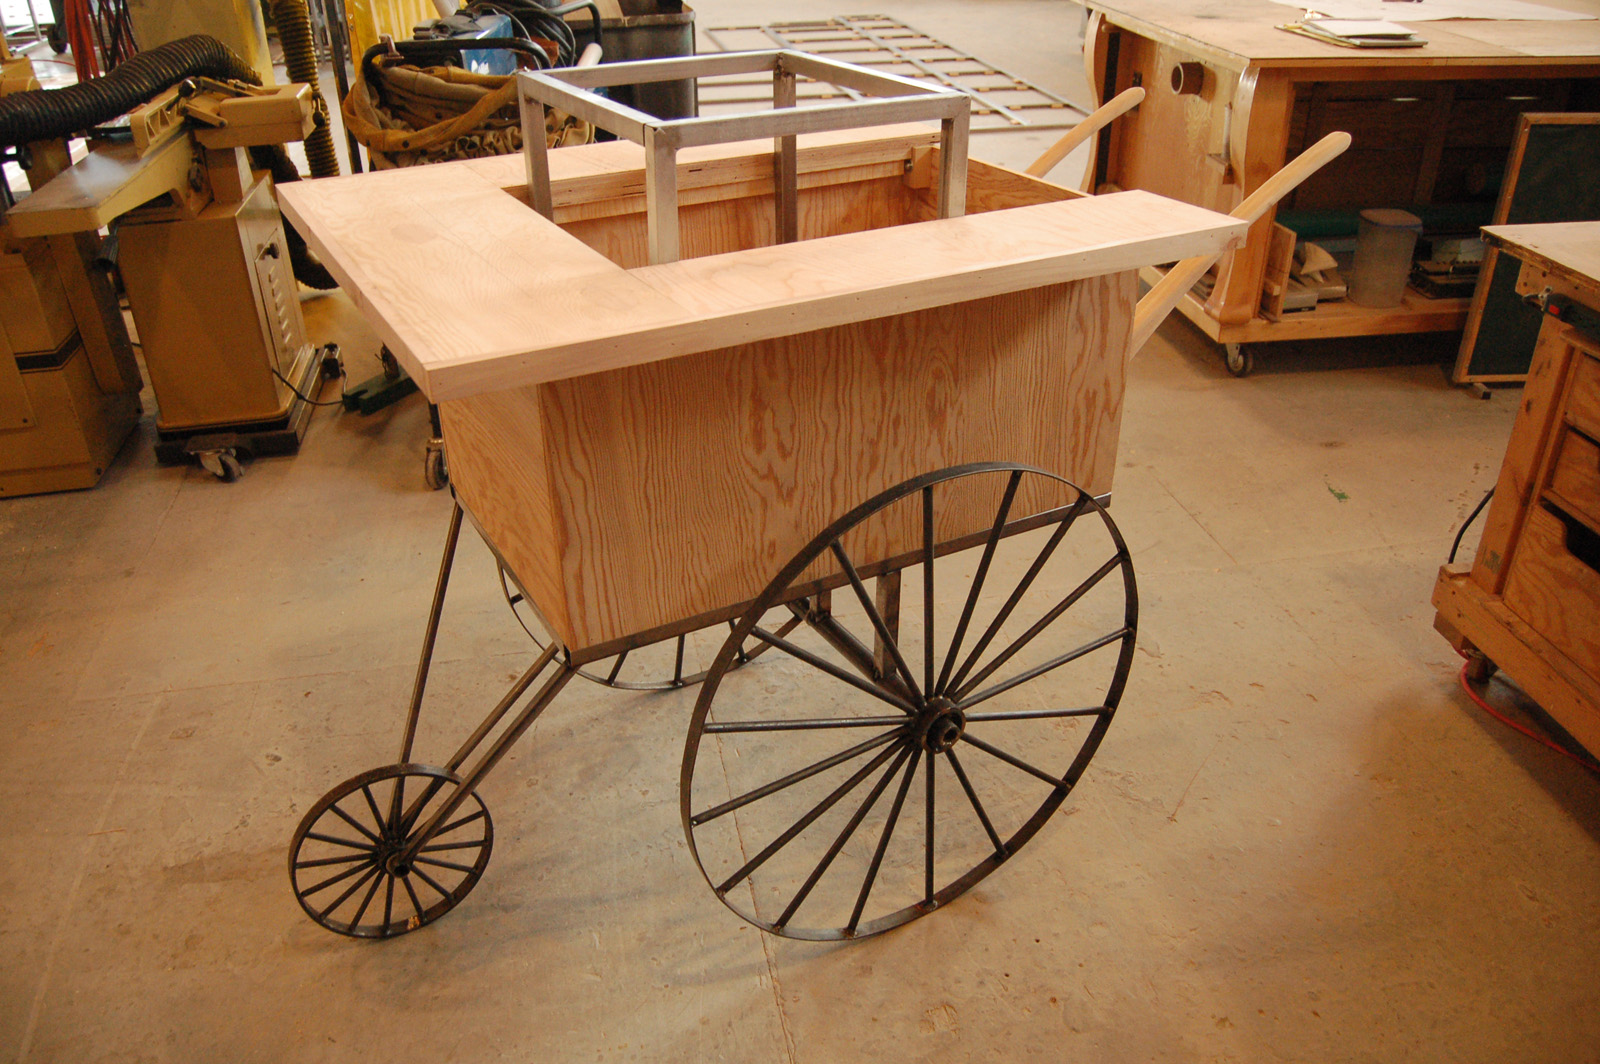
The top of the cart was pretty straightforward; it consisted of a plywood box, a thick “counter”, two handles I shaped out of solid alder, and a metal box to serve as the oven. There was also a braking system to lock the wheels in place to keep the cart from rolling into the audience when the artist walked away, but that is a post for another day (In opera, the singers are called “artists”, rather than “actors” or “singers”).

Finished cart prior to painting

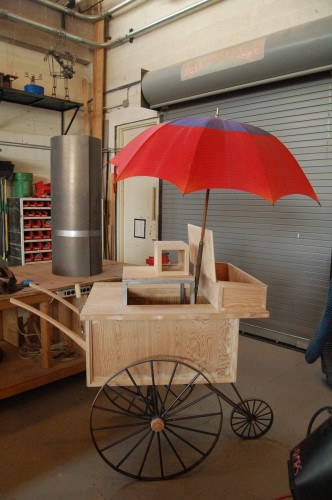
A number of accouterments completed the look. A box with a hinged lid was placed on front for artists to take crepes from. I welded a tube in position to hold an umbrella at a jaunty angle; the umbrella needed to be removable to facillitate storage backstage. Finally, I placed some molding around the edges to match what was in the drawing.

Crepe cart from "La Boheme"

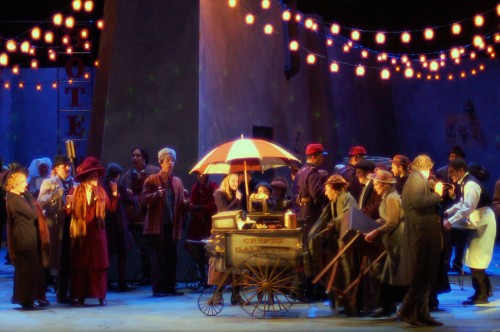
Here is the final cart after the paint shop finished with it and the props master dressed it. Bon appétit!

The Intelligent Homosexual’s Guide to Links about Props

Last night finally brought us to the opening of Tony Kushner’s new play, The Intelligent Homosexual’s Guide to Capitalism and Socialism With a Key to the Scriptures, which we’ve been in previews for since March (and rehearsals since February!). I was the assistant props master on the show. There’s been quite a stir with Mr. Kushner this past week as well; first, he was set to receive an honorary degree from John Jay College, but then the board of trustees of CUNY voted to deny it; Mr. Kushner wrote an eloquent and biting response asking for their apology; finally, Ben Brantley of the New York Times wrote an editorial on the matter and opened it up to reader’s comments.  Last night’s opening even saw some protesters show up in support of Tony Kushner.

Kushner supporters outside the Public Theater, photograph by Jay Duckworth

It’s a fascinating (and important) story if you are involved with theatre. But if you read this blog just for the props, don’t worry, I have some links for you to finish off the week:

  • Here is an absolutely fantastic inside look at the Office of Exhibits Central for the Smithsonian Institute, which fabricates the displays and exhibits for their various museums. Besides more traditional materials and methods like mold-making and fiberglass, they have also made a huge push into new technologies like 3D scanners and printers, CNC routers, fabric printers and more.
  • No Tech Magazine has posted the table of contents from an 1837 book titled The Panorama of Professions and Trades. It proposes to show all 87 types of jobs in existence (I think there were far more than that, even at that time, but I digress). What is interesting is how many of these trades remain essential skills for the well-rounded props artisan.
  • Jean Burch has posted a list of project management skills over on her Technical Direction Tidbits blog. I fell a Props Director is similar to a Project Manager in many respects, and this list shares many of the skills which a props director also needs.
  • Do you like pencils? Here’s a whole page dedicated to pencils. You can peruse hundreds of photographs of different pencils while learning their history, as well as view some classic pencil advertisements.