Tag Archives: crafts

Review: Costumes and Chemistry by Silvia Moss

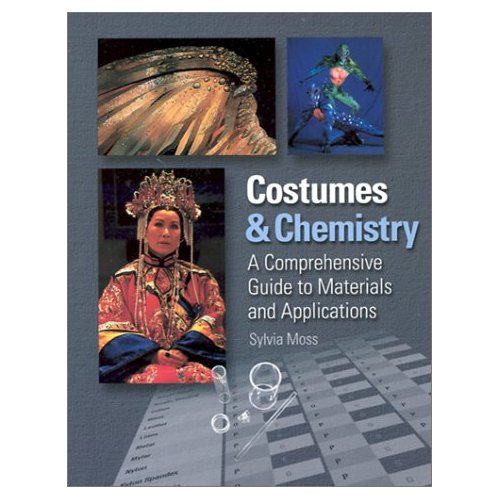
I only recently came across this book for the first time. I’ve never noticed it before because of the title; if I had seen it before, I would have assumed it dealt only with costumes, not props, and I would have moved right along. Make no mistake though, this book is vital to the props maker. It actually contains almost nothing about making clothes or fitting actors or even that much about fabrics and sewing. Instead, Costumes & Chemistry: A Comprehensive Guide to Materials and Applications, by Silvia Moss, covers all sorts of paints, adhesives, and plastics (in both sheet and casting form) which the prop shop uses. Though the examples shown are mostly costume props and accessories and giant character heads and suits, you can very easily apply it to many of the props you need to build.

Costumes & Chemistry reveals a lot of research and development. It turns costume crafts and props into more of a science where the materials are thoroughly tested and described, rather than a hodge-podge of traditions and assumptions swirling around in each person’s head. Moss talked with chemists, technicians, salespeople and manufacturers of many of the materials you use from basically every company you’ve ever heard of who makes these materials. Armed with a number of grants from UCLA and interviews with so many people working in the field, she has created a reference book that should be on the shelf of anyone working in props and costume crafts, as well as those interested in cosplay and convention costumes, replica prop making, LARP, and even model making.
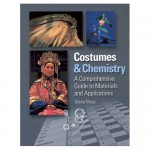
Costumes and Chemistry by Silvia Moss

Part 1 of the book is brief, providing much of the same safety information found in Monona Rossol’s book. The bulk of the book is divided between parts 2 and 3, or materials and applications.

The section on materials divides them into categories such as paints, adhesives, plastic sheets, and thermoform plastics. For each type of material in these categories, Moss gives the brand names of the various products that she tested, examples of why and how they are used, a description of the physical properties, how to clean them up (where applicable), precautions and health and safety information, where to buy them, and what sizes and forms they come in. This isn’t where you will find information about making props from paper plates and pipe cleaners; this covers all the modern materials you’ve used or read about such as Sintra, latex foam, leather dye, Kydex, etc.

In the section on applications, Moss breaks down how many example costumes were made. These include costume accessories, headpieces and jewelry from Las Vegas revues, Broadway musicals, advertising characters in commercials, various mascots, and other venues. This section provides some illustrations giving general techniques, but for the most part, it discusses the applications of various materials through very specific examples from a wide variety of craftspeople. Some of the pieces chosen for the book are quite recognizable, and it can be interesting and surprising once you find out what materials and techniques were used to create their look.

Costumes & Chemistry was published in 2004, so it should remain up to date for awhile. I could see an update in a few years to include new formulations of current materials and new brands (as well as the deletion of defunct brands; Phlex-Glu, for example, is listed in the book but no longer produced). For the most part though, most of these materials have been in use for several decades now, and barring some dramatic new invention, should remain in use for several decades more.

How to Gold Leaf

Gold leafing is one of the easiest and most common ways to give a prop a gilt look, or even to make it appear like a solid piece of gold. Real gold leaf is actual gold hammered into a sheet as thin as a piece of tissue. For theatrical purposes, we nearly always use metal leaf which replicates the look of gold. There exist more complicated and elegant ways to gild an object, but the quick and easy way I’m going to show you involves applying the leaf directly to an object which has been coated in gold size.

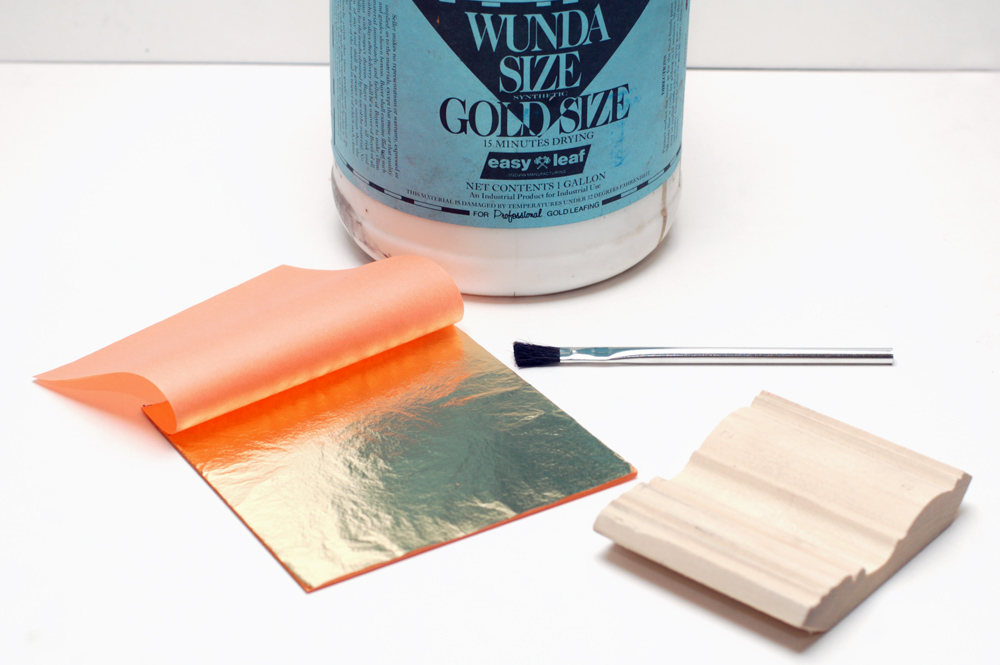
The materials you will need are the gold leaf, gold size, a brush for applying the size, another brush that will remain dry, and your object. The most common sizing I’ve seen in theatres is Wunda Size, which is one of the few water-based sizes, meaning easier clean-up and less fumes when wet. (You can read an interesting treatise on gold size if you’re interested in learning more.)

Supplies for gold leafing

You need to prepare the surface you are leafing. The leaf does not hide or fill imperfections; If you wait until after you’ve put the leaf on to sand the surface, you will simply sand the gold leaf off.

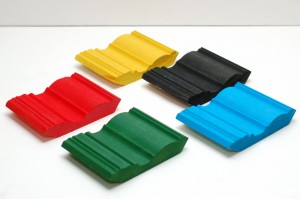
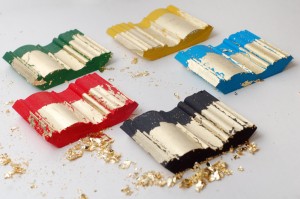
The color underneath the gold leaf is called the “bole” color. Traditionally, terra-cotta clay or red paint is painted underneath to give a warm feel to the gold. A yellow or golden bole gives an even, neutral look, and helps cover up any cracks or uncovered spots. These are the two most common boles you will find for theatrical purposes. A black bole gives a very cold look, and is good for imitating Art Deco pieces. Other boles you can experiment with are various greens or even blues.

Pieces with different boles painted on

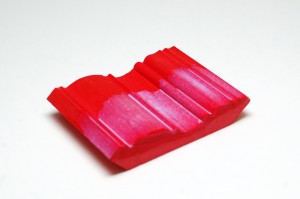
Once your bole is applied and dried, you brush on your sizing. You want to make sure you work it into every crack and crevice. You must wait for it to dry completely before you begin with the gold leaf. This can take anywhere from ten to twenty minutes depending on how much you put on, as well as the temperature and humidity. Technically it’s not “drying”, it’s becoming tacky. Size can remain tacky for hours, even days, before it dries, which is one of the properties that makes it desirable for gold leafing.

Applying the sizing
Applying the sizing

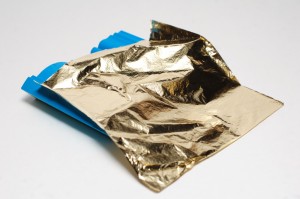
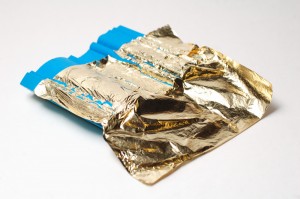
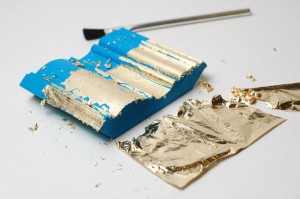
Now that the sizing is no longer wet, you can carefully take a sheet of gold leaf. Start smoothing it onto the surface with your fingers, and finish up with a clean and dry paintbrush to work it completely onto the surface. As you get overlapping and overhanging pieces, you can remove them by brushing really hard with the brush. At this point, it’s almost as if you’re burnishing the gold with your paintbrush; you want to rub it until there are no more gold flakes sloughing off of the piece.

Laying the leaf on
Laying the leaf on...
Working it in
... working it in...
Brushing it smooth
... and brushing it smooth.

I realize it may look like I misplaced the leaf, but I left the end bare to illustrate the differences in the boles as seen in the following photograph.

Examples of gold leafing on top of various boles

It is difficult  in a static photograph to make out the differences which the various boles give you. What makes gold leaf interesting is how the various surfaces catch and reflect light, and how that changes as either the object or the observer moves. The bole color you decide to use is dependent on the colors and tones of the set and costume, as well as the type of stage lighting used. Don’t lose too much sleep over it; the majority of items gold-leafed for theatre are either red or yellow depending on how much warmth or age you want to give the object.

You will notice gaps and cracks in your gold leaf where pieces failed to stick. You can take smaller flakes and apply them to these spots, again using your bristle brush to rub the leaf onto the surface. If you find particularly stubborn areas where the gold leaf won’t stick, it means you need more size. Go back and touch up the uncovered areas with a second coat. Once it has dried again in ten to twenty minutes, you may return for round two of applying the gold leaf.

Monday Click-a-Link

Bloody Bloody Andrew Jackson closed last night, Merchant of Venice froze last Thursday, and Winter’s Tale freezes tonight. For the first time since January, I’m not working on more than one show at once. Whew, that was a long year. I’ll be making more in-depth articles for this blog now that I have my nights and weekends free again. Until then, here are some great links to keep you busy:

  • Go Make Something – 160 how-to articles about paper crafts and altered art
  • Ask a Crafter – Pretty self-explanatory. Lots of questions and answers about adhesives, fabrics, sealants and any other materials related to crafting.
  • Thistledown Puppets – A lot of studio and process shots of this foam puppet-maker’s projects.
  • Gourmet Paper Mache – Dan the Monster Man has lots of videos and photographs of the papier-mâché creatures he creates.
  • Dark Side Creations – Lots of tutorials, tips and tricks of this DIY prop and monster-maker

Props a’Twitter

For those of you who are hip with this whole internet thing, I am on Twitter. You can follow me if you want. It’s not as focused on props as this blog, but I’ll occasionally throw up a link to something of interest to the props community. These are some sites I’ve tweetered about in the past:

  • Vintage Printables – A fascinating (and organized) collection of public domain artwork and graphics suitable for printing (and making paper props).
  • Craft Rooms and Organizing – An ongoing series showcasing the spaces of crafters. It’s a great inspiration for setting up work and storage spaces in tight quarters.
  • Photos of my Models – A photo gallery of Michael Paul Smith’s incredibly detailed models of a mid-century American town.
  • 75 years of Band-Aid – A brief history of Band-Aid with a great gallery of their bandage packages throughout the years.
  • Louvre database – A (still incomplete) database of all the artworks in the Louvre museum.

So if you can’t stand missing out on future links like this, as well as my unparalleled humor, go ahead and check out my Twitter.

Friday’s Link-tacular

It seems like everyone is working on at least one, if not more, shows at the moment. I should have some cooler stuff to write about in a few weeks. Until then, enjoy another list of links!