Tag Archives: coating

Homemade Coatings

I found a couple of recipes for a coating in some old props forums (circa 2002). They refer to the coating as “homemade Sculpt-or-Coat”, though it is very similar to recipes for scenic dope and monster mud. I have not tried any of these recipes, but I am posting them here for my own future reference and for yours.

This coating is useful for coating foam, to “paper mache” burlap, cheesecloth or muslin to wood and steel, or for use as a general texture. For texturing, you can mix in sawdust, sand, vermiculite, etc., for various results.

For a 5 gallon recipe:

  • Fill 2/3 of a 5 gallon bucket with a 50/50 mix of acrylic caulk and joint compound.
  • Add 1/2 to 3/4 gallon white latex paint.
  • Add 1/2 gal. Rhoplex.
  • Mix well with a drill and paddle mixer.
  • Add about 1/3 gal. of white glue. Mix thoroughly.

You can tint it using latex or acrylic paint, or universal colorant. You can thin it with more white paint or Rhoplex. You have about 20-30 minutes of working time, and it dries fully in 12-24 hours. It should not go on thicker than 1/4″ or it will be prone to cracking. You can alter the recipe to suit your needs; adding more joint compound gives a harder and more rigid finish, while more acrylic caulk gives a more flexible finish.

Rhoplex is an acrylic binder made by Dow Chemical Company. It can be tricky to find, particularly in bulk. There are many other acrylic binders you can find at hardware and paint stores, though I am not sure whether these will also work. Other posters in the thread say they use PVA in lieu of Rhoplex (the PVA paint binder, not PVA glue or PVA mold release).

In another thread, Wulf points out that Rhoplex is pricey and hard to find, and that it may be easier and cheaper just to buy Sculpt-or-Coat for small batches. His own recipe involves PVA white glue, powdered clay and latex paint. Simply combine equal parts, stir very thoroughly and allow it to stand for about a day for the clay to absorb.

A Capital Idea

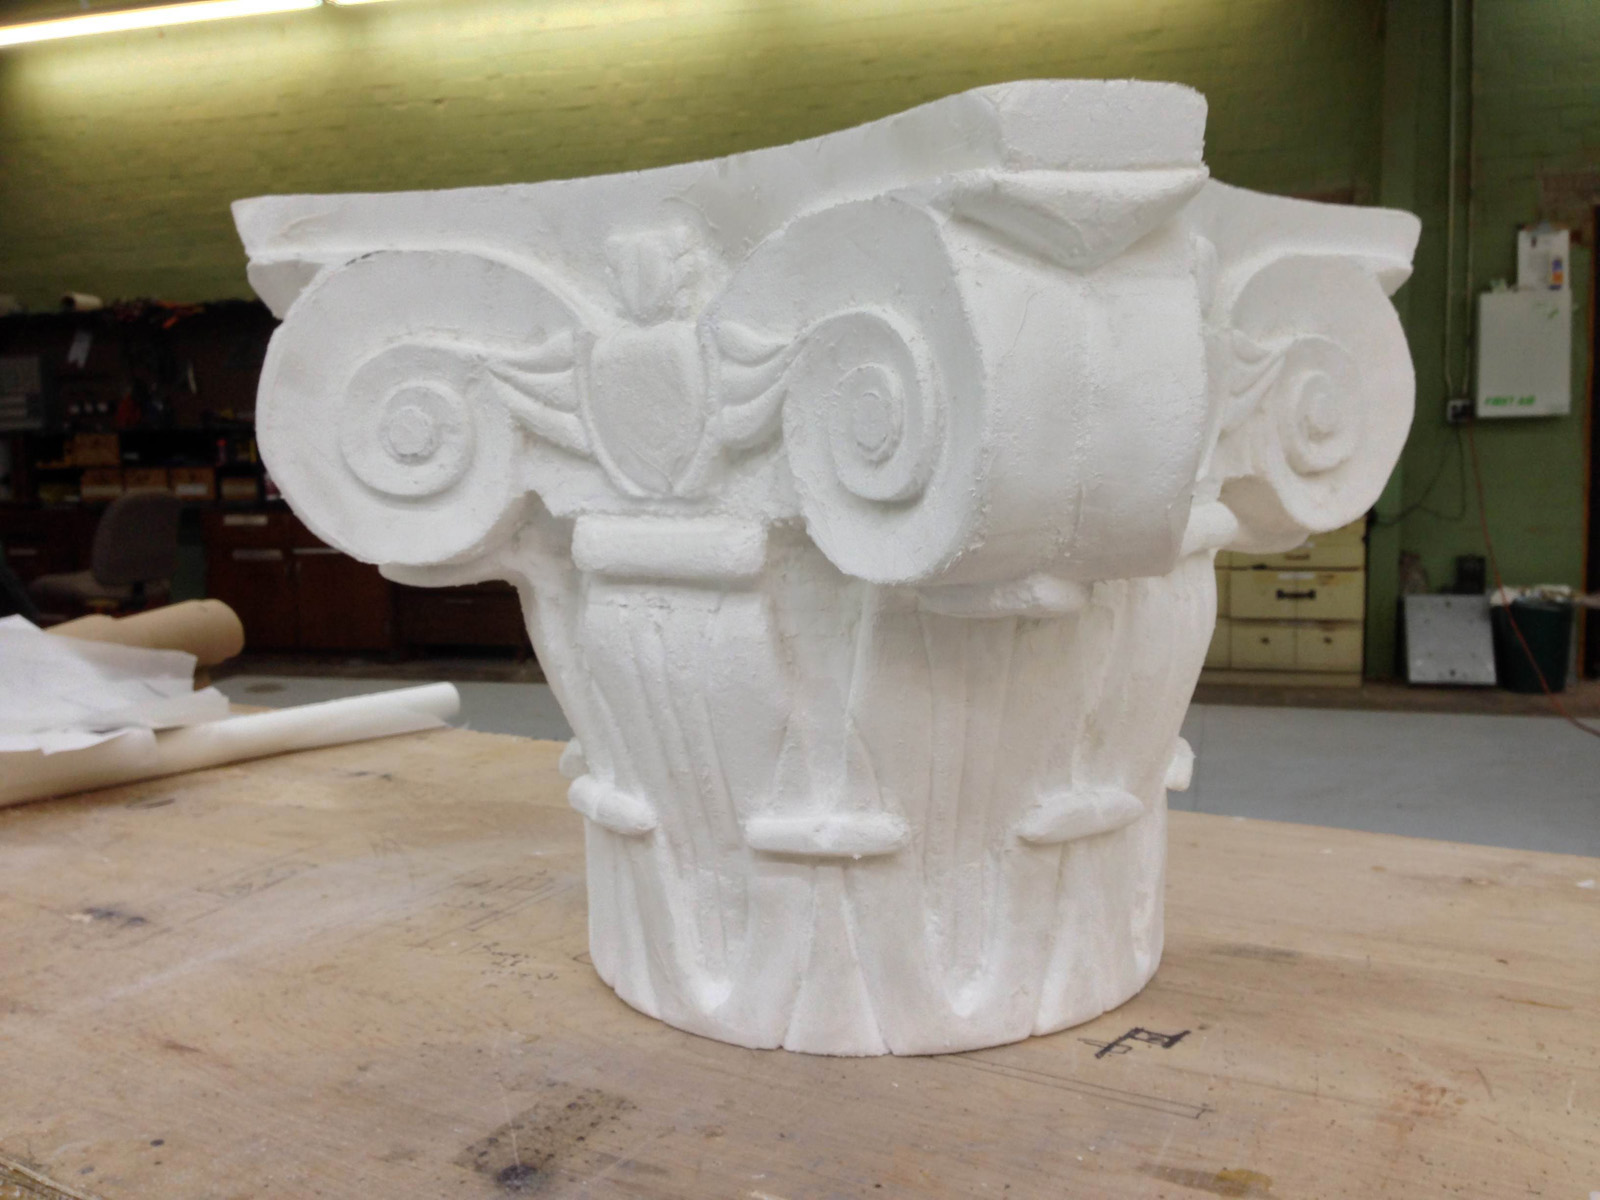
Last week I got a call from Triad Stage, a theatre over in Greensboro, NC, to do some carving for the scene shop. I had done some foam carving in the props shop last autumn, and when another project came up, they thought of me.

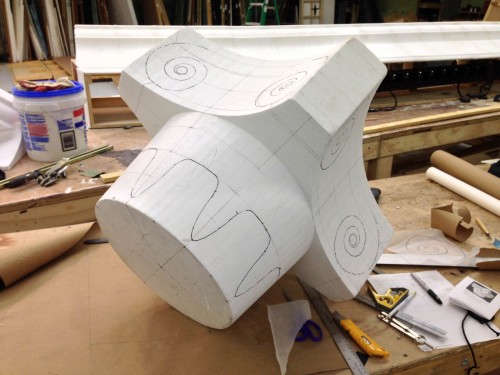
Layout on the blank
Layout on the blank

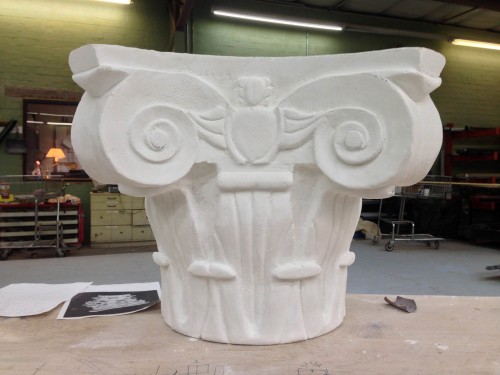
They already had a blank cut to size when I arrived at the shop. This blank was cut by the foam manufacturer, and was made of two pieces glued together (it looked like they used a 2-part polyurethane foam, or even just Gorilla Glue as the adhesive). This helped immensely in getting me started, since the piece was already symmetrical and scaled to the size they wanted. I started by dividing the piece into equal pie shapes and transferring the design from the research onto the foam.

Beginning the carving

The foam they gave me was a 3 lb EPS foam, which was a lot denser than anything I had ever used before. Basically, EPS foam comes in a variety of densities, with 1 lb, 2 lb and 3 lb being the most common. The numbers come from the weight of one cubic foot of foam. So 3lb foam has three times as much polystyrene packed into the same area as 1 lb foam. Of course, EPS is the beaded foam, so it is still trickier to get a smooth surface than it is with either blue or pink foam, but those are not readily available in large blocks like this.

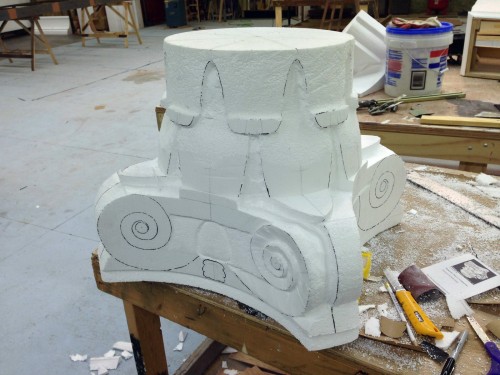
Adding details
Adding details

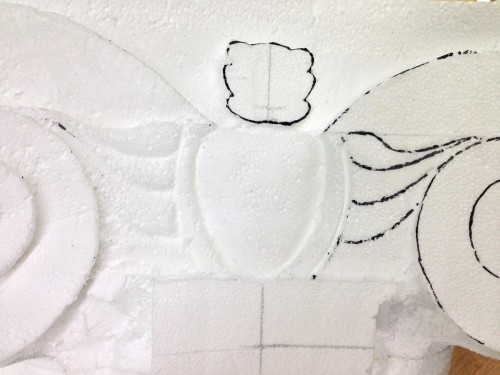
The designs on this style of classical capital are very symmetrical and repetitive, so I really only had to draw out one half of one side, and then just trace and transfer it to the other seven halves. I carved the whole thing mainly with my snap-blade knife, surform, sandpaper, and a big ol’ half-round bastard rasp. I broke out a router a couple of times to clear out some of the deep pockets; the router also helped me cut to a consistent depth around the whole piece.

Coated
Coated

Since the capital was being placed on a column high above the set and was not going to move or be handled during the show, I opted for a simple coating of joint compound to keep the cost and time down. I basically applied just enough to give it a smooth coating and a nicer surface for paint.

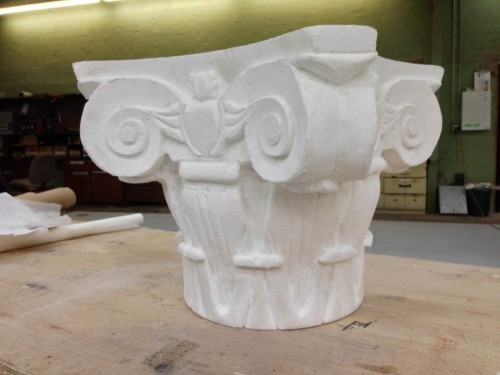
Finished capital
Finished capital

The design on this capital was greatly simplified to allow it to be carved in about half a week. Because it was going to be painted black and be placed high above the set in the shadows, it just needed to hit the high points of the shape so the audience would go “oh, there’s a fancy thing up there.” Or at least, that’s what the audience in my head says after the show.


Milky the Cow

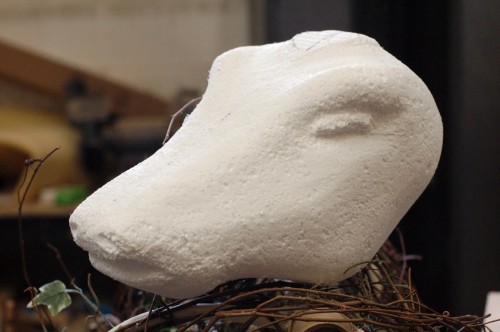
I recently finished some work on a production of Into the Woods at Elon University. The students hired me to build the animals (some may call them puppets). Milky the Cow is one of the main animals, appearing in many of the scenes. I began by sculpting a cow head in white foam.

Sculpted foam head
Sculpted foam head

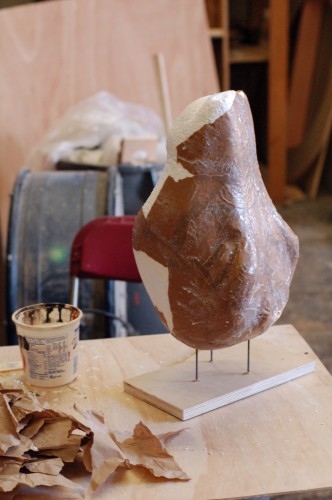
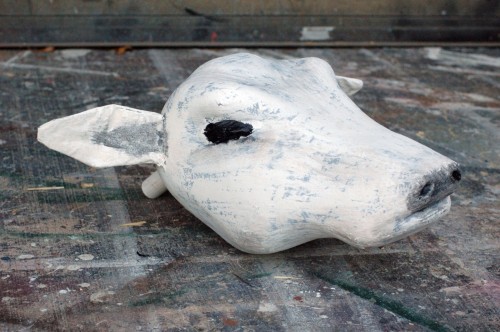
I gave the head a coating of papier-mâché. The design of the show used a lot of found object and natural material arranged to suggest a forest, rather than attempting a realistic portrayal of one. So the construction of the head proceeded in a manner to highlight the fact that it was a handmade object, rather than attempting to completely mimic an actual cow’s head.

Applying papier-mache

The body was a separate piece; it was just the torso, tail and udder, without any legs. They were basing their design off of the Regent’s Park production (which transferred to the Public Theater this past summer, though I left just before it came).

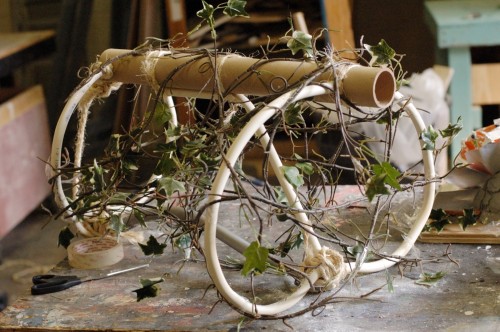
I started with a structure made of a cardboard tube “spine” and some bent PVC pipe to define the shape. I than began wrapping vines around to create the outer surface. Everything was wired in place, but I also added some twine to make it appear as though it was lashed together.

Body structure
Body structure

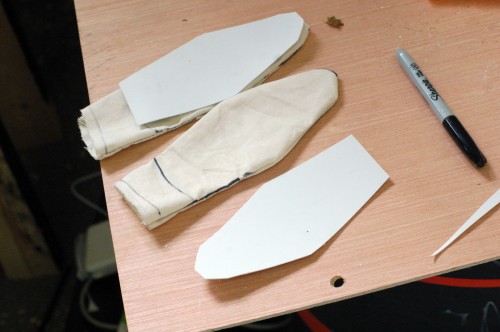
Next for the head were some ears. I patterned and sewed them out of muslin, with a piece of styrene inside to give it some stiffness. Once the ears were on the head, I heated them with a hot air gun so I could curl and shape them. When cool, the styrene retained that shape.

Ears
Ears

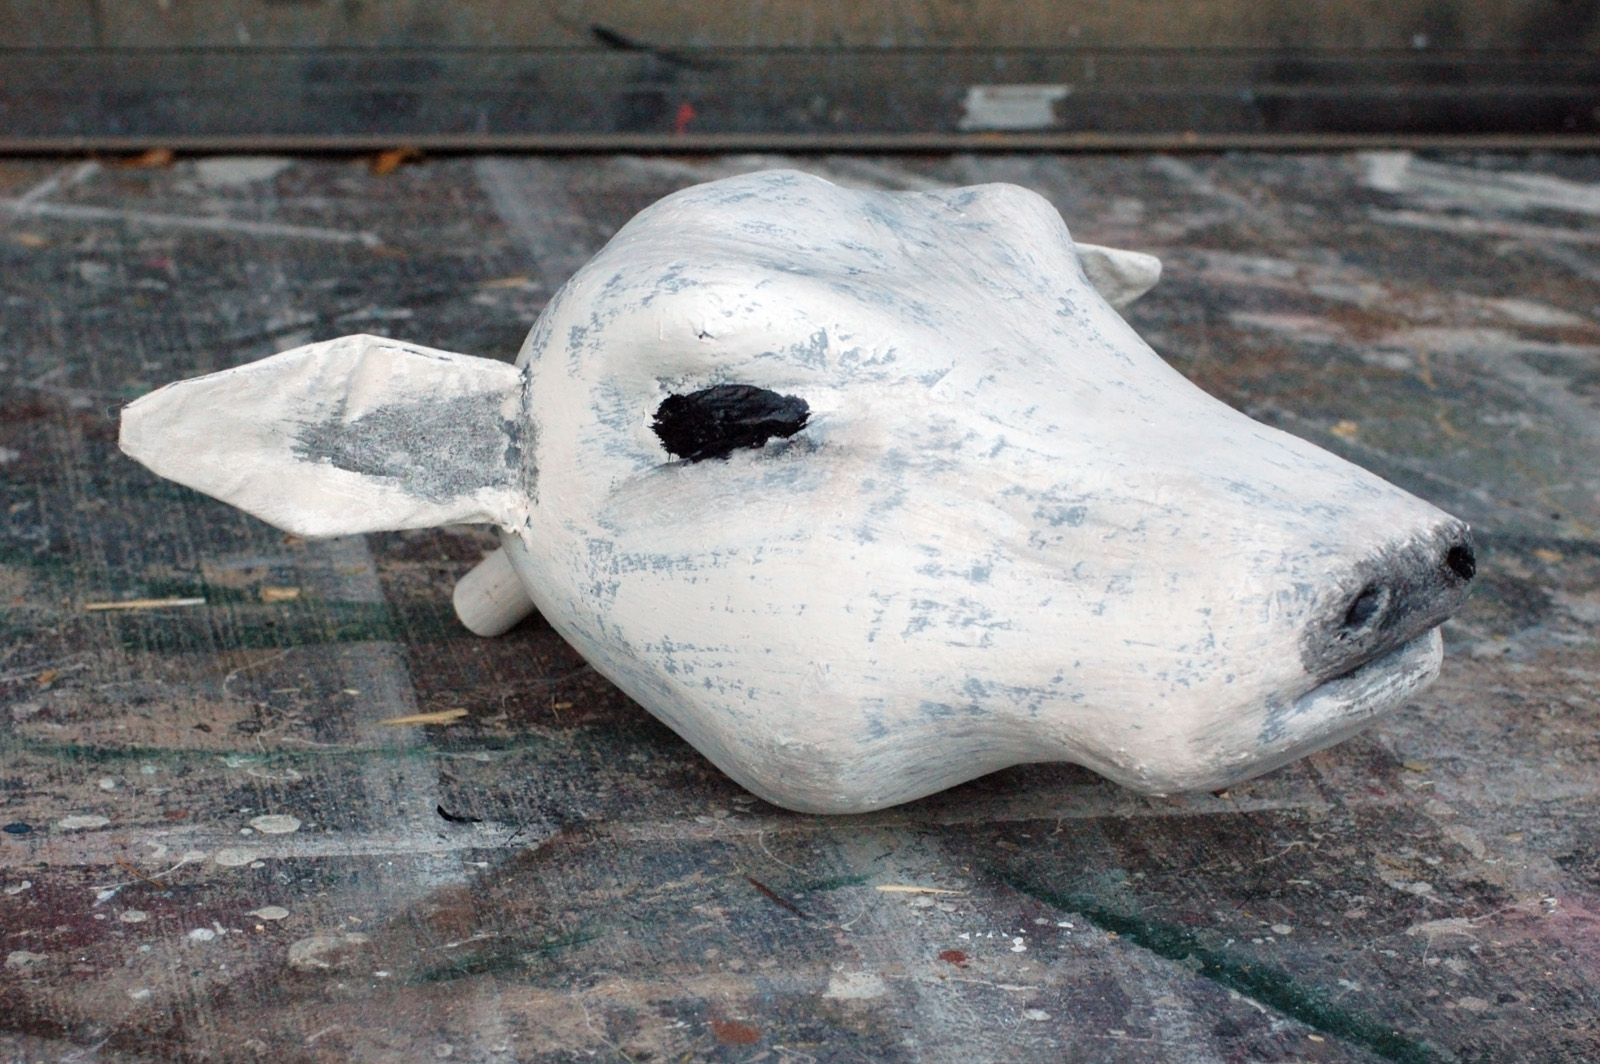
The head got a coat of grey primer, followed by a dry brush of off-white over top. I glued a dowel coming out of the back of the head so the handler could hold onto it and manipulate it around.

Cow head
Cow head

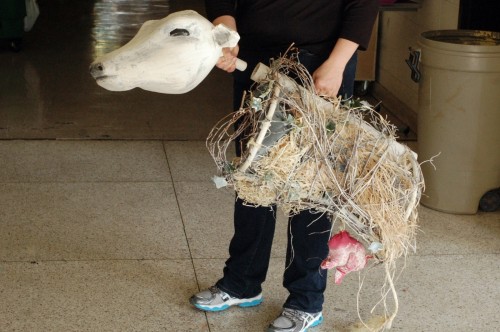
The udder was a few pieces of red fabric which I patterned, sewed, and stuffed with polyester batting. I lined the inside of the body with some screen material so the actors could throw objects inside as Milky “ate” them, and they would be easy to retrieve after the show. I added some raffia to beef out the body since the vines did not give enough coverage on their own.

Milky White
Milky White

So there you have it; one Milky the Cow!

Scenic Dope and Monster Mud

Scenic dope is a general term for a number of materials used for a number of techniques. In the late 19th and early 20th centuries, a ceiling paint known as calcimine was popular. It was essentially whiting mixed with animal glue and a bit of water. Whiting is powdered and washed white chalk, aka calcium carbonate. Set builders used it to prime flats for painting, or a thicker form to adhere muslin to flats. Along the way, it evolved into recipes and formulations which could be used for all sorts of texturing.

If you add linseed oil to whiting, you can make a simple caulk. If you mix whiting with casein (milk protein used as a binder in casein paint) and water (and borax if you want anti-fungal qualities) you can also make a simple joint compound. With the introduction of latex paint (really, acrylic paint, as it contains no actual latex), we now have the modern equivalents for the building blocks of scenic dope.

As it is a material which undergoes frequent experimentation and improvisation, no set recipe exists. A good place to begin your own experimenting is with a gallon of latex paint, 2–5 tubes of painter’s latex caulk, and 1–2 cups of joint compound. The thinner recipes (more paint, less caulk and joint compound) make good coatings for foam, while the thicker recipes (some push the ratio to equal parts paint and joint compound) can hold some heavy texture as it dries, almost to the point of being sculpt-able.

Note that the recipe calls for latex caulk and not silicone caulk. Silicone caulk is more common and easier to find in hardware and home improvement stores, but silicone does not bond with anything, which makes it impossible to mix into a recipe.

For a more flexible recipe, you can mix joint compound with glue (animal, or PVA). This is especially helpful when you are coating surfaces that have a bit of “give”. The harder dope recipes may crack under strain, whereas this one will bend.

You can add any number of additives to your recipe. Water putty and plaster allows it to dry harder but more brittle. Paper pulp really thickens the mix, and it can become almost like a thin clay, which is great for sculpting bark or rough stone on your surfaces. Sand can be added for a, well, sandy surface. Really, if you want a chunky texture, you can add almost anything chunky that you have laying around. In addition to mixing materials like sand into the mix, you can also sprinkle or dust it onto the surface while the dope is still wet. This will give it a coating, or crust, that you may find to your liking.

Theatrical suppliers make any number of products which mimic scenic dope, each with slightly different properties, but formulated to give consistent results. Rosco’s Foamcoat and Sculptural Arts’ Sculpt or Coat are just a few.

Because the recipe consists of latex paint and joint compound, both of which are water soluble, the resulting surface needs to be water-proofed if it will be outside or around moisture.

The properties of dope are similar to the wheatpaste used in papier-mache, and it is frequently used in conjunction with fabric. Strips of fabric are coated with dope and lain over a surface to create textures.

“Monster mud” is a term which began to appear in the late twentieth century to describe a mixture used frequently in the haunted house industry. You mix five gallons of joint compound with one gallon of latex paint. You can then submerge cloth—a large weave like burlap works best, though clothing or other fabric works as well—into the mixture, squeeze the excess mud out, and shape it. You may also spread the mud on straight to add texture. It may take up to several days to dry, but it becomes rock-hard (though not water-proof). It’s a clever way to mimic sculpted fabric, though any kind of flowing surface lends itself to this technique.