Tag Archives: carpentry

Coffee Table

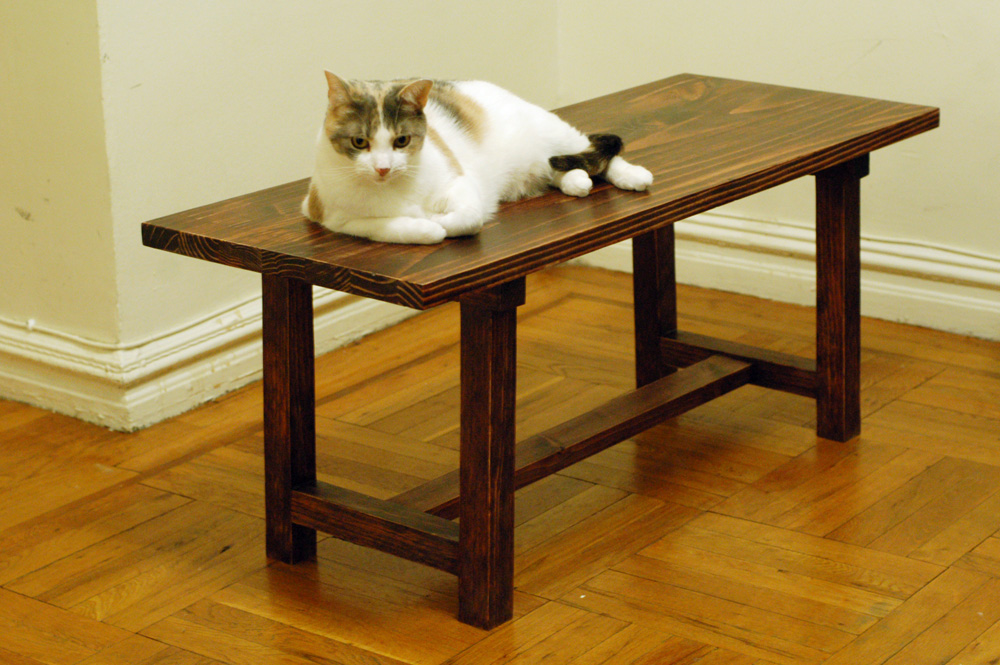
A few weeks ago, I built myself a new coffee table. It’s not a prop, but I thought I’d show some pictures anyway. We had a set of IKEA shelves in last fall’s production of In the Wake; one of the shelves was just the right size for the top of the coffee table. I gathered the rest of the materials from scraps of lumber that had been sitting around the prop shop for a long time. I kept the design simple; it was almost like a modified trestle table, with a single center stretcher, and the legs had a slight angle to them.
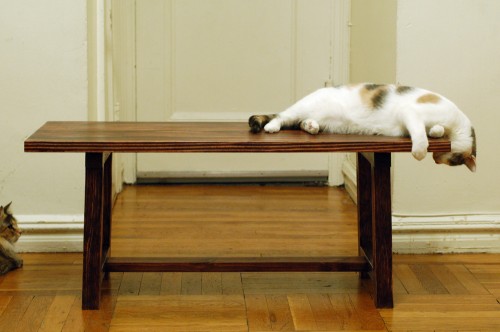
Front view of the table

All the wood I used was pine. While I like the grain pattern of pine, I can’t really stand light-colored wood, so I applied a coat of red mahogany stain to it. One of the things I rarely get to do when making props is put a nice finish to a carpentry project; usually we just slap a coat of polyurethane on and call it done. I decided to go with two coats of shellac. The denatured alcohol means it has some VOCs when you are working with it, but when that is fully evaporated, you are left with just the resin from the lac beetle, giving you a natural finish which is both food-safe and hypoallergenic. You can build up a really nice and hard finish by applying several thin coats with sanding in between. One of the other things that makes it great is that each coat dries in about an hour, as opposed to the 24 hours it takes for a coat of Tung Oil to dry. I applied one coat, sanded it with 220 grit sandpaper, added a second coat, and sanded that with 400 grit paper. The finish protects the stain from coming off the wood and moisture from going into the wood. It leaves the wood slick and smooth without really obscuring its natural appearance (or making it look like a shiny piece of plastic like some horrific finishes you see).

Because I built this in the prop shop, I needed to bring it home when I was all finished. Being in New York City without a car means I had to bring it on the subway.  With that in mind, I had built it so it could be broken down into four pieces which just needed to be screwed together. Basically, I had made my own “flat-pack” furniture. I shrink-wrapped the pieces up and carried it home with ease.
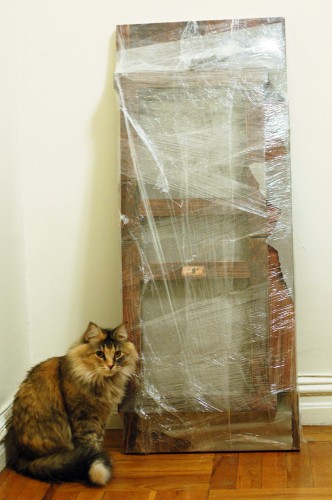
Wrapped up for transport

I even labeled the joints so I knew which way the pieces went when it came time to reassemble it.
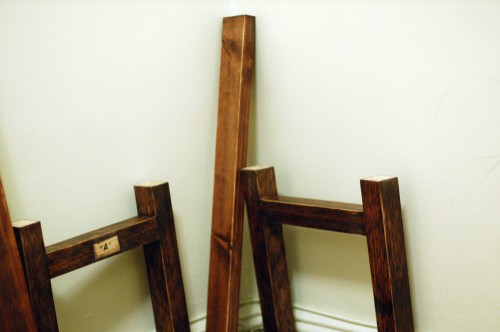
Unpacked
Unpacked

Obviously, my cats were very interested in this new arrival. Biscuit especially seemed to approve of it.
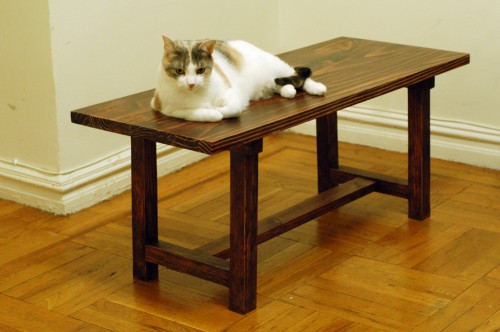
Finished coffee table

A Common Error in Making Cutlists

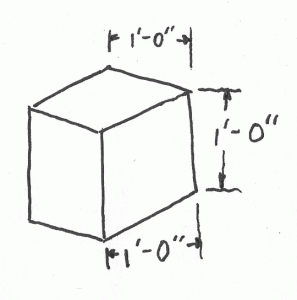
One way to begin with a carpentry project is to make a cut list. You break apart the drawing into all the parts, figure out the measurements for each of those parts, and draw up a list of how big each piece should be. Perhaps the most common error in developing a cut list is neglecting the thickness of the pieces. Let’s say you want to build a cube which is one foot on each side. A perfect cube. A solid cube will be built with six pieces of wood. For this exercise, let us say you will build it with scraps of ¾” plywood you have laying around the shop. If you make a drawing of a cube, you may assume you need to cut six pieces one foot long and one foot wide.

A one-foot cube
A one-foot cube

Wrong!

Let’s look at the drawing again.

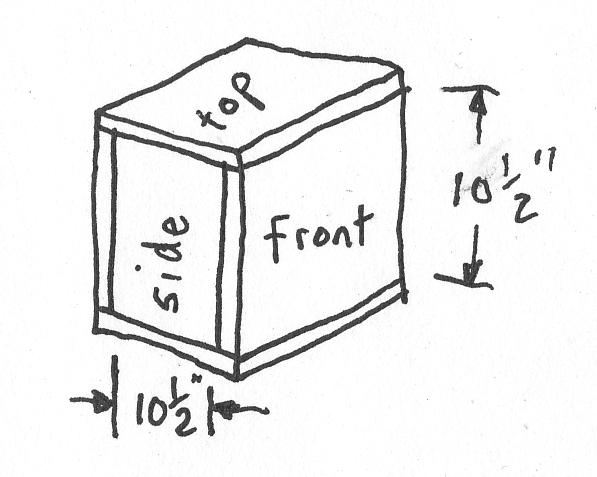
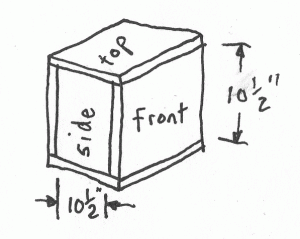
The top and the bottom can be one foot by one foot. However, if you make the front and the back one foot by one foot, the cube will end up being one foot by one foot, one and a half inches. See? You need to subtract the thickness of both the top and bottom from the length of the front and the back. In this case, ¾” and ¾” is an inch and a half, so the length of the front and the back would be 10 ½ inches. The width remains one foot.

Revised drawing showing thicknesses

The sides need the thicknesses of the materials taken away from both the length and the width. In other words, it will be 10 ½” by 10 ½”. So our final cut list looks like this:

  • 2 pieces at 1′-0” x 1′-0”
  • 2 pieces at 10 ½” x 1′-0”
  • 2 pieces at 10 ½” x 10 ½”

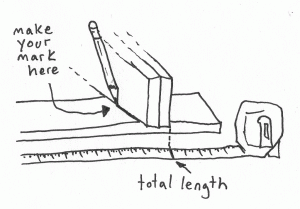
At this point I wish to add a caveat. Plywood does not come in exact measurements. While it is sold as ¾” thickness (or ½” or what have you), the actual measurements vary. Three quarter inch construction plywood is actually 23/32”. In some cases, you may not care about a thirty-second of an inch difference, though in others you may. One sure-proof method for accounting for the actual thicknesses of materials is to hold two pieces on the piece you are measuring and make your mark using them as a guide.

An easy way to account for thicknesses

Now, in props, there is no reason to try and create a cut list for all the parts at the beginning before you begin working. Sometimes, it is nearly impossible to do all the math to discern the measurements of every single piece. Other times, you need to build a section and look at it so you can visualize the next portion of what you are building. It is not always necessary to have a project completely mapped out in your head at the outset, because better solutions may become apparent as the prop comes into being.

I’ve posted before about the importance of precision in cut lists. You will also find a link to a wonderful series at Popular Woodworking which has a more in-depth look at cut lists.

Parts of a Chair

Learning the names and terms for parts of objects is important in developing your shared vocabulary for easier communication. If a designer asks you to “make the splat wider”, you don’t want to waste your time trying to widen a drop of paint.

For chairs, this was a little tricky trying to distill down all the general parts. Not all chairs have all the parts. Some parts are only specific to certain styles or time periods. Various people refer to similar parts by different names; in some contexts, they can be synonyms, while in others, they might have slightly different definitions. I’ve tried to exclude terminology which describes styles of parts. So while I defined a “leg”, I haven’t included a “cabriole leg”.

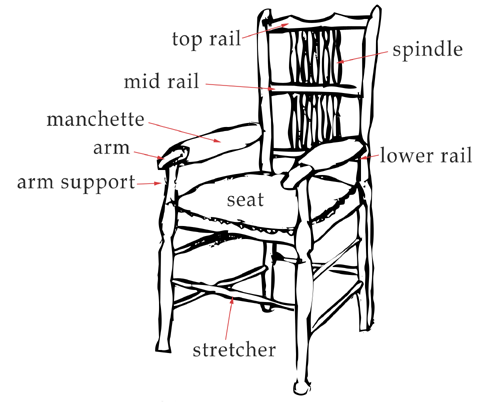
Some parts of a chair

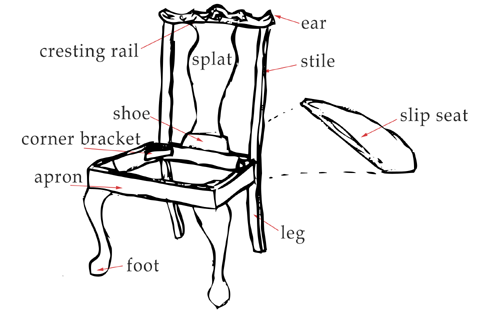
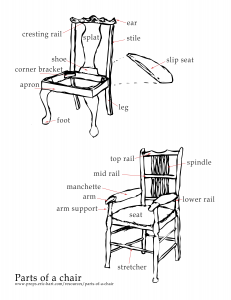
You can refer to the drawing above as well as the one below when looking at the definitions. At the end of today’s post, I’ve included a full-size drawing of both diagrams together at a higher resolution so you can print it out and hang it up. Have fun!

Some more parts of a chair
  • apron – the strips that run between the legs and connects to the surface (seat)
  • arm or armrest – part that supports your elbow and forearm
  • arm support – generalized term for the upright piece which supports the arm
  • back rail – rails specific to the seat back
  • back upright – synonym for “stile”
  • corner bracket – item which connects two members for added support and structure
  • cresting – ornamental topping, usually set in the center of the top of a chair-back
  • cresting rail – rail which contains the cresting, aka top rail
  • ear – small projecting member or part of a piece or structure, either decorative or structural
  • foot – bottom of the leg
  • headpiece – another word for “top rail” or “headrest”. With cresting, can be called “cresting rail”
  • leg – support for the chair
  • lower rail – lowermost rail of the seat back
  • manchette (arm pad) – upholstered patch or cushion on an armrest
  • mid rail – rail close to the vertical center of the seat back
  • rail – horizontal bar (of the back)
  • seat – the piece you set your bum on
  • seat back – general term encompassing the whole back of a chair, from the seat on up
  • seat rail – a synonym for the apron, or a single piece of the apron
  • shoe – a piece that sits on the back seat rail and holds the bottom of the splat, allowing easy replacement of a broken splat without disassembling the whole chair
  • skirt – band of fabric that hangs free from the bottom of an upholstered cushion. Sometimes used as a synonym for “apron”
  • slip seat – a seat which is easily removable to facilitate re-upholstery
  • spindle – a cylindrically symmetric shaft
  • splat – a vertical central element of the chair back
  • stile – outside vertical framing member (of the back)
  • stretcher – horizontal support element joining the legs
  • top rail – uppermost rail of the seat back
  • upholstered back – a padded back covered in fabric
  • upholstered seat – a padded seat covered in fabric
  • upright – vertical members of a chair back
Diagram of the parts of a chair
Click to load a large version for printing

A brief intro to furniture history

Furniture history is important to most props people. This is obviously an enormously complicated and involved topic. My aim here is merely to point to some resources for a general overview. Sometimes, a topic is so overwhelming, you don’t even know where to begin.

History of Furniture timeline

Maltwood has a useful History of Furniture timeline. The chart breaks down trends in material choice, makers, influences, and cross-lists them with European monarchs. You can click on the chart to get more details about the specific design movements.

You can fill an entire library with books that have been written about the history of furniture which, coincidentally, is where you can also find books. While the books you use have much to do with what show you are doing, there are some more general purpose books in the public domain which you can download free from various sites. These books are useful for furniture up to the early twentieth century.

Wikipedia provides a useful starting point for delving into the study of period furniture. The History Channel also has a brief article of use.

More on a Wooden Table

In the previous post, I spoke about the wooden table we were building for The Last Cargo Cult.

Wooden table after staining and sealing

Jay Duckworth started off with a coat of darker stain to catch the raised grain and really accentuate it. He went over the whole thing again with a lighter shade. After it appeared on stage during tech rehearsal, Peter Ksander, the designer, wanted to see it a bit darker and richer. I added a light coat of Red Mahagony stain, which got it where it wanted to go; we sealed it with a thin coat of water-based polyurethane. You may have noticed some boxes behind the table, which were the other major props challenge on this show. Below is a wider shot to show the full tableau.

The set of The Last Cargo Cult

Meredith Ries, who helped us out with a lot of the box work, has a more extensive write-up on the cardboard boxes at her own blog. The pile is about sixteen feet high at its tallest point.

The Last Cargo Cult is currently in previews and opens this Monday, December 7th.