Tag Archives: carpentry

A Wild Bar for a Wild Party

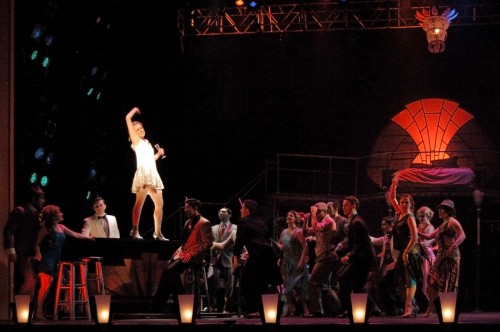
It is a little over a week since Elon University’s Wild Party closed, so I thought I would share some of the props I built while working as the props master on it. First is the sleek Art Deco bar. This production featured a lot of dancing and movement (in fact, the show was more of a dance piece with singing than a traditional musical) and the bar was key in a lot of the dancing. Actors jumped up and down off of it constantly and danced on top of it. Needless to say, it had to be sturdy.
Wild Party
Wild Party

The other hurdle was that I only had a bout a day to build the bar to a point that they could use it in rehearsal; it did not have to be finished, just usable. The bar had a sort of boomerang or banana shape to it. I knew it would take awhile to layout the shape, not to mention all the pieces I would need to cut that followed the shape but were inset or offset by varying amounts. Since the scenic designer, Natalie Taylor Hart, already had the footprint of the bar drafted in CAD, we decided to CNC these pieces and save some time.
CNC the top
CNC the top

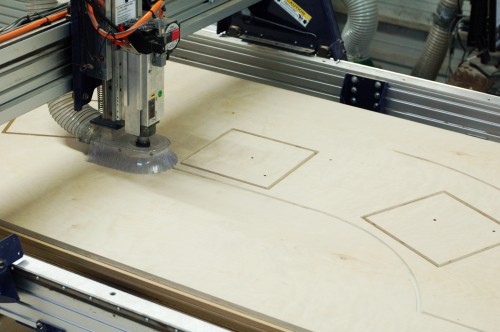
The top was two layers of plywood. We were putting lights in the bar that would shine upward, so the top also had squares to hold three pieces of 3/4″ plexiglass; the squares on the top piece were large enough to fit the plexiglass, while the squares on the bottom piece were a touch smaller to create a lip for the plexiglass to sit on.
Pile of CNC pieces
Pile of CNC pieces

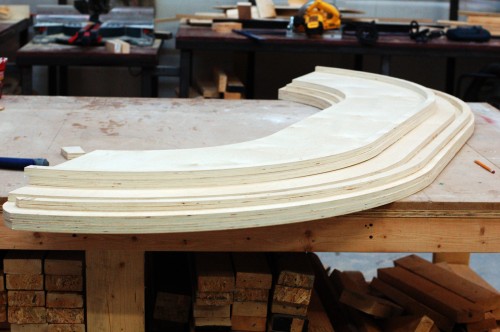
I also cut the footrest, a piece for a shelf in the middle, and some formers to nail the wiggle wood to. This pile of pieces would have taken awhile to draw and cut by hand, but with CAD, Natalie just had to copy the same shape over and over again, insetting the front curve by whatever measurement I gave. With this pile of pieces, I just had to cut a bunch of formers and uprights to connect them all together.
Notches and holes
Notches and holes

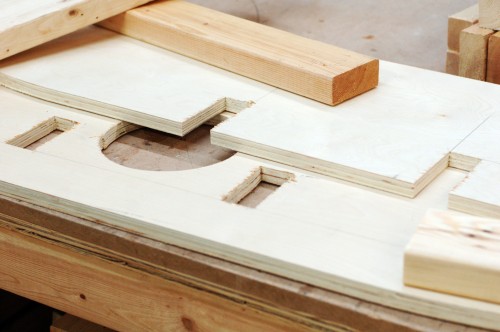
I decided I wanted some supports to run unbroken from the top to the bottom of the bar for strength, which meant I had to cut some notches and holes in the plywood that they could run through. If I had more time to figure the whole thing out ahead of time, I would have drawn these into the CAD. Since the pieces were already cut, I needed to measure and cut them by hand. See, even with fancy fabrication machines, you still need a solid grasp of traditional tools to build things.
 

Two levels complete
Two levels complete

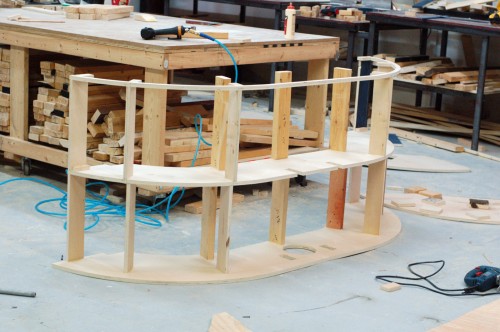
I built the bar up one level at a time, marking carefully to keep the whole thing square and straight. I positioned the supports so they were nearly above the support below them; they were offset just a bit so I would be able to drive a nail in.
Bar skeleton
Bar skeleton

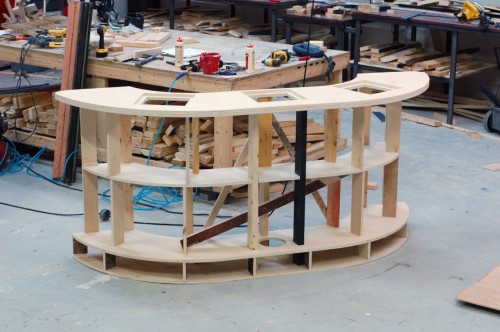
The supports along the front of the bar did double duty as formers, providing a nailing surface for the wiggle wood I would add later. I tried to keep the back as open as possible so it could be used as shelving to store all the props; the set was fairly open and skeletal, so the bar served as a place for a lot of the hand props to appear and disappear. The diagonal braces in the photograph above are just to keep the bar sturdy as they use it in rehearsal. Once the wiggle wood was added, I removed them, because the wiggle wood acted as one large piece of diagonal bracing.
Wiggle Wood
Wiggle Wood

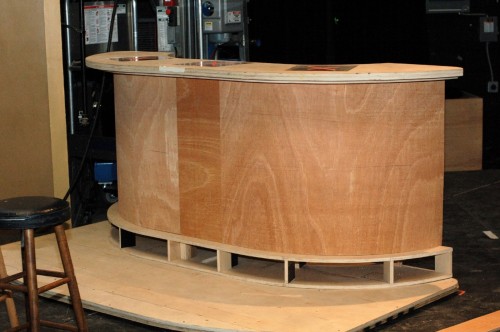
I finished the bar onstage in between rehearsals. The curve was longer than eight feet, so I could not cover it with just one piece of wiggle wood. The center is relatively flat, so I placed a small piece directly in the center; I have found it easier to fill and sand seams between wiggle wood when they are on flat areas. The footrest also got a small strip of wiggle wood after the bar was secured to the wagon underneath it. All the faces got a thin coat of joint compound and a light sanding, and then it was on to painting.
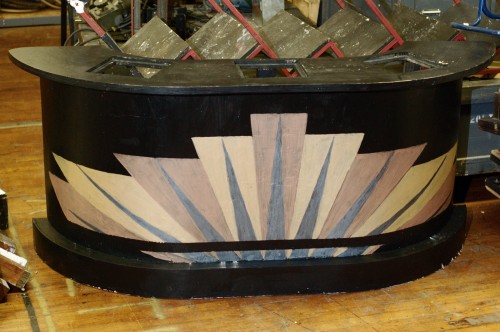
Wild Party Bar
Wild Party Bar

You can see the bar is a bit rough around the edges in the photograph above since I did not have time to take a picture until after strike. The Art Deco design painted on the front was a great touch added by Natalie and her crew. As she also pointed out, despite all the climbing and dancing done on this bar, she never saw it sag or wobble.

Player Piano for Crazy for You

Another project I worked on for Crazy for You at Elon University was a player piano. The piano sits against the wall of the saloon for a number of scenes. It has a couple of gags; when we first see it, a cowboy is playing a song on it, then gets up and walks away as the piano continues to play. Later, another cowboy fires a gun which hits the piano and causes it to start playing on its own again until it is kicked.

We began by looking for a real piano which we could take apart and modify. After a few weeks of unsuccessful searching, I decided I would just build one. After all, it needed to be a custom size to fit into the set, so transporting and modifying a real piano might be just as labor-intensive. The exterior of a piano is not really that complicated; it’s mostly a giant box with various levels of molding and details. The tricky part was getting it to play on its own.

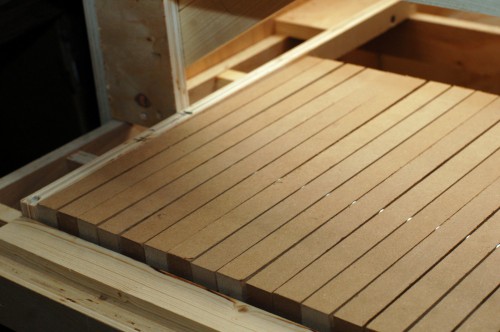
Detail of the piano keyboard

One of the perks of working at a university is that you have a lot of crew members backstage who can operate tricks by hand. I knew the player piano could be worked manually from behind, so I just needed to figure out how to make that work. I cut out a set of piano keys from 3/4″ MDF and drilled a hole through each one. I ran a piece of metal rod through all the holes; I added a washer between each piece of MDF as a spacer. You can just make out the washers in the photograph above, catching a glint of light. This method allowed the MDF “keys” to pivot around the rod. I set the “keyboard” in the piano and added  blocks underneath to limit their movement to that which a piano has. You will notice the holes were drilled offset from the center. The extra length in the back gave the back extra weight; when you let go of a key in the front, gravity would pull the back down, returning the key to its natural position. This simple mechanism would allow someone in front to play the keyboard normally, and someone in the back could make the piano appear to play on its own by pushing the keys up.

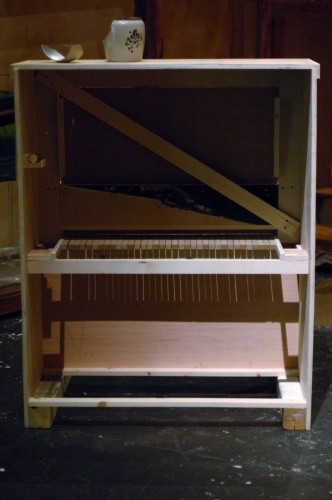
A view from the back

In the view from the back, you can hopefully get a better sense of what is going on. The keys can be accessed from behind; pushing them up causes the keys in front to move down, as if the piano is playing itself. When you let go of the keys in behind, they return to their normal position. The piano was pushed up against the wall, and a hole was cut in the flat, allowing a crew member to reach in and “play” the piano without being seen by the audience. The music itself was played live by the orchestra.

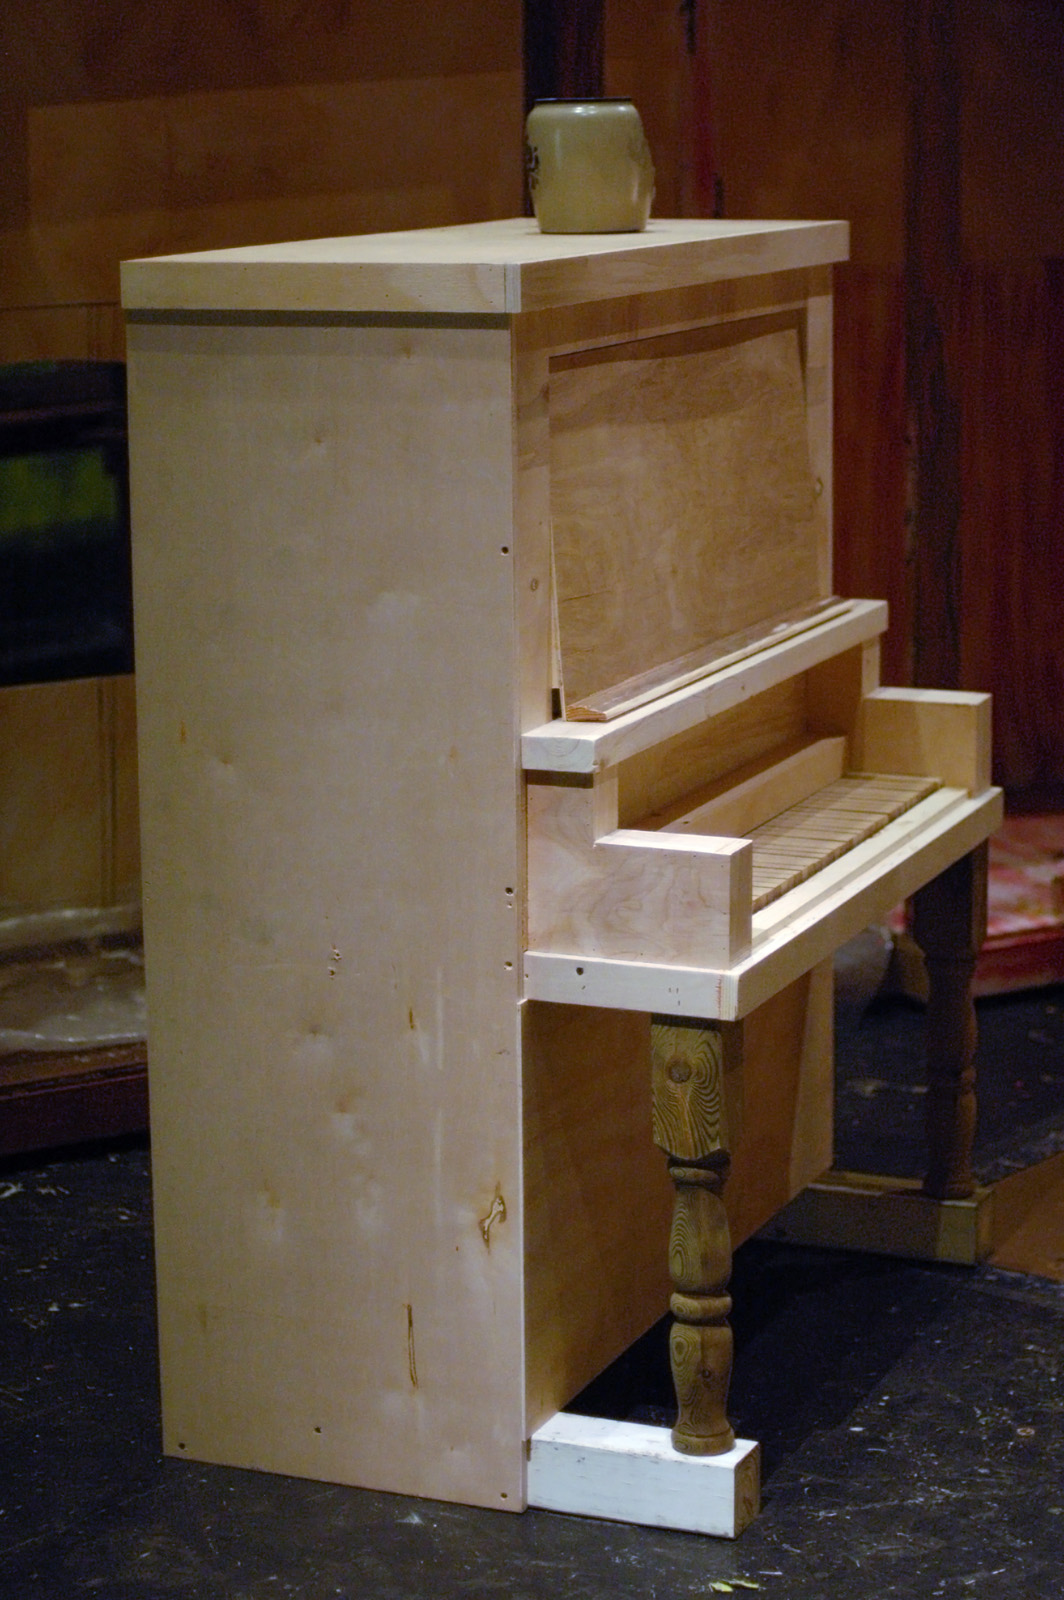
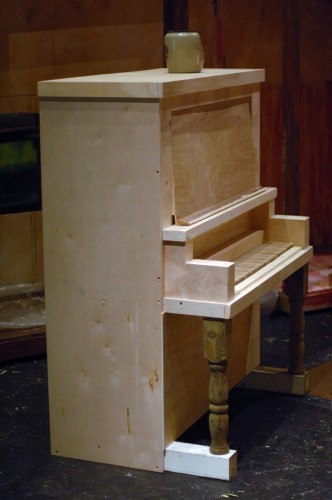
The finished, unpainted piano

The photograph above shows the piano immediately before it is painted. I managed to build the entire thing with scrap material, amazingly enough. The scene shop at Elon has a CNC machine, and it produces some wacky off-cuts. The scene shop usually doesn’t have time to trim the edges to make them square and usable again, but I do, so it gives me some nice large pieces of quality plywood and lauan.

The saloon in Crazy for You

The piano was painted to match a lot of the other woodwork used in the saloon scene. I cut some black keys out of black foam core and hot glued them on top of the white keys; they basically moved along with the white keys as they were played, but were not playable on their own. With the keys painted white and the piano painted with dark wood tones, it gave enough contrast that even the balcony seats could witness that the piano was playing on its own. All in all, it was a pretty fun prop for having been built in little over a day.

King Roger’s Throne

While in New York City this summer, I got word from the Santa Fe Opera that they needed an extra props carpenter for a few weeks. Though I had a lot of editing on my book to do, I jumped at the chance to head out there.

Beginnings of the structure and shape
Beginnings of the structure and shape.

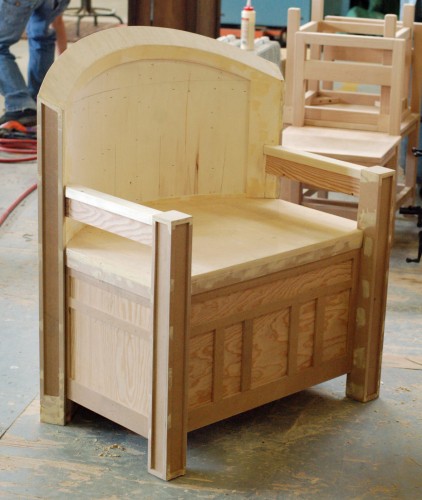
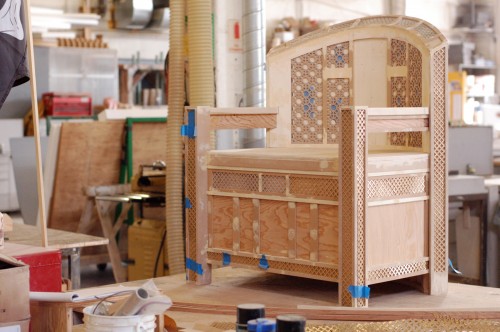
One of the main projects I worked on was a throne for King Roger, a Polish(!) opera from 1926. The throne was meant to look like it was carved out of stone. It was also going to be on stage the entire show and the artists would be climbing and leaning all over it, so it needed to be strong.

Front view
Front view.

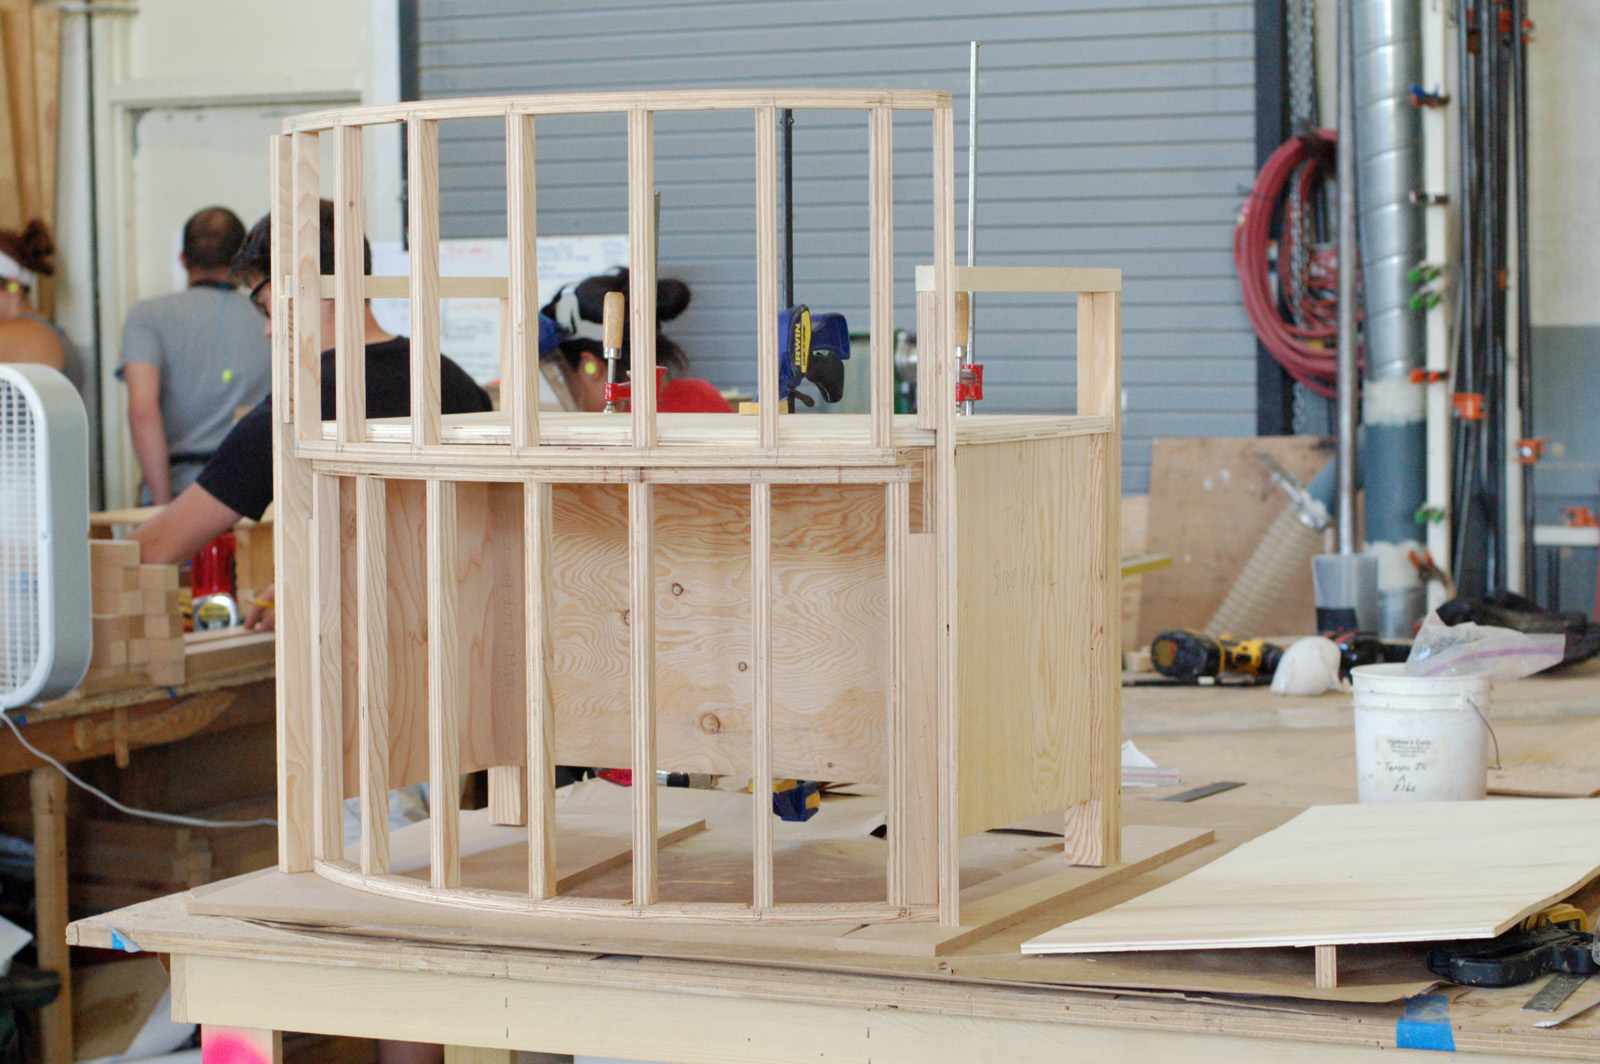
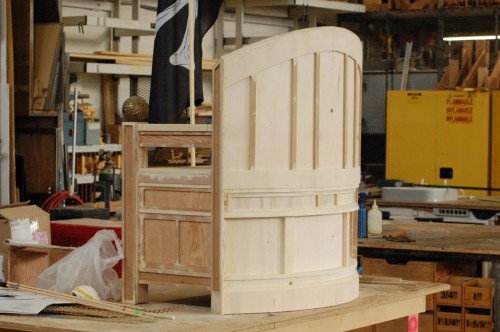
Perhaps the trickiest challenge was the back. The whole back had a curve to it, and the top of the back was also shaped in a curve. To top it off, the top surface was also beveled. A bevel on a compound curve is not really something you can do on a machine. I measured, marked and cut what I could, but most of it needed to be shaped by eye with a portable belt sander.

Back view
Back view.

All the sculpted and textured bits were going to be applied after the throne was built. I constructed it so everything had a surface to be attached to, than applied strips of different thicknesses to build up all the framing and molding.

Diapering the panels
Diapering the panels.

The photograph above has some of the textured panels as they are fit in. I had to cut all the pieces before hand so they could be painted separately from the throne itself. The larger panels would receive custom sculpted pieces, which were being made by Anna Warren (who runs the Fake ‘n Bake blog).

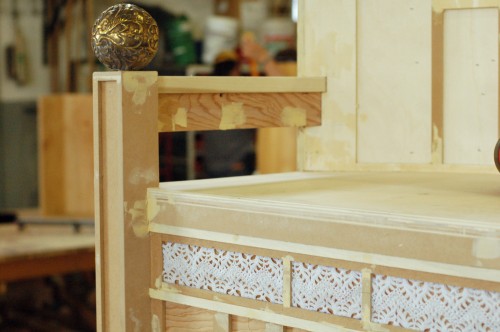
Lace as detail
Lace as detail.

Some of the panels were switched to pieces of stiffened lace to add variety. I also attached some cast resin balls to the tops of the front legs.

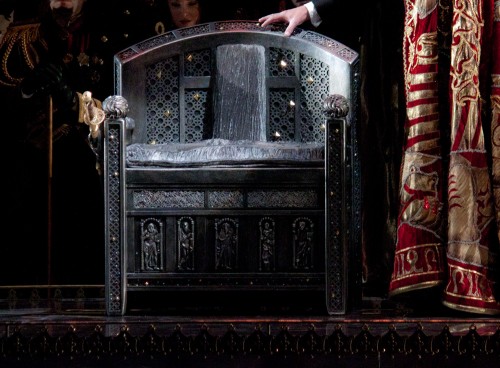
Final throne.
Final throne. Photo by Michael Chemycz.

I actually had to leave Santa Fe before King Roger opened, but Michael Chemycz, one of the other prop carpenters, snapped some great photos of the throne on stage during the dress rehearsal. Jest to dość ozdobny tron!

Six Foot Tall Microscope

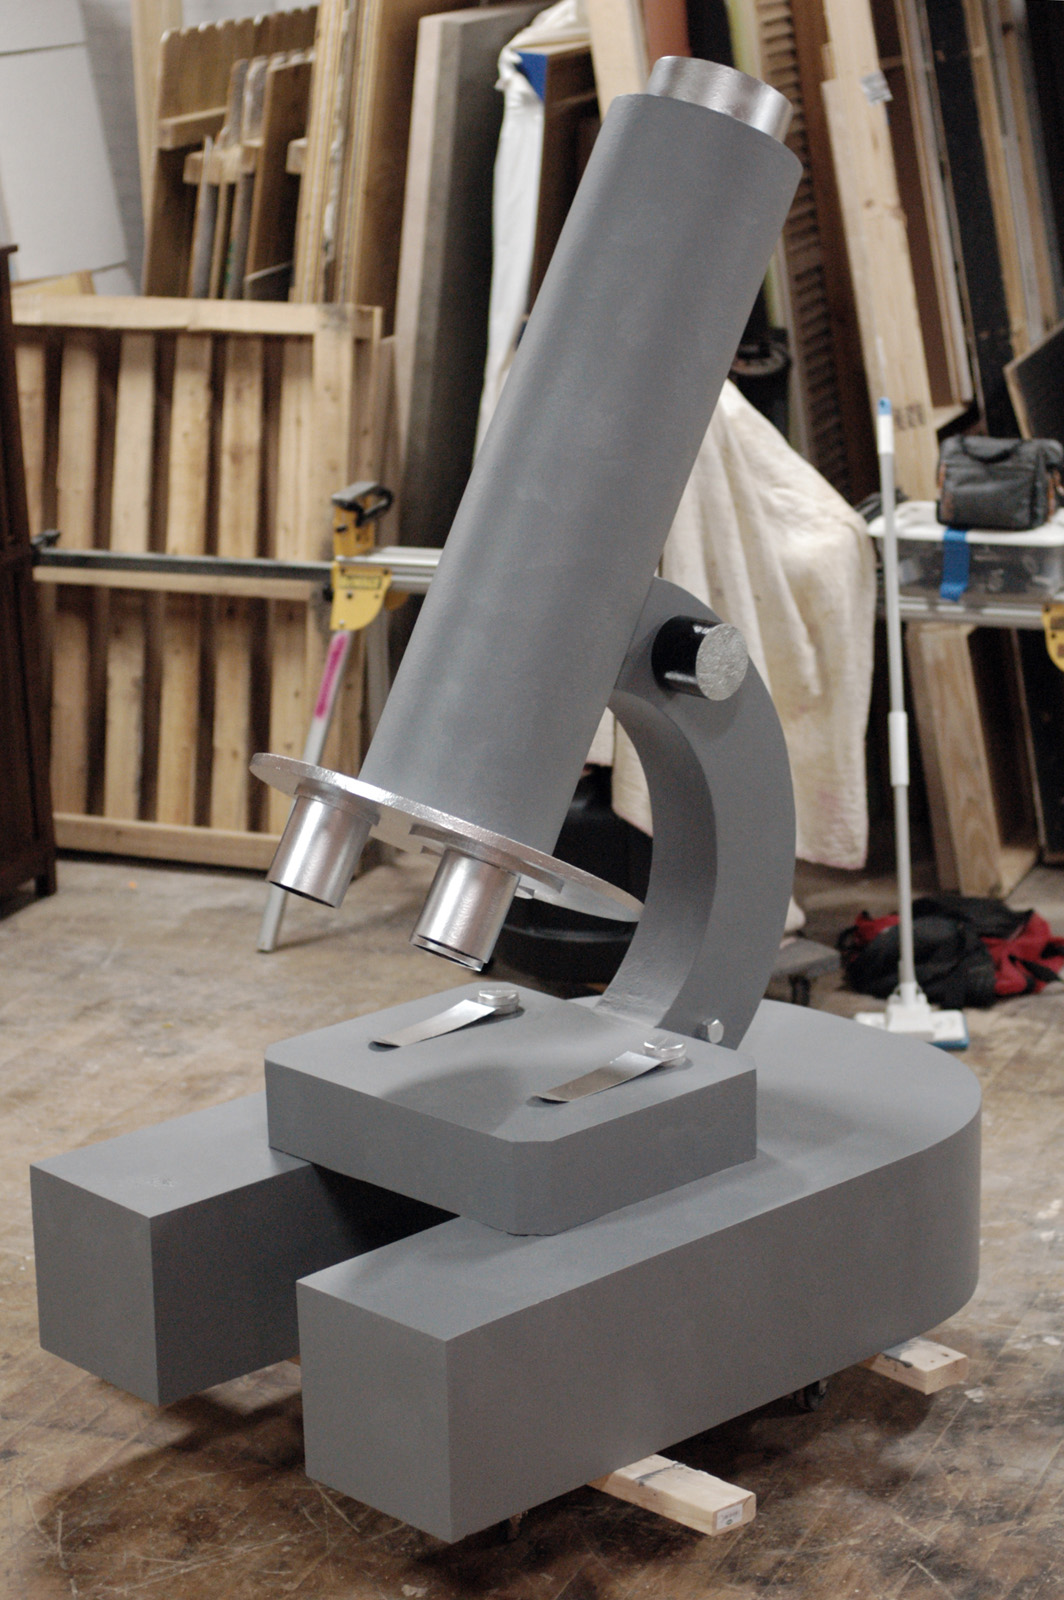
I just finished building a six foot tall microscope which resulted in some nice photographs. I guess at six feet tall, it’s not really “micro” any more; it should just be called a “scope”.

Base structure
Structure of the interior of the base

A company with a microscope as its logo wanted a giant microscope to bring to trade shows. They wanted the silhouette of the prop to match their logo (which was simply a drawing of the side view) but with some details added to make it look more like a real microscope. One of the challenges was in designing a prop that looked like a real microscope but still resembled the outline of their logo when looked at from the side.

Continue reading Six Foot Tall Microscope

Last Friday Sites

Just a reminder that tomorrow from 9am to 10pm at the Holly Hill Mall in Burlington, NC, is the first Burlington Mini Maker Faire. Check it out if you are in the area and you like making things. The mall parking lot will be hosting a D.A.R.E. carnival that day too, so after you look at the robots and wood lathes, you can ride a cocaine-free ferris wheel.

A career in theatre props” is a well written article about Antony Barnett, Head of Props at the Royal Opera House. It discusses what he does as the lead prop maker at a very busy shop. It is also interesting in telling how British prop makers learn their craft and get started in the business.

Sad news out of Brazil; Tiago Klimeck, an actor playing Judas in an Easter Passion play, died from an accidental hanging during a performance. The article, while light on details, does mention that authorities think “the knot may have been wrongly tied.” The only safe way to do a live hanging is with the rope attached in the back to a harness under the actor’s costume. The loop of rope in the front should be incapable of holding any weight, and should be able to break away when the slightest bit of weight is applied. In other words, there should not be a knot that can accidentally be “wrongly tied”; there should not be any knot. Though this story may remind you of the accidental hanging of an actress in a Halloween haunted house last year (the girl lived), in that case, the noose was never intended for live hangings. It was simply a prop “used for visual affect” (I am not sure why articles on accidental hangings all need grammatical errors).

I just came across this, though it is from 1996. Patrick Tatopoulos is the maker of monsters from Stargate (the film), Independence Day, the John Cusack Godzilla film, and many others. Visual Effects Headquarters has an interview with him and a look at how he got started and what he has accomplished.

I missed this on the first go-around, but in honor of the 100th anniversary of the Titanic disaster, Popular Woodworking Magazine has posted free plans and instructions to build the deck chairs used on that infamous ship. It’s a complicated and involved chair, but it looks like a fun project if you want to own a piece of history (or if you are doing the musical Titanic).

Christopher Schwartz has posted the first chapter from Bernard Jones’ “The Practical Woodworker” on building crates and packing boxes. Crates and boxes seem like an easy item to construct, but the endless varieties and methods to construct them make them a good first project for a budding carpenter. Besides that, we build a lot of boxes in props, and even complicated forms have elements of box construction somewhere in them. This chapter does a great job of showing some of the more popular standards for box and crate construction.