Tag Archives: carpentry

Midcentury Bar Cart

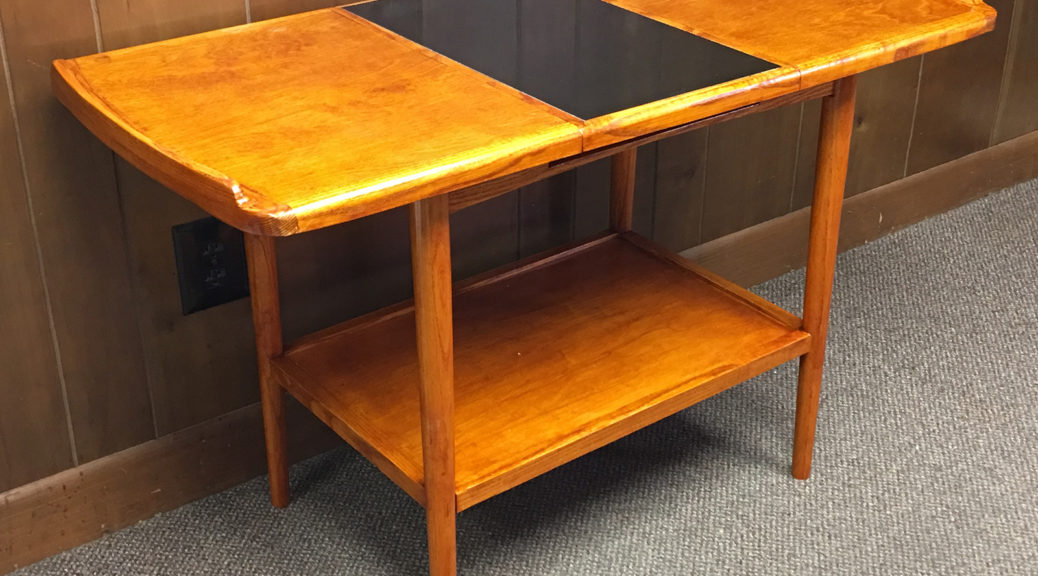
For Triad Stage’s production of Who’s Afraid of Virginia Woolf a few months ago, I needed to find a very specific bar cart. The scenic designer, Anya Klepikov, provided me with a research image of a stunning midcentury piece that was uncomfortably out of our price range. It had some challenging aspects to it, but I knew I could build it myself for a fraction of the cost.
Clamping the pieces
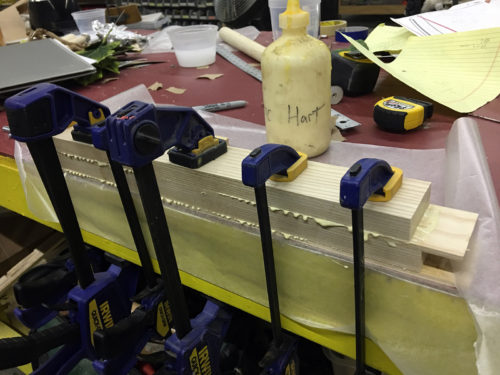
Clamping the pieces

I built the table out of a mix of oak boards and oak plywood. For the thicker pieces of oak, I laminated several pieces together.
Assembling the top
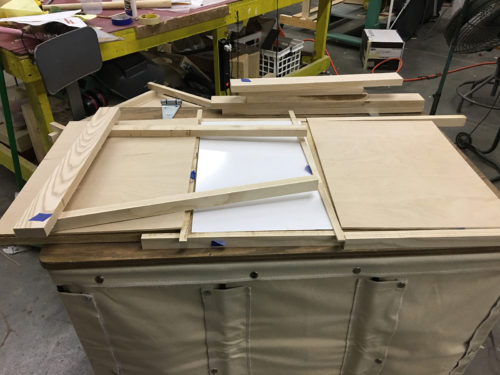
Assembling the top

In the research image, the table of the cart splits in the middle, and a black melamine leaf is added to make it longer. Ours didn’t need to do that, so I just built the top as a single piece. It was a single sheet of plywood covered in two thin pieces of nice plywood, with a piece of melamine in the middle. The edges were strips of hardwood to cover the plywood edges. I couldn’t find black melamine, so I used white that I spray painted black.
Attaching the lip
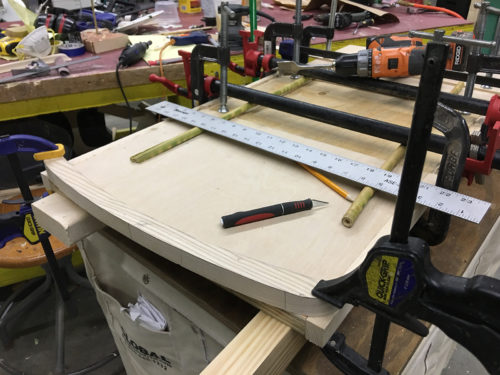
Attaching the lip

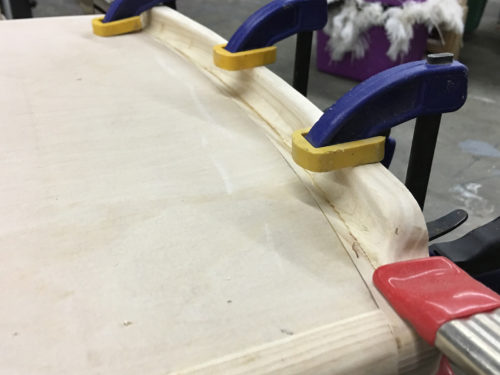
Each end had a curved breadboard with a raised lip. It took a bit of finessing to cut the end of the plywood and the breadboard so they fit together perfectly.
Attaching the lip
Attaching the lip

I cut and shaped the raised lip as a separate piece before attaching it. I routed all the edges, and I was worried that I wouldn’t be able to fit the router on if the lip was attached. Once it was glued on, I did some hefty belt sanding on the end to smooth everything and make it appear to be one solid piece of wood.
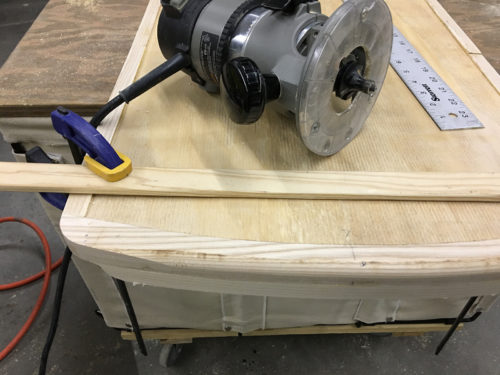
Rounding the edge with a router

I clamped a rail on the bottom so I could round over that edge as well, with the rounded edge fading out gradually.
Milling the joints
Milling the joints

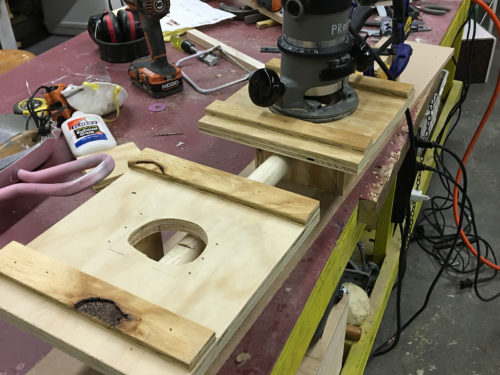
Because the legs were both round and tapered, they needed a flat surface to attach the apron and shelf to. I built a jig for the router to mill a flat area perpendicular to the ground. The apron pieces could then be doweled securely to the legs.
Glue assembly
Glue assembly

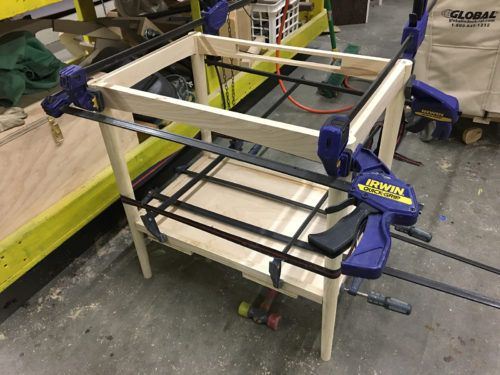
Before gluing, I fit everything together dry to make sure my measurements were all correct. When you have round tapered legs, it is very easy to make a mistake between the length of the top apron pieces and the shelf apron pieces; everything needs to be exact to keep the whole piece square and sturdy. Once everything was fit properly, I disassembled it, added glue to all the joints, and clamped it all back together.
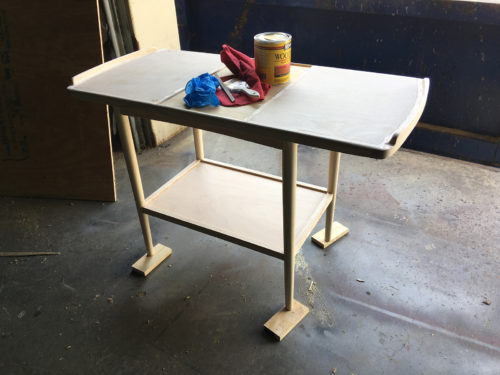
Preparing to stain
Preparing to stain

After one final sanding over the whole table, it was ready for staining. I used a tint from Minwax called “Gunstock.” I sealed it with a coat of amber shellac. When it dried, I rubbed it down with #000 steel wool, then added a second coat of amber shellac, which was also sanded with steel wool. The whole table was then wiped down with Pledge Furniture Polish. This not only removes the finest dust particles, but it imparts a thin layer of wax that helps give the surface a bit more shine.
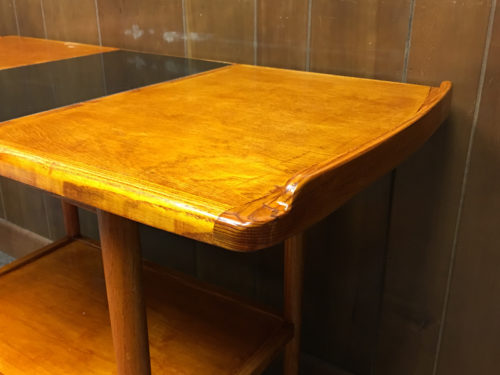
With stain and shellac

The photo above shows off the sweet curves which the piece has.
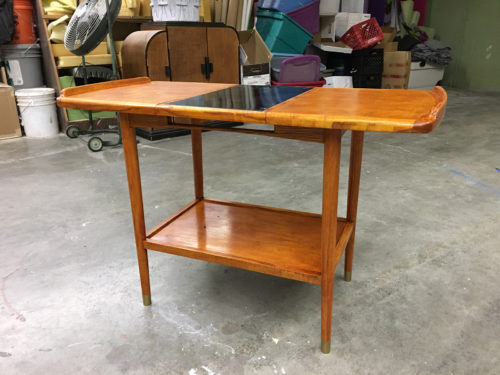
Completed bar cart
Completed bar cart

When I shared images of the completed bar cart with Anya the designer, she realized she wanted brass leg caps added to the bottom. I wasn’t able to find an exact cap to fit the legs, so I coated them with a thin layer of epoxy and painted it with brass spray paint. It gave the same effect as brass caps, but with far less work.
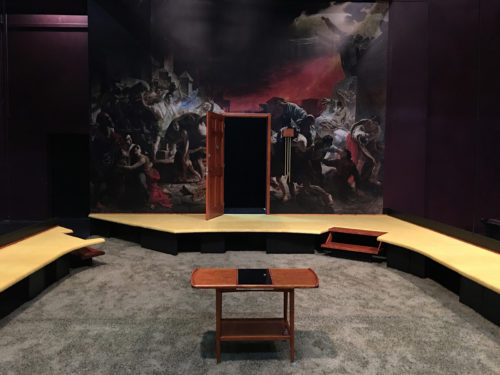
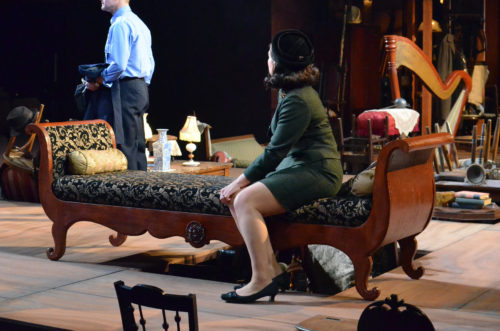
Bar cart on stage
Bar cart on stage

The bar cart was the only piece of furniture on the whole stage, so the extra work to make it perfect was justified. It was a nice piece to build for my last show as the full-time props master at Triad Stage.

Art Deco Liquor Cabinet

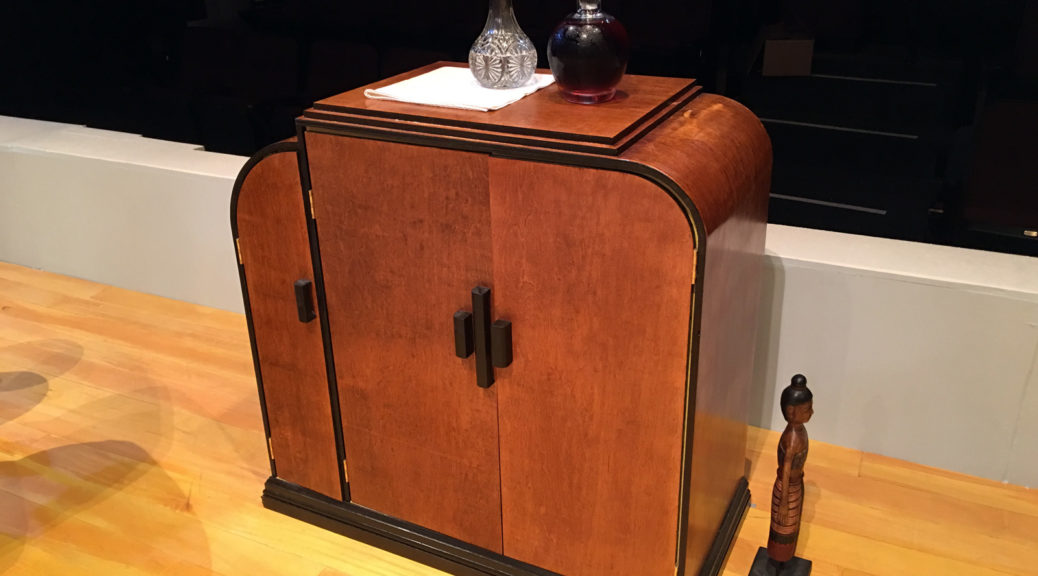
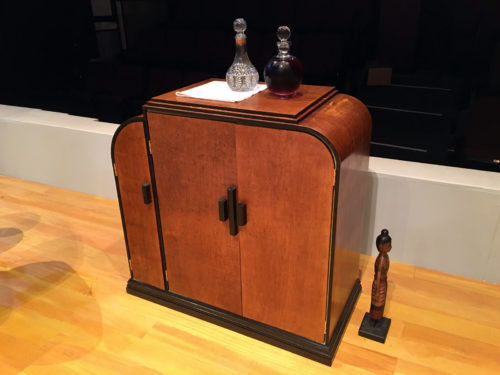
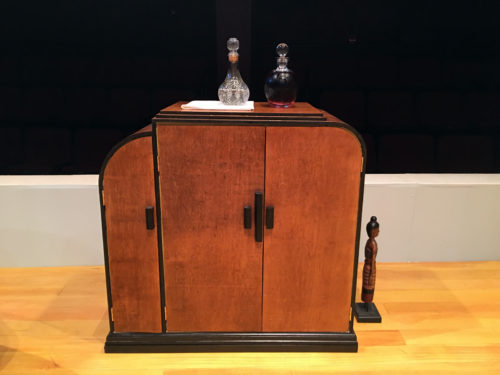
The set for Triad Stage’s And Then There Were None called for a posh, but stark, Art Deco design. One of the key furniture pieces is a liquor cabinet, since each of the ten characters has at least three drinks through the course of the play.

I had no luck sourcing an Art Deco liquor cabinet in this part of the country, so I decided to build it. Having a very distinctly Deco piece on stage would help the other less-distinctly Deco pieces feel at home in the period. Robin Vest (the scenic designer), and I passed around some research images and landed on a piece that had all the right elements but was still achievable with my equipment and time.

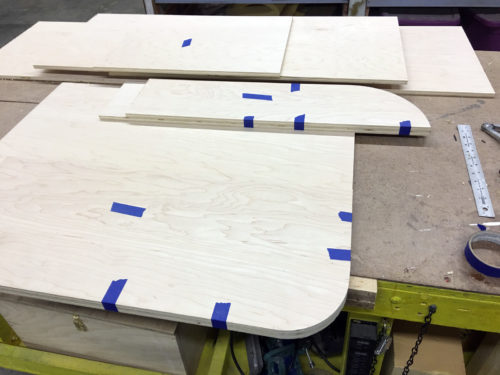
Making the cuts
Making the cuts

One defining element for this style of furniture is the bold, sweeping curves. These were traditionally made by bending thin sheets of wood and laminating them together to create a curved piece of plywood, then adding a highly-figured veneer on top. That was beyond my budget, but I had previously bent plywood by cutting kerfs, and thought I could do it again. The design of the cabinet was specifically chosen to easily hide the kerf cuts.

I chose some nice maple plywood from the big box store. The back of the cabinet and the doors would establish the curves, so I taped them together when gang-cutting them on the band saw.

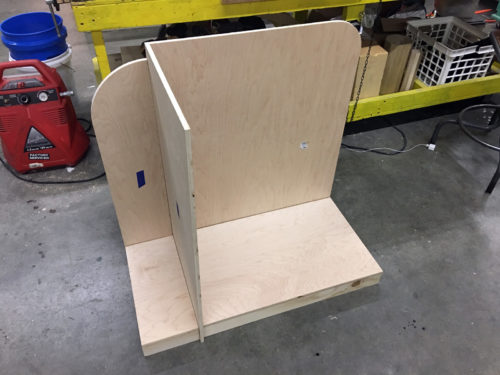
Assembling the carcass

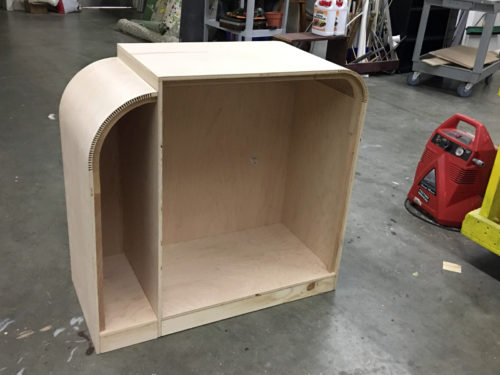
When all the flat, fixed pieces were cut, I assembled it together without glue to make sure everything was measured correctly. The cabinet was basically two parts with a door on each side.

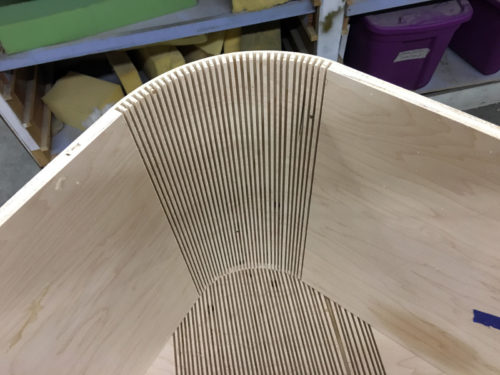
Cutting the kerfs
Cutting the kerfs

To cut the kerfs, I first measured where the curve would begin and where, roughly, it would end. I left the piece a bit long, intending to trim it to the exact size once the kerfs were all cut. You can never calculate exactly how long a piece should be when you add a curve to it; the material behaves differently than how the math predicts.

I set the blade height on the table saw so it would cut through all but the last layer of ply on my plywood. I used a sled to cross cut the groove through the length of the wood. I had a marking on the table saw so that after each cut, I could slide the wood down to make the next cut, and each cut would be evenly spaced.

I’m sure there is some formula to calculate how far apart each cut should be, but I just used a test piece of wood to make sure I was achieving the curve I needed.

Attaching the curved pieces

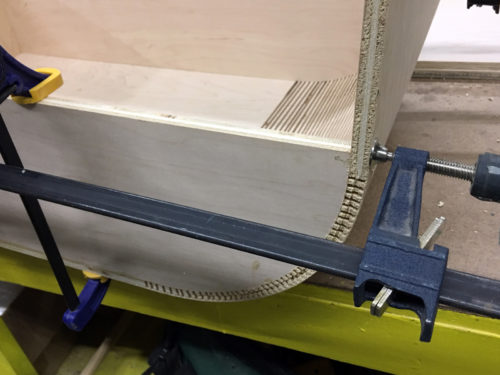
When all the kerfs were cut, I was ready to attach the bent pieces to the frame. They were glued to the back of the cabinet, while the front would be open for the doors. I clamped the doors in place so the plywood was held in the correct shape while the glue dried.

While everything was still clamped, I filled the kerf cuts with a mix of sawdust and wood glue to sort of “lock” it in place. A curved piece of wood like this can move if it is not fully supported.

The cabinet body
The cabinet body

The curved pieces were a bit springy without any front supports, so I added an oak frame. It was inset so the doors would still be flush with the front when mounted; it also helped serve as a door jamb to prevent the doors from swinging inside.

Stained and shellacked

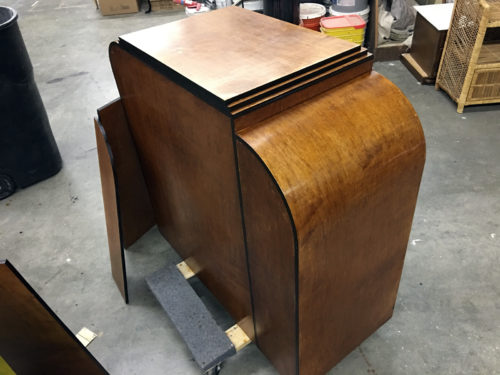
I stained the outside of the cabinet with one coat of English Chestnut stain. All the plywood edges were sanded smooth and filled, then painted black. The curved edges needed a lot of filling to close the gaps from the kerfs. Everything then got two coats of amber shellac, sanded down with some #000 steel wool after each coat.

Painted interior
Painted interior

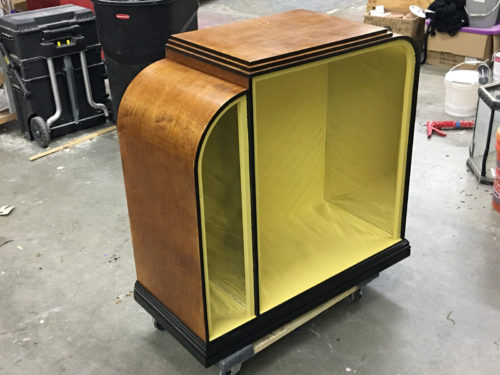
For the sides of the interior, I laid in some thick mirrored mylar I had left over from another project. A lot of liquor cabinets in this style had mirrored interiors. It also allowed me to cover the kerfs on the inside of the curves, which would have taken forever to sand smooth. The remaining interior surfaces were painted with some bright yellow I had gotten for another 1930s-inspired piece.

I also added some molding to the bottom and two more panels to the top to create the stepped design that is another characteristic of this style.

Art Deco Cabinet
Art Deco Cabinet

After mounting the doors, the final step was adding the handles. I cut and shaped some basic handles out of a piece of two-by-four. I added them after the doors were mounted because they all needed to line up visually with each other, even if the doors were not precisely straight and even.

Cabinet front view
Cabinet front view

I was very proud of this piece. Even though its flaws and theatrical construction were apparent up close, it looked stunning from only a few feet away.

Benches from Beautiful Star

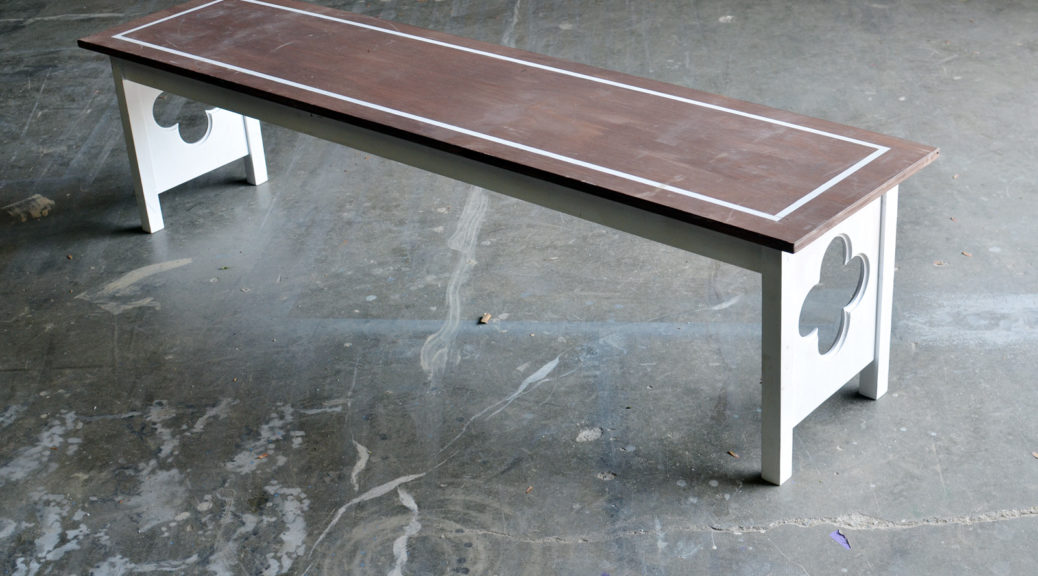
A few months ago, Triad Stage put on their Christmas show, Beautiful Star. Though it was a remount, it had some major design changes this year. For the props shop, we needed to build six church benches that could be rearranged throughout the show to create various “locations.”

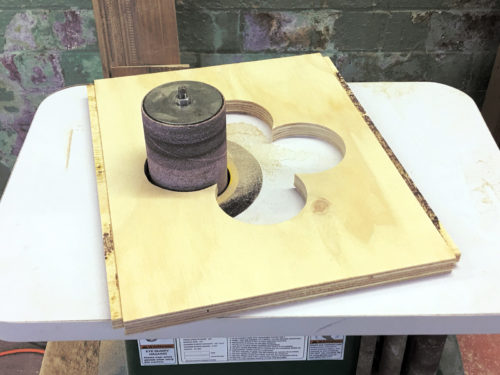
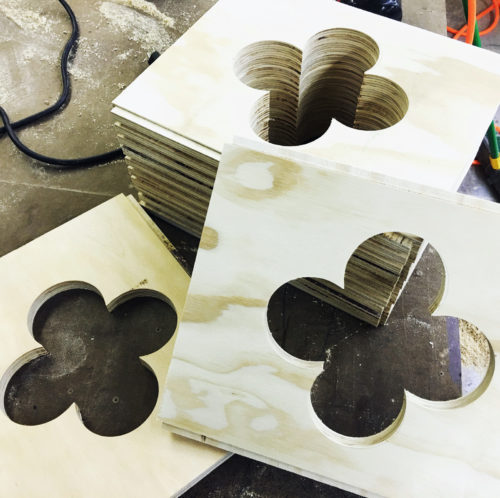
For the quatrefoil cut-out, I laid out the pattern with a compass and cut it with a jigsaw. I sanded it smooth using a sanding drum that was nearly the same diameter as the individual circles in the pattern.

Cutting the quatrefoils

I took the time to make one of the quatrefoils as perfect as possible, and then used a pattern cutting bit on my router to cut the rest of the side panels. I needed twelve panels for the six benches I was making.

So many panels
So many panels

The team wanted the benches to be able to stack on top of each other, sit up on their sides, and otherwise act as instant scenery. They also needed to support the weight of actors standing on them, but be lightweight enough for children to carry them.

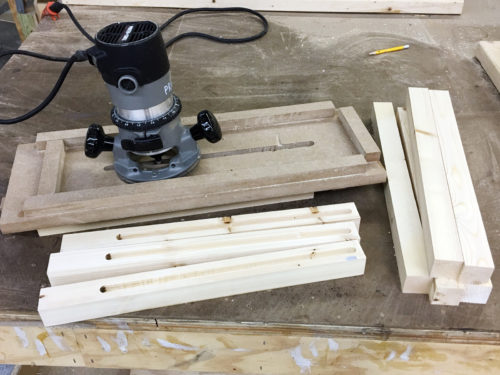
I routed a groove down the sides of all the legs. My jig kept the groove in the center of the leg and set stop points for the top and bottom as well. I also cut a tongue on the side panels, which you can see in the previous photos.

Routing the joints
Routing the joints

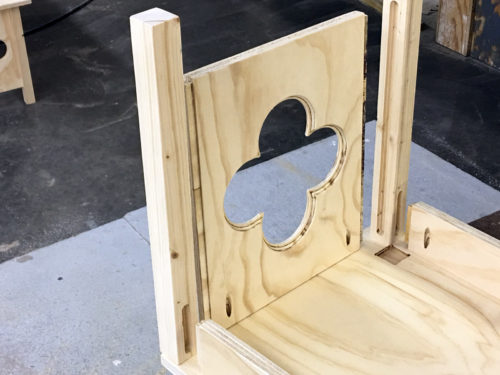
In the picture below, you can see I also cut a mortise and tenon for the apron to connect to the leg, and a notch for the leg to fit up into the seat. Additionally, the aprons and side panels were attached to the seat with pocket hole screws. This sucker was going to be strong.

Fitting it together
Fitting it together

The joints made the whole bench pretty sturdy even without glue, but once it was glued and screwed together, it was rock solid.

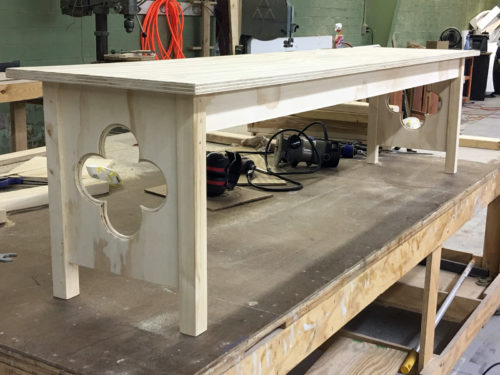
The unpainted bench
The unpainted bench

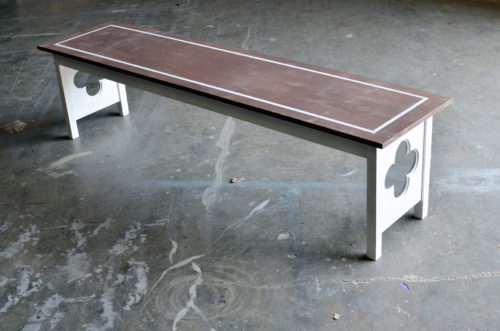
We glazed the seat with a dark brown and painted the sides white. During tech we added the white border around the seat to finish off the look. Now we have six lightweight church benches that can be used in a whole host of shows.

Beautiful Star bench

Sofa from The Price

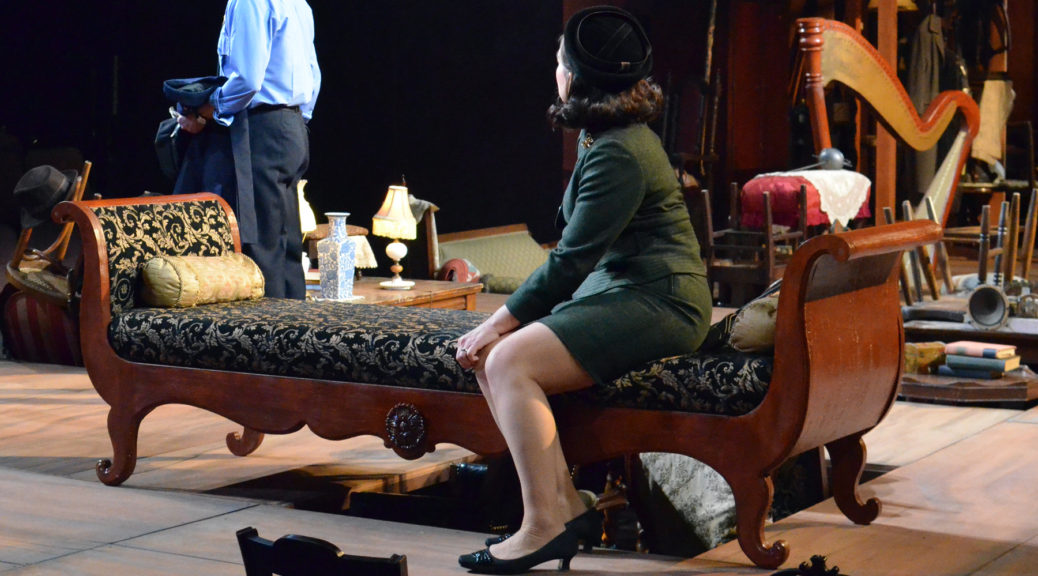
We recently closed Arthur Miller’s The Price at Triad Stage (preceding the Broadway version by a few weeks). With a week before tech, a concern arose that the “Biedermeier-style” sofa blocked too many sightlines. We needed a backless version, and since nothing like that exists in our stock, I had to build one.

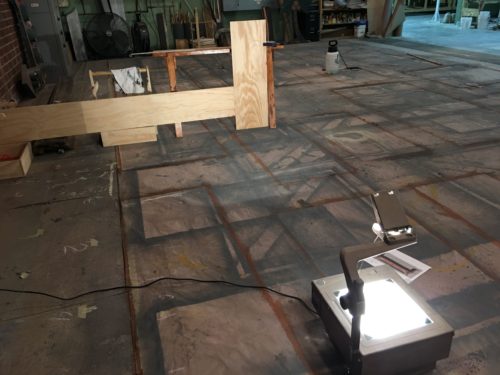
Tracing the profile
Tracing the profile

The designer, Fred Kinney, found a research image he liked. The photograph was taken straight on from the front, so I was able to trace it directly onto some plywood with an overhead projector.

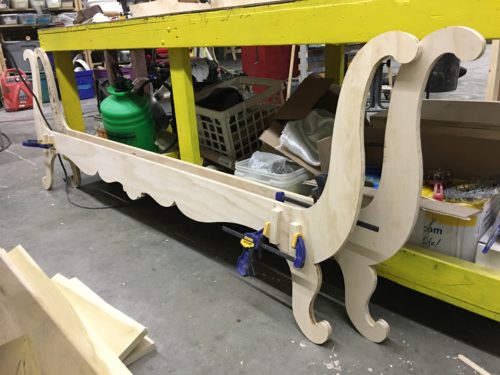
Cut outs
Cut outs

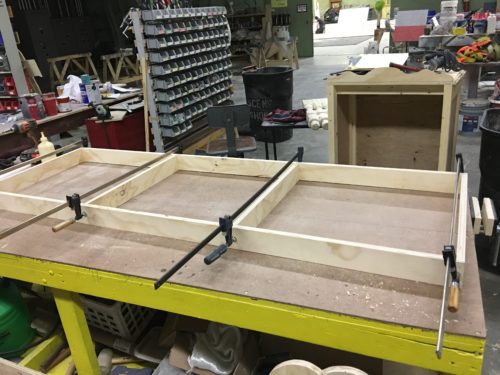
I made each front and back piece out of three pieces of plywood and doweled them together. I have some temporary blocks attached in the photograph above to help clamp them. They will also be held together in the back by the cushion frame.

Building the base
Building the base

The base for the cushion was just a simple platform frame.

Cushion
Cushion

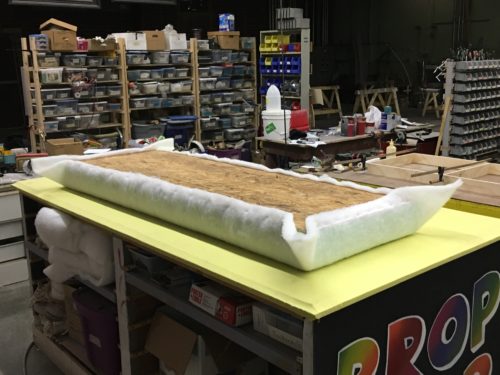
The cushion for the couch was a separate piece made of high density foam on top of a sheet of oriented strand board (OSB). The whole thing can be removed from the couch at any time. The plywood from the home improvement stores is so prone to warping; I’ve switched to OSB for my upholstered pieces because it is one of the flattest sheet goods you can buy there. It is really cheap too, though it does add a bit of weight and you have to build a good frame underneath it.

Armrest
Armrest

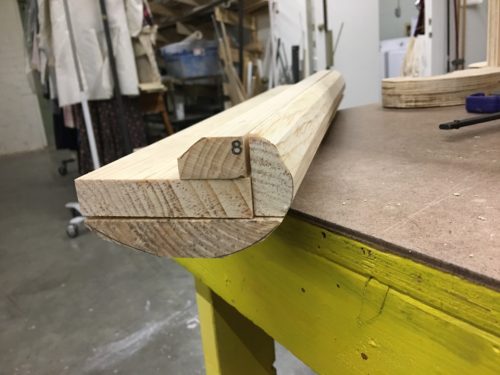
The armrests needed to be long pieces of solid wood shaped into a rolling curve. I traced the curve onto several smaller pieces of lumber, and cut away most of the waste with several passes through the table saw. After gluing the pieces together, I smoothed all the angles into curves using a belt sander.

Unpainted piece
Unpainted piece

I routed the edges of the front and back to give them a decorative profile. The armrests were screwed in, but I also ran a large through-dowel to help support them since actors were going to be resting there. I also doubled up the plywood on the legs and arms to make them appear thicker and to give more structure.

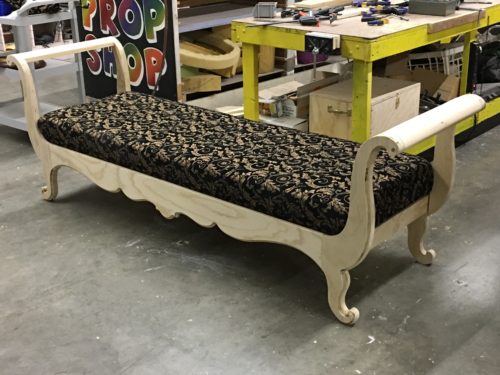
Backless couch from The Price

The inside panels of the arms were covered in fabric, while the outside panels were capped with a piece of wiggle wood. The whole thing was painted and covered in amber shellac. I found two rosettes in stock and added them to the center for that final decorative touch.

Friday Night in Props

Building a Sci-Fi Cyber Octopus for 80’s Style Practical Effects – Make Magazine talks with Nicola Piovesan, creator of an indie film called Attack of the Cyber Octopuses. He is 3D printing the titular cyber cephalopods to use as practical effects in the film. Cool stuff.

Sombra Gun Replica – Part 1 – Eva Foam Build – Kamui Cosplay is currently shooting a series of videos as she replicates a video game weapon out of flexible foam sheets. The first part on fabricating the gun is here, and you can find the next video on painting as well.

The Rise and Fall of the Everyman Tycoon – Or the 3d printing revolution that wasn’t. This article is more about the rise and fall of the Makerbot company; you can still find plenty of cheap, tiny 3D printers on the market. But the hype seems to be dying down. A few props people are experimenting with them, but many have discovered their limitations. The machines which are actually affordable print items that are too small for stage use, and the time it takes to draft and print an item can actually be longer than ordering and overnighting an actual item.

A Trick to Sawing Compound Angles & Odd Shapes – Christopher Schwartz has a great technique for cutting a compound angle on an odd shaped piece. For the one-two punch, follow this up with Get Four Feet Flat on the Floor to make sure all your chair or table legs are even.