Tag Archives: blood

How to Make Stage Blood

Asking how to make fake blood is kind of like asking how to make food. Sometimes you need a light breakfast, sometimes a heavy dinner. You need to ask yourself what the blood needs to do. While trying out new recipes can be fun, it is not terribly useful unless you know what you are trying to achieve. So when dealing with making stage blood, I will first look at the preparation you must do, than introduce some of the basic chemistry which can lead to some blood recipes for you to try.

Preparation

The three aspects of preparation are research, planning, and experimentation. You need to research what the effect will look like. Even if you are not going for a realistic effect, you want a reference image or images which you’ve shared with the director and the rest of the production team so you are all on the same page. The last thing you want is to show the director the results of your hard work and have her go, “That’s not what I was picturing at all.”

Planning is also vital. There are hundreds of blood recipes with countless variations, all designed for specific needs. What does your blood need to do? Does it get in the actor’s mouth? Does it need to be washed out of the costumes? Does it run freely or pool up into puddles? Is it just a liquid or does it have chunks in it? If you can plan out what the blood needs to do, you may find that you can use different recipes for different effects, or fake some parts with less expensive paint or dye. Do a break down of all the effects in the show and determine what each needs to do individually.

The final step is to experiment. No matter how great your blood recipe is, there are just too many variables in a show to not test out a number of options. The stage lights will affect the color of your blood; it may look great in the shop, only to appear purple once on stage. The color of the costumes or set may also require some tweaking to the blood’s color. As with any prop, you often want to present your director with a number of options to choose from.

Recipes

There is no one-size-fits-all recipe for stage blood. Many theatres and prop people have developed their own formulas and keep their secrets jealously guarded. There are a number of recipes you can find to use as a starting point. With a bit of knowledge of chemistry, you are armed with a repertoire of techniques which can be expanded as you gain more experience.

Essentially what you need is a thick, gooey base with a colorant added. The most basic recipe is corn syrup (Karo Syrup in the USA, or Golden Syrup in the UK) and red food coloring. You can add a bit of blue or even green food coloring to refine the color. This recipe is edible, which is good if the blood is used around an actor’s mouth, but since it is organic, it can attract insects and vermin, and will rot after a time. It is also sticky, messy, and will stain clothes and skin.

If you want to avoid stains, you will need to add some form of soap to the blood mixture. This will help limit the colorant from attaching to the fibers of the clothing. Liquid color-safe bleach or dish soap work well. You can use a “no-tears” baby shampoo if the blood has the possibility of getting near anyone’s eyes. You can experiment with colored soaps too. Green or blue dish soap, or Simple Green, can be used to tint the red food coloring. It is essential to work with your costume department whenever the blood is coming into contact with costumes. They can scotch guard the areas that will receive blood beforehand. They can also throw the costume into a bath of cold water with lots of stain remover as soon as it gets off stage. You may still need two or three backup costumes. The other problem with any soap-based blood is that it will lather if you rub it too much.

If you want to limit the potential for staining further, you need to look at your colorant. Different brands and types of food coloring have different staining potentials. As an alternative, you can substitute children’s non-toxic poster paint, or other washable art products.

Powdered gelatin, instant pudding, or cocoa powder can be used as thickening agents in lieu of or in addition to corn syrup. Corn starch or flour will also thicken your mix. Creamy peanut butter will both thicken and darken your mix. Interestingly, the protein in the peanut butter makes it easier to wash out.

If you want your blood to congeal or clot during the scene, there are a number of ways to do that. The instant pudding mentioned above will coagulate like real blood. KY jelly will make it clot after a period of time as well. If you thin the blood with cheap vodka or other alcohol-based products, it will congeal over time. A little unflavored gelatin will turn your blood into scabs.

A touch of mineral oil will give it some sheen and help catch the lights. Adding glycerin on top will also give it a fresh and shiny appearance and improve the surface tension.

Further Reading

There is a lot more reading to be found across the internet, with recipes utilizing any number of ingredients for various effects. As long as you do your homework beforehand, you should have no problem coming up with the right recipe for your effect.

Blood Sponges

We are in the midst of tech rehearsal for The Bacchae here at Shakespeare in the Park; next weekend, we begin preview performances already, and opening night is on August 24th. Needless to say, I’m a little distracted.

Here’s a quick little video showing some “blood sponges” we were working on with the body. You can read more about the body in my previous posts, a Body for Bacchae: Part One and Part Two. We glued some sponges to parts of the body. The idea was that they could be filled with fake blood before the performance. When the actress portraying Agave cradled the corpse, she could squeeze the part of the body with a sponge and have blood run down her hand on cue.

A body for Bacchae: Part Two

In part one of “making a body for Bacchae“, we developed a series of samples and prototypes of dead body parts out of spray foam, Foam Coat, and Dragon Skin. Since then, we’ve been able to show the pieces to the whole production team; John Conklin, the scenic designer, and JoAnne Akalaitis, the director, gave us the go-ahead to continue on with the actual body pieces.

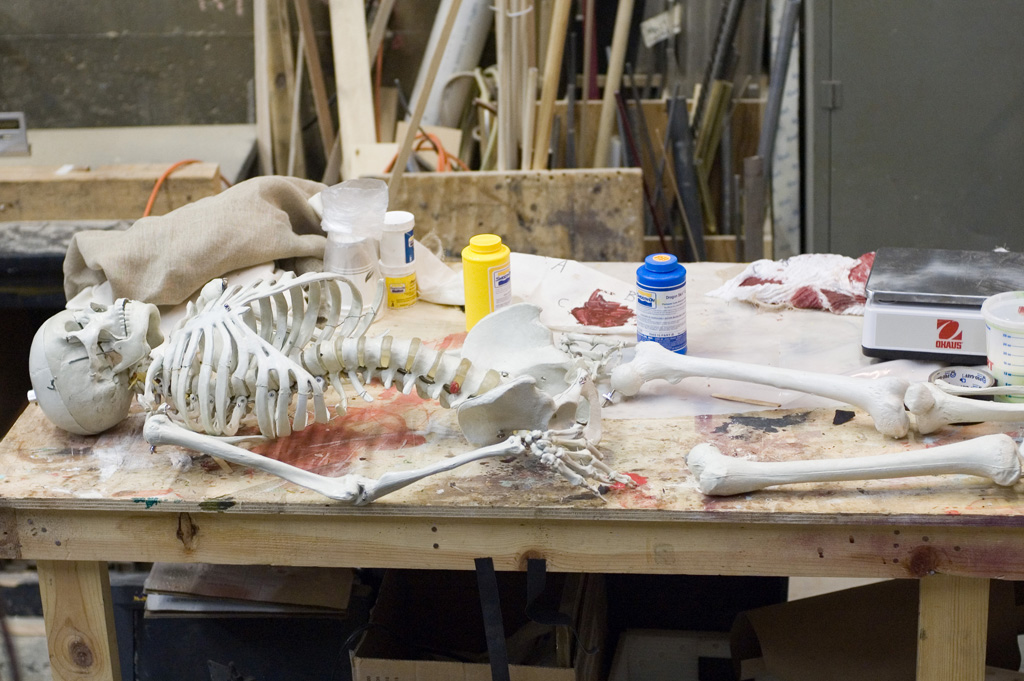
We started with a skeleton. We were originally going to get a skeleton from a medical supply store, but I found a corpsing tutorial at “Skull and Bones.com” which shows that you can get a “4th quality” skeleton from certain companies for a lot cheaper. It may be missing some hardware and fasteners, and the overall quality will be less, but all the pieces are there, and for our purposes, it was perfect.

The full skeleton laid out on a table

We broke the skeleton apart into several pieces. In the play, King Pentheus is killed through sparagmos, and we had to make the end result. The legs and skull were three separate pieces. We left one shoulder blade and upper arm on the torso, which left us with one complete arm, and one forearm.

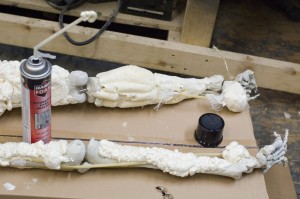
The first steps in adding muscle to the bones

Like the sample pieces, we built the muscle up by spraying expanding foam onto the bones, carving it into muscles, and coating everything with Rosco Foam Coat.

Continue reading A body for Bacchae: Part Two

A Shocking History of Stage Horror

Tabula Rasa has a history of gore effects used in theatre. Some highlights include:

  • Loading a dummy with animal blood and animal intestines for realistic disembowelings
  • Hiding a lamb’s tongue in an actor’s mouth to simulate him biting it off

The history goes all the way back to Ancient Greece. It’s interesting to see how real blood and offal was used throughout all but our most recent history. Though the information presented is brief, it’s a great starting point for anyone interested in this kind of thing.

A body for Bacchae: Part One

For the upcoming production of The Bacchae at Shakespeare in the Park, we have to make a ‘meat suit’. In the play, King Pentheus is dismembered and has pieces of his flesh torn off by the Bacchants (the party-goers). This happens off-stage, but his torn-apart body is wheeled onstage, where his mother, Agavë, attempts to reassemble him.

The director envisioned a corpse covered in meat. We in the props shop needed to find a way to mimic that look. It also needed to hold up under the weather, as the Delacorte is an outdoor theatre.

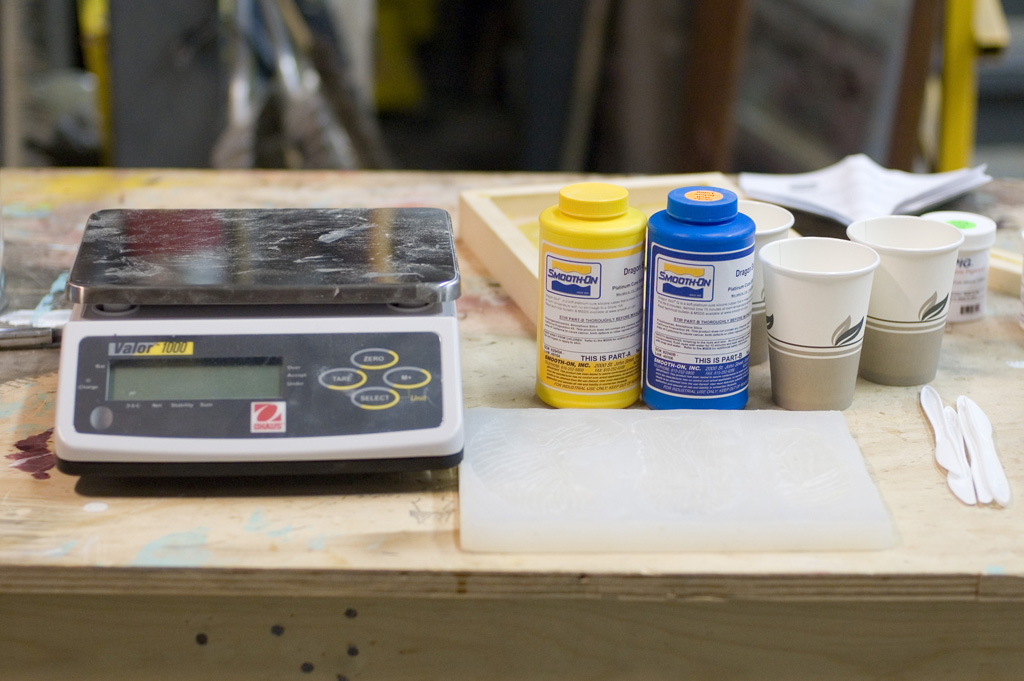
Jay Duckworth, the properties director at the Public Theatre, decided to use Dragon Skin, a silicone rubber product from Smooth-On, Inc. It comes in liquid form in two parts. You mix an equal amount of each part together, and you get a viscous liquid which can be cast or brushed on. After a little over an hour, it becomes a rubbery solid.

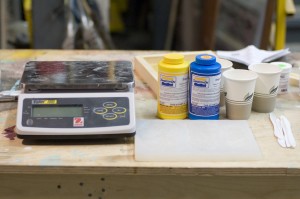
Getting ready to use Dragon Skin

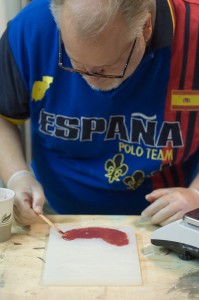
We began experimenting with casting these up into meat-shaped pieces. Dragon Skin can be colored with “Silc Pig”, a silcone pigment which comes in a number of colors. I found good results by mixing two batches up simultaneously with different levels of pigmentation. By pouring them into the mold at the same time, we could achieve random differences in color throughout the piece, which gave more realisic results.

Jay pours Dragon Skin into a mold

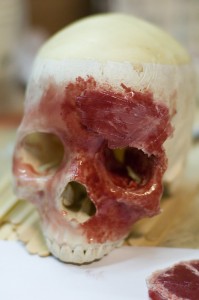
Jay found good results from painting the Dragon Skin directly onto the skeleton pieces.

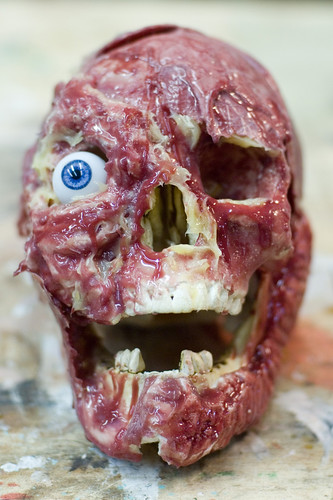
Painting the Dragon Skin directly onto the skull

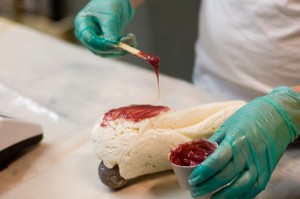
I suggested using spray-foam to build up chunks of muscle on the bones, and then painting the Dragon Skin onto that. Along with Michael Krikorian, we prototyped up a number of bones with a variety of techniques to compare them. We decided that overemphasizing the depth of the ridges and covering the foam with Rosco FoamCoat led to our favorite results.

Layering Dragon Skin on top of foam

“Silc Pig” comes in a number of different colors, so we mixed various batches of Dragon Skin to simulate fat, muscle, skin, and various other bits of chunky ooze on the bones.

There are a number of important things to keep in mind. First, silicone rubber reacts with certain chemicals, which keep it from curing. Most importantly is latex, so if you use latex gloves when working and touch the mixture, it will remain in liquid form. Use vinyl or nitrile gloves. We also found that hot glue will keep the Dragon Skin from curing. Also, use an accurate scale. The measurements need to be precise, and you cannot do it by sight alone.

Most importantly, as always, good research is the key to a realistic product. Everybody knows what muscle looks like until it comes time to actually carve it. Needless to say, doing research for this project was particularly vomit-inducting.

Now that we’ve come up with a repertoire of techniques to use, we can begin work on the actual prop. Keep watching this blog for more photographs of our progress.

The final skull prototype. All photos by Eric Hart