Category Archives: Tools

Sheet Metal Bending Brake

As I mentioned in my last post, I had to (or rather, wanted to) make a sheet metal bending brake for one of my latest projects. A brake is basically a tool (or jig) in which you can insert a piece of sheet metal, and then make a clean fold or bend in a straight line.

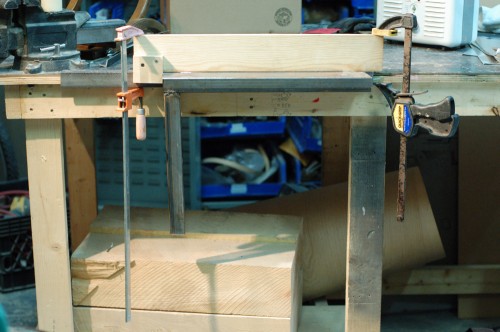
Front view of the brake

Again, I have to credit this post on Dave’s Sheet Metal Bending Brake for getting me up to speed on the best way to design a brake.

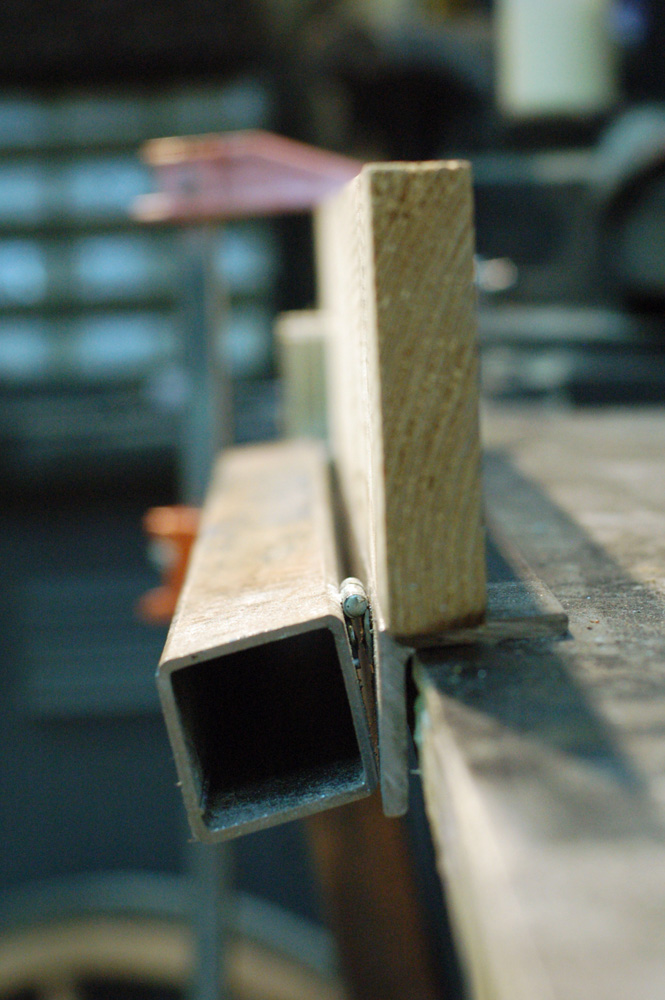
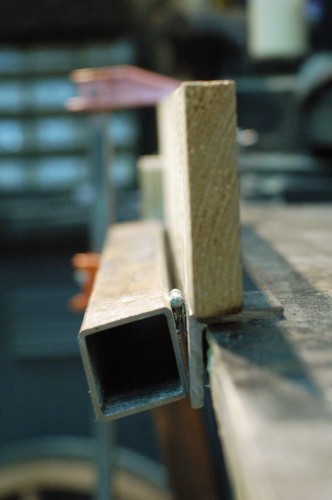
Side view of the brake

The piece of angle-iron is screwed to the worktable. The square tube is attached to the angle-iron by two small hinges, which are welded on. The tops of the bar stock, hinges and angle-iron are all in line with each other. Finally, I have a piece of wood which can be clamped down to the brake; the front face of the wood is lined up with the front face of the angle iron.

Sequence showing a fold being made

The metal is laid on the box tube and angle iron. The wood is clamped down. The fold will happen at the edge of the wood, so we mark the metal where we want the fold, and line that mark up with the edge of the wood. When you lift the handle, the metal bends with a nice sharp crease.

Here is a brief video of the brake in action making all the folds on one of the footlights.

Carpentry Then and Now

Carpentry is one of the oldest artisan skills co-opted by the props artisan. Every culture that exists near trees utilizes wood as a construction material in some way. It was inevitable that they would also build their various theatre articles out of wood. Masks, used in early rituals, were often wooden. In medieval Europe, various guilds sponsored plays which were related to their specific trade. For example, the ship builders’ guild would put on a play about Noah’s Ark, and the Bakers’ Guild would provide the accouterments for The Last Supper. Furniture, then, was most likely built by actual craftsmen as needed.

Likewise, France in the time of Moliere saw craftsmen building props. The theatre was controlled by the monarchy, which also controlled the various guilds, who enjoyed monopolies in their industries. Thus, if a play called for a chair or table which could not be borrowed, the specific furniture guild could be called upon to construct what was needed.

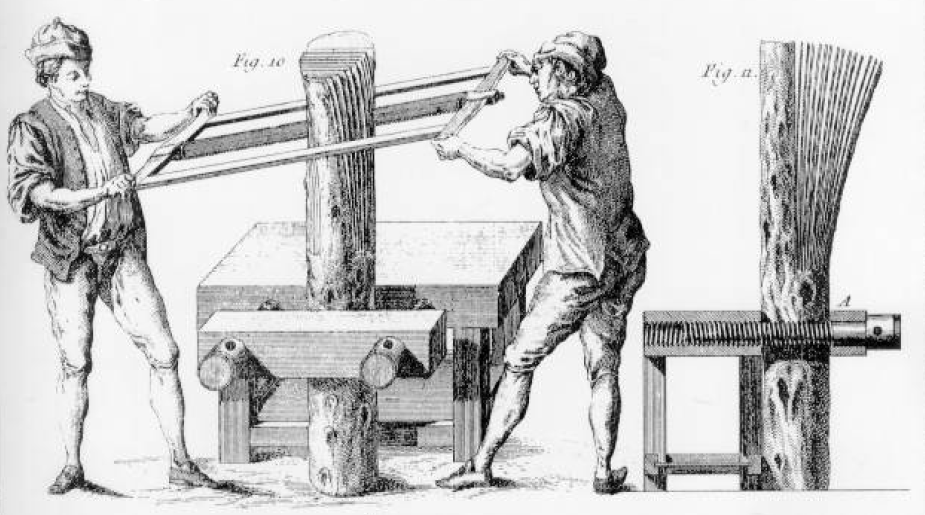
From a plate in Andre Roubo’s book on woodworking

Several societal innovations occurred which brought carpentry out of the guilds and more accessible to the average prop master. The industrial revolution brought standardized parts and mass production. This greatly improved the quality and amount of carpentry tools which were available to the general public. Tools such as highly accurate marking devices, truer saws, and mechanically-advantaged drills increased the speed and efficiency of carpentry to the point where a more generally-trained property master could now construct custom props out of wood for a show.

The second innovation, which is really an extension of the first, is the introduction of electrical power tools. Tools which relied on power were certainly available long before electricity; animal, water and steam power could drive a shaft in a large shop, which in turn, drove any number of large power tools. Electricity made it possible to escape the line and bring the tool anywhere. A prop master could now use a table saw or band saw in a basement of a theatre as long as they had an electrical outlet down there. If they needed to bring a tool to another part of the theatre, they could. The great leap forward came not just in the greater speed and efficiency of these tools, but also the ability to set up a shop in nearly any location. This innovation continued with the introduction and improvement of battery-operated power tools. These days, you can perform just about anything on a cordless tool as you can with a corded one.

These innovations should not be overlooked. If you’ve ever ripped multiple pieces from a full-length piece of plywood, imagine having to do the same thing with a handsaw. The sheer amount of carpentry which a props artisan can accomplish in one day is far greater by magnitudes than what was possible in the days before Vaudeville.

Buying the Right Tools

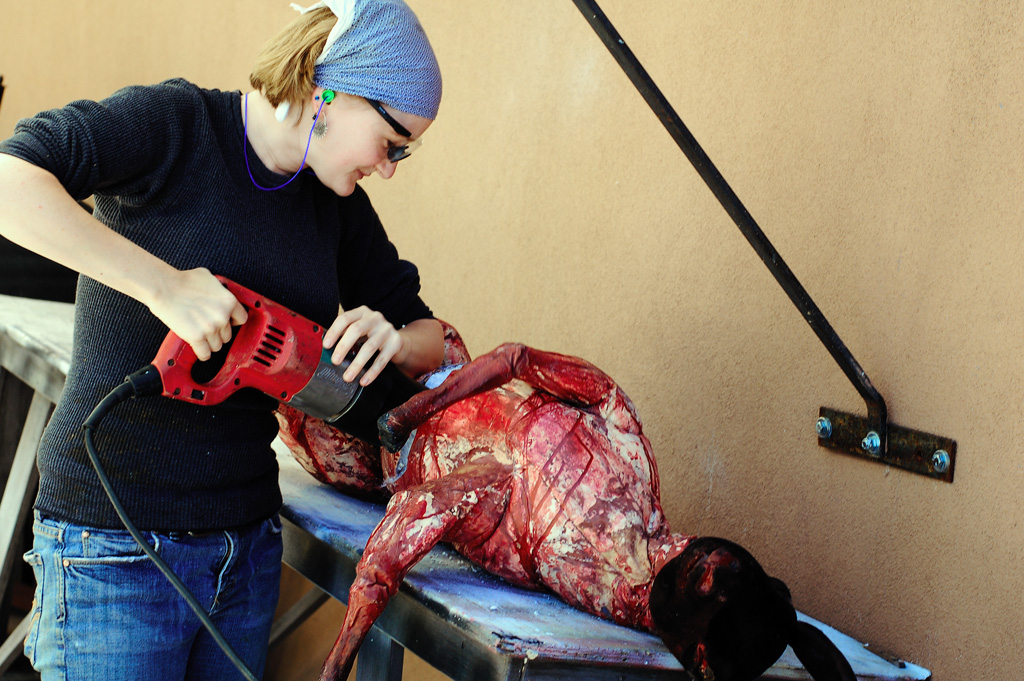
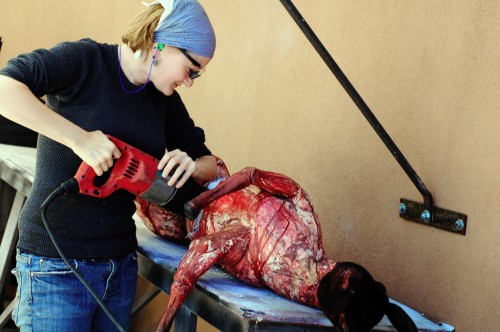
Amy Slater cuts a fake goat apart

Artisans have a wide range of opinions on how to choose your tools. Some feel the cheapest tools are good enough, while others feel only the most expensive tools are worth your time. I believe it’s better to have the right tool for the job, rather than trying to improvise with the wrong tool. If that means you have to buy the cheapest one because your budget is small, so be it. Better to pound in a nail with a cheap hammer than the end of your cordless drill.

When you are building your tool collection, you will most likely feel tempted to buy all sorts of tools you see in the store or read about. If you wish to “audition” a tool to figure out whether it deserves a place in your toolbox, buy the cheapest version that will get the job down. If you use it to the point where it wears down and falls apart, you know it will be worth it to invest in a more expensive and higher quality version. You will also learn why it is a cheap version and which features and specifications to look for in your next purchase. If, however, that cheap tool sits around in your tool box for a year, unused, than you can feel good that you did not spend a lot of money on a tool which you don’t actually need.

Thoughts on 3D Printing Technology

I first wrote about desktop fabrication on this blog over a year ago as part of my “Future of Making Props” series. This weekend, I got to see a number of 3D printers in action. For those who don’t know, 3d printers build an object from a 3D CAD file by laying down very thin layers of plastic one at a time. This weekend at Maker Faire, I got to see a number of the cheaper DIY machines in action: MakerBot, RepRap, and Fab@Home were all there.

I’ve been excited about this technology for prop-making for awhile, as you can basically buy a complete MakerBot Cupcake Kit for around $700 and start printing your own three-dimensional plastic pieces. I’m a bit less excited after seeing what the finished pieces look like. They do not have that great a resolution, and there is a lot of clean up you would have to do to it. Let’s say you needed a small bust of Mozart for your play and you wanted to make it yourself. You would have to develop or make a three-dimensional computer file of the finished piece, which takes time and requires a completely different set of skills than sculpting it in clay. You would need to purchase and maintain a 3D printer. The printing process itself is rather slow; for a larger piece, you most likely would need to leave it running overnight. Once the piece is printed, you still need to sand it and clean it up, and only then can you mold it and cast it. Once you combine the time and money it would take to do all that and compare it to an artisan sculpting and carving a piece, the artisan still wins hands down.

That’s not to say they are without merit. At the moment, their draw is less as a means to an end then as an end itself. You should build and modify your own 3d printer if you are interested in building and modifying your own 3d printer. If you just need the objects it can produce, there are far less-circuitous routes to get there. As prop-makers and prop masters though, it is important to keep an eye on this kind of technology and be prepared to take advantage of it when it matures. It is a game-changer. It has the potential to transform prop-making as much as the introduction of synthetic materials has in the past century, or the invention of power tools to replace hand tools.

You can see they kinds of things which can be made by these machines at Thingiverse, which brings up another advantage of these machines. Once you create an object which works, you can make another just by hitting “print”. You can also share the file with anyone else who has a printer. Thingiverse is a site where you can share your own creations or download other people’s. To put it simply, you do not even know how to use 3d computer software to get things to print. Someone else can do it. That other person does not even need to be in the same location. You can email someone on the other side of the world a picture of what you want and they can email back the computer file you need to print it. I can envision a time when prop masters maintain their own library of printable objects much like they share files for paper props now.

This is already happening with websites like 100K garages or shops like TechShop. TechShop has all the fancy machines like CNC routers, 3d printers, laser cutters, plasma cutters, milling machines, as well as the non-fancy but necessary tools like welders and sanders. At Maker Faire, they were advertising that they were opening up a location in New York City in 2011. It’s very exciting.
36 Knots, Bends, and Splices

Who here likes knots? Who doesn’t like knots? When I was first starting out as a stagehand apprentice, I was told there were three knots I should memorize: the square knot, bowline, and clove hitch. These, I was taught, made up the bulk of all knots needed in theatre. Any other specialty knots came into play when you were doing specialty jobs. This has held fairly true throughout my career; other than the odd decorative knot or particular rigging challenge, I can usually solve my knotty problem with one of these three knots.

To that end, here are diagrams of thirty-six common knots, bends, and splices I pulled from an old book. These aren’t decorative or pretty knots; these are heavy-duty working-class knots, including the three I mentioned above. There is, of course, the larger question of what circumstances each of these knots should be used in; perhaps I will address that in a later post. Until then, why knot just enjoy the pictures?

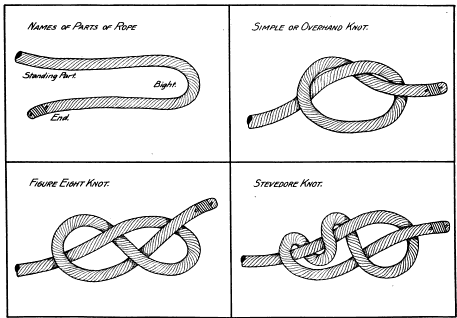
Parts of a rope, overhand knot, figure eight knot, stevedore knot

Continue reading 36 Knots, Bends, and Splices