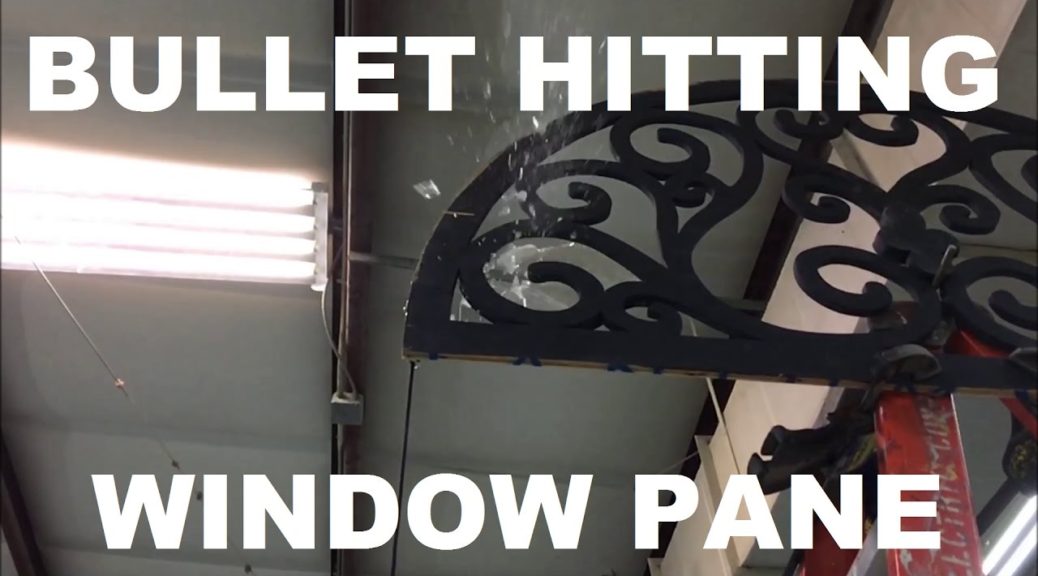
A few months back, I did the props for Arms and the Man at Triad Stage. Set during the 1885 Serbo-Bulgarian War, the first scene revolves around a Swiss soldier breaking into the bedroom of a Bulgarian woman. The war rages around them, and at one point, a bullet shatters through the glass of her balcony door. That’s a prop.
We not only needed to make a breakaway window pane that would fit the decorative transom, but I had to come up with a way to break it. Obviously, we couldn’t fire a bullet through it; we couldn’t fire any projectile through it because it was facing the audience. I needed something that could be triggered from offstage and remain hidden both before and after the trick. Luckily, the audience could not see the upstage side of the door unit. The video below shows the mechanism in action.
Essentially, I took a mousetrap and tied a nut to it. When triggered, the mousetrap flung the nut into the window, breaking it, and then it hung out of sight. The rest of the mechanism is simply to keep the mousetrap secure so it will not trigger prematurely, but also to make it easy to pull the string when the cue is called.
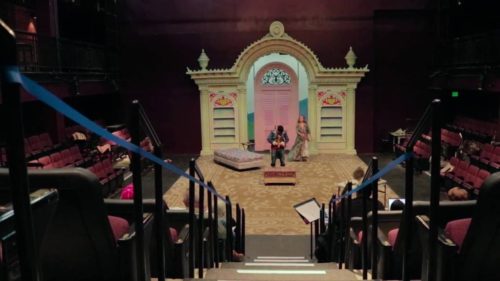
The Bedroom, Act One
The photo above shows the window in the context of the set. Somehow this is the best photo I could find.
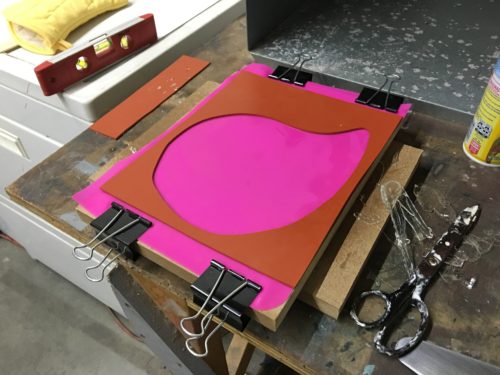
Glass mold
The window pane itself was made from isomalt, a sugar substitute which works a lot better for breakaways than traditional sugar glass. I get mine from Make Your Own Molds, but you can find it at many baking and confectioners shops since it is used for sugar sculpture on cakes.
For the mold, I cut the shape of the pane I needed out of a sheet of silicone rubber, and placed it on a silicone baking pad.
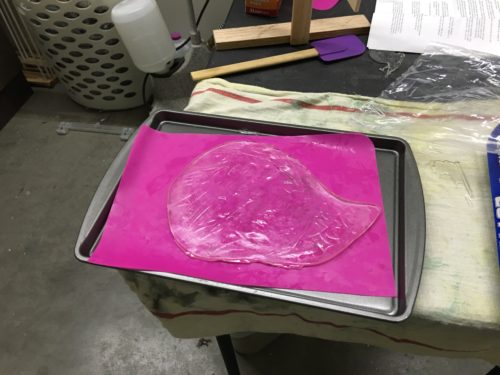
Breakaway glass pane
Above is one of my first attempts. The panes became a little clearer and smoother as I made more of them and experimented with the process. Below is a behind the scenes video put out by Triad Stage for this production. It has a bit of footage showing me making the breakaway window panes.
The effect was eventually cut during tech. The scene was rather dark, so the audience could not see the glass breaking. The setup and cleanup of the effect was not worth the little it added to the scene, so it was replaced with a sound and lighting effect.
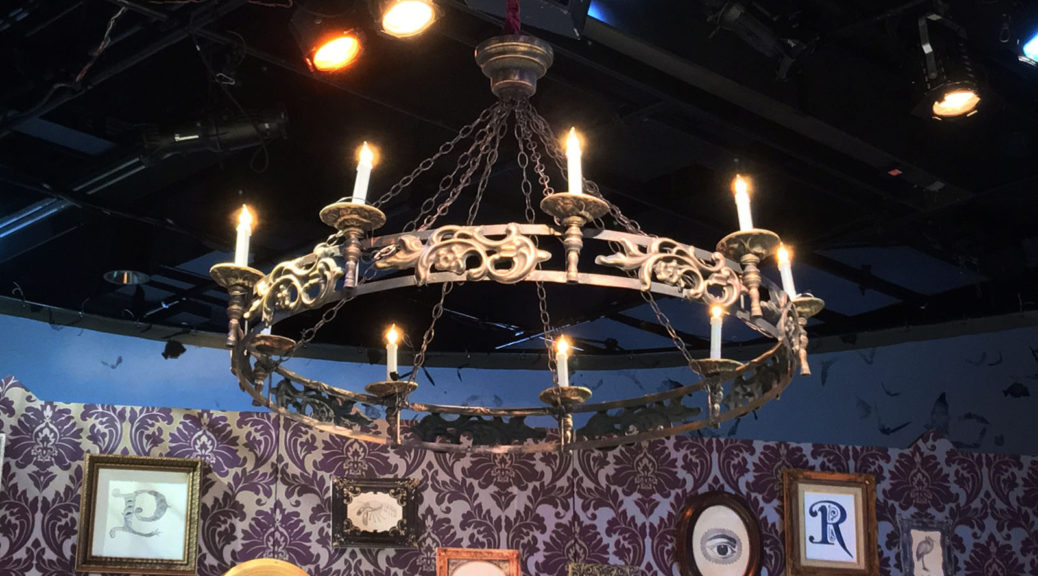
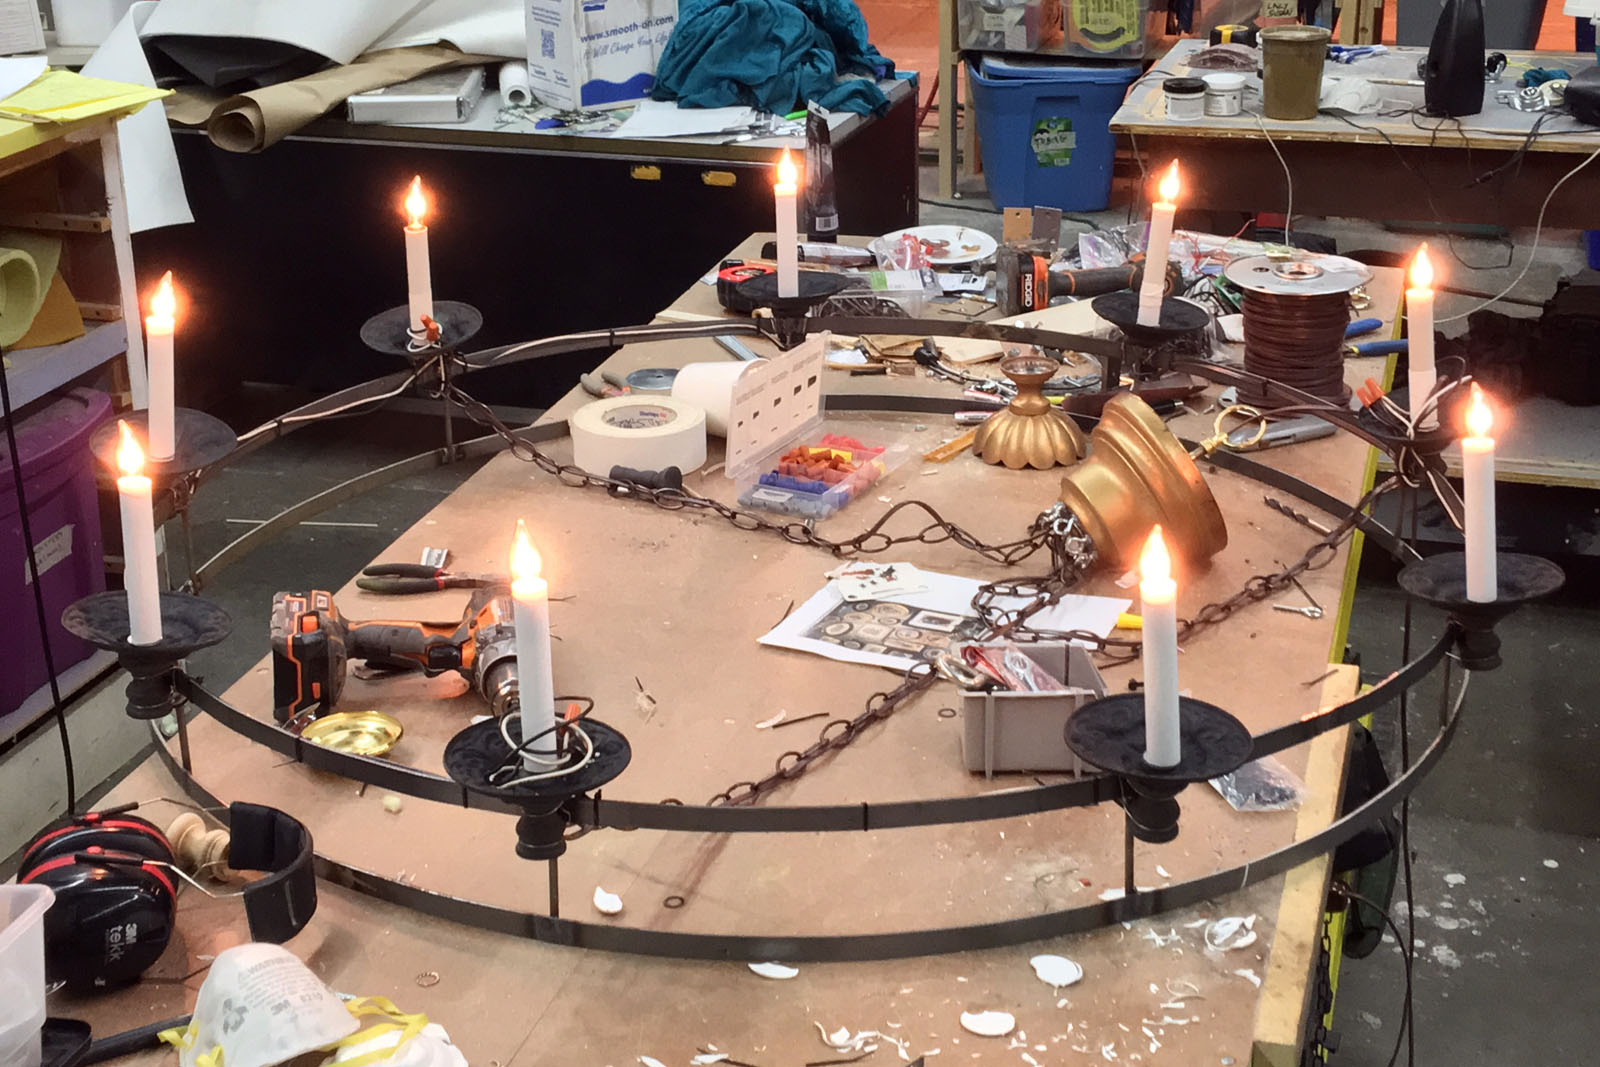
Triad Stage’s production of Irma Vep opened last Saturday. Anyone who has ever propped that show knows it has a ton of tricks and unique pieces. On top of all that, our production also had a massive Gothic ring chandelier. Our scenic designer, Robin Vest, drew a four-foot diameter chandelier with nine candles. I knew I would never be able to afford such a piece (even if I could find it), so it was off to the shop to construct it from scratch.
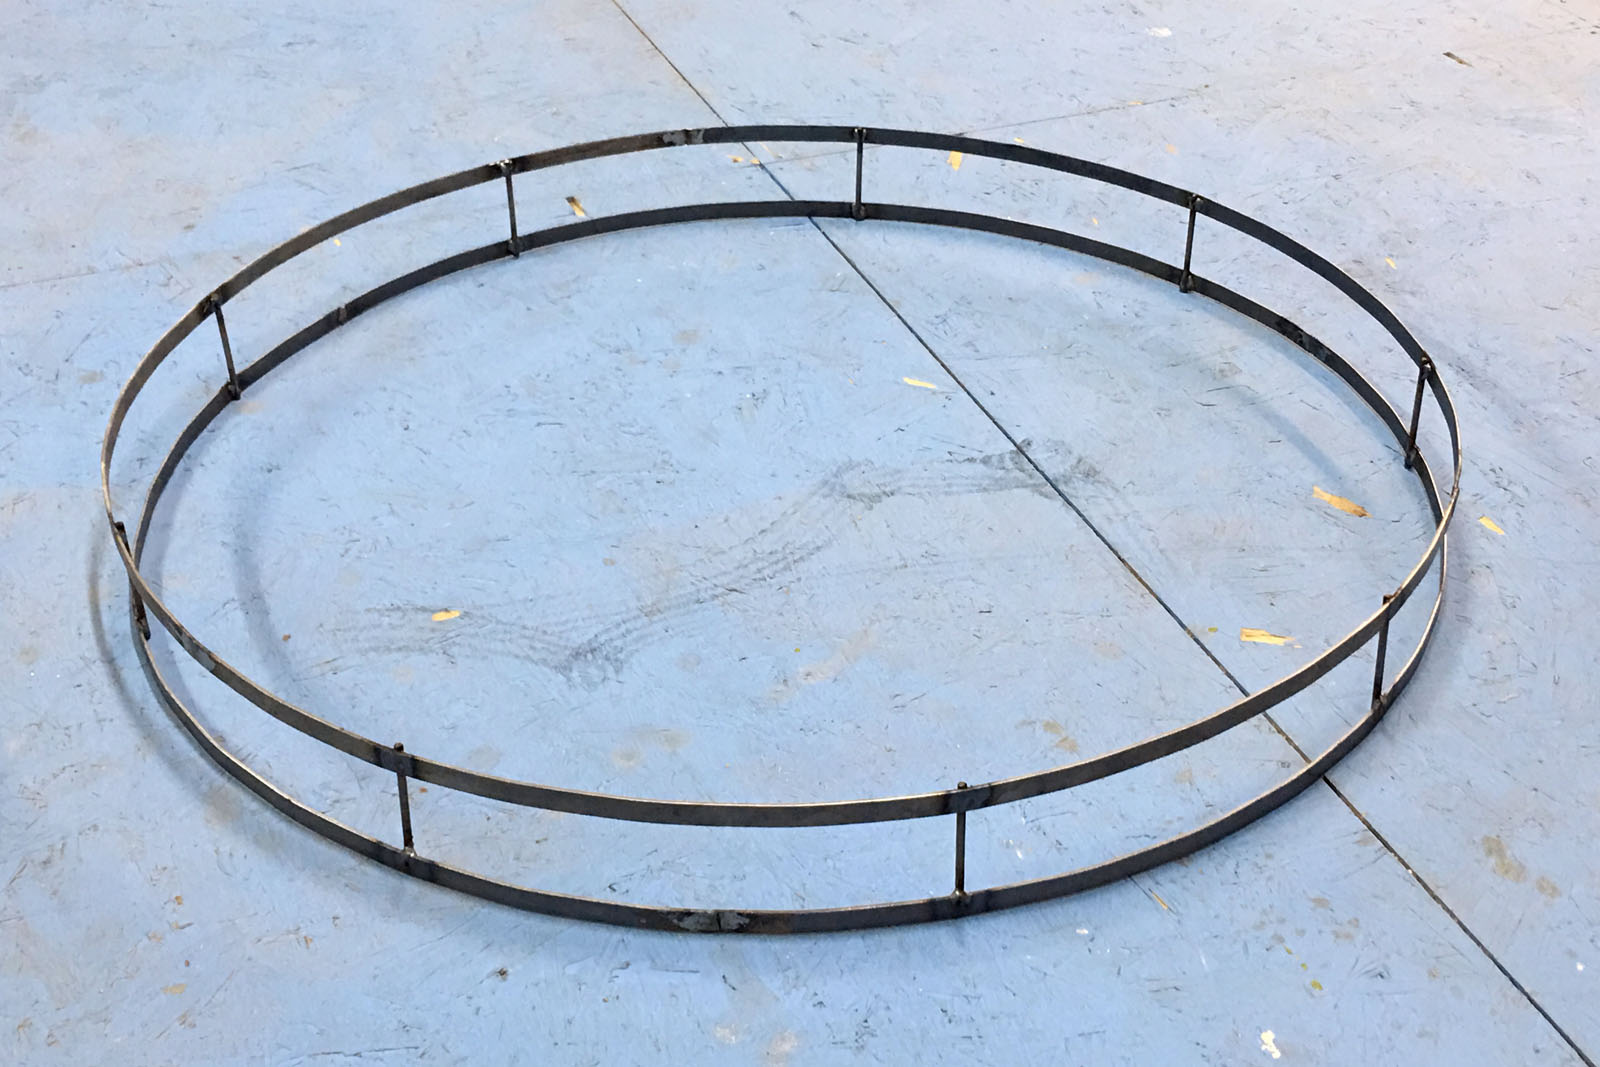
Steel frame
First up was the ring itself. I bent two bars of steel using my ring bender, and welded them into a single wheel connected by short rods of steel.
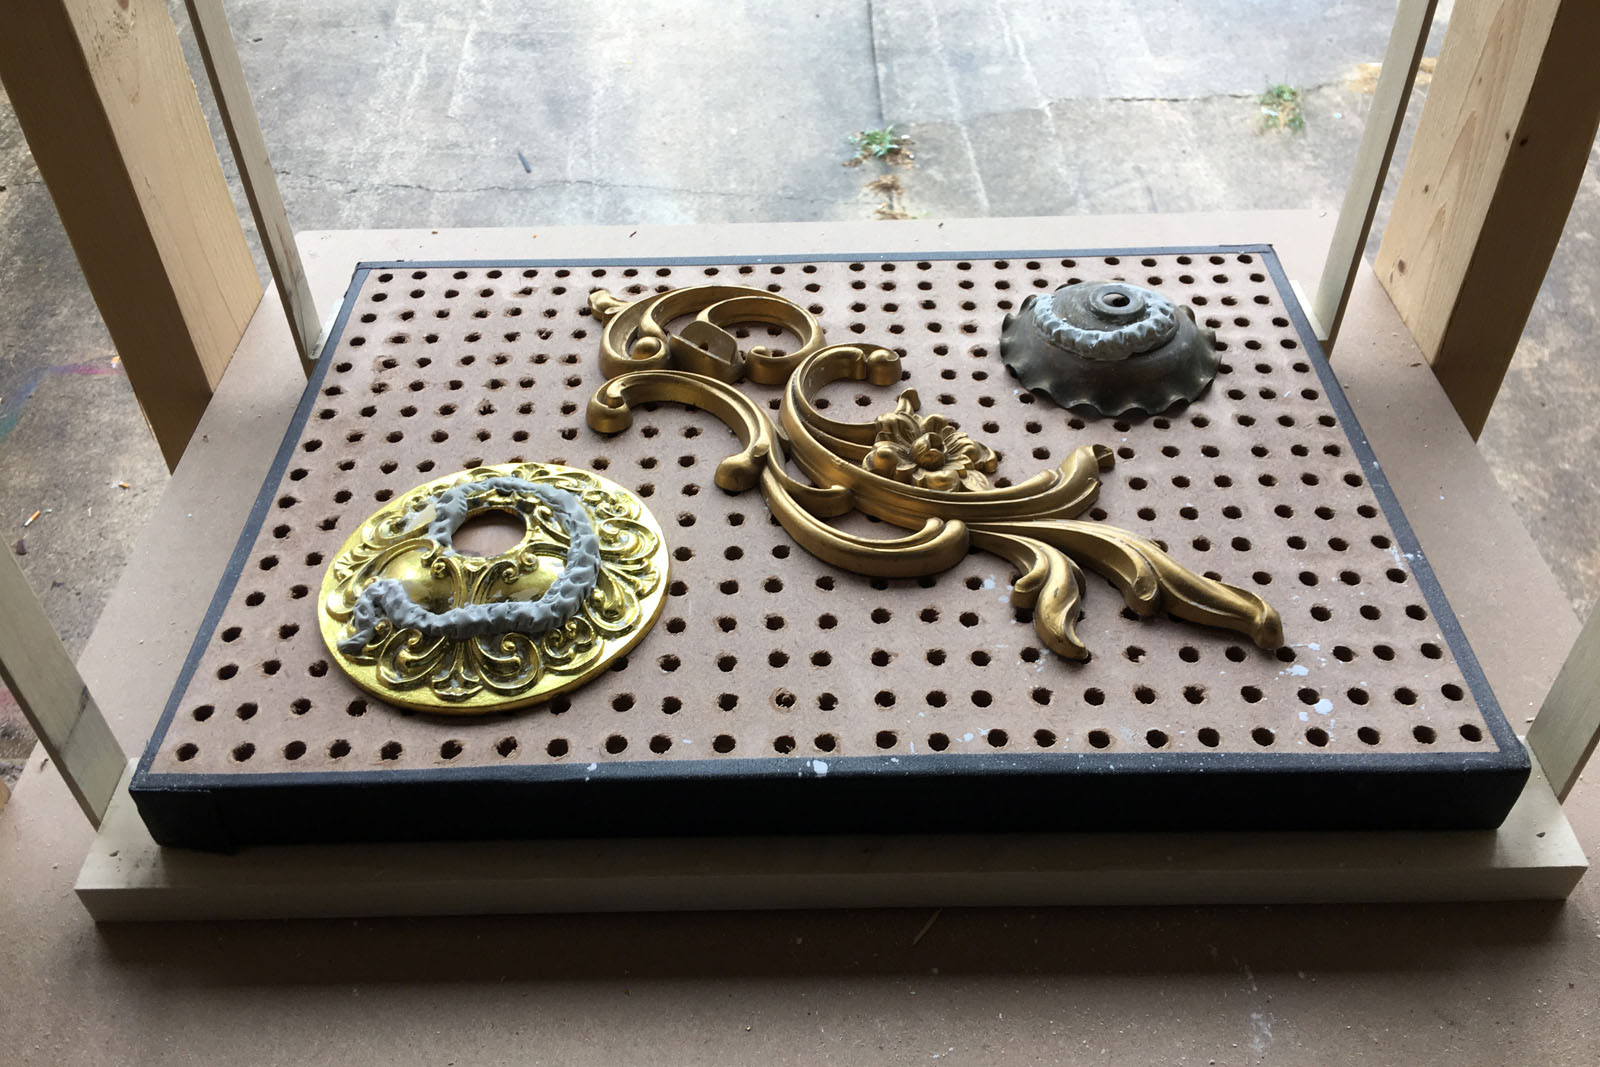
Vacuum forming bucks
I needed some bobeches for under the candles and some scrollwork around the ring. I decided to fire up my new vacuum former for the first time and make all those pieces out of plastic. I already had some bobeches and a carved floral scroll-y piece that I was able to use as forms.
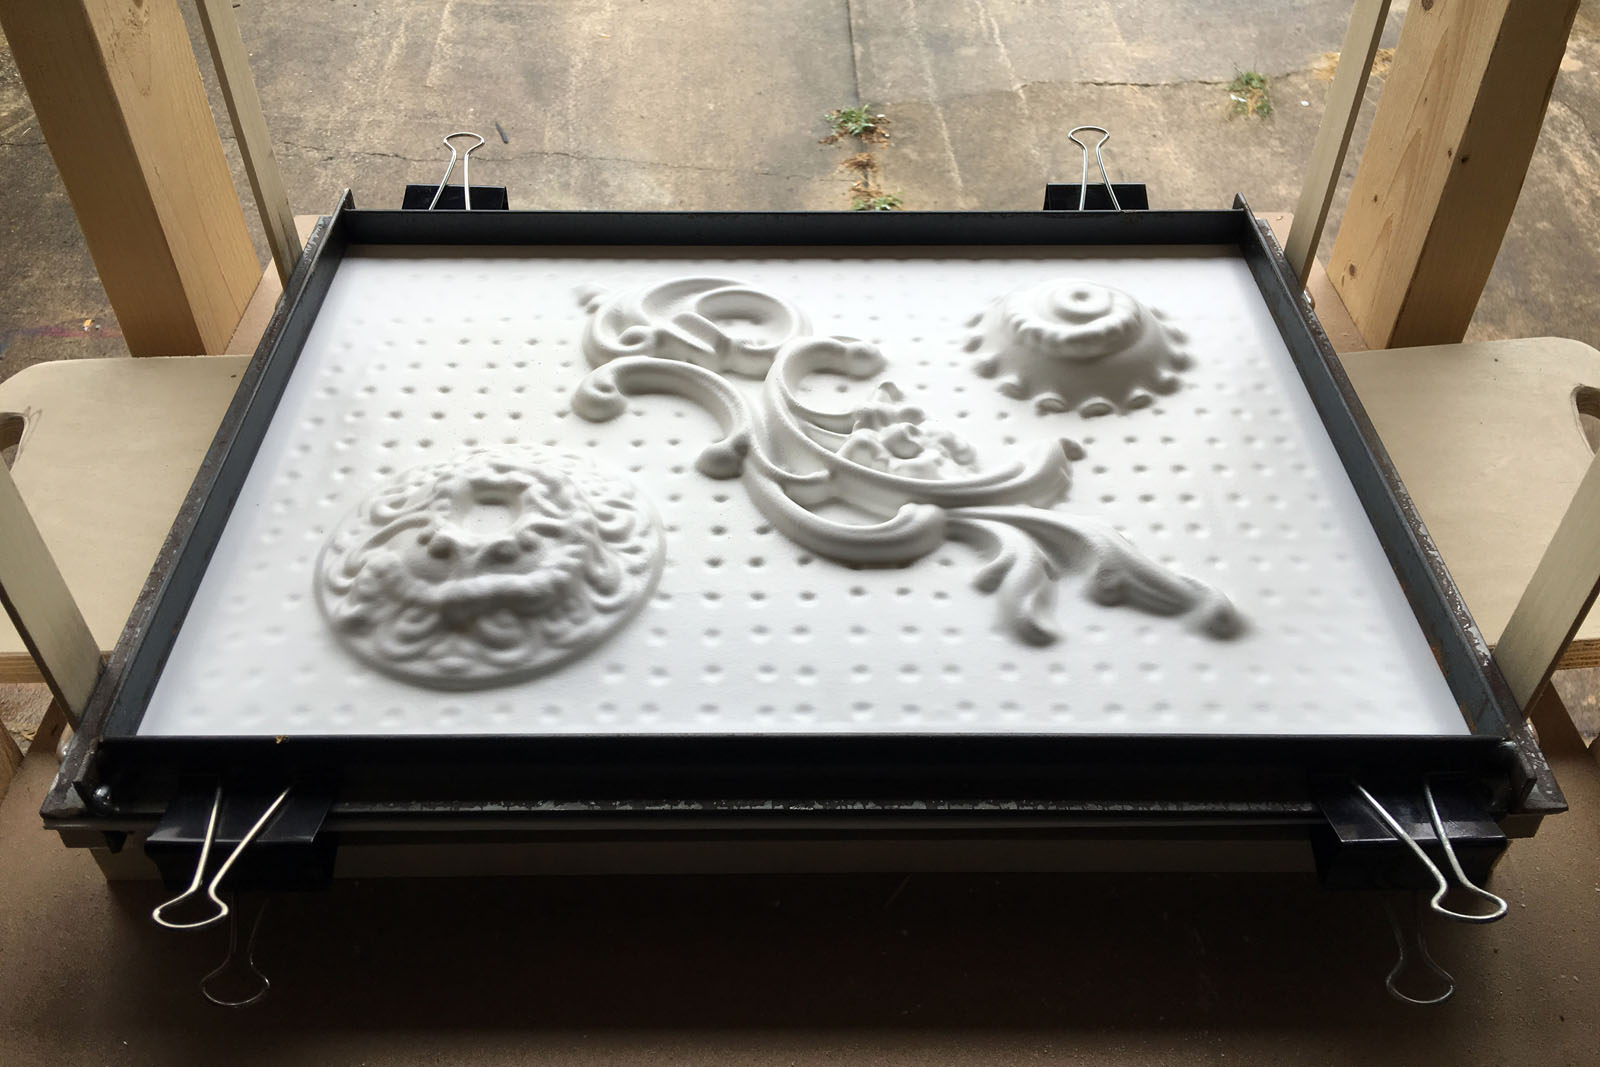
Formed plastic
Each sheet of plastic fit one bobeche, one scroll piece, and one smaller bobeche for some sconces I was also altering. I pulled nine sheets, and then cut out all the pieces.
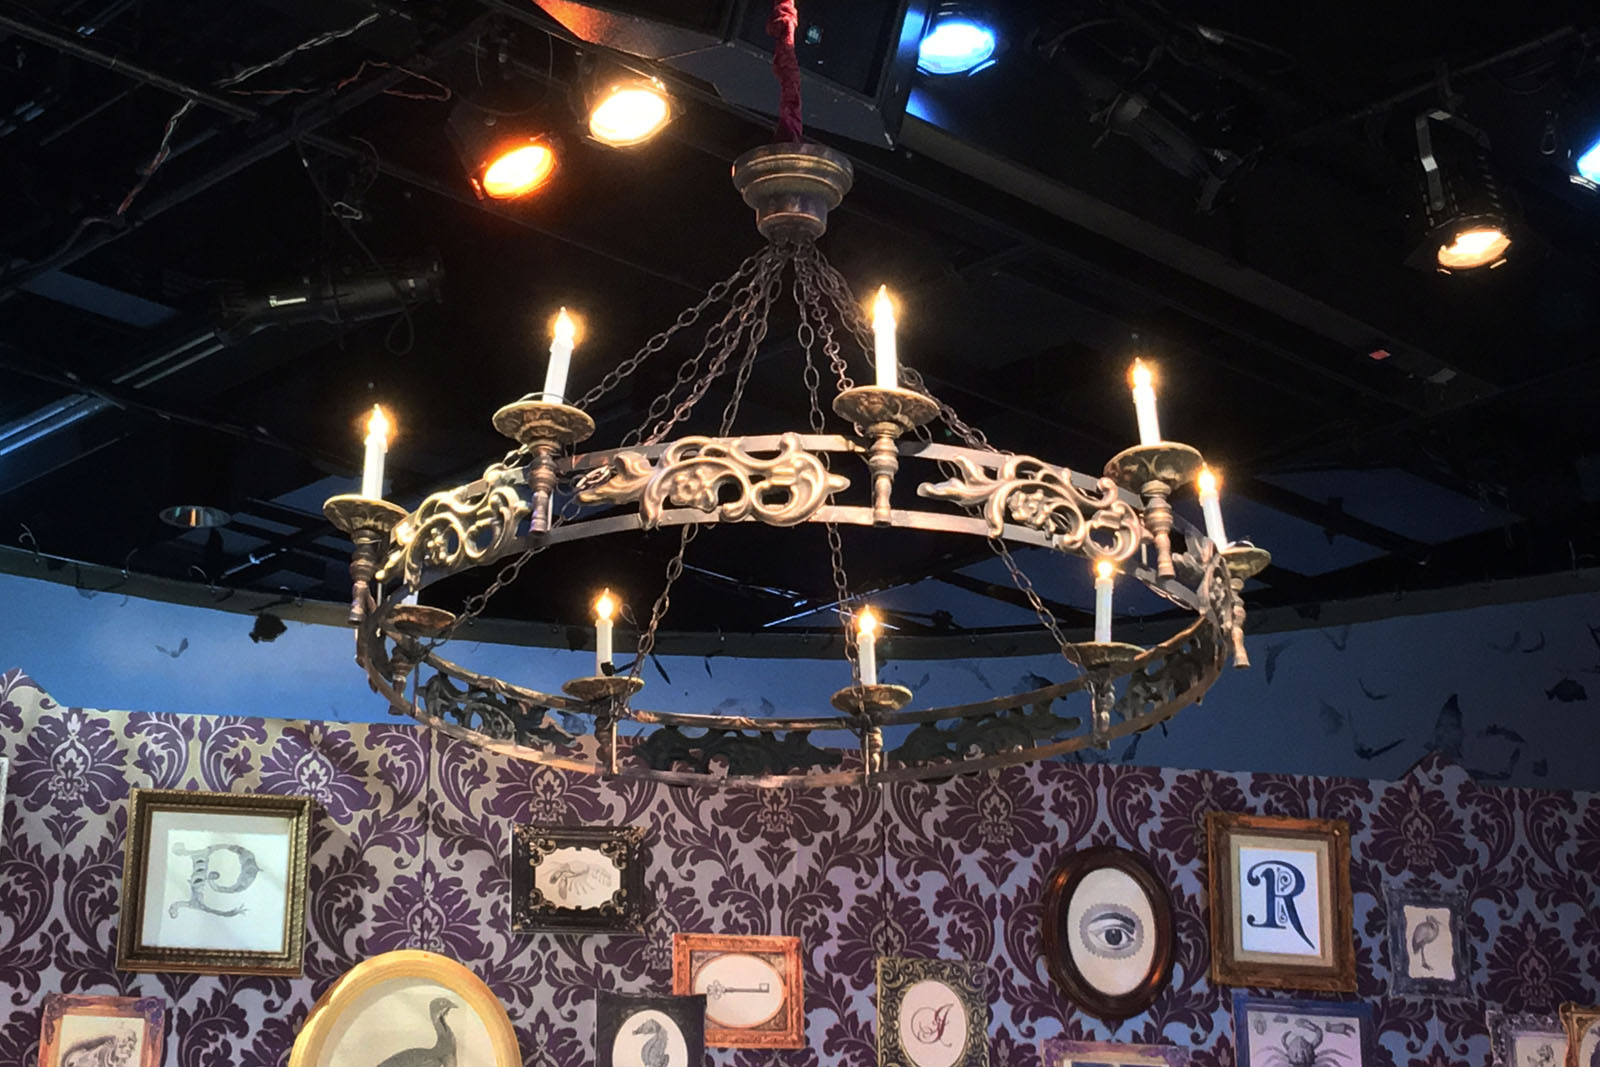
Wiring the lights
The candlestick holders were wooden pieces I picked up at the craft store. I attached them to the ring and then wired the whole thing together. The candelabra sockets had small tails of wire, so I wired three together, than ran some lamp cord up the chain to the center hanging piece. With nine candles, this meant I had three pieces of lamp cord running up the chains, and those three were wired together inside the center piece to another longer piece of lamp cord that the electricians could attach a plug to. The bulbs were 7 1/2 watts each, so the whole fixture was only 67.5 watts, which made lamp cord totally fine for this.
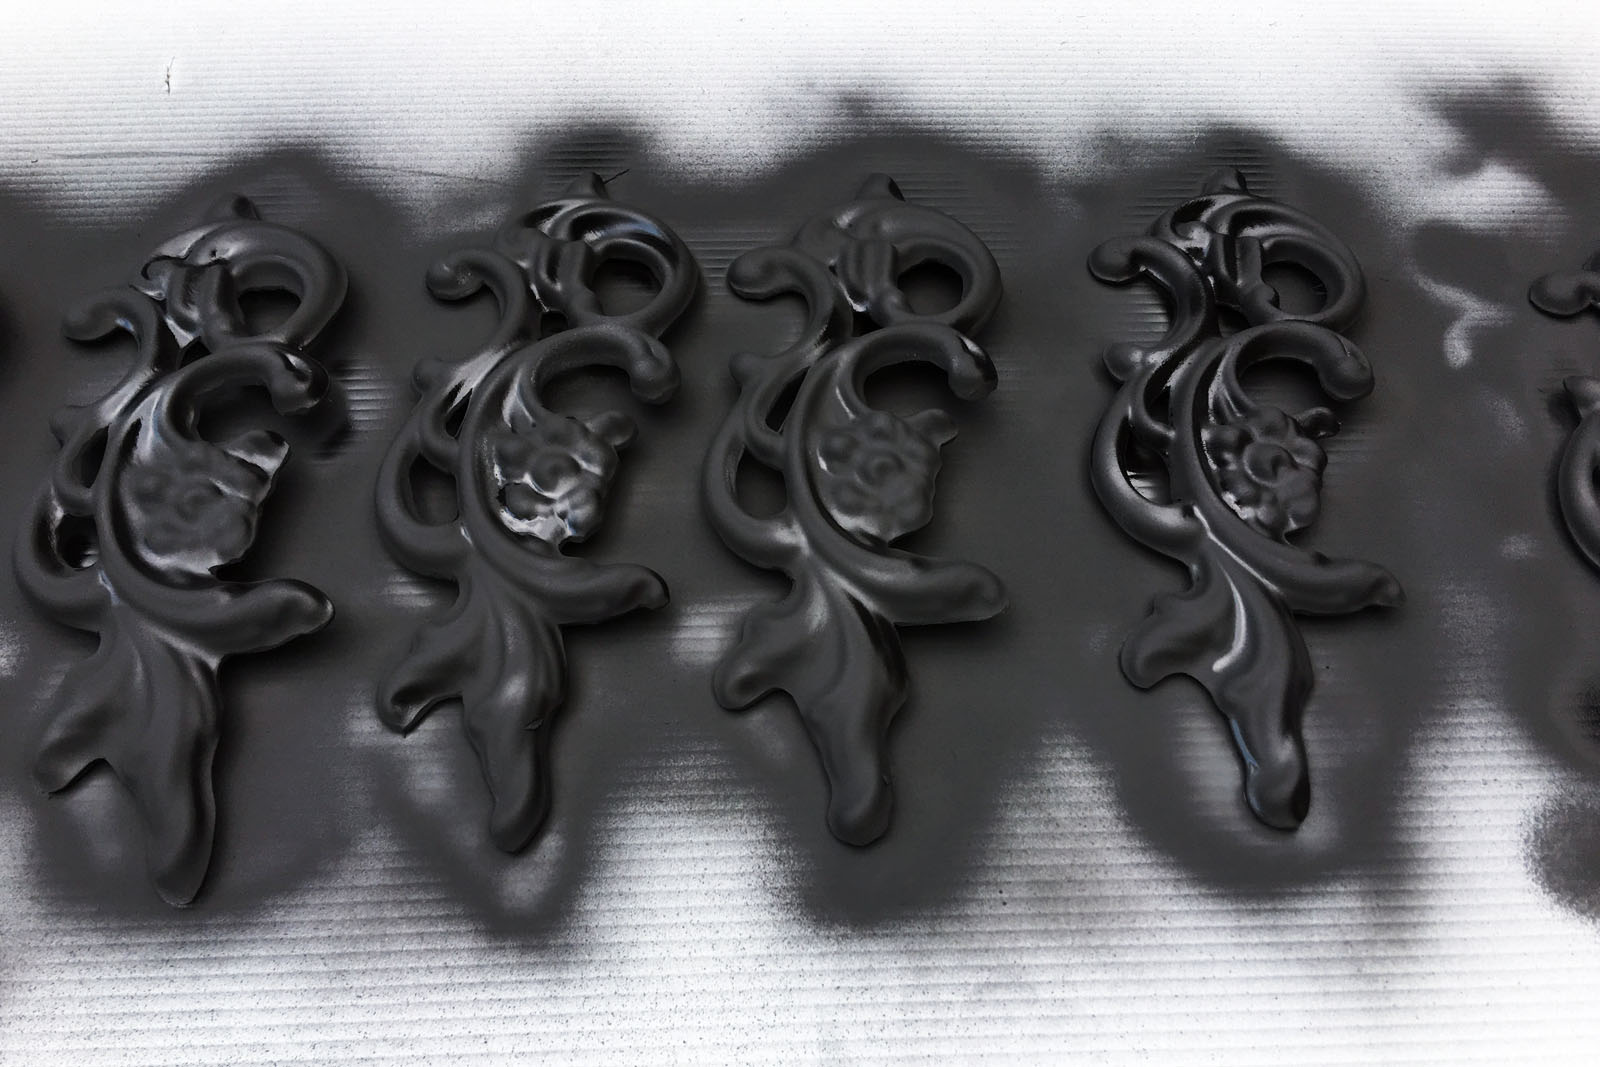
Painted pieces
I spray painted all the plastic pieces before attaching them. Once everything was assembled, I drybrushed some bronze acrylic paint over the whole thing, and then it got some gold paint highlights.
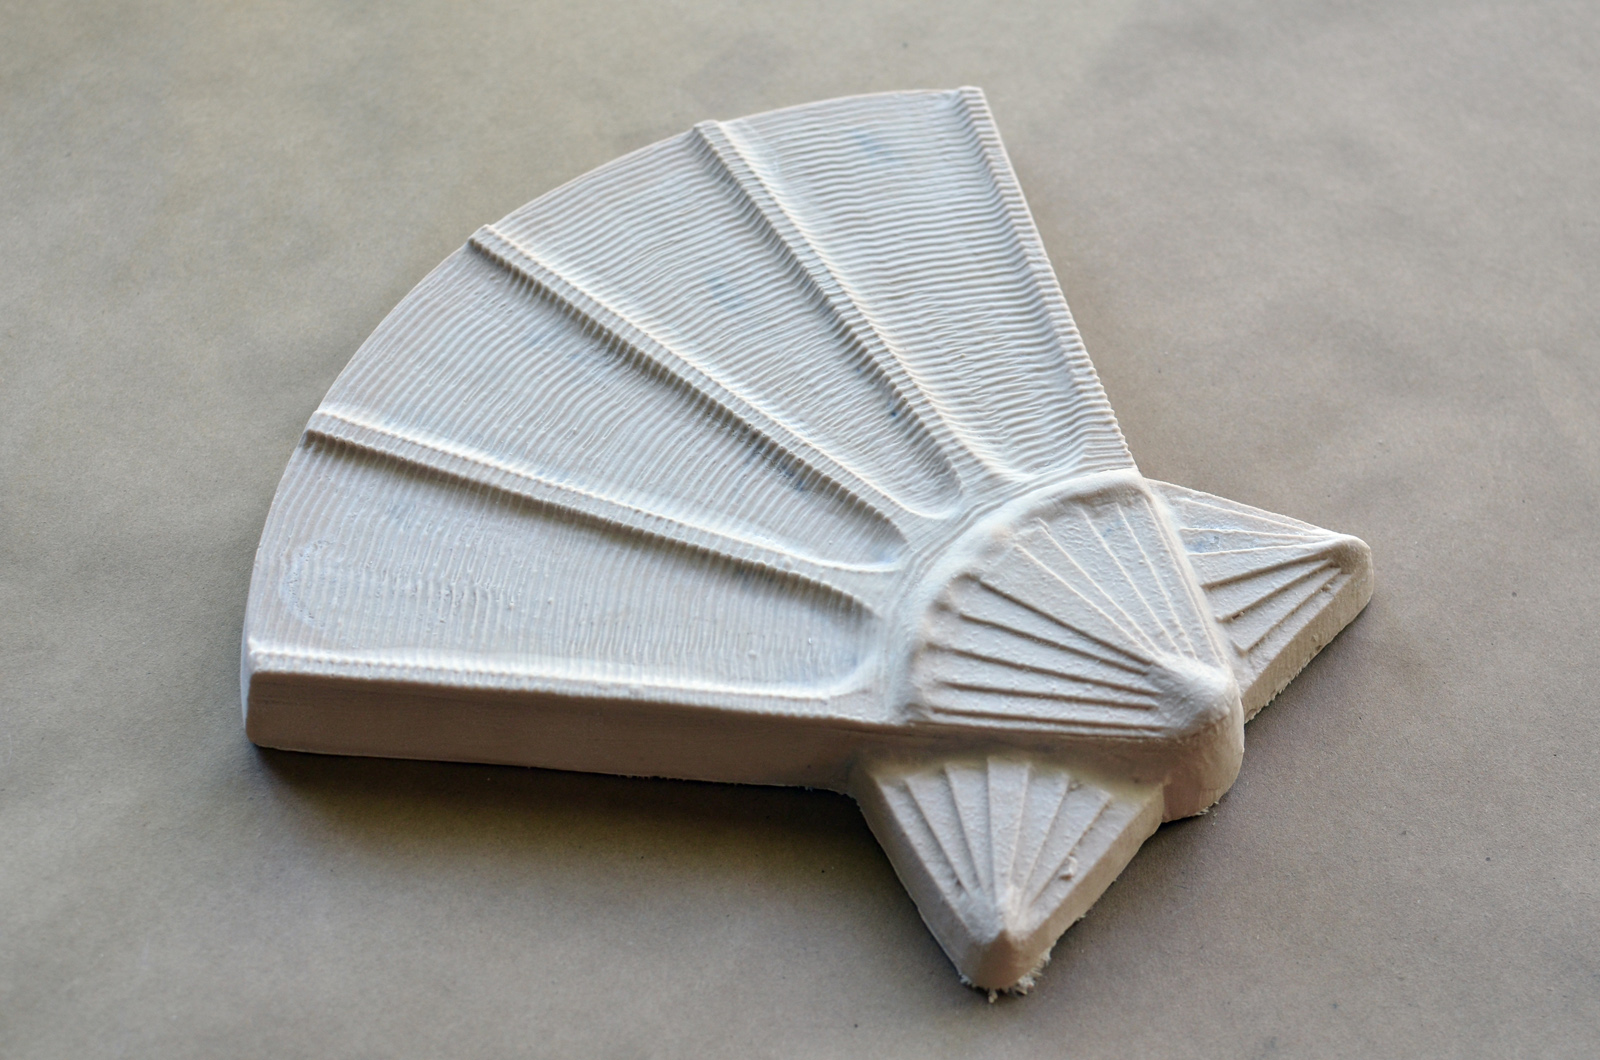
I have a second project from The Faery Tale Adventure which I recently finished. Like the Magic Seashell from a few weeks back, this was a project I used to get photographs and videos for various techniques covered in the second edition of The Prop Building Guidebook, which will be out in early 2017.
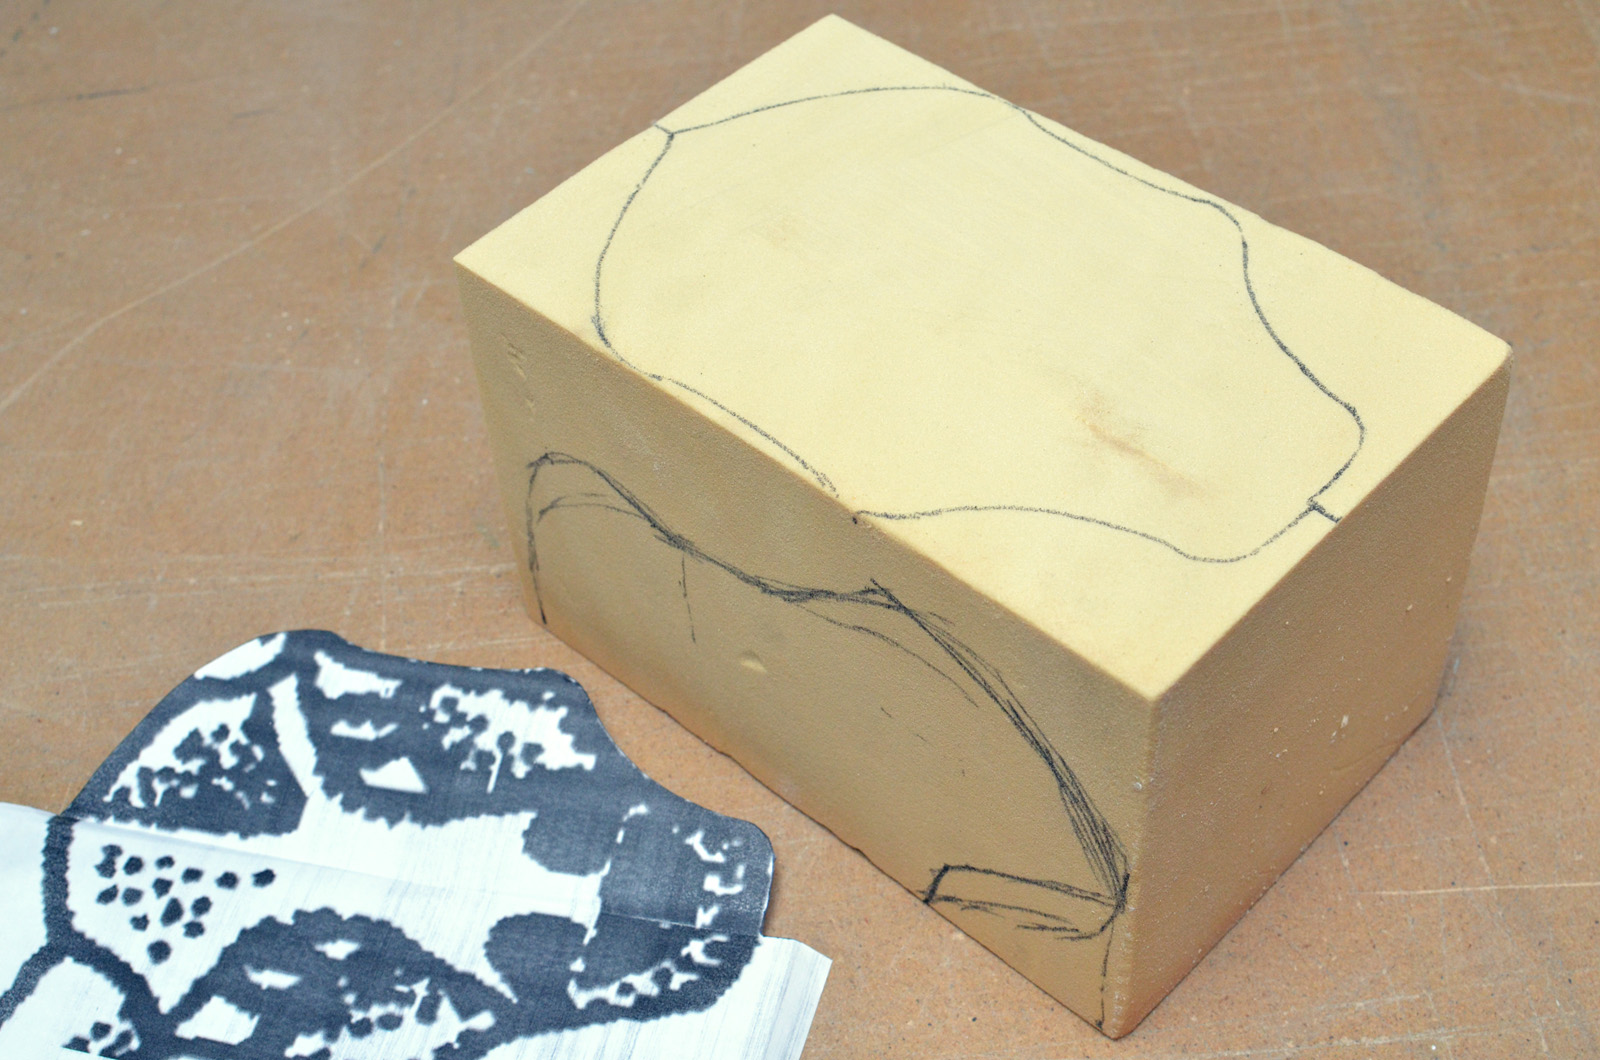
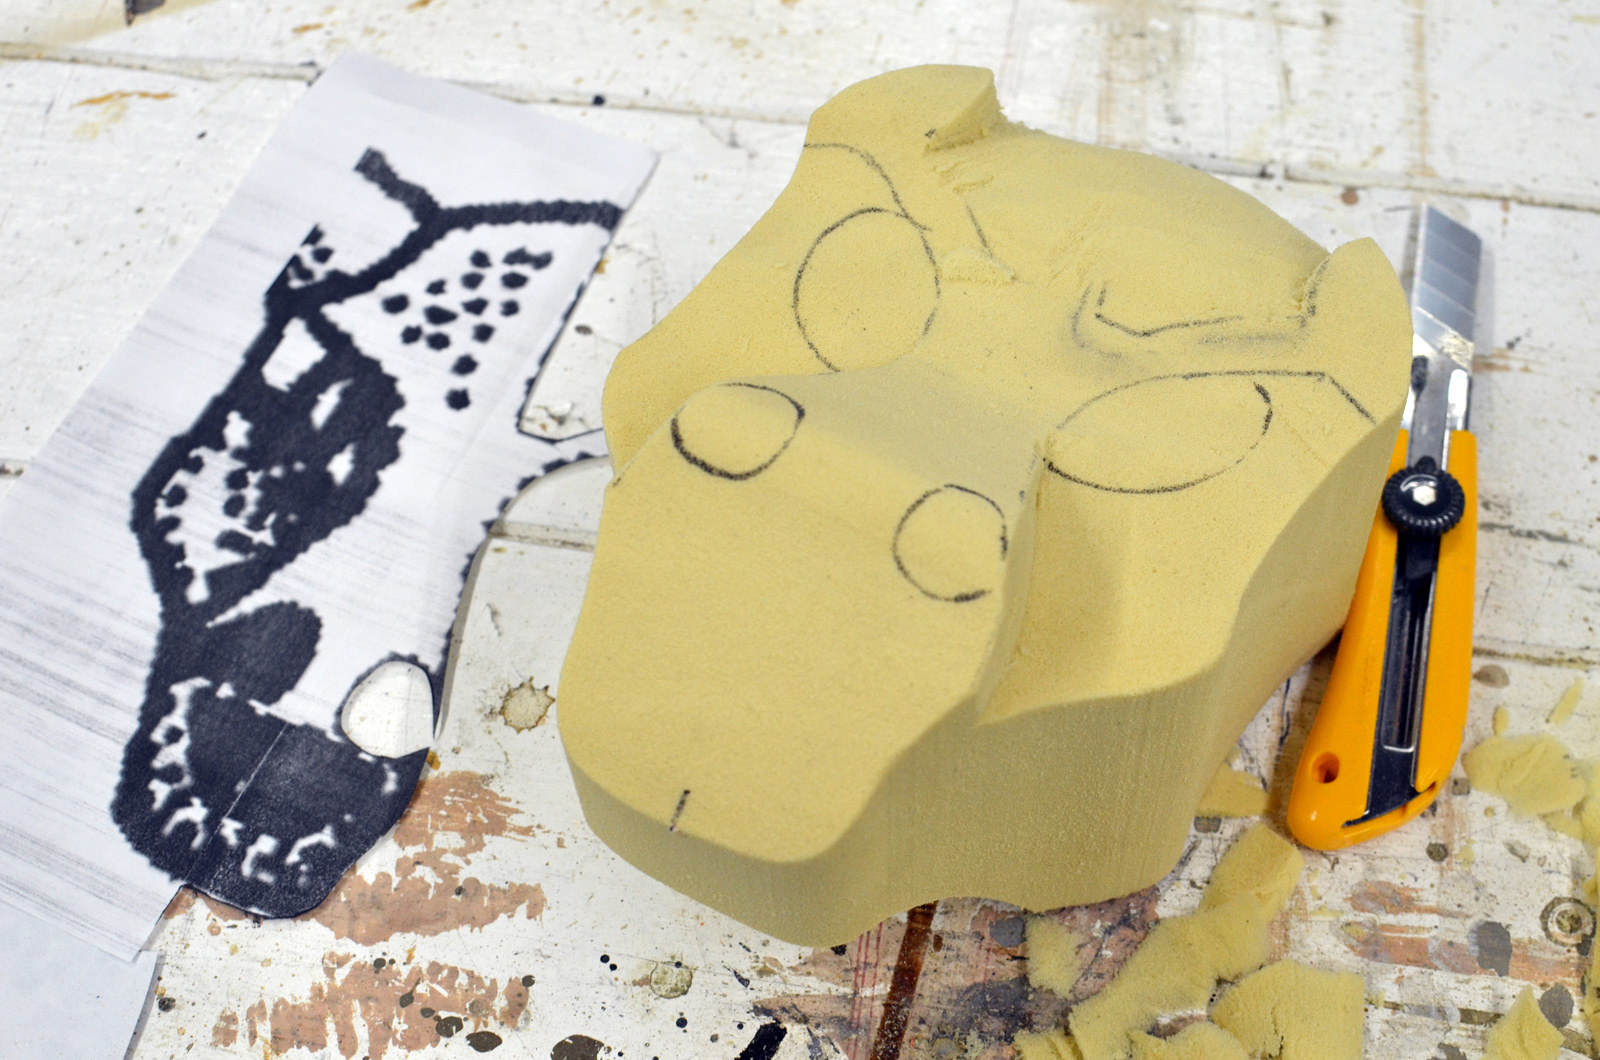
Polyurethane block
This was my first time carving into polyurethane foam, and the difference from polystyrene foam was remarkable. It does not have any of the sponginess of polystyrene. It cuts like butter but you can get really sharp, defined details.
Unfortunately, the dust may be reactive with your skin, so you need to wear gloves, sleeves, and a mask while working with it. The inertness of polystyrene dust has it beat there. But for a small piece like this, it was pretty fun.
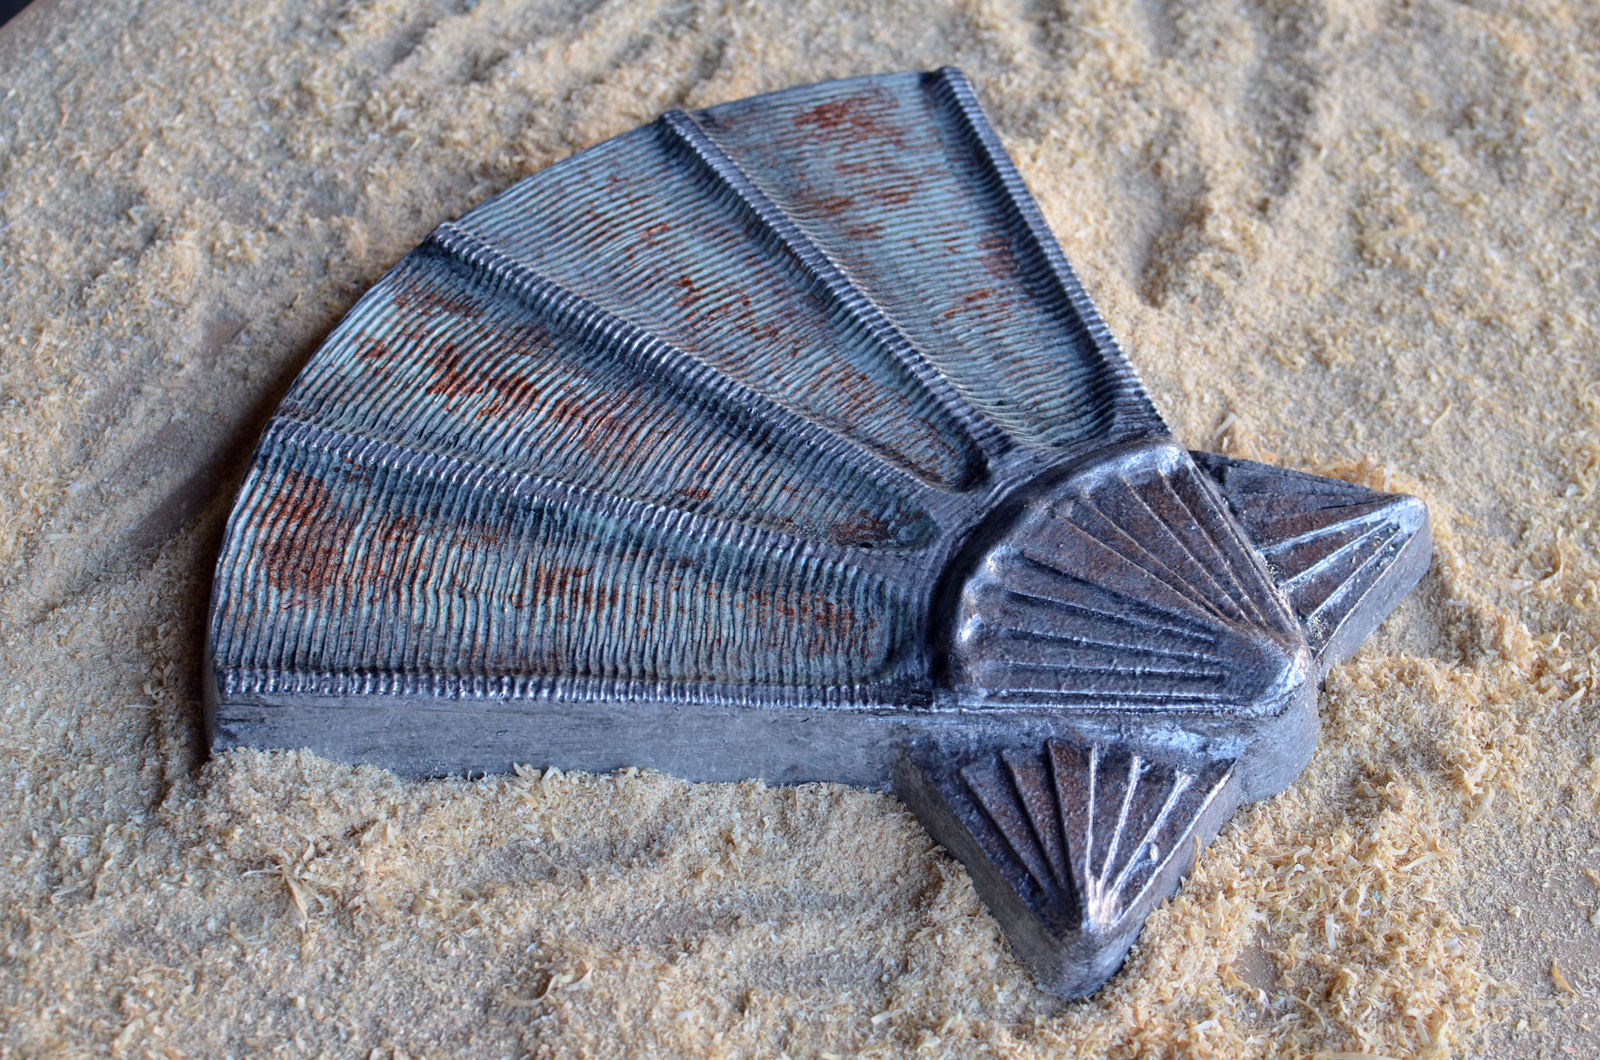
Starting to carve
The video game graphics were not helpful; the actual Talisman is only seven by nine pixels big. But the manual has some artwork which I enlarged and used as a guide.
I have some more photos and information about carving polyurethane which will be in the second edition of my book.
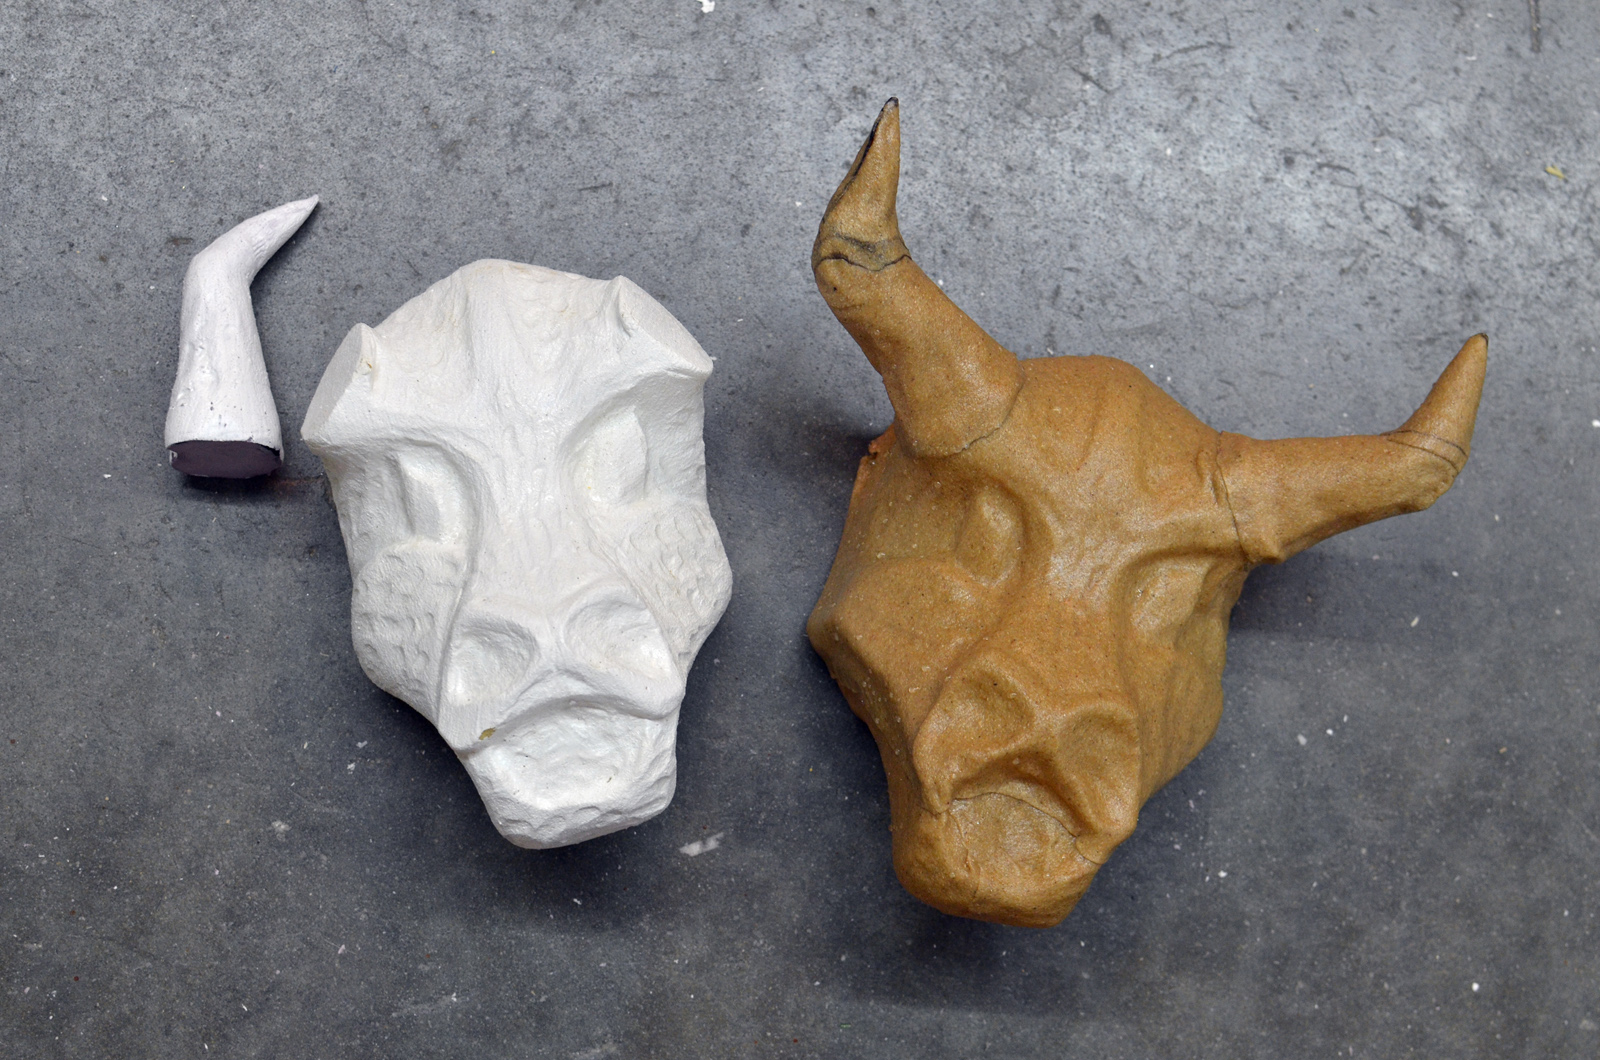
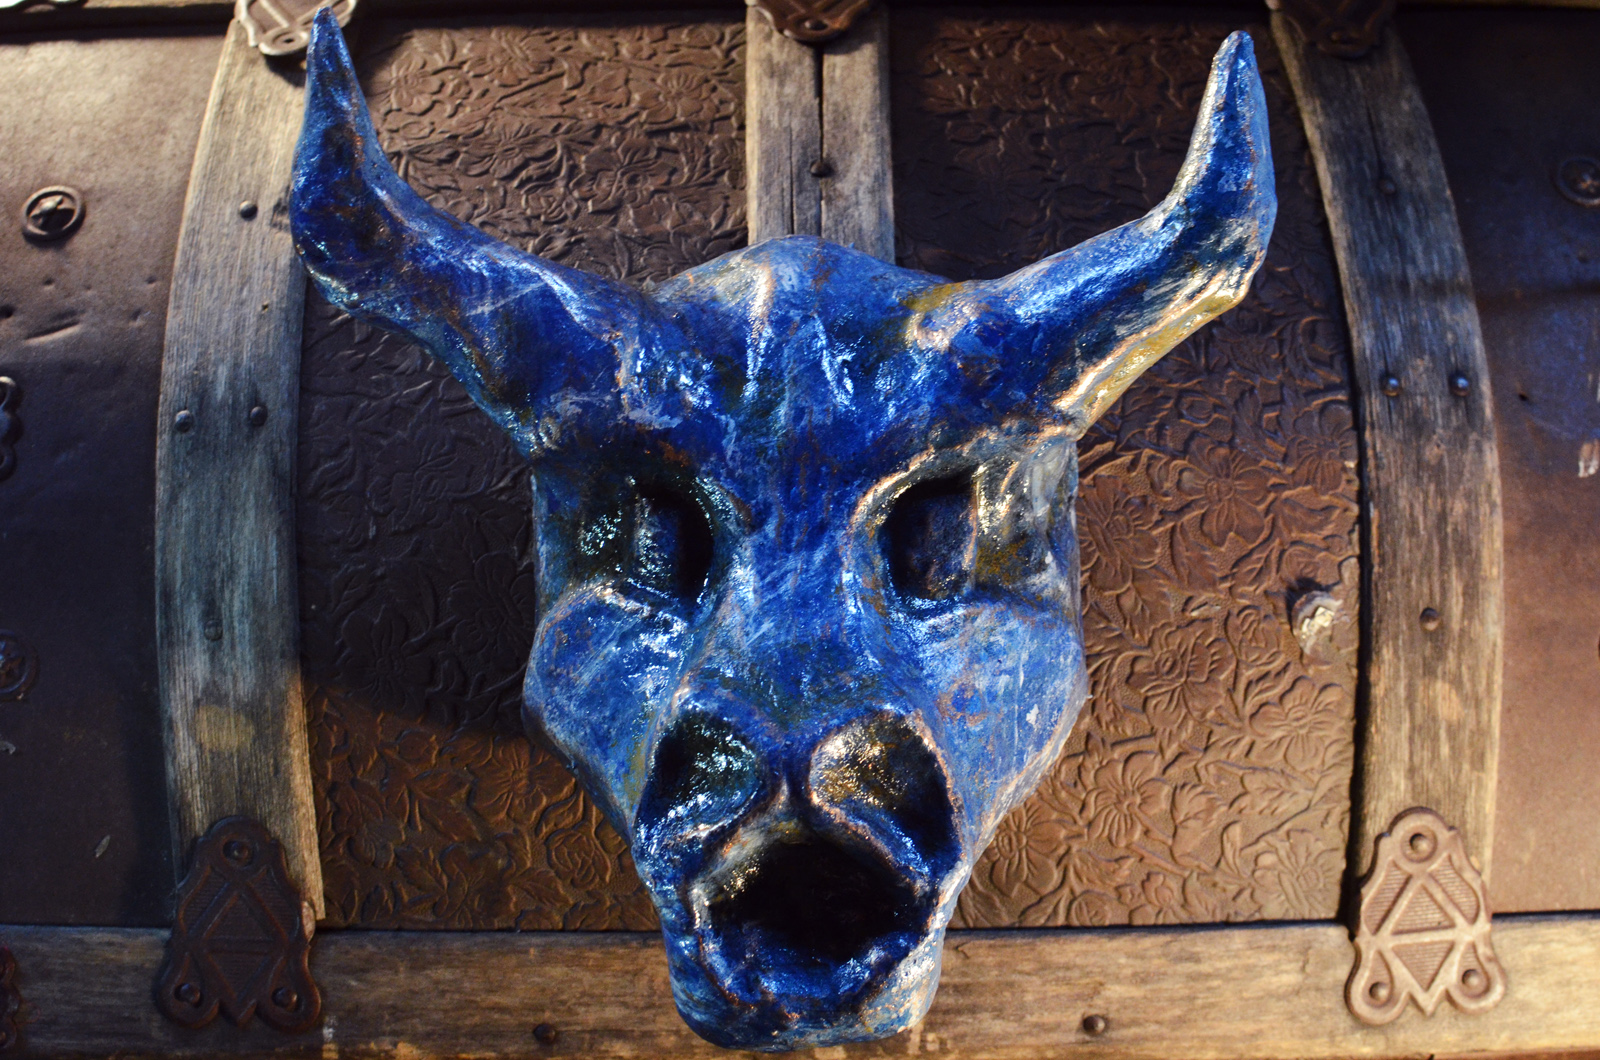
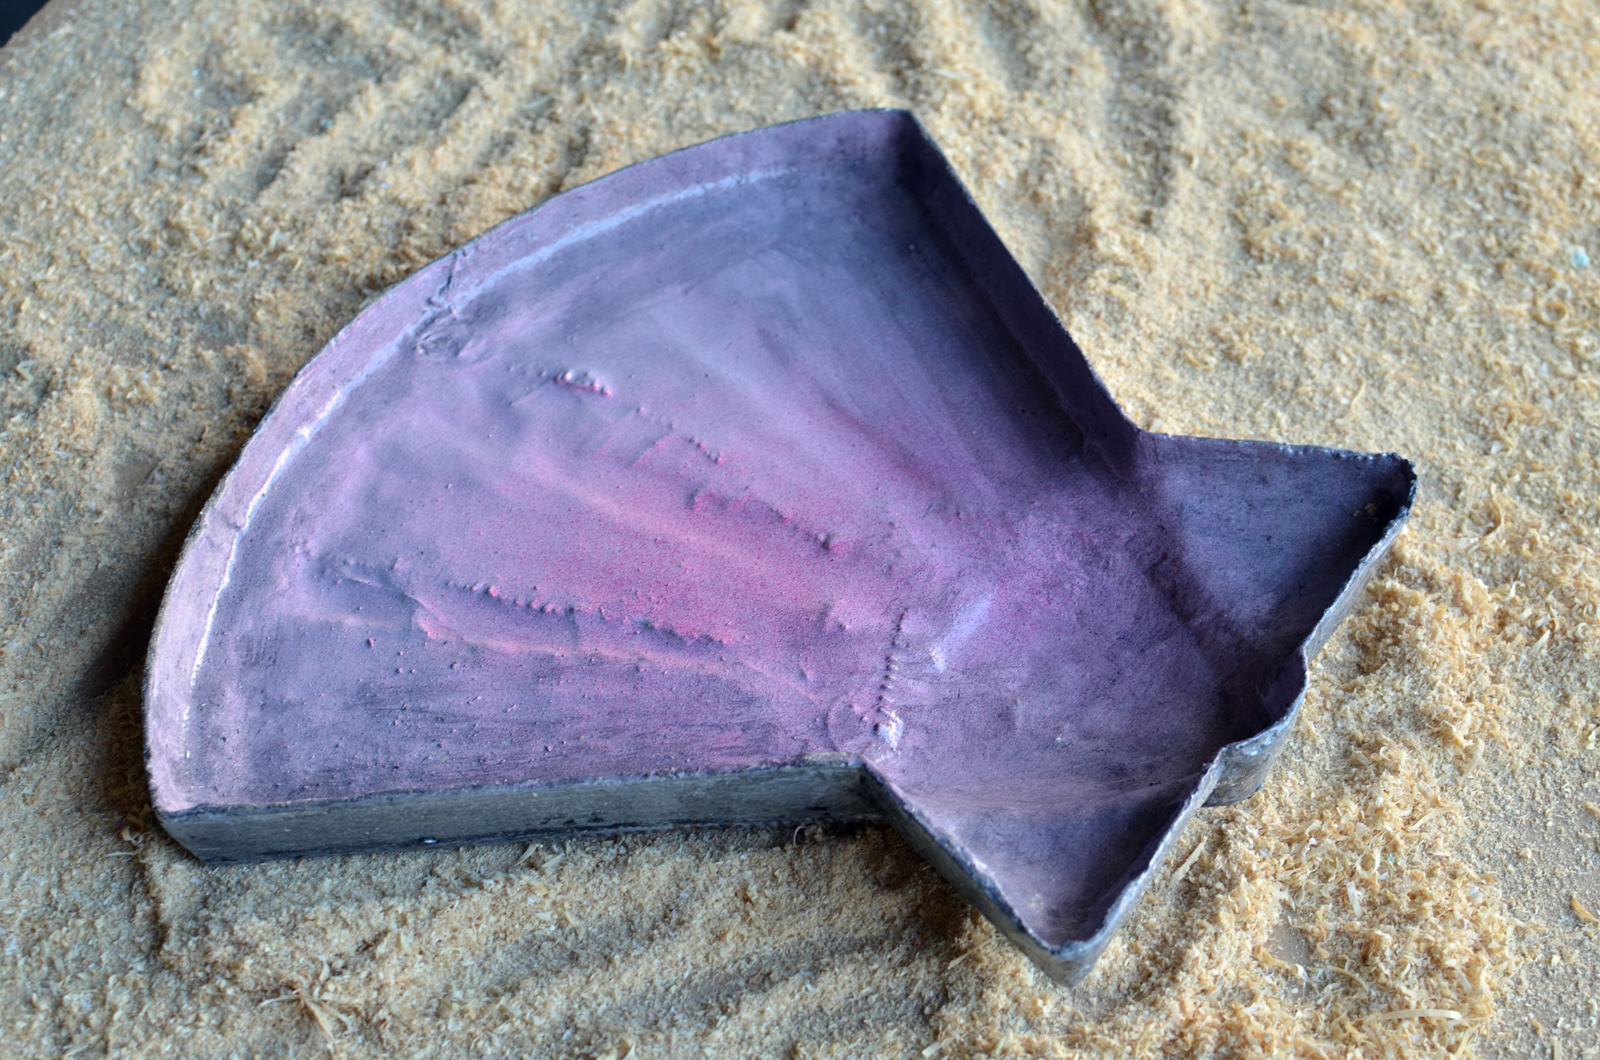
Form and Worbla
I tried out Worbla for the first time on this project. I have a video on Worbla coming out within the next few months, and the second edition will have a lot more information on it as well.
You can see in the photo above I coated the polyurethane with Flexcoat to give it more of a shell. I made the horns separate and attached them afterwards.
I’ve worked with Wonderflex before, so I noticed some differences between the two materials. First, Worbla smells like maple syrup when it’s heated. Really. Wonderflex seems to have much more of a transition between hard and soft. Worbla will become pliable very quickly with heat, then re-solidify quickly when cooled; Wonderflex becomes gradually more pliable as it is heated. That may be because the Worbla is thinner, or maybe because its formula is a bit different; I don’t know.
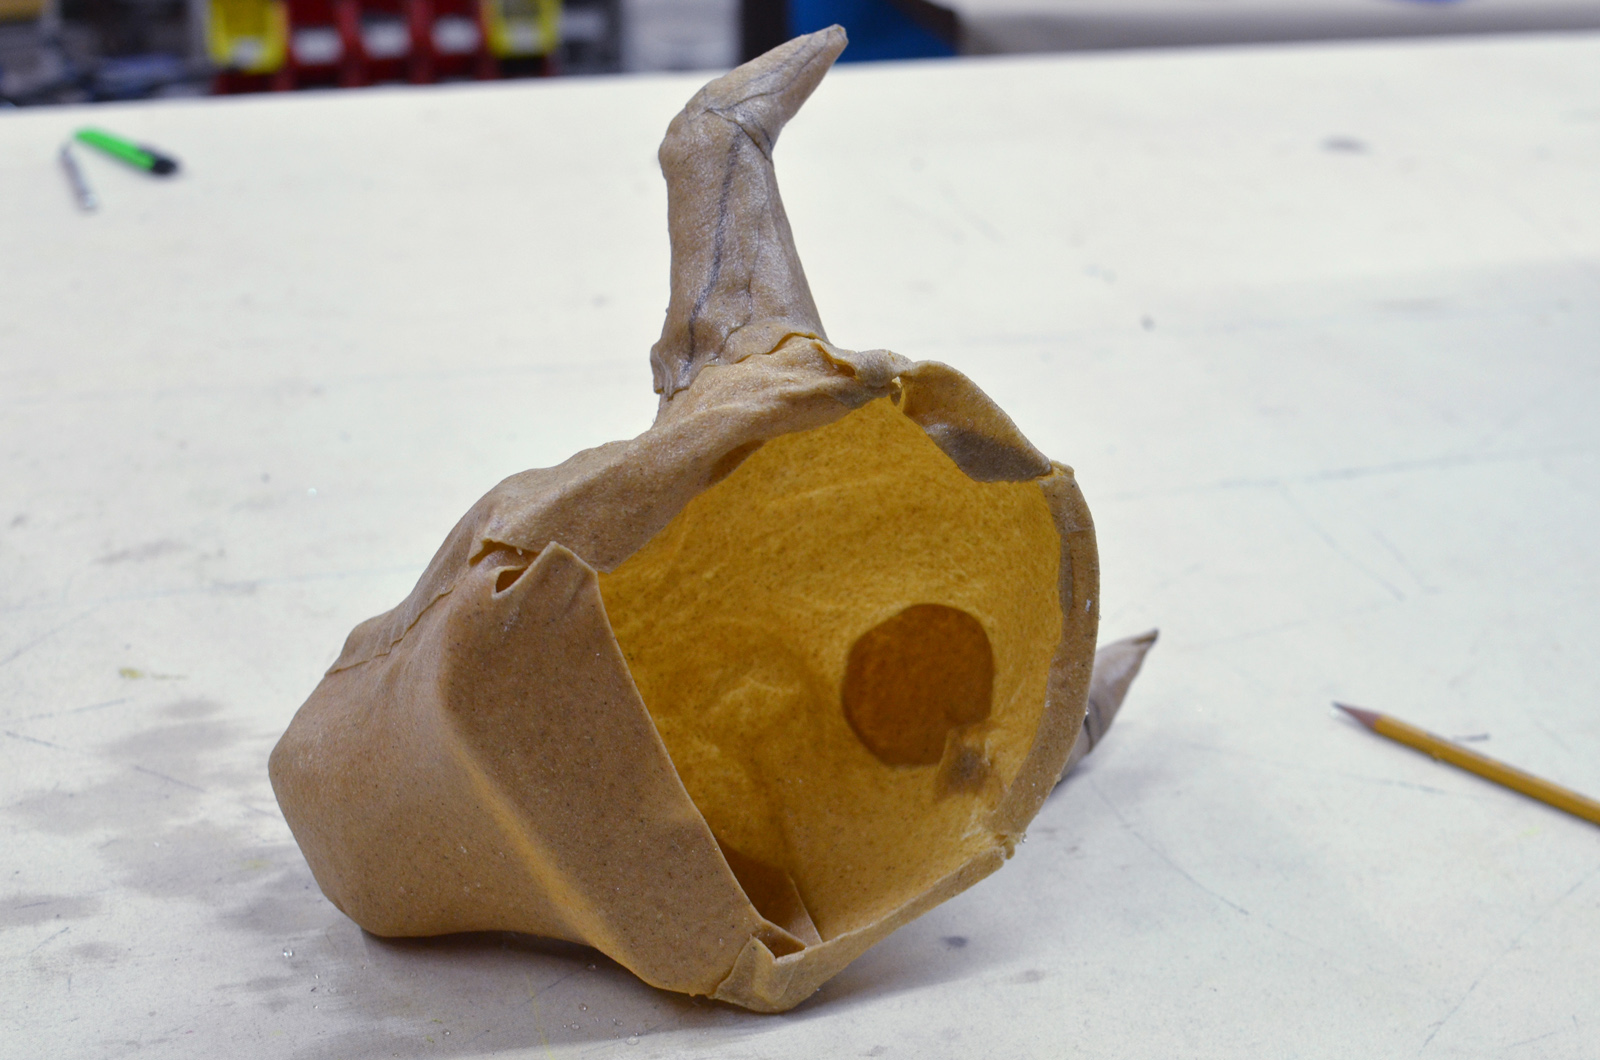
Back of Worbla
Like other thermoplastics, the benefit of Worbla is that you make a hollow shell of a prop rather than a solid chunk. My original plan was to fill the void with lights so the Talisman could glow, but I ended up putting so much paint on the outside that it became opaque.
Isometric view of Talisman
For my first attempt at paint, I tried hydro-dipping. That did not work. So I covered that over with a traditional marbleing technique, which will also be in the book and in a future video.
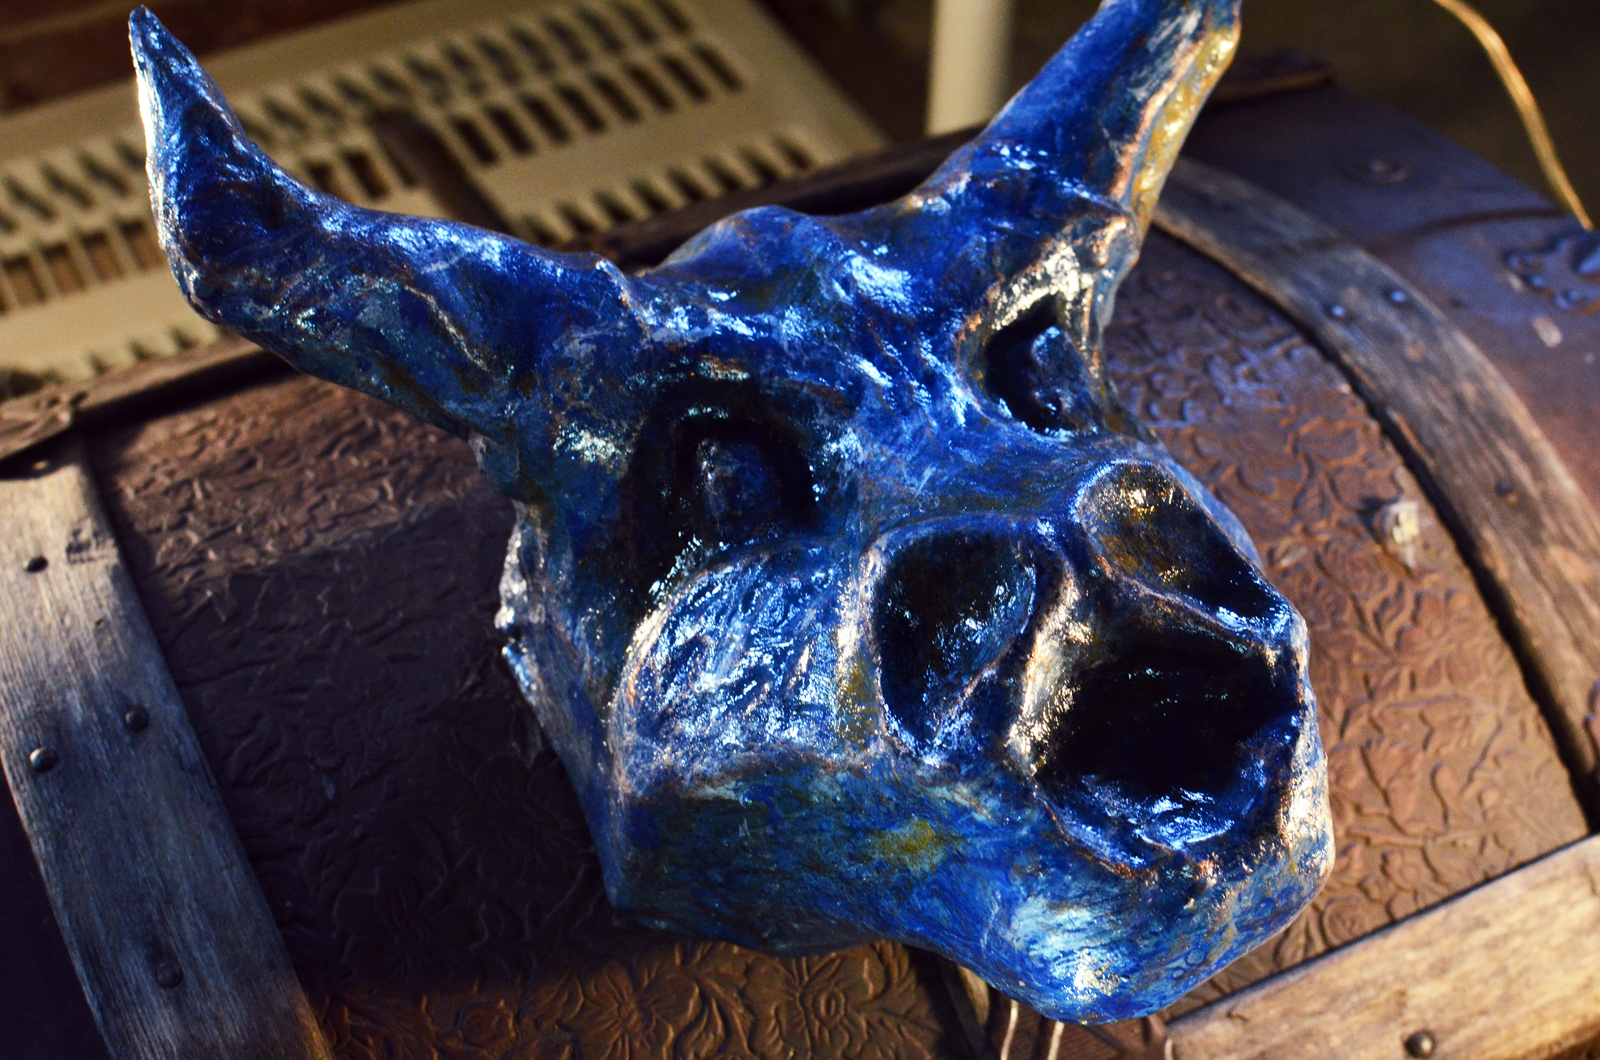
Talisman from Faery Tale Adventure
I finished it off with a black wash for ageing and some copper metallic acrylic for highlighting, followed by a spray gloss clearcoat.
And now I have a Talisman that can keep my humble props shop safe from evil spirits and undead creatures.
When I was a kid, I played a video game called Faery Tale Adventure that was filled with all sorts of magical items. I started making replica props of these items; I needed projects to show off various techniques for the second edition of The Prop Building Guidebook, and I wanted some props I could trot around to Maker Faires. The first one I have finished is a magic seashell, used in the game to summon a friendly turtle.
Seashell Model
The model was cut out of MDF and layered with pieces of cardstock. I used some Apoxie Sculpt to further refine the shape. I coated it to give it a bit of texture, then spray painted it gloss pink to seal it all together and make it shiny.
Clay covered model
Next I made a matrix mold of the shell. I’ll describe it briefly here, but I have a lot more information in my upcoming book. I also shot a video which I promise will be up later this summer. Basically, you cover the model in a half-inch of clay, build a box around it, and fill it with plaster.
After the plaster is poured
When the plaster is set, you remove the clay and put the plaster mother mold back. This leaves you with a half-inch air gap between the plaster and the model; fill this with silicon rubber.
After the rubber is poured
The silicone rubber mold ends up supported by the plaster, and I used the smallest amount of silicone rubber possible. Matrix molding takes a lot more prep work, but it leaves you with very clean-looking results, and saves you money on materials.
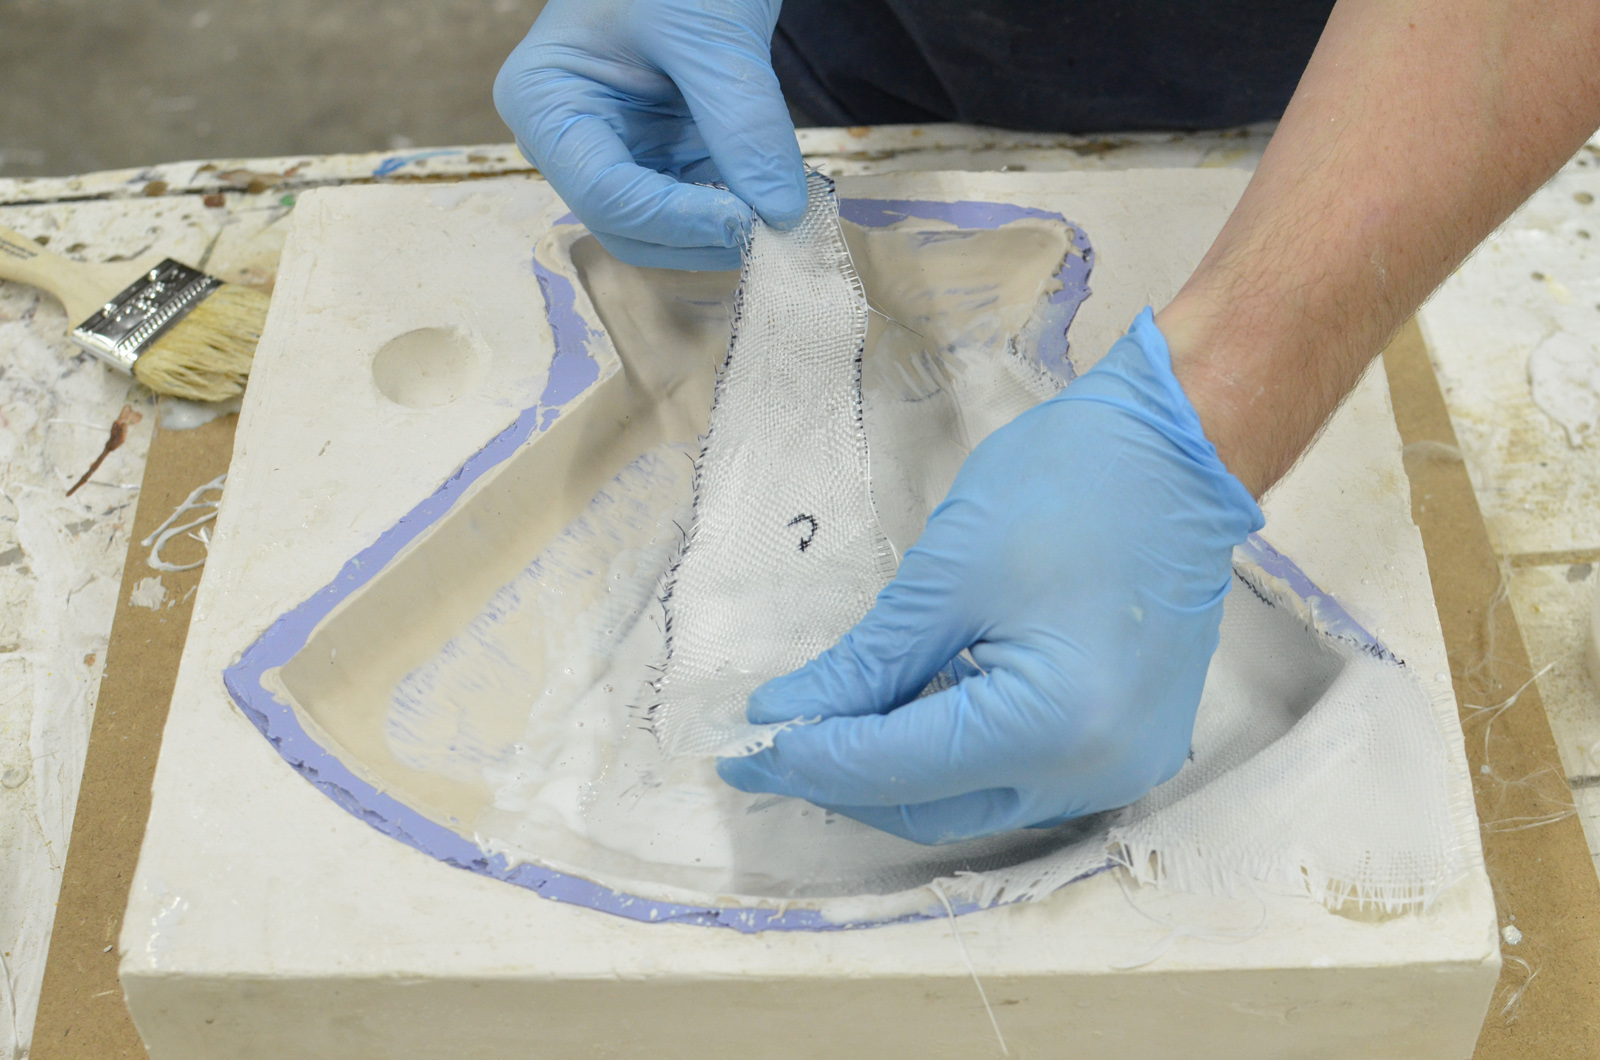
Laying in fiberglass cloth
To make the finished piece, I used fiberglass with Aqua Resin. Again, this was for the book; I will have a video of the entire process later this summer. I had never actually fiberglassed a piece from a mold before, so I learned a lot; the final seashell  was actually the fourth one I attempted, and the first I completed without anything going wrong.
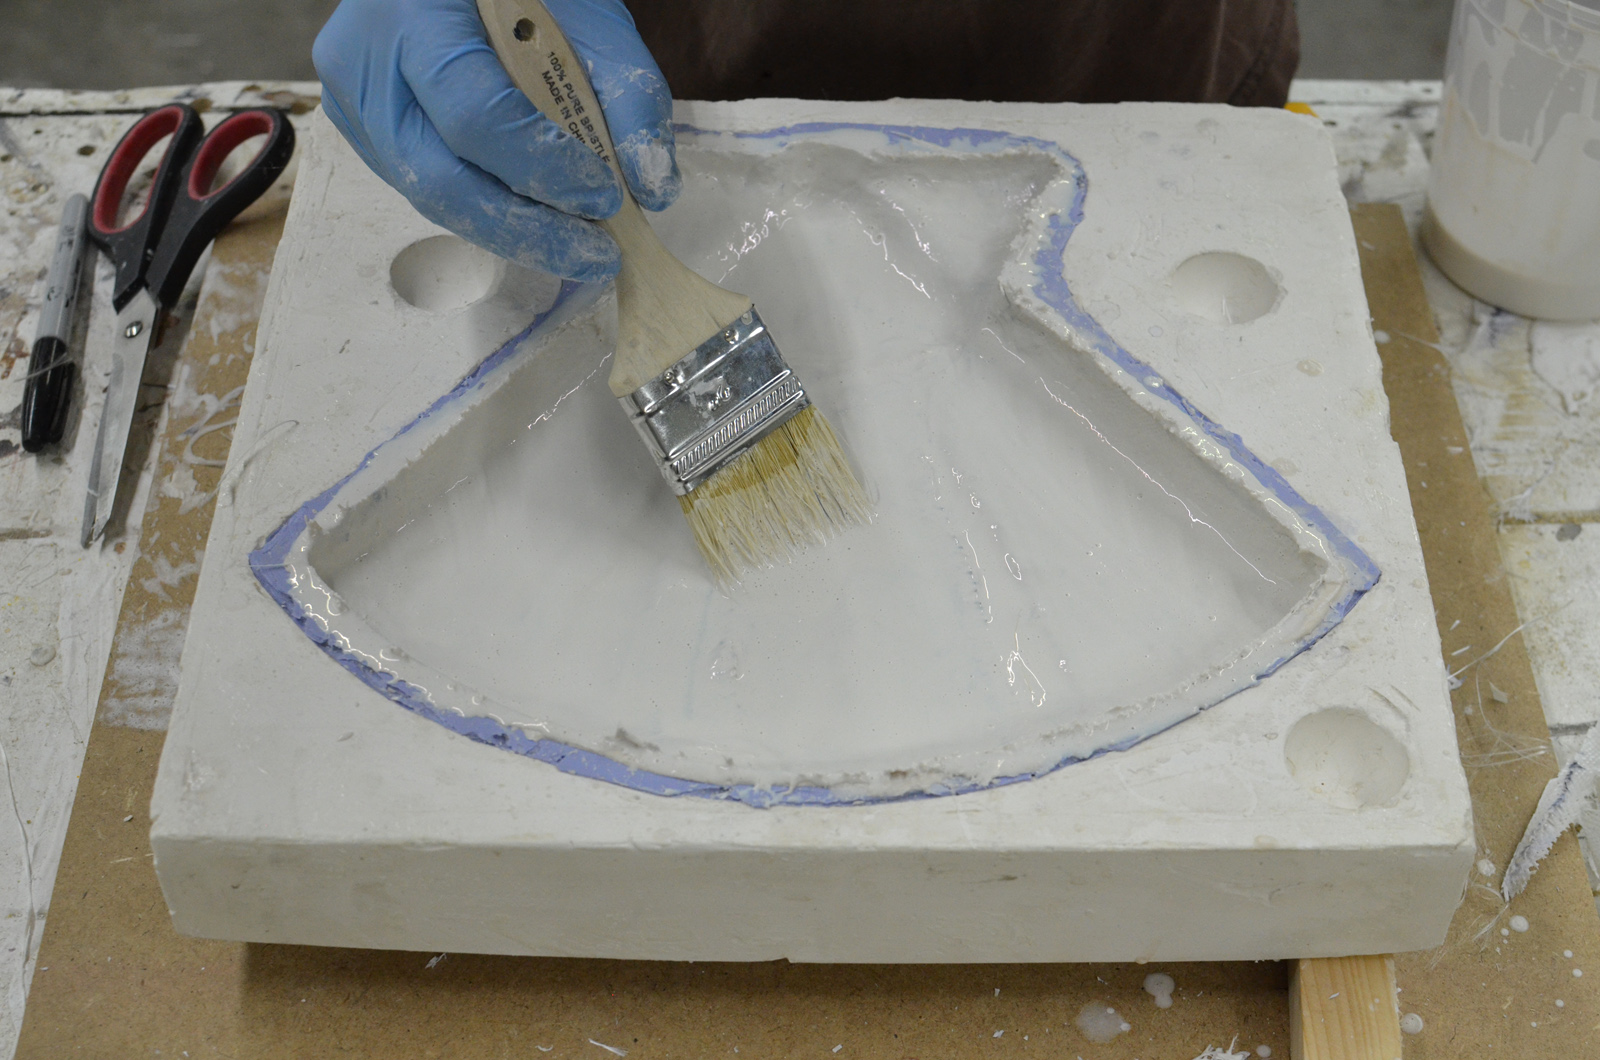
Coating with Aqua Resin
Using Aqua Resin with fiberglass is similar to using polyester resin, but a whole lot less toxic. The end result is a bit more like plaster rather than plastic, but it is still fairly strong and lightweight. I have a few more alternatives to polyester resin that I’ve been wanting to try so I can compare the results.
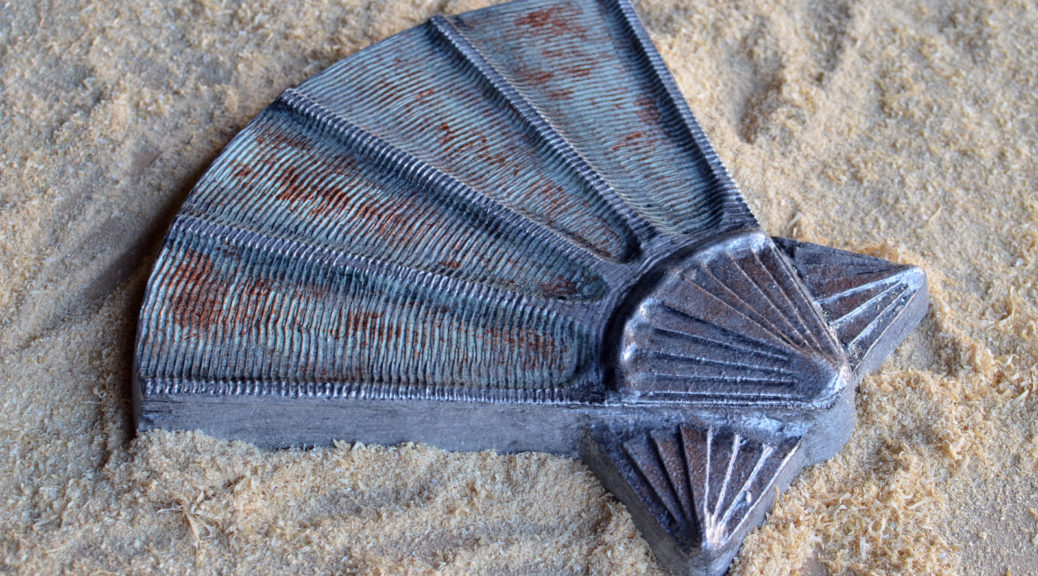
Finished piece before paint
This was not really that great of a piece to demonstrate the advantages of using fiberglass. It is very flat; you can easily create it using sheet goods, such as lauan, and still have it remain strong but lightweight. Fiberglass becomes more useful when you need an undulating skin, like a mask, that needs to be hollow but retain a consistent thickness throughout. But these are things I think about long after I have begun a project, when it is too late to start a new one from scratch. I say this for those of you who will look at this prop and ask, “Why did he bother with fiberglass? Why not just cut it out of thin plywood?”
Seashell
With the piece finished, I painted it with a number of metallic paints, as well as a dark wash for the cracks and crevices, and some Rub’n Buff for highlights along the edges.
Back of seashell
It’s magic! Good enough to sell on the seashore.
Making and finding props for theatre, film, and hobbies