Category Archives: How-to

Guides to building props or using certain techniques and materials

Upholstering a Chaise

I just finished Buyer and Cellar at Triad Stage. We needed an all-white antique French chaise. I could not find any within our budget, especially since I knew I would need to reupholster anything I found.

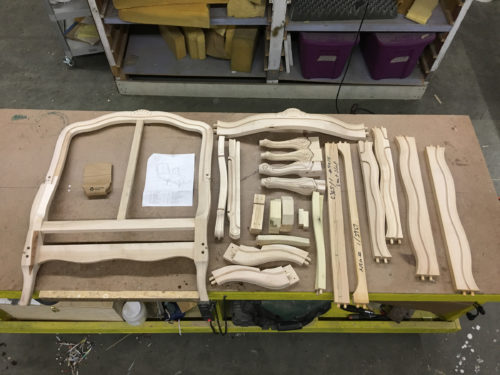
One of the great prop secrets is that you can order furniture frames from companies that sell to professional upholsters. I found a company that made a chaise in the style I needed. You can order a frame unfinished and knocked down, which means it arrives without any paint or stain, and it is completely unassembled. The cost is a fraction of a finished piece (and the shipping is far cheaper, too).
Unboxing the chaise
Unboxing the chaise

The frame came flatpacked just like a piece of IKEA furniture, only instead of allen keys, it fit together with glue and dowels.
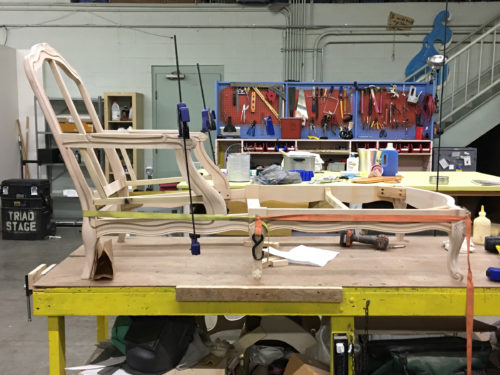
Assembling the frame

Other than a few extra (I hope) pieces, assembling the whole piece was easy to do with the provided instructions.
Adding the seat
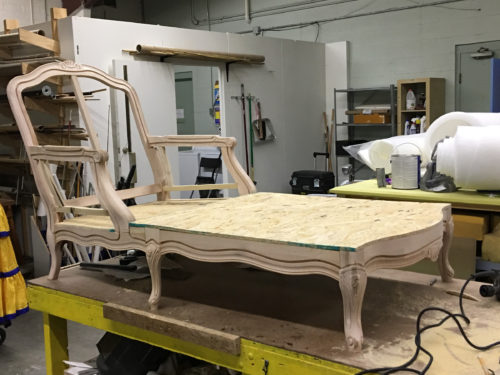
Adding the seat

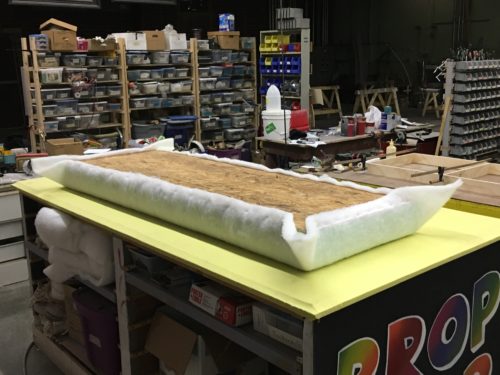
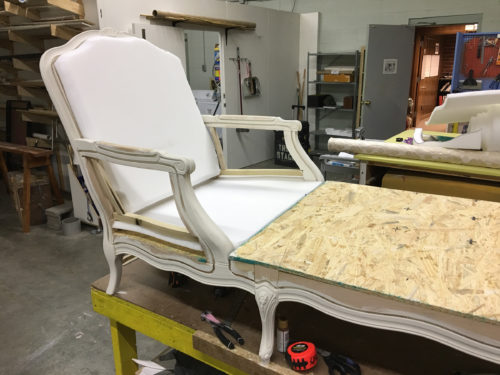
At this point, a real upholster would start adding webbing for the seat. I like to put a flat sheet good across the whole base. It makes it much more rigid, which a lot of actors prefer because they can get out of the chair much more quickly. It also provides support for when the director wants someone to stand on the chair, which will inevitably happen (and did indeed happen on this show).
Foam cushions
Foam cushions

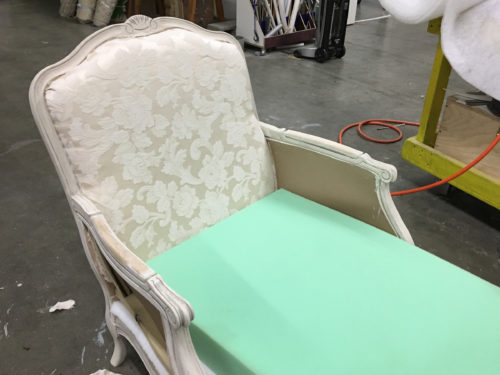
I painted the exposed wood before adding any fabric to avoid a mess. I upholstered the back and inner panels first, because the outer panels would block off where I needed to staple.
Seat cushion and side panels

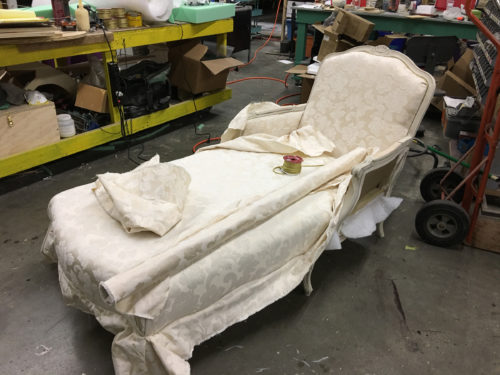
The chaise has a groove routed along the edge, so I stapled the fabric into that and then trimmed the excess. My thought was that I could stick some 3/16″ decorative cording on top to hide the staples and give it a nice, clean edge.
Final seat cushion shape

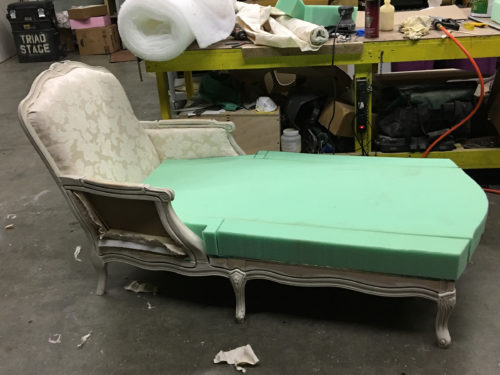
I covered the side panels in cardstock and put the cushion directly on that. I also tried to cover the back in cardstock, but that didn’t give enough support, so we needed to go back in and reinforce it with some webbing.

The seat is a luxurious piece of four-inch foam made possible by a 70%-off coupon from Jo-Ann Fabric.
Stapling down the fabric

In the picture above, you can see the fabric before it was trimmed. I found an Olfa knife worked really well. We also found some gold cord in the Christmas aisle at the craft store that worked well to finish the edges.
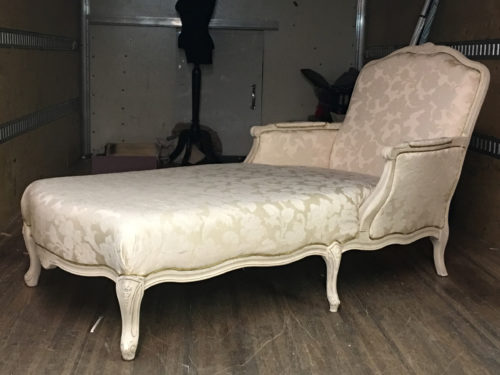
Finished chaise
Finished chaise

The remainder of the upholstering was done by Keri Dumka and Shay Hopkins-Paine, who worked with me on this show. Overall, it was an interesting experience to upholster a piece of furniture totally from scratch. It also gave me some ideas on how to build upholstered furniture in the future.

Ancient Cherokee Box

Our final production of the season at Triad Stage was a new piece called And So We Walked. Written and performed by DeLanna Studi, it recounts her journey to walk the Trail of Tears with her father and rediscover her Cherokee roots. The show itself is traveling around the country for the next few weeks before another full production at Portland Center Stage next spring.

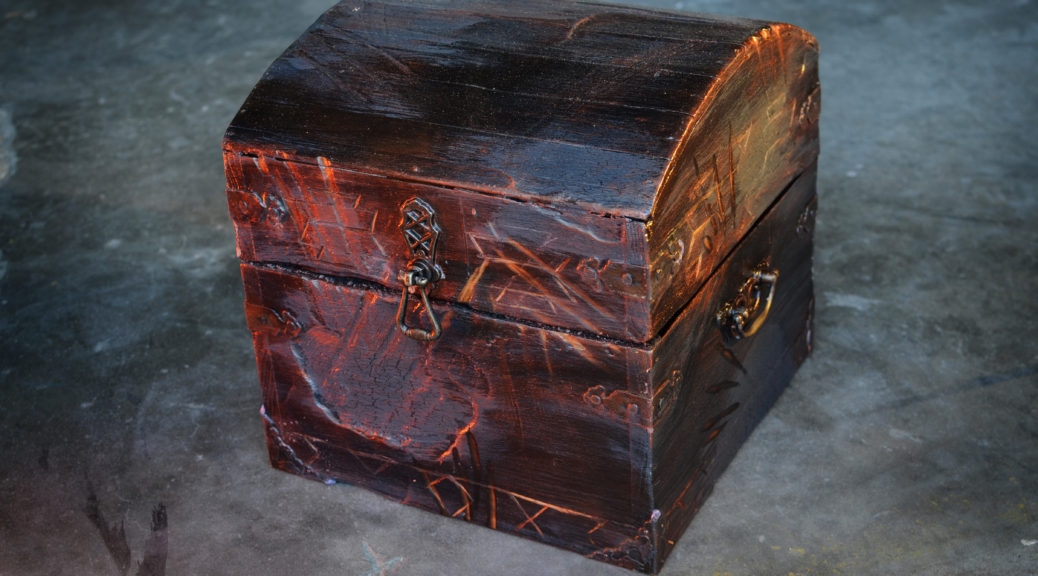
The show takes place in both the real world and a theatrical dream world, and one of the props I built was an ancient burned box which held secrets. We determined the size and shape in various devising sessions and rehearsals, so I simply made another box out of nice materials to match a rehearsal version I had already made.

Constructing the box

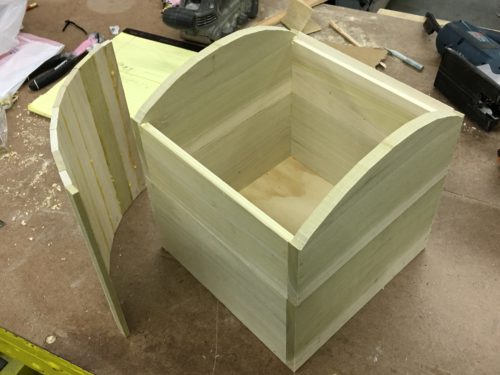
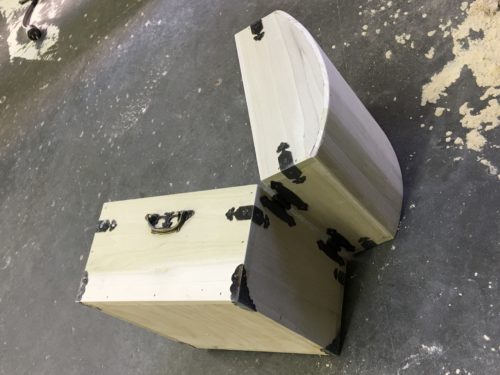
The carcass was constructed from half-inch poplar I bought at Home Depot (my planer was broke), with a piece of plywood for the bottom. The top wanted to be vaulted, so I ripped a number of slats from quarter-inch poplar, beveled the edges, and glued them together to make the vault shape.

Attaching the hardware

Once the top was all glued together, I ran a belt sander over it to transform the faceted surface into a smooth curve.

The hardware was a mix of stuff from the hobby store and pieces I had in stock from other boxes I had built. A lot of this decorative brass box hardware comes straight from China, so you have to wait a few weeks or even months to get it shipped. Whenever I order some, I get several options and extras so that I slowly build up a stock to use on projects that have too tight of a deadline to wait for the shipping.

Burning the outside
Burning the outside

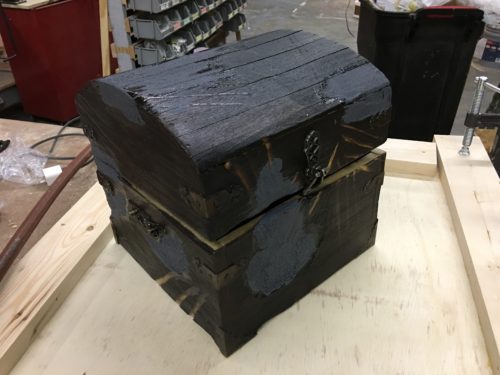
The box is described as “burnt”, so my next step was to burn it. I used a basic propane torch you can get at the hardware store. I charred the whole outside of the box, and allowed the flames to go to town on a few areas to really break up the surface.

Once it was cool, I removed all the charcoal with a wire brush. I sealed it with shellac to keep any charcoal remnants from staining the actress’ hands or white costume.

In the areas which burned away the most, I applied some grey crackle paint to simulate the charcoal I had just brushed away. The box is also described as having deep scratches, as if some mythical being had been trying to claw it open, so I added those with a grinder and Dremel.

Painting the inside
Painting the inside

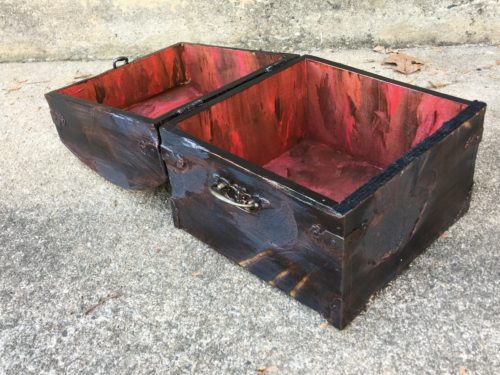
The inside received a wet blend of various acrylics to give it a deep red aged appearance that suggested blood. I dry brushed a few other colors, including some metallics, over the outside to help accentuate the imperfections and texture.

Ancient carved box
Ancient carved box

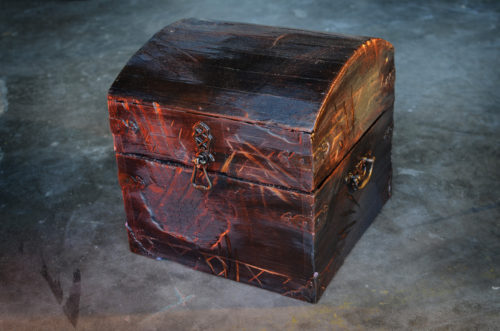
During tech, the director really liked the way the scratches looked on the box and wanted some more. She asked for some Cherokee patterns to be engraved around the edges as if some primitive creature had carved them in by hand. Once I added those, the box was complete.

Sofa from The Price

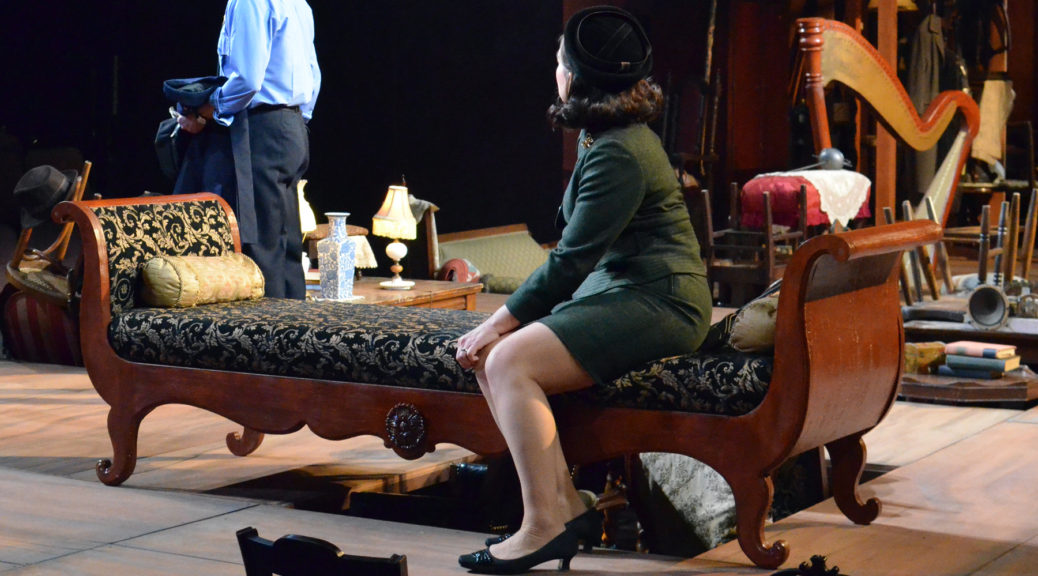
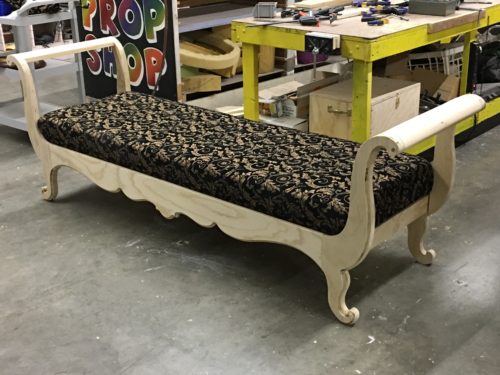
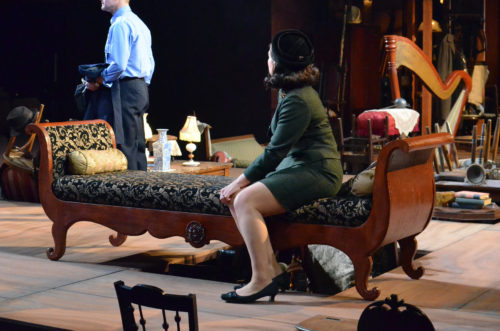
We recently closed Arthur Miller’s The Price at Triad Stage (preceding the Broadway version by a few weeks). With a week before tech, a concern arose that the “Biedermeier-style” sofa blocked too many sightlines. We needed a backless version, and since nothing like that exists in our stock, I had to build one.

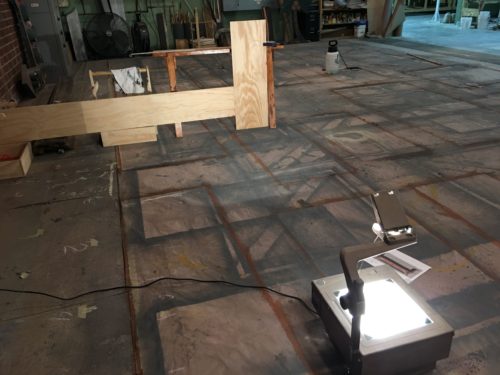
Tracing the profile
Tracing the profile

The designer, Fred Kinney, found a research image he liked. The photograph was taken straight on from the front, so I was able to trace it directly onto some plywood with an overhead projector.

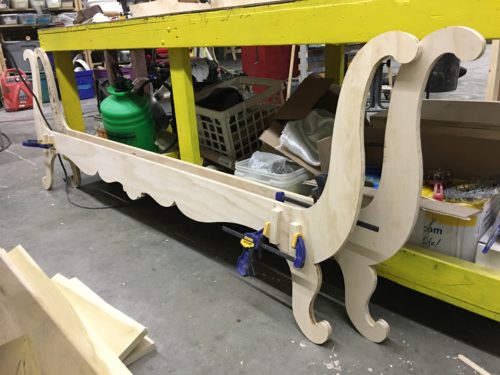
Cut outs
Cut outs

I made each front and back piece out of three pieces of plywood and doweled them together. I have some temporary blocks attached in the photograph above to help clamp them. They will also be held together in the back by the cushion frame.

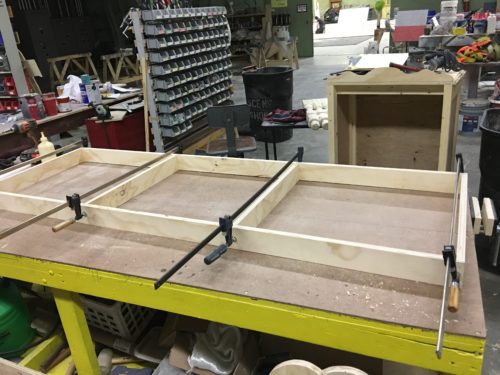
Building the base
Building the base

The base for the cushion was just a simple platform frame.

Cushion
Cushion

The cushion for the couch was a separate piece made of high density foam on top of a sheet of oriented strand board (OSB). The whole thing can be removed from the couch at any time. The plywood from the home improvement stores is so prone to warping; I’ve switched to OSB for my upholstered pieces because it is one of the flattest sheet goods you can buy there. It is really cheap too, though it does add a bit of weight and you have to build a good frame underneath it.

Armrest
Armrest

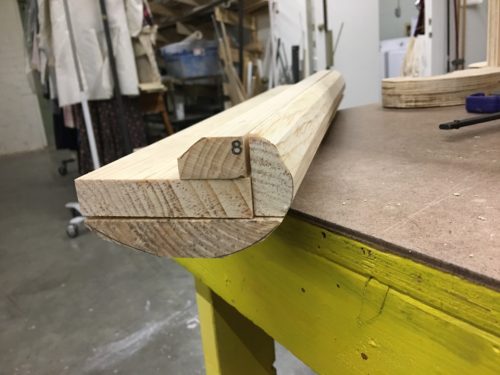
The armrests needed to be long pieces of solid wood shaped into a rolling curve. I traced the curve onto several smaller pieces of lumber, and cut away most of the waste with several passes through the table saw. After gluing the pieces together, I smoothed all the angles into curves using a belt sander.

Unpainted piece
Unpainted piece

I routed the edges of the front and back to give them a decorative profile. The armrests were screwed in, but I also ran a large through-dowel to help support them since actors were going to be resting there. I also doubled up the plywood on the legs and arms to make them appear thicker and to give more structure.

Backless couch from The Price

The inside panels of the arms were covered in fabric, while the outside panels were capped with a piece of wiggle wood. The whole thing was painted and covered in amber shellac. I found two rosettes in stock and added them to the center for that final decorative touch.

Fiberglass with Aqua Resin

When we think of fiberglass, we think of the smelly, toxic resins used to reinforce it. Many props people avoid fiberglass for that reason. Water-based resins offer a less toxic alternative. Aqua Resin is one brand which is useful for theatrical prop building with fiberglass. You need a dust mask when handling the powder, but once mixed, it is non-toxic.

In my latest video, I show how to make a prop using fiberglass with Aqua Resin in a one-piece negative mold.

You can see how the mold was made in my post on matrix molding, and you can see photos of the finished prop in my post on the Magic Seashell.

Using fiberglass is one of the techniques that now has a step-by-step photo tutorial in the second edition of The Prop Building Guidebook: For Film, Theater, and TV, which comes out February 10, 2017. You can see all the companion videos at the Prop Building Guidebook website.