Category Archives: How-to

Guides to building props or using certain techniques and materials

Gnome Building

For the upcoming production of “Broke-ology” at Lincoln Center, I was asked to build a three-foot garden gnome. They had a prop from the original production at the Williamstown Theatre Festival, but it was starting to break and crack in certain places. The gnome undergoes a lot of abuse during each performance, so they needed a new one with a better interior structure. So for the past two weeks, my wife and I have been gnome building.

Structure
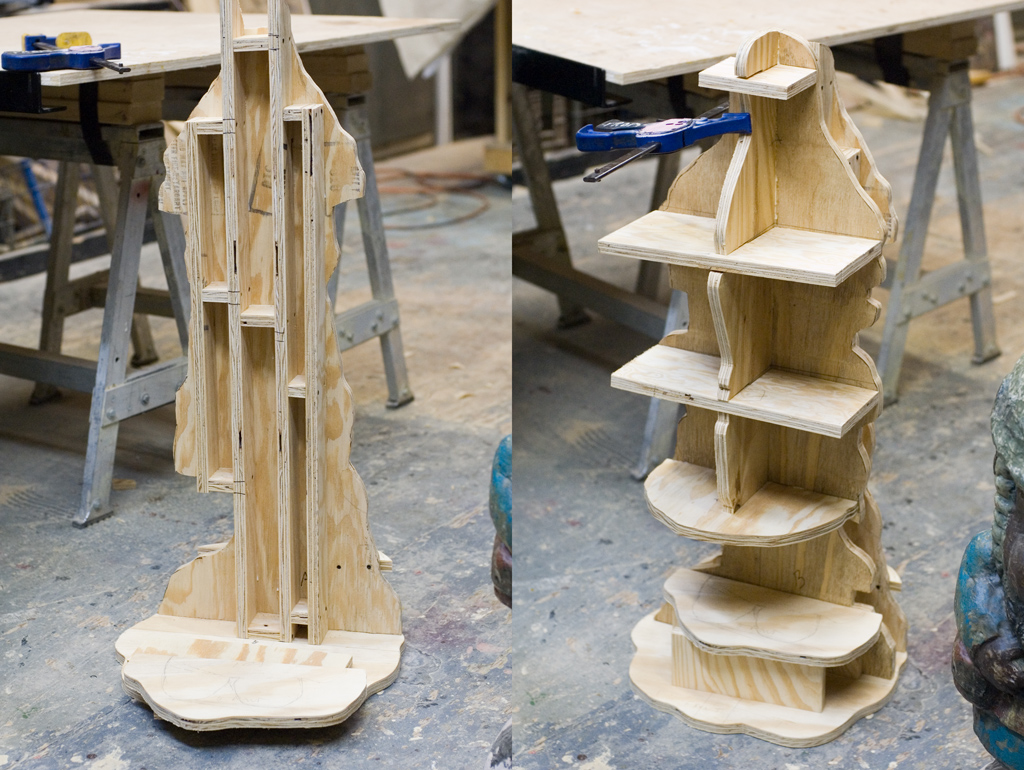
The interior plywood structure of the gnome

The original gnome was a solid chunk of foam, with weights added in the base. Since it gets fairly thin around the ankles, it was beginning to separate at that point. My major concern with the interior skeleton was making sure there were no weak points on the gnome.

Additionally, while I had the original gnome with me, I took measurements and tracings directly off it to make several “slices” of the gnome’s shape to use as the structure. You can see what I mean in the photographs above. So the plywood would not only give me structure, it would also serve as a guide while adding and carving the foam.
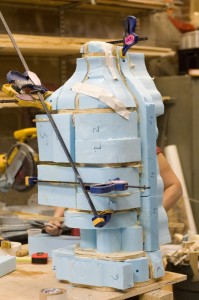
Chunks of Styrofoam added to the skeleton

Carving

We couldn’t keep the gnome forever, so I took pictures of all four sides, plus the four in-between sides, as well as various views from above. It never hurts to have too many reference pictures. To remove large pieces of foam, we used either a knife or sometimes a reciprocating saw. If we needed a large amount of foam sculpted down quickly, we used a wire brush wheel hooked up to a cordless drill. We did the more precise and final carving and sculpting with a variety of rasps, knives, and sandpaper.  Sculpting and carving are very personal skills, so the best tools are often the ones you make yourself. Natalie made several tools just by gluing pieces of sandpaper to various shapes of wood.
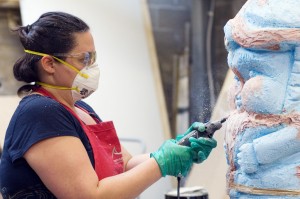
Natalie uses a Dremel to carve details

You can see in the photograph above that we added auto-body filler (or Bondo) to fill in gaps, cover mistakes, or build up areas where we took too much off. You need a respirator when using it, but it hardens very quickly. You can use a rasp or knife on it after about ten minutes, and you can sand it after about an hour. We also used a Dremel tool for quickly carving out details.

Coating

I pontificated in an earlier post about various ways of coating foam. First, we wrapped the gnome in muslin strips which were soaked in glue. The process is very similar to papier-mache. We tore the muslin strips to give them a ragged edge which could be smoothed down over the previous pieces. After this dried, we covered the whole thing in Rosco Foamcoat, which we laid on like stucco to give it a bit of worn and weathered texture. After a light sanding, we painted on the various base coats.
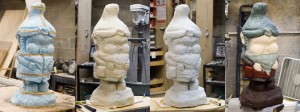
Step-by-step process of coating the foam sculpture

The final step was coating it with epoxy resin. This gave it a very hard, smooth, and water-proof shell. It’s also fairly pricey, very toxic, and requires a lot of set-up. The exterior of the gnome was fairly solid with just the muslin and Foamcoat coverings, so for lower-budget shows and shorter runs, you may want to forego the epoxy resin. It’s a somewhat complex process, so I’ll address it in more detail in a future post.

Final Painting

After the epoxy had cured over night, we added the final paint layer. We used acrylic paint. We also dusted it with some black spray paint to weather and age it, as well as some dulling spray to get rid of the shininess from the epoxy.
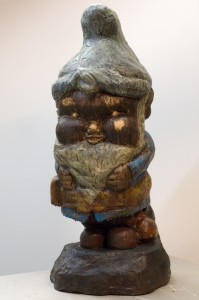
Gnome for "Broke-ology"

Coating Foam

My wife and I are currently working on a project for a new show which is essentially a Styrofoam sculpture. It got me thinking about the various ways to treat and coat foam.

You need to coat foam with something. If you tried to paint raw foam, it will eat all the paint up. If you tried to use anything with a solvent, such as spray paint, it will dissolve the foam. Finally, uncoated foam is just too fragile for many uses, especially in theatre.

Coating the foam with Gesso or joint compound will smooth it out and give it a paintable surface. If you mix the joint compound with glue, it will make give it a little more flexibility, as joint compound tends to crack and flake off. Though your Styrofoam will look nice with these kinds of coatings, they will still be fairly fragile.

At the display company I’ve worked at in the past, we made a lot of sculpted pieces out of foam. For the most part, we used Rosco Foamcoat on top of our pieces. Foamcoat goes on a little like joint compound, and creates a hard but flexible coating. It can be sanded and painted, but it doesn’t fall apart like joint compound. It gives a good amount of protection, though it will still dent if you hit it or drop it.

Another product we use at the display company is Aqua Resin. This takes a lot more time, but you are left with a very hard and very smooth surface.

You can use other types of resin on Styrofoam. Polyester resins will eat through the foam, but epoxy resins will give you a very hard, very smooth surface. These are normally used in conjunction with fiberglass or other composite fibers. You can use fiberglass or carbon fiber over foam to give it a lot of strength; this is how some surfboards and skateboards are made. At this point though, are you making a Styrofoam prop, or are you just using it as a form for the fiberglass?

For the project we’re currently working on, we’ve decided on the following compromise; we are going to cover the foam in muslin strips soaked in glue. After this dries, it will create a hard outer shell which can be painted. With a fibrous coating, the piece will resist cracking or crumbling. We will then coat the piece in Foamcoat to smooth it out and hide the texture of the muslin. Finally, we will cover the whole thing in epoxy resin to make it smooth, waterproof, and even stronger. I did a few tests, and this gave the best result for our timeframe and budget.

Finding out this kind of information online can be difficult, so most of what I’ve written here is based on my experience, experimentation, and some research. If anyone else out there ever sculpts in foam, I’d love to hear how you finish it off.

How to read a script

A prop master develops a prop list by reading the script. The director, designer, and/or stage manager may come up with their own prop list; you still need your own so you can get working right away, and so you can make sure the rest of the production team has considered all the props that may be in the production.

First off, if your script comes with a prop list in the back, don’t use it. These are from the original production. The design and direction of your production will certainly be slightly altered, and can even be totally different.

Read the script twice. The first time is for fun, to get an overall feel of the play. You want to be able to have an intelligent conversation about the play with the rest of the design team. You don’t want to be the one at the meetings going, “Wait, Juliet is a girl?” The second time you read through it is to start noting props. Have your own copy of the script so you can mark it as you read. This script should live in your prop bible. Mark the page number of the prop on the prop list for easy reference later.

You can find props references throughout the script. The scene descriptions will give descriptions of the set furniture and some set dressing. The stage directions will tell you what hand props are being used, and how they are used.  The character descriptions can give more clues about hand props, and can also hint at possible costume props. Even the dialogue can hold additional prop notes.

Look for clues on how a prop is used, and what it needs to do. If a chair is introduced on page 3, and on page 42, a character leaps on top of it, that needs to go on your prop list. A designer will usually decide what a prop must look like, but it is up to you to figure out what the prop needs to do. The director will also determine what a prop needs to do in rehearsal, but it helps to know as soon as possible if anything on your list will take some time or effort to build or acquire.

One final bit of advice comes from Bland Wade, who reminds you to consider all the ramifications of a stage direction, rather than what is merely written down. When a script says a character enters “smoking”, you need to ask what kind of cigarette he has. Where did it come from: a pack, a cigarette case, a friend? Where do the ashes go? Does he light it on stage? With a lighter or matches? What kind of lighter? Where does he extinguish it? In an ashtray or the floor? One simple stage direction can lead to a page’s worth of props.

How to Make Stage Blood

Asking how to make fake blood is kind of like asking how to make food. Sometimes you need a light breakfast, sometimes a heavy dinner. You need to ask yourself what the blood needs to do. While trying out new recipes can be fun, it is not terribly useful unless you know what you are trying to achieve. So when dealing with making stage blood, I will first look at the preparation you must do, than introduce some of the basic chemistry which can lead to some blood recipes for you to try.

Preparation

The three aspects of preparation are research, planning, and experimentation. You need to research what the effect will look like. Even if you are not going for a realistic effect, you want a reference image or images which you’ve shared with the director and the rest of the production team so you are all on the same page. The last thing you want is to show the director the results of your hard work and have her go, “That’s not what I was picturing at all.”

Planning is also vital. There are hundreds of blood recipes with countless variations, all designed for specific needs. What does your blood need to do? Does it get in the actor’s mouth? Does it need to be washed out of the costumes? Does it run freely or pool up into puddles? Is it just a liquid or does it have chunks in it? If you can plan out what the blood needs to do, you may find that you can use different recipes for different effects, or fake some parts with less expensive paint or dye. Do a break down of all the effects in the show and determine what each needs to do individually.

The final step is to experiment. No matter how great your blood recipe is, there are just too many variables in a show to not test out a number of options. The stage lights will affect the color of your blood; it may look great in the shop, only to appear purple once on stage. The color of the costumes or set may also require some tweaking to the blood’s color. As with any prop, you often want to present your director with a number of options to choose from.

Recipes

There is no one-size-fits-all recipe for stage blood. Many theatres and prop people have developed their own formulas and keep their secrets jealously guarded. There are a number of recipes you can find to use as a starting point. With a bit of knowledge of chemistry, you are armed with a repertoire of techniques which can be expanded as you gain more experience.

Essentially what you need is a thick, gooey base with a colorant added. The most basic recipe is corn syrup (Karo Syrup in the USA, or Golden Syrup in the UK) and red food coloring. You can add a bit of blue or even green food coloring to refine the color. This recipe is edible, which is good if the blood is used around an actor’s mouth, but since it is organic, it can attract insects and vermin, and will rot after a time. It is also sticky, messy, and will stain clothes and skin.

If you want to avoid stains, you will need to add some form of soap to the blood mixture. This will help limit the colorant from attaching to the fibers of the clothing. Liquid color-safe bleach or dish soap work well. You can use a “no-tears” baby shampoo if the blood has the possibility of getting near anyone’s eyes. You can experiment with colored soaps too. Green or blue dish soap, or Simple Green, can be used to tint the red food coloring. It is essential to work with your costume department whenever the blood is coming into contact with costumes. They can scotch guard the areas that will receive blood beforehand. They can also throw the costume into a bath of cold water with lots of stain remover as soon as it gets off stage. You may still need two or three backup costumes. The other problem with any soap-based blood is that it will lather if you rub it too much.

If you want to limit the potential for staining further, you need to look at your colorant. Different brands and types of food coloring have different staining potentials. As an alternative, you can substitute children’s non-toxic poster paint, or other washable art products.

Powdered gelatin, instant pudding, or cocoa powder can be used as thickening agents in lieu of or in addition to corn syrup. Corn starch or flour will also thicken your mix. Creamy peanut butter will both thicken and darken your mix. Interestingly, the protein in the peanut butter makes it easier to wash out.

If you want your blood to congeal or clot during the scene, there are a number of ways to do that. The instant pudding mentioned above will coagulate like real blood. KY jelly will make it clot after a period of time as well. If you thin the blood with cheap vodka or other alcohol-based products, it will congeal over time. A little unflavored gelatin will turn your blood into scabs.

A touch of mineral oil will give it some sheen and help catch the lights. Adding glycerin on top will also give it a fresh and shiny appearance and improve the surface tension.

Further Reading

There is a lot more reading to be found across the internet, with recipes utilizing any number of ingredients for various effects. As long as you do your homework beforehand, you should have no problem coming up with the right recipe for your effect.

Blood Sponges

We are in the midst of tech rehearsal for The Bacchae here at Shakespeare in the Park; next weekend, we begin preview performances already, and opening night is on August 24th. Needless to say, I’m a little distracted.

Here’s a quick little video showing some “blood sponges” we were working on with the body. You can read more about the body in my previous posts, a Body for Bacchae: Part One and Part Two. We glued some sponges to parts of the body. The idea was that they could be filled with fake blood before the performance. When the actress portraying Agave cradled the corpse, she could squeeze the part of the body with a sponge and have blood run down her hand on cue.