Category Archives: How-to

Guides to building props or using certain techniques and materials

Faking a Beer Can

For our upcoming production of The Book of Grace by Suzan-Lori Parks at the Public Theater, we need beer. Technically, we need about ten beers per night.

A real can, and two prop cans with fake labels

Unfortunately, in most legitimate theatres, you cannot have the actors drinking beer during a performance. You need to figure out a way to have a beer can filled with water or something equally innocuous. One way to do it is by emptying a beer can and refilling it. This can be tricky if you also want to crack the lid as part of the stage action; the sound is made because the contents are under pressure, and unless you re-pressurize the can when filling it, you’ll lose that satisfying crack noise. Your other option is to cover a can of non-alcoholic liquid with another label. You can either cut the label out of a real beer can, or manufacture one out of paper. We’ll take a brief look at both methods.

Cutting the top off of a can

To cover one can with the label off another, you need to start by cutting off the top and the bottom. Aluminum cans cut easily with an X-Acto blade, snap-off blade, or box cutter. You don’t want to use a power tool like a band saw or jig saw, as the movement of the blade will shake the can and tear it uncontrollably. Once you remove the top and bottom, you can slice down the side to make a flat rectangle of metal.

A fully cut can label

Once you have the label cut out, it’s time to attach it to your other can. Many actors prefer not to drink soda or anything too sweet during a show, as it snots up their throats. They may also have special diuretic needs that may preclude using certain drinks. Your best bet is canned carbonated water. Whether you choose seltzer, club soda, tonic water, or sparkling water depends on personal preference, but also on what the cans look like. The club soda I’ve used here has a very non-descript can that does not make itself known after it has been covered.

Wrapping the club soda with the beer label

Budweiser cans have the advantage of using white as a background color; you can use white electrical tape to attach the label. If you use a different brand, you need to experiment with other types of tape. Clear packing tape is a great option if you want to avoid a colored line along the top and bottom. Make sure whatever tape you use is strong enough to keep the sharp edges of the aluminum from cutting through.

Finished can
Finished can

Wrapping a can of carbonated water with a paper label is another way to go. This is a good idea if your printing costs are less than the cost of acquiring beer cans. The most difficult part of this is generating the artwork. Photographing or scanning the labels can leave unrealistic shading. If you are uncomfortable using a computer graphics program to assemble and even build parts of the labels from scratch, this may not be the route for you.

Paper labels
Paper labels

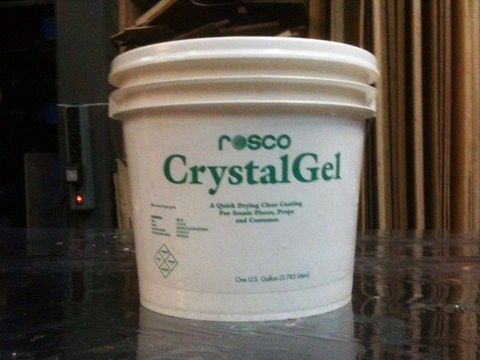
You can use tape to attach the labels on the paper ones as well, or an adhesive on the back (please excuse the messiness of the tape job in the photograph below). You may find the paper label is a lot duller than an aluminum one, so you can spray it with your favorite glossy or semi-glossy clear coat.

A can covered in a paper label

Whichever method you decide depends on the specifics of your production. There are many variables which can effect the look of the can from the audience, such as the lighting or distance to the stage. The production may have other peculiar blocking that will affect your prop choice. If the actors crush the cans, you may not wish to cover it in a second layer of aluminum, as it may make it harder or even more dangerous to pull that off.

Just remember, whatever your show needs, you “can” do it!

Faux Oil Paintings

Our upcoming production of Bloody Bloody Andrew Jackson has a gallery in the audience of 19 portraits. These were described as oil paintings of “dead white guys”. We decided to begin experimenting with printing these portraits out and seeing how we can make them look more like a painted canvas.

Rosco Crystal Gel
Rosco Crystal Gel

I decided to try some of the Rosco Crystal Gel we received a while back. Crystal Gel acts a little like “Sculpt or Coat”. You can brush it on in thin layers, and it will hold the texture you give it. It dries clear and hard, but it remains fairly flexible. My idea was to use it to add textural brush strokes over a picture we print out on our large plotter.

Eric Hart paints Crystal Gel onto a printed painting

The Crystal Gel has a consistency of mayonnaise. The instructions say you can thin it with water if you want. It starts out white, which makes it easier to see where you are applying it.

Jay Duckworth continues adding Crystal Gel

You can see in the above photograph that the painting is getting wrinkled. We weren’t really surprised by that; for our next test, we mounted the paper to a piece of foam core before painting.

A real-life oil painting!

We were very happy with the final result. The photograph above doesn’t really convey the best part about this method. The texture of the dried Crystal Gel catches the light differently depending on where you stand, so as you walk by the painting, it appears to be made with thick layers of paint.

More on a Wooden Table

In the previous post, I spoke about the wooden table we were building for The Last Cargo Cult.

Wooden table after staining and sealing

Jay Duckworth started off with a coat of darker stain to catch the raised grain and really accentuate it. He went over the whole thing again with a lighter shade. After it appeared on stage during tech rehearsal, Peter Ksander, the designer, wanted to see it a bit darker and richer. I added a light coat of Red Mahagony stain, which got it where it wanted to go; we sealed it with a thin coat of water-based polyurethane. You may have noticed some boxes behind the table, which were the other major props challenge on this show. Below is a wider shot to show the full tableau.

The set of The Last Cargo Cult

Meredith Ries, who helped us out with a lot of the box work, has a more extensive write-up on the cardboard boxes at her own blog. The pile is about sixteen feet high at its tallest point.

The Last Cargo Cult is currently in previews and opens this Monday, December 7th.

A wooden table

The last show for the calendar year at the Public Theatre is Mike Daisey‘s “The Last Cargo Cult”. We needed to construct a new table to match the design of the world. The design called for a solid, fairly sturdy-looking wooden table, which showed some character and a lot of age.

The boards for the table top are clamped together

The table top was made of four planks of equal length. I connected them using a biscuit joiner. I was able to borrow the scene shop’s new Woodcraft bar clamps for this. You alternate whether the clamps go over top or underneath the surface to keep it from bowing. I also clamped a metal bar on either end as an additional way to keep the planks level with each other. You can ignore the random one by four in the photograph; I’m not sure why that was there.

Wax paper to catch excess glue

I used wax paper to keep the glue from squeezing out and adhering the wood to the work table, or worse, dripping onto the clamps. If you wipe the excess glue away, you will smear it into the wood. It may look like it’s gone, but when you go to stain the piece, it will not accept the stain and you will be left with light-colored spots. Wait until the glue dries and then scrape it off. If you are painting the table, or the glue is in a hidden place, then by all means, wipe away while wet.

Finished table top
Finished table top

Here is the final table top. I used a belt sander, starting with a 50 grit belt, then skipping straight ahead to 12o grit, and finishing with 320 grit. I then hit it with a random orbital sander at 400 grit. Peter Ksander, the set designer, wanted to bring out the grain and accentuate the pattern. I wiped the surface with a wet rag. This causes the dark grain to raise up from the lighter grain; if you were aiming for a smooth surface, you can then sand the higher grain down, but in this case, I left it alone.

Taper jig on the bandsaw

Karen Cahill, the properties manager at George Street Playhouse, was on hand for a bit to help out. She glued the boards together to make the blocks for the legs. I made a taper jig to quickly replicate a taper onto all four legs. I used the band saw as the table saw could not raise high enough to cut it in one pass.

Kreg Pocket Hole Jig

Easily one of my favorite new tools of the year is the Kreg Pocket Hole Jig. You can see in the photograph above how it allows you to drill holes so the screws exit the center of the end grain. For prop carpentry, the speed and strength of the joints it creates have replaced many of the joints I use regularly. For tables, I use them to attach the apron to the legs, followed by the apron to the top. This allows me to keep the top of the table free from screw or nail holes.

Lining up apron and leg for attachment

You need to clamp the pieces well to keep them from drifting; the pocket hole jig creates a hole at a slight angle, so the screw will want to push the wood back as it drives in. Above, you can see the various pieces of wood we used to not only hold the apron in place while we attached it to the leg, but also to space it consistently on all the legs. Jay Duckworth was on hand for much of this part as well. He also routed the groove you see in the legs below and stained the table at the end of the day.

Final table before staining

Making a Breakable Glass

I’m props mastering a show called “Slave Shack”, at the Algonquin Theatre in the Gramercy Park area. One of the scenes calls for the actress to fling a scotch glass against the wall, where it breaks.

I decided to buy a number of thin glasses and spray them with Plasti-Dip. It’s a rubber coating which sprays on, and it comes in a variety of colors, including clear.

A glass smashed after sprayed with Plasti-Dip

The rubber coating keeps the pieces of the glass together when it is smashed. If any pieces do break loose, they are not as sharp. I made a video to illustrate the process a lot more succinctly:

The obvious disadvantage of this method is that the glass ends up looking frosted. Also, you cannot use this method when you are breaking a bottle or glass over someone’s head. You can use it to coat glasses and bottles which are being thrown or dropped, but you should not have shards of glass, even coated in rubber, flying around an actor’s eyes and mouth.

The advantage? I bought three dozen (36) glasses for about $50 at a restaurant supply store. The Plasti-Dip is around $7-8 a bottle, and I only needed two bottles for this.

Smash Plastic, your other alternative, gives you a clear product, but it costs around $200 a gallon. You also need to make a mold (and buy molding supplies) and spend the time casting all of your glasses.

Sugar glass is great for films, but it degrades too quickly for theatre. Unless you want to be cooking up a fresh batch every night before the show for the next 2 weeks, or however long your show runs, it’s not a very viable alternative.

Glass dismissed!