
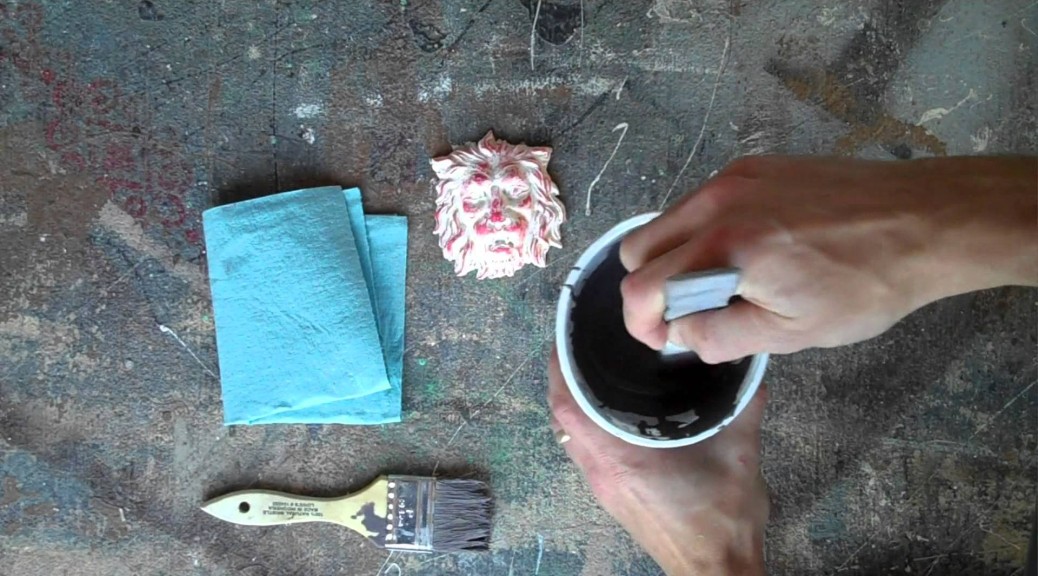
This week I’ve added three videos to the Prop Building Guidebook’s companion video page. They are all shorter than previous videos and each involves a common technique for painting props. I shot a video for wet blending, dry brushing and glazes. You can watch the video on dry brushing below, watch the individual videos on YouTube by clicking the previous links, or check out all my videos by heading to the companion video page. See, I’m all about providing options.
Category Archives: How-to
Guides to building props or using certain techniques and materials
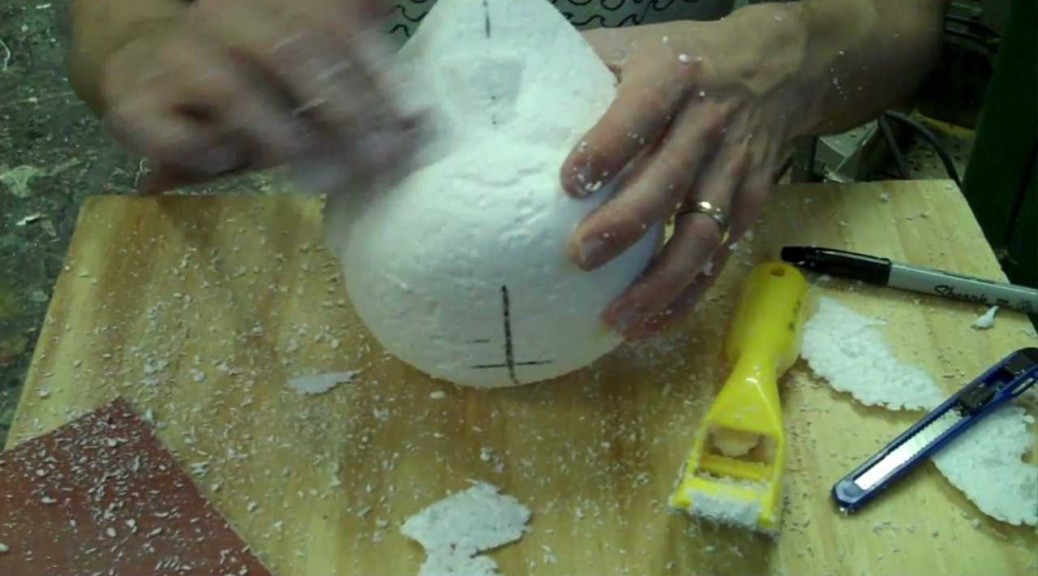
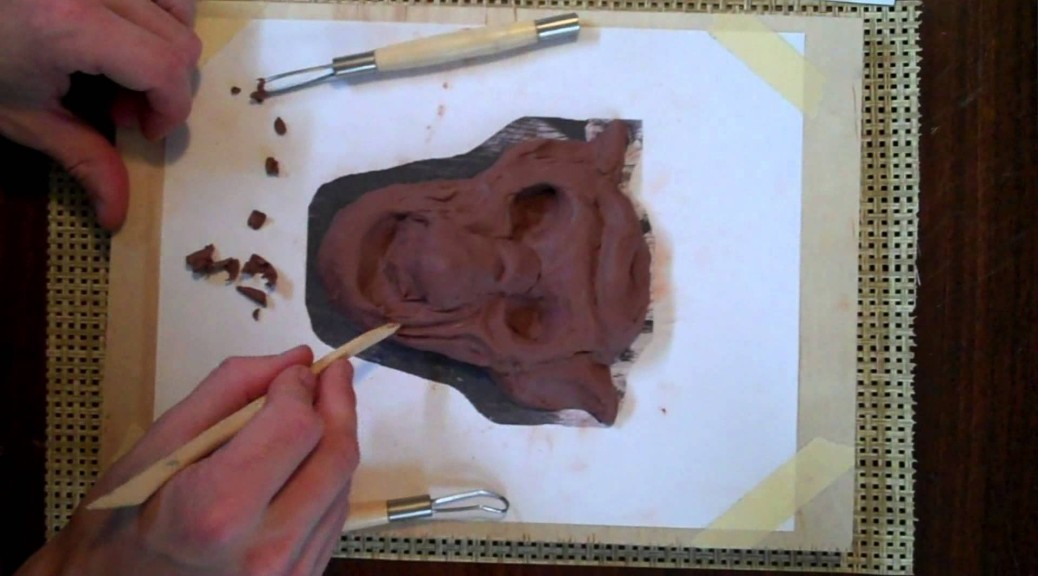
New Video: Sculpting Foam
I have a new video up at the Prop Building Guidebook companion website video page. This one shows basic sculpting and carving of foam. I filmed myself while sculpting a small head for the Vicky “doll” in the recent production of Cloud 9 which we just opened.
CNC Cast Iron Park Bench
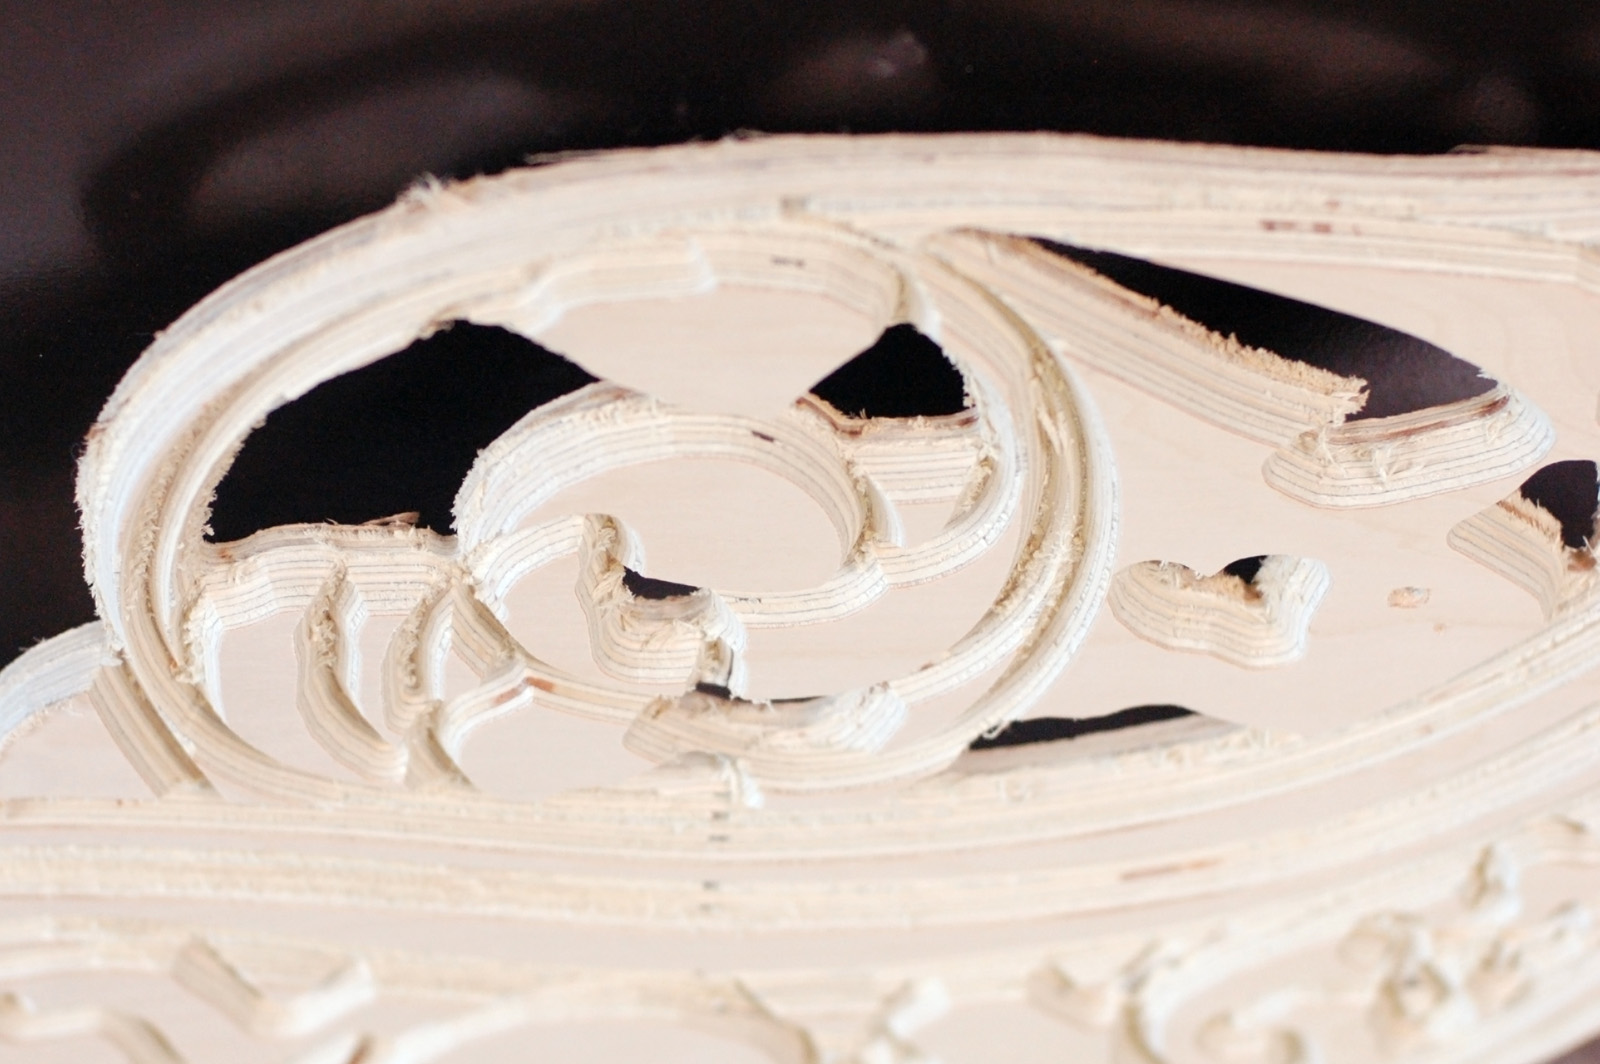
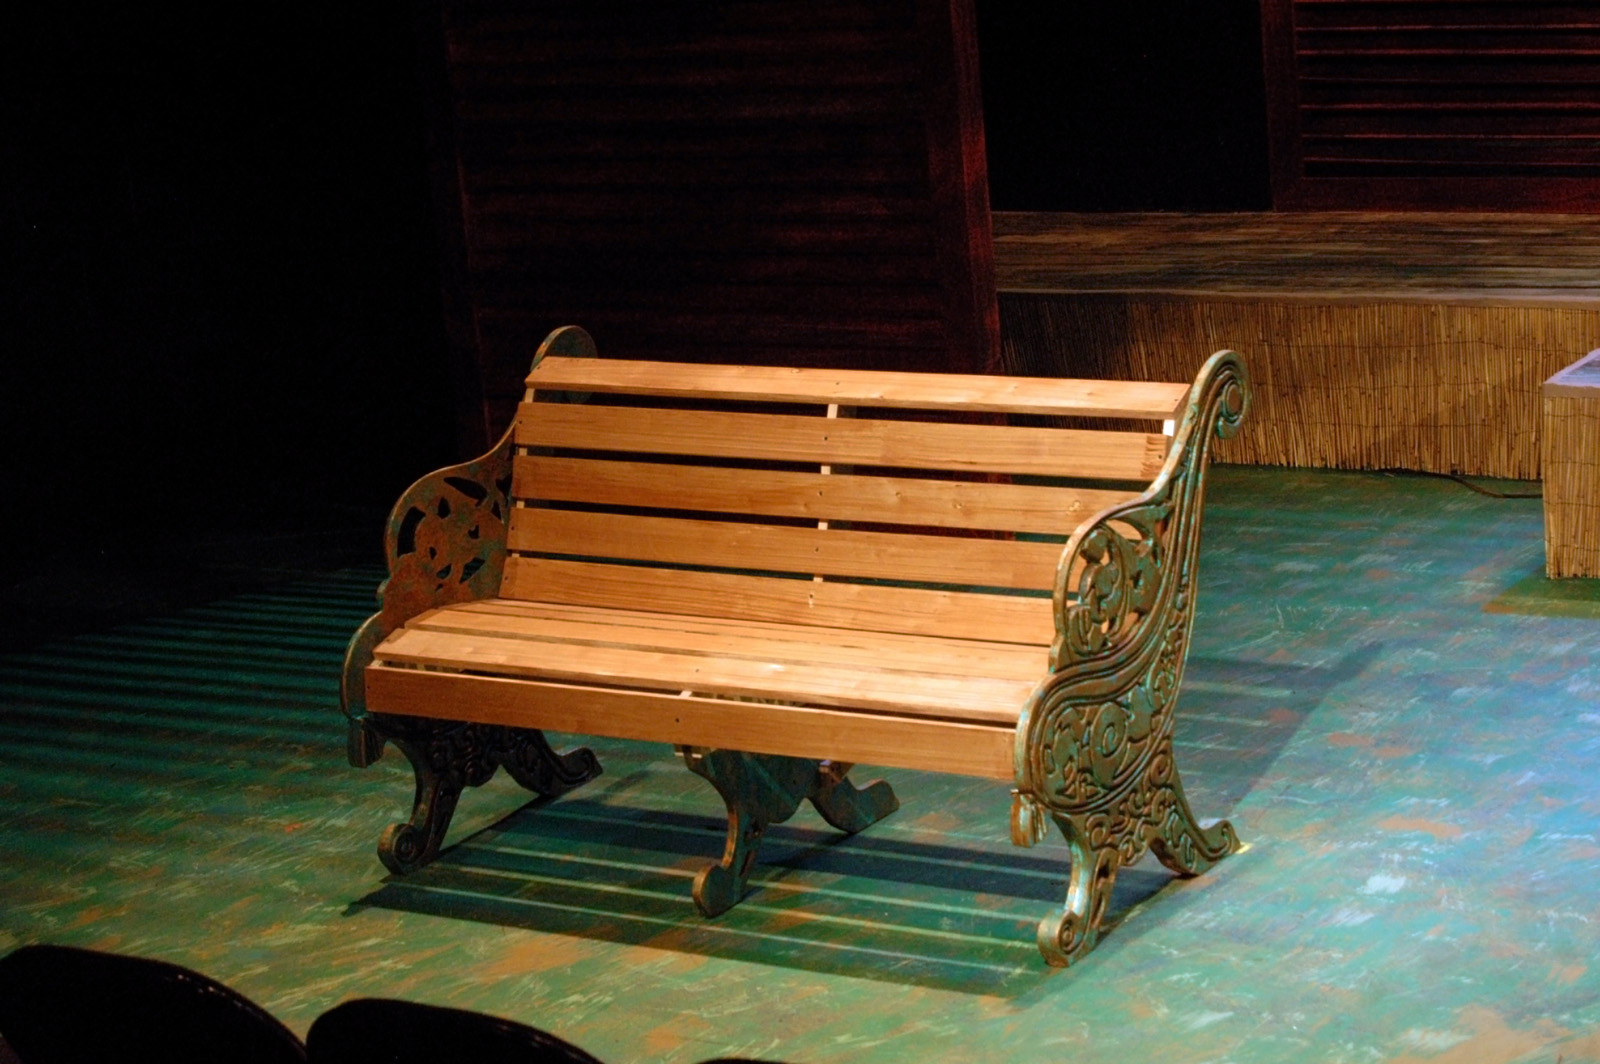
Yes, I built this exact same cast iron park bench seven years ago. I even used the same research image you see in the link. I couldn’t build it the same way, though. The first time around, I used a lot of found pieces and details which I did not possess this time. I also needed to build three matching benches, which warranted a different approach then building a single one. I was building and buying all the props for Elon University’s production of Cloud 9, and the whole second act takes place in an English park; the director was keen on basing it off of Kensington Park. We decided to cut and carve the ends on the scene shop’s CNC router.
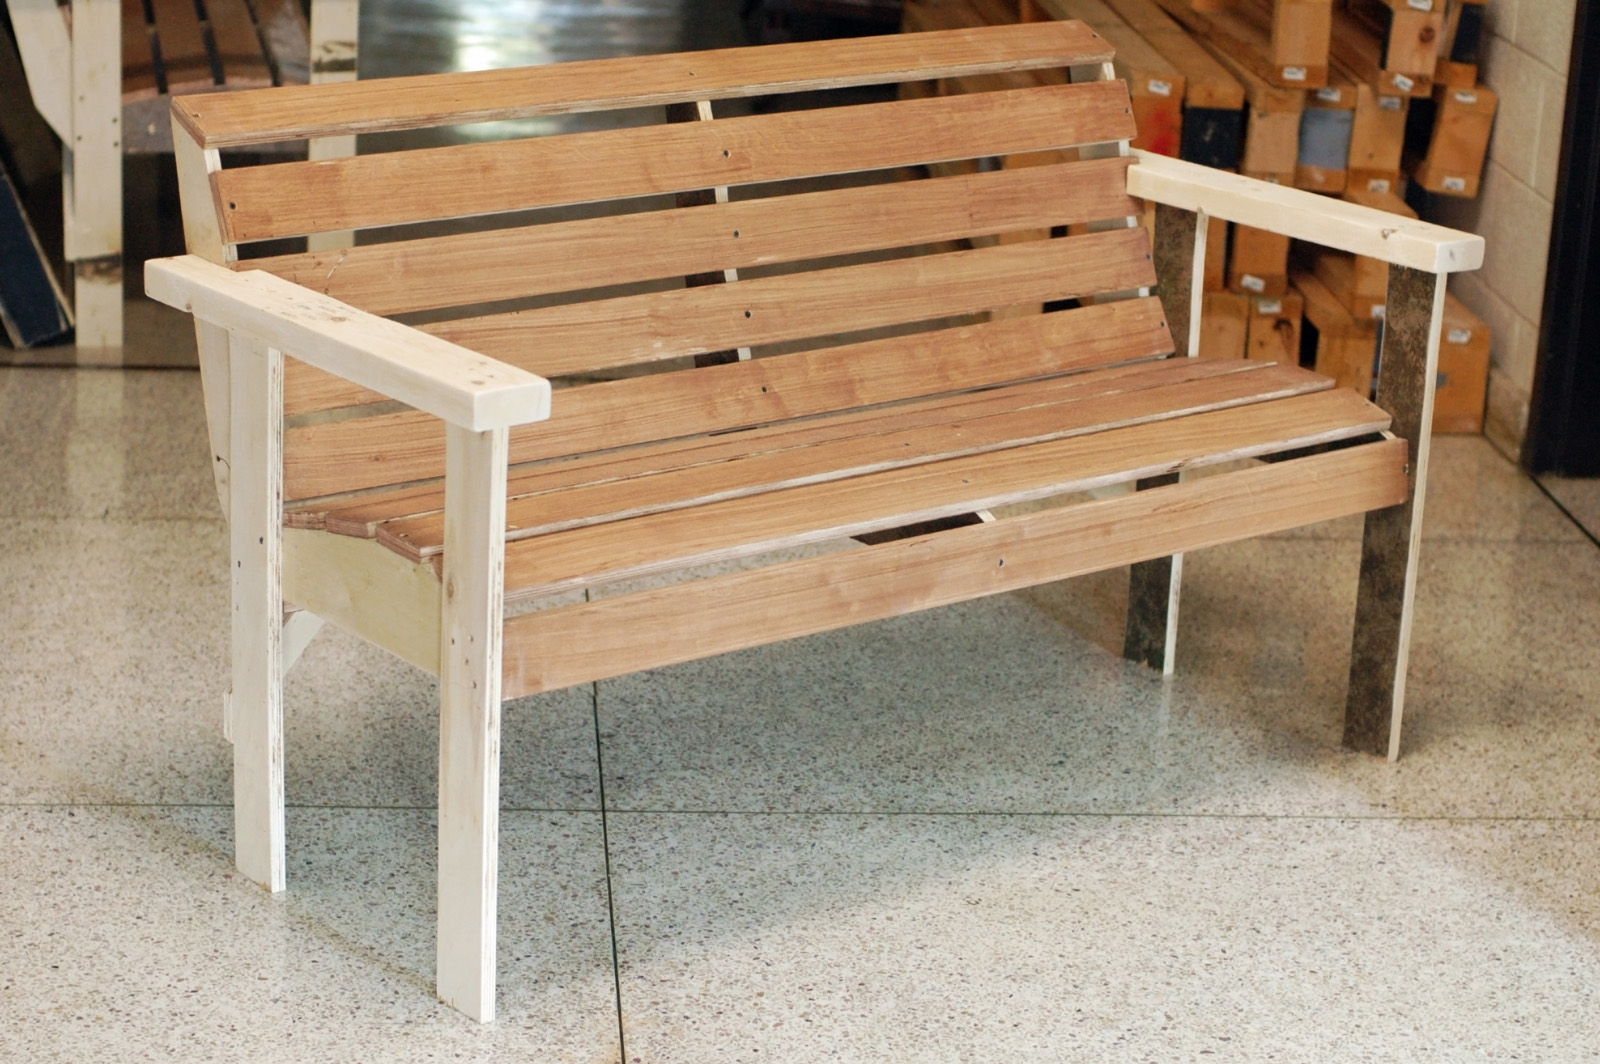
First I built the seats themselves with some stand-in legs and arms. I arranged some slats I had cut into a shape that was comfortable to sit in, than I screwed them together onto supports which kept the whole thing sturdy. The stand-in legs held it all up at the correct height so they could rehearse with the benches while we worked on the real ends. The idea was that when the real ends were ready, we would just unscrew the fake legs and pop on the real ones without having to take apart and reattach all the original slats. This also ensured that the curve and depth of the seat they were using in rehearsal would be exactly the same on the performance benches.
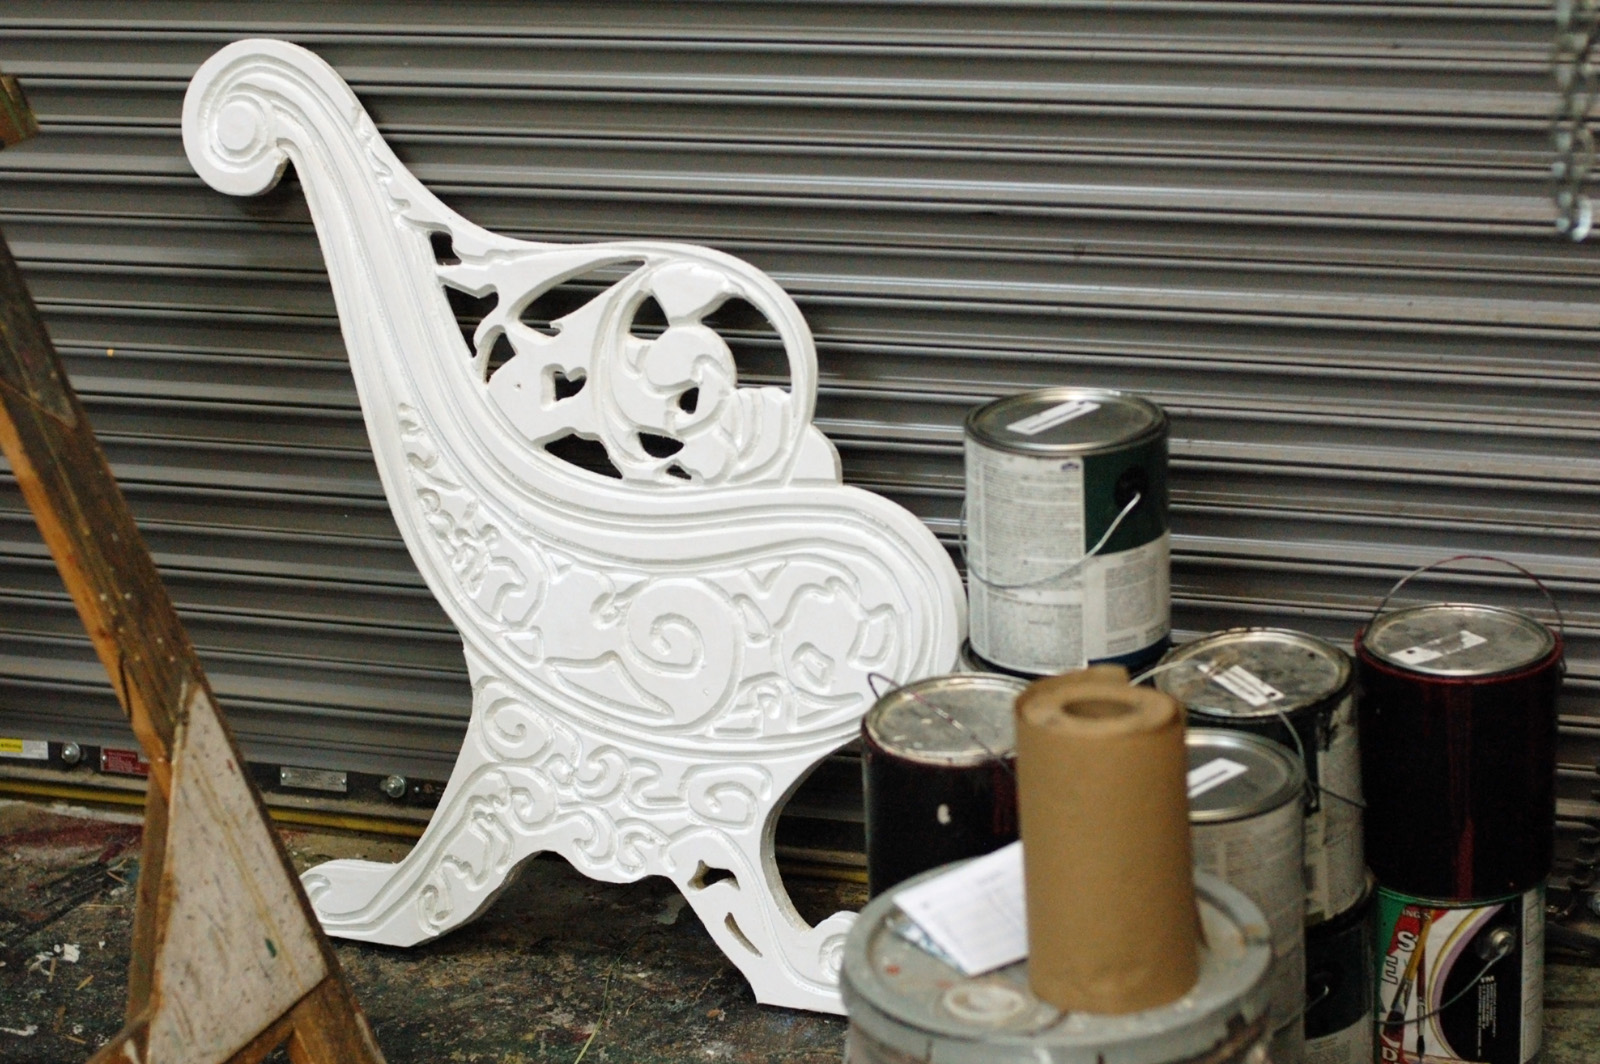
I began by making a line drawing of the bench in Inkscape, an open source vector graphics editor. I drew three layers; the first was a line showing where all the inside “holes” should be cut and the second showing where the outermost profile should be cut. The third layer showed where all the engraving would go. Rather than cutting all the way through the plywood, the router would only cut partway down, and it would use a v-shaped cutting bit (this technique is known as “v-carving”).
With the drawings finished, I gave them to the Natalie Hart, the scene designer (also my wife), to import into AutoCAD. I’m sure you can use the Inkscape drawings directly, but I have no experience with CNC file formats, and Natalie has already successfully used her CAD drawings on the CNC machine. The curves I drew in Inkscape turned into a series of many tiny lines in AutoCAD; this meant when they printed, they looked like many tiny lines rather than a single smooth curve. The curves she redrew in AutoCAD printed as smooth curves, however. I’m not sure I will use Inkscape again to draw for a CNC; if I find myself using the CNC a lot in the future, I may just spring for one of the less-expensive CAD drawing programs out there.
The final piece of the puzzle was getting the drawings into PartWorks, which is the CNC machine’s software that generates the instructions it uses in cutting. Our production manager/lighting designer Bill Webb happily took that on, since the machine is second-nature to him by now. In about three hours, we had all the pieces we needed for all three benches.
You can see in the photograph above that the CNC left a lot of cleanup work to do. I experimented with a number of abrasive flap and wire wheels to see if there was a quick way to sand the whole thing, but it ended up requiring hitting every nook and cranny with a Dremel tool.

We had taken measurements off the rehearsal benches and put them into AutoCAD so the CNC parts would line up exactly with the existing structure. For the inside of the end, we only printed the bottom half and attached it to the outside part. This gave a bit of a lip for the existing bench seat to rest on, while also providing a lot of surface area to screw into from the side. It also helped line up the bench seat to the ends at the correct height.
The faux-verdigris paint treatment was developed by one of the students (good job, Vee Bland!). Natalie and I painted them up, and I quickly assembled them so they would be ready mere minutes before photo call.
Naturally, I would have loved to play around with the software and the drawing to develop a more realistic carving, as well as spend some time learning to run the CNC machine on my own. The time frame on this production was just too intense; 15 days between the first day of rehearsal and opening night, and these benches were but a small part of all the props and furniture I had to build and acquire. Still, it gave me a good idea of how I can integrate CNC fabrication into my prop work when it can come in handy.
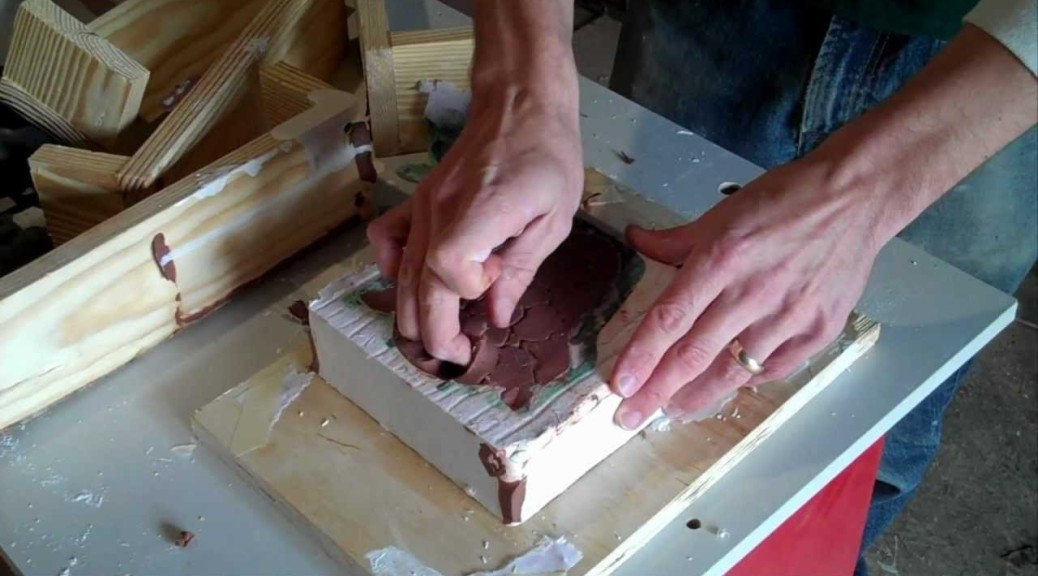
Making a Plaster Mold
I have a new video up on the videos page of The Prop Building Guidebook website. This one deals with making a one-piece plaster box mold. Plaster is a cheap and relatively easy-to-work-with molding and casting material, and a one-piece box mold is one of the most basic types of molds to make. I feel a one-piece plaster box mold is one of the best introductions to mold making for those reasons. If you can pull it off, you’ll have more success as you move on to silicone rubber and other fancy mold-making materials.
So check out the video below, and don’t forget that I’ll have new videos up every week until my book comes out on February 26th.
Companion Videos for my Book
With less than seven weeks before the release of The Prop Building Guidebook: for Theatre, Film, and TV, I have begun adding videos to that website. These videos are meant to augment the content of the book, since some things are just easier to show in motion, rather than describe with text and pictures. I will be adding new videos every week until the book launches on February 13th.
So without further ado, I am proud to announce the brand-new Prop Building Guidebook companion video page. Only two videos are up at present; the first is on the vacuum former I built, which you probably remember from last autumn. The second has just been added today and shows you how to sculpt in oil-based clay. You can check it out below:
Keep on propping!