Category Archives: How-to

Guides to building props or using certain techniques and materials

Piano for Wild Party

Every musical needs a piano, right? Of course, if you have a piano on stage and people are dancing, you’re going to want the people to dance on the piano as well. Such is the prop master’s life. I had to build a dance-able piano for Elon University’s production of The Wild Party, which closed a few weeks ago.

Appropriated Piano Parts

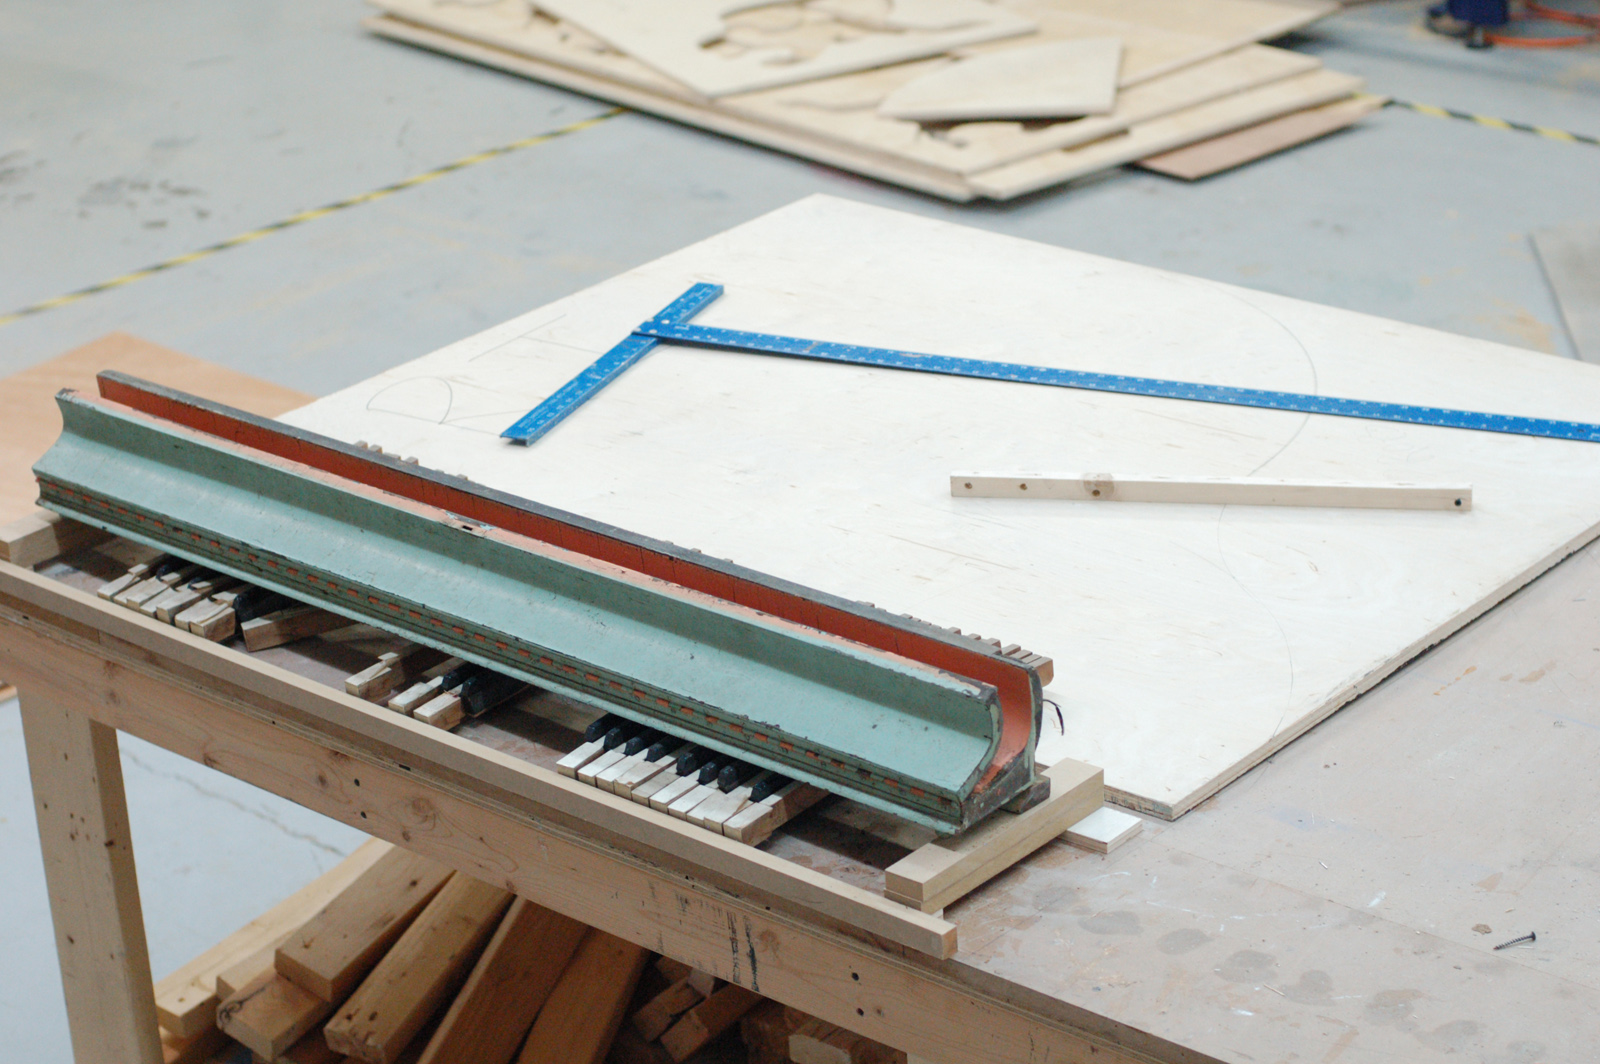
As it turns out, my father has taken apart a piano or two and kept the pieces in his barn. When I was visiting over Christmas, I picked up some of these parts, including the keyboard lid and a partial keyboard. While I probably could have faked the keys, the lid was a real find; it’s two pieces of solid oak cupped along the entire length. This shape would be hard to fake on my own, and it would be nowhere near as sturdy as the piece I found, which could support a person’s weight in the center without bending.

Shape and Structure
Shape and Structure

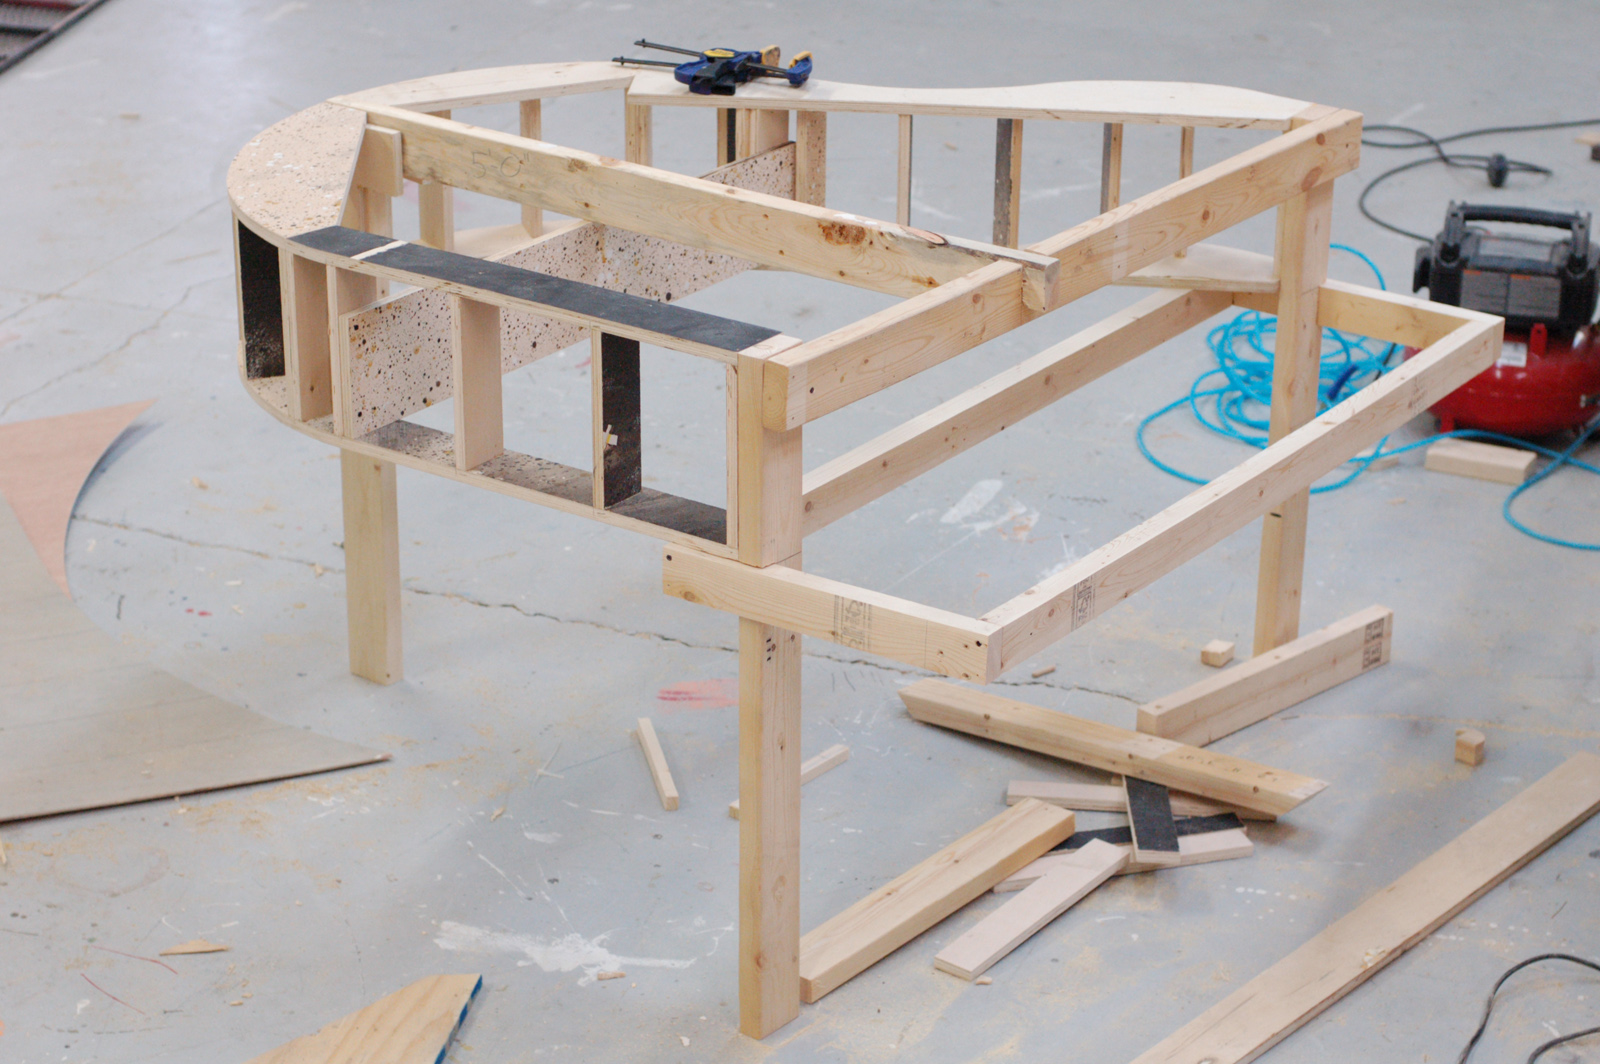
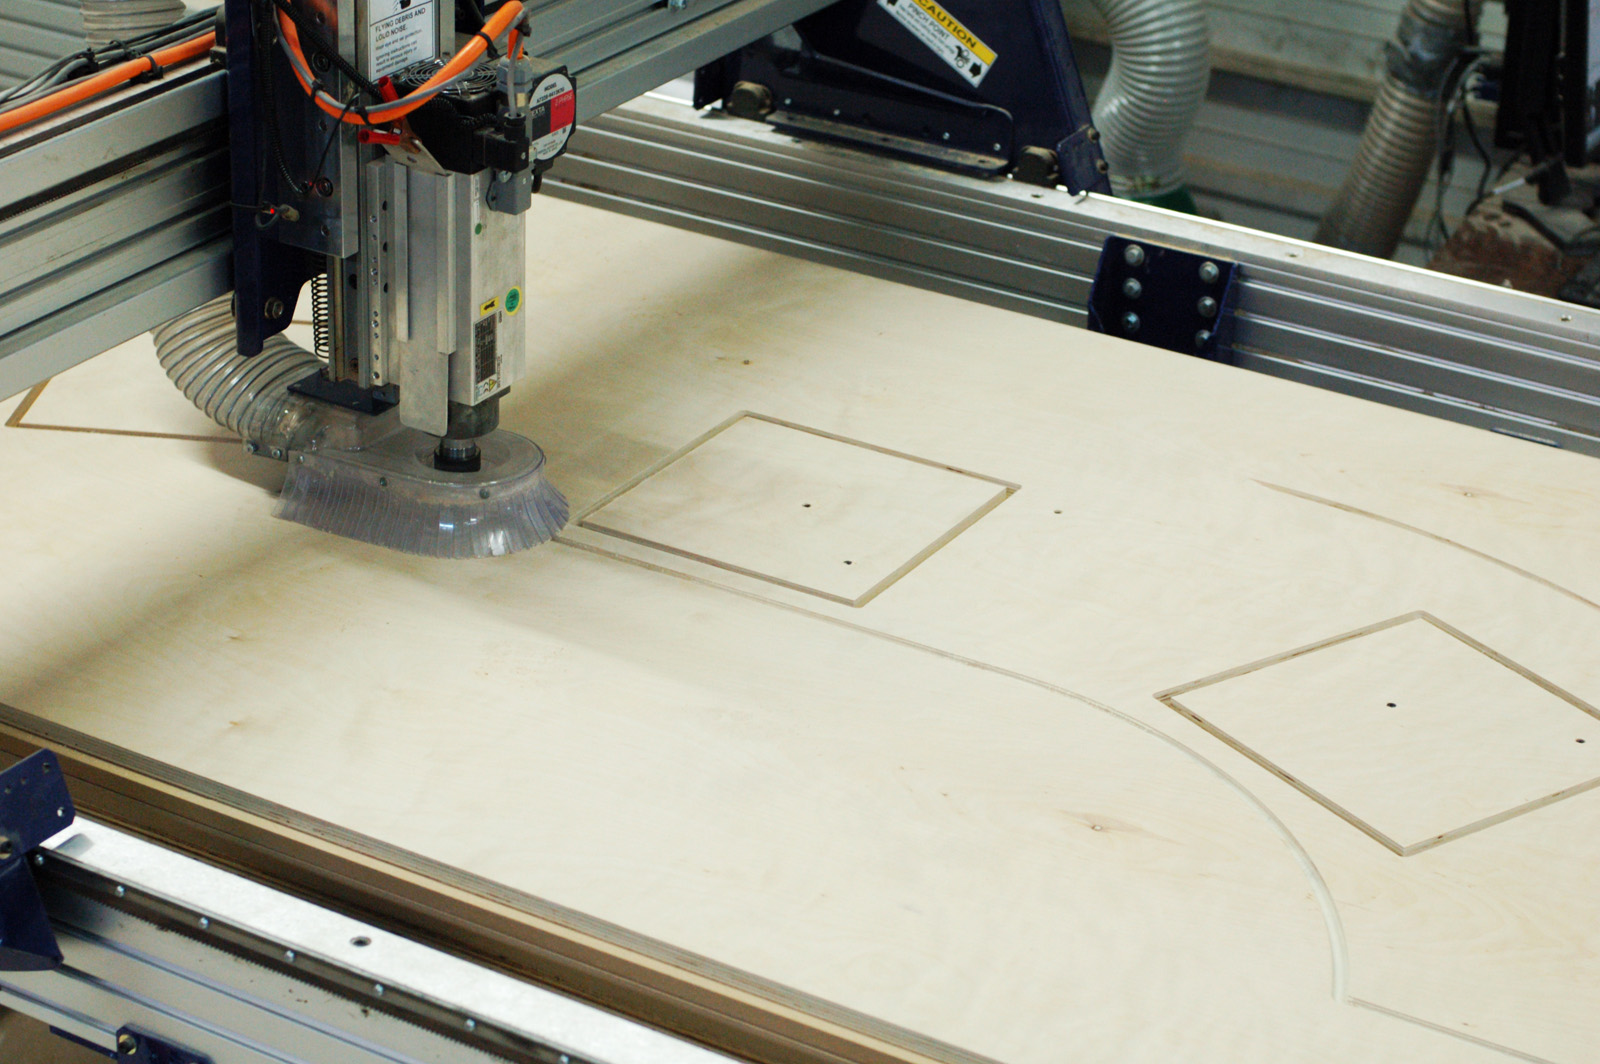
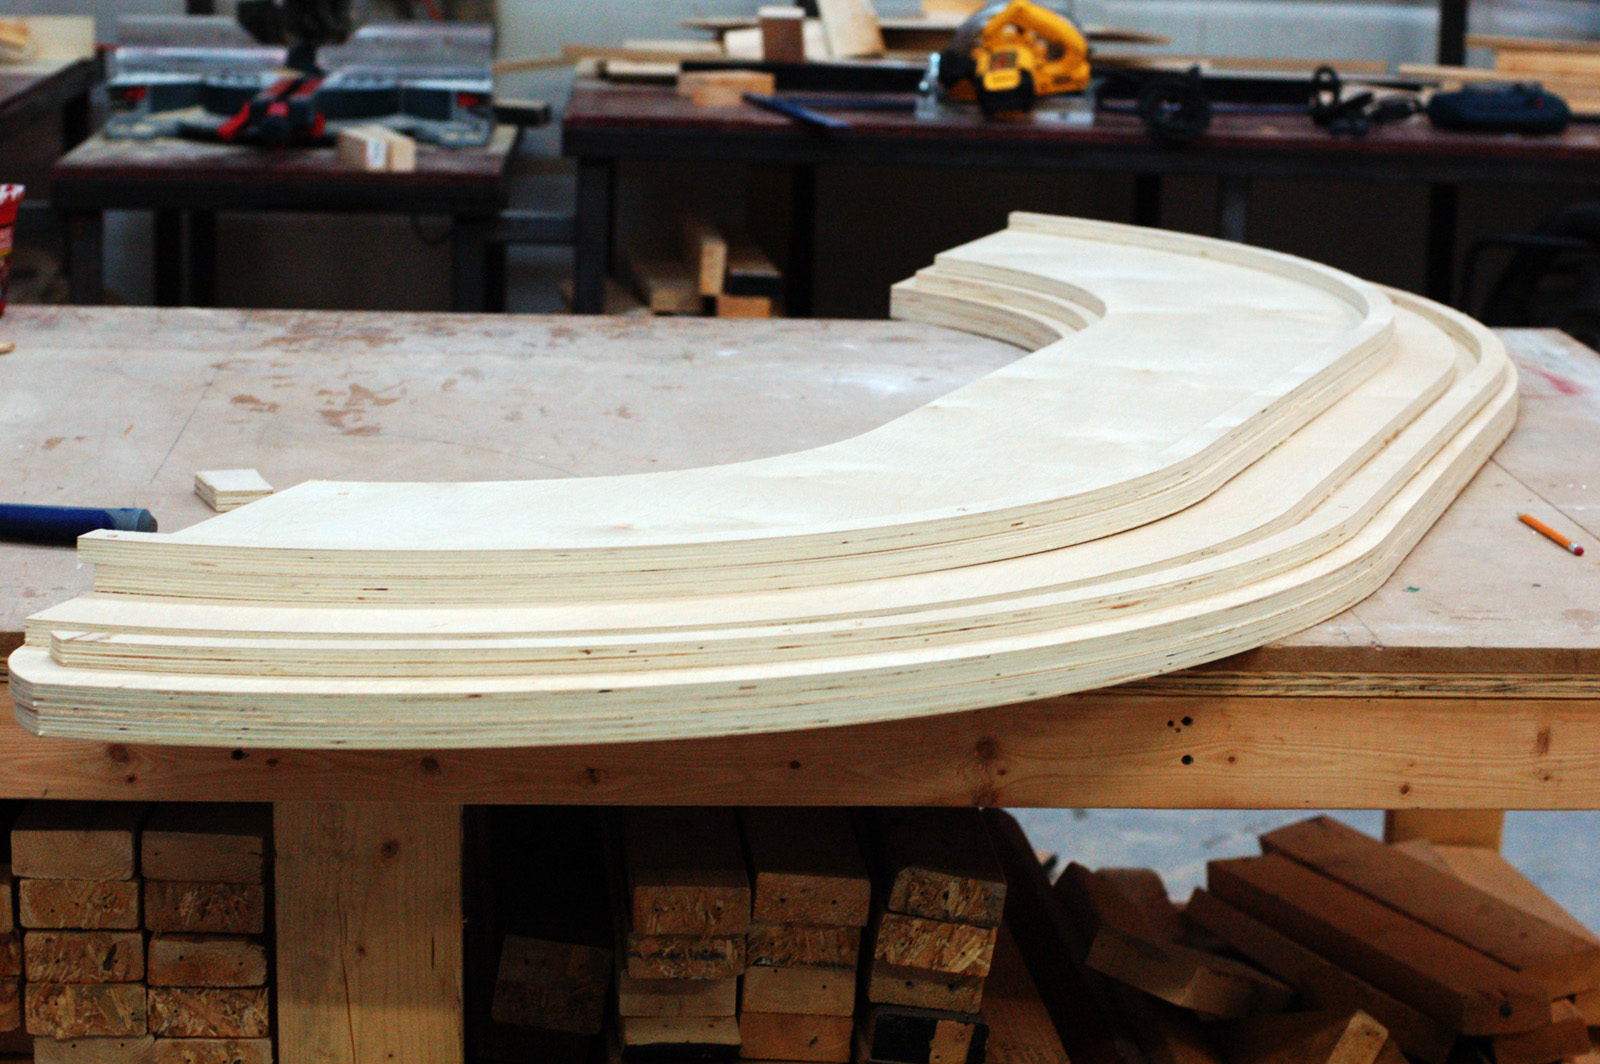
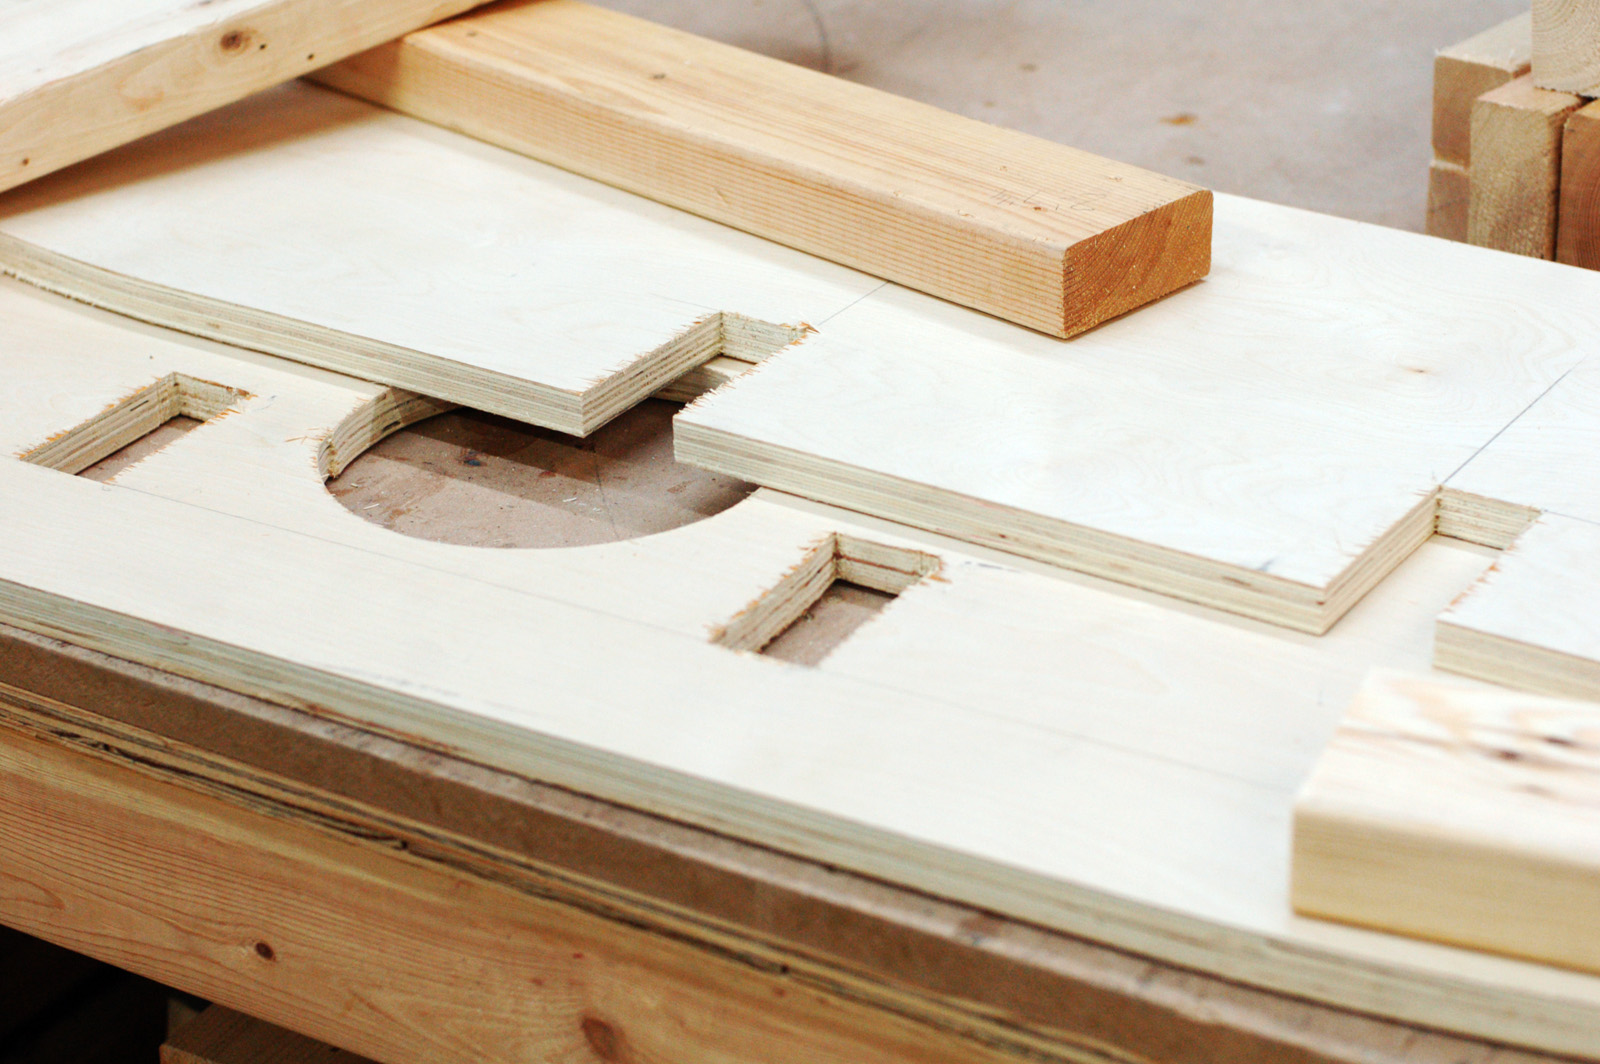
It needed to be strong and sturdy, but lightweight enough that it could be quickly turned and moved throughout the musical by the actors. The photograph above shows the beginning stages. I had to make the shape also serve as the structure, because there was not a lot of room to hide cross bracing or reinforcements.

Unpainted Piano
Unpainted Piano

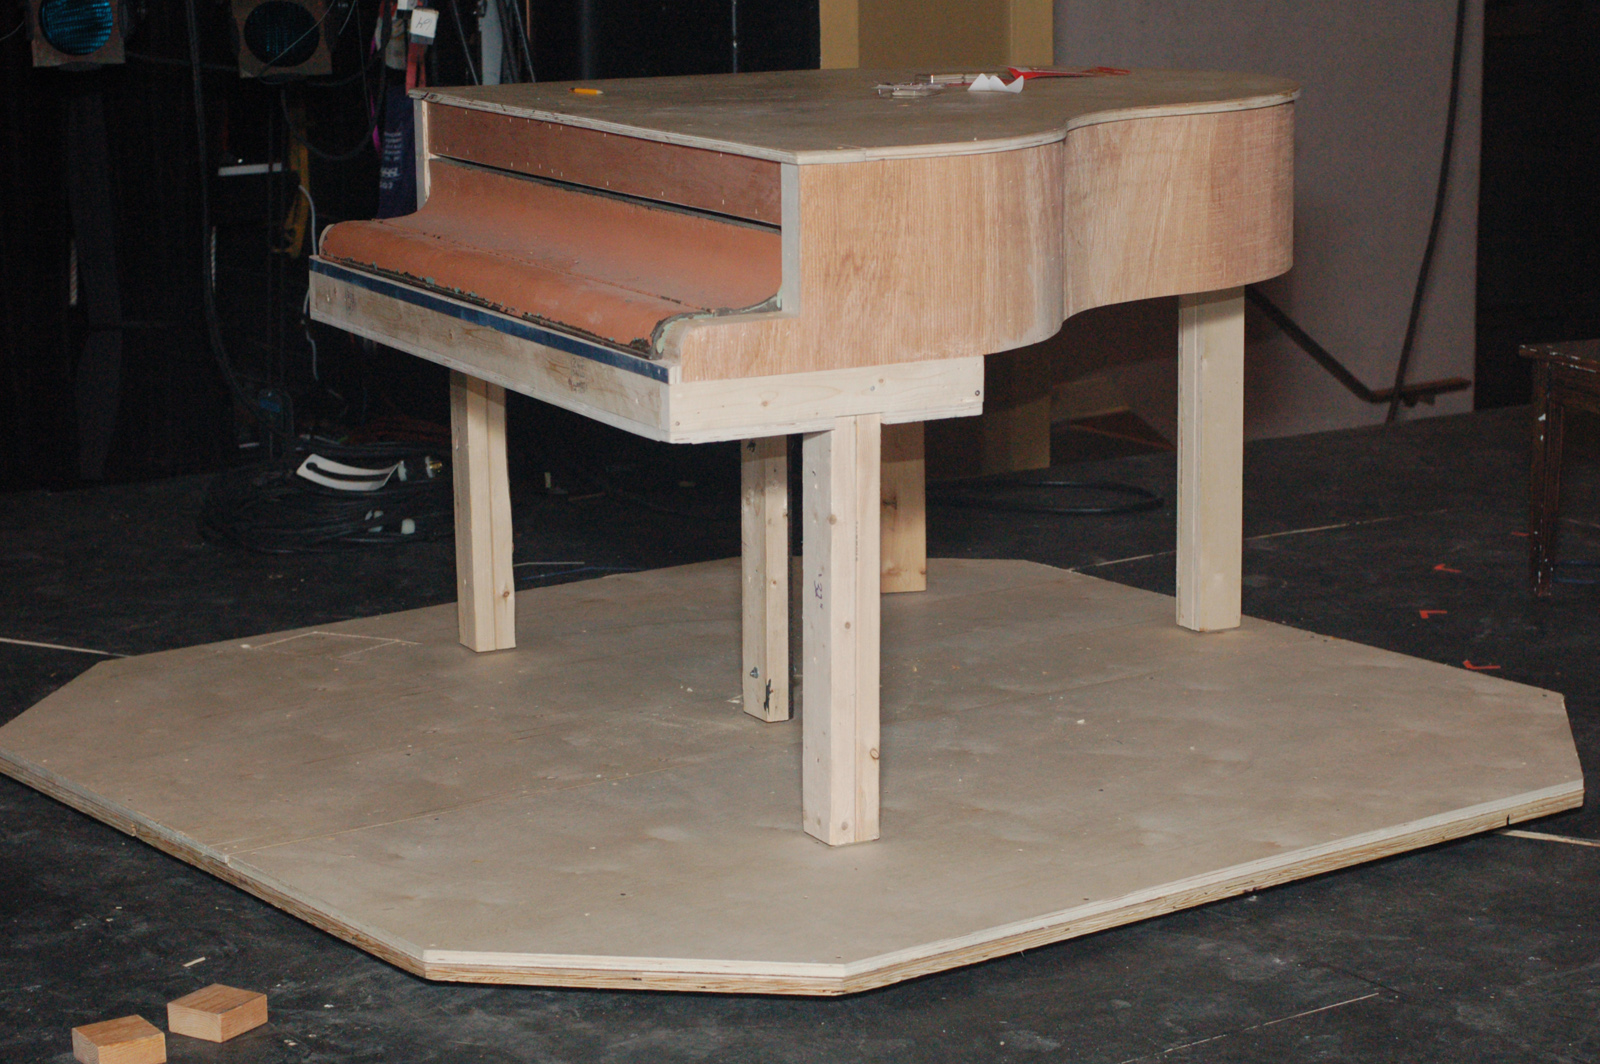
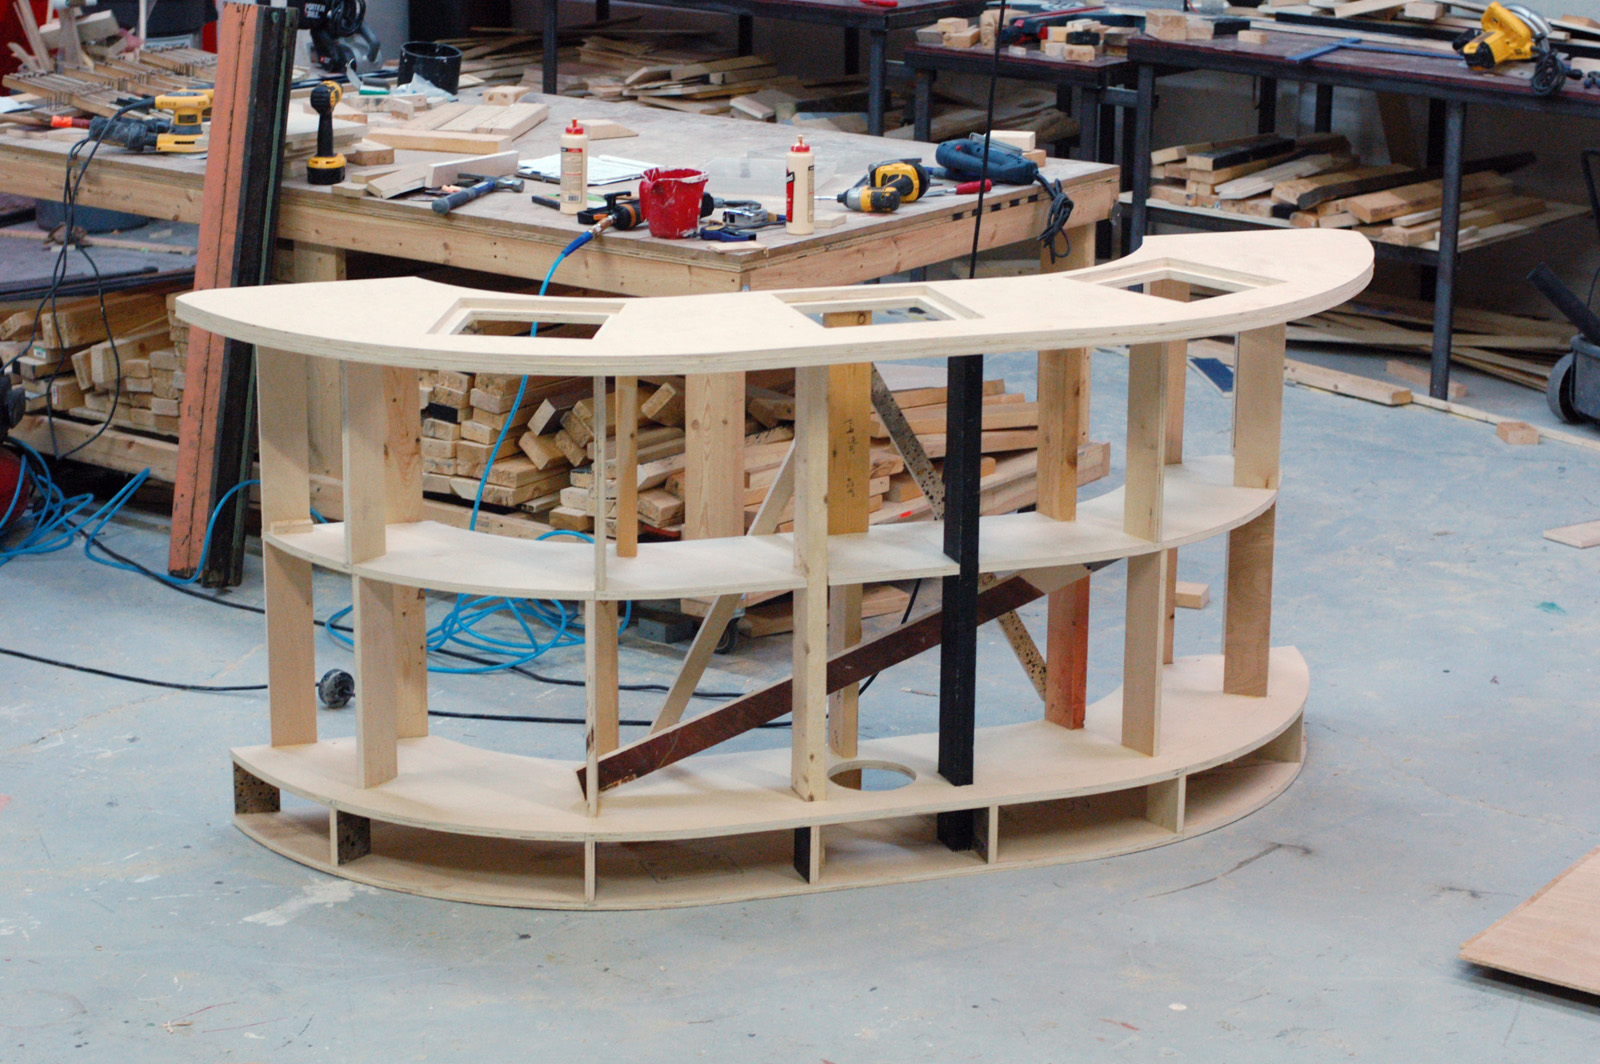
The two-by-four in the center of the piano hides a pipe that leads down into the platform itself. This gave a pivot point to the piano so when the actors spun it around on the wagon, it would rotate on a fixed point.

Painted Piano
Painted Piano

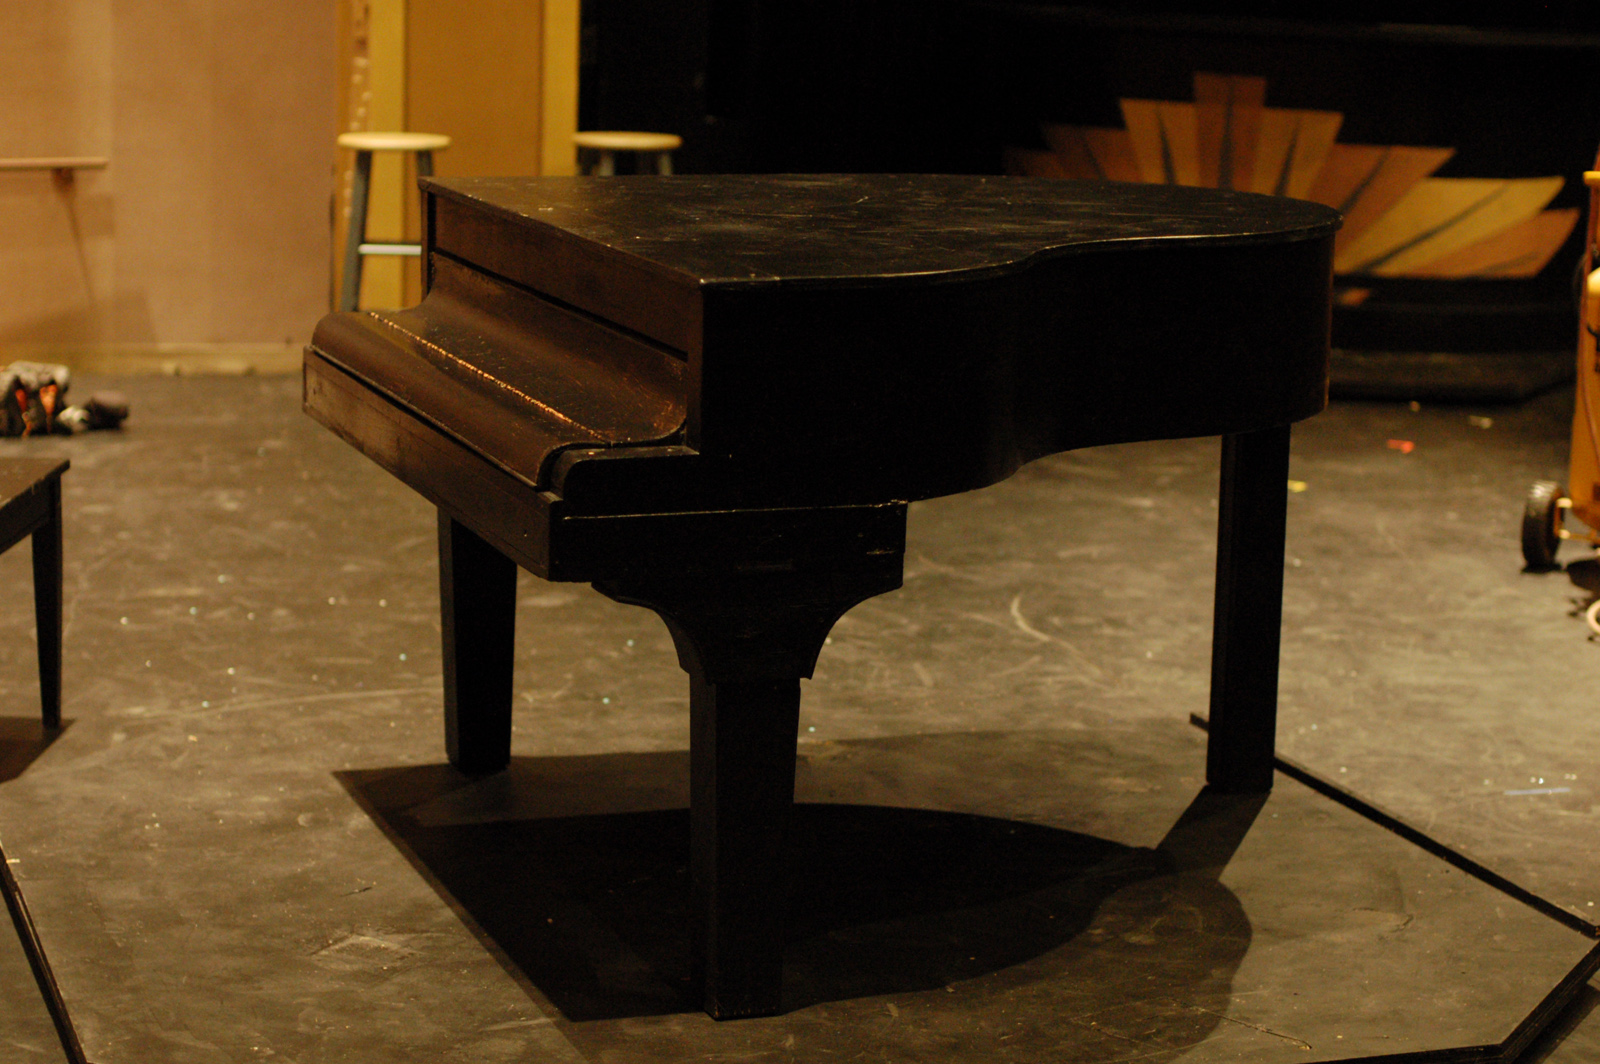
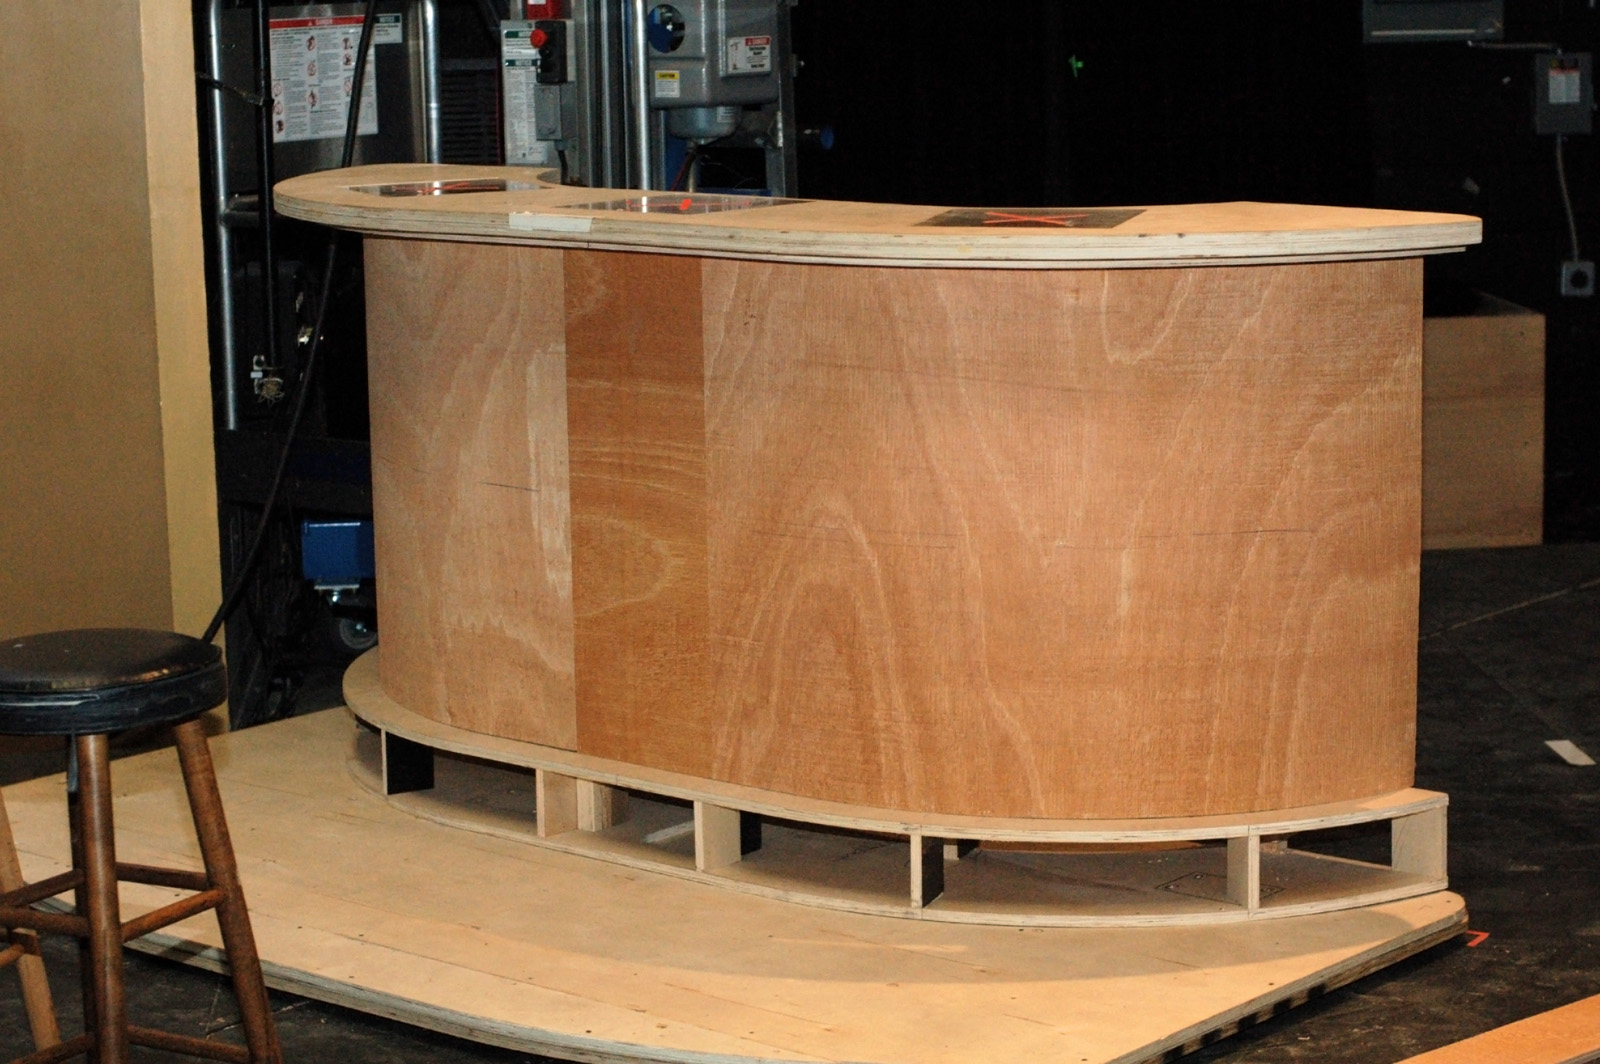
The piano received a coat of black paint followed by a few coats of Sculptural Arts’ Plastic Varnish Gloss (one of my wife’s favorite products). You can see in the photo above that I added more facing to the front legs to make them appear like more traditional piano legs. On a real piano, these would be cut from solid wood, but on my prop piano, they are pieces of quarter-inch plywood and wiggle wood over top a leg made from two two-by-fours.

Wild, Wild Party
Wild, Wild Party

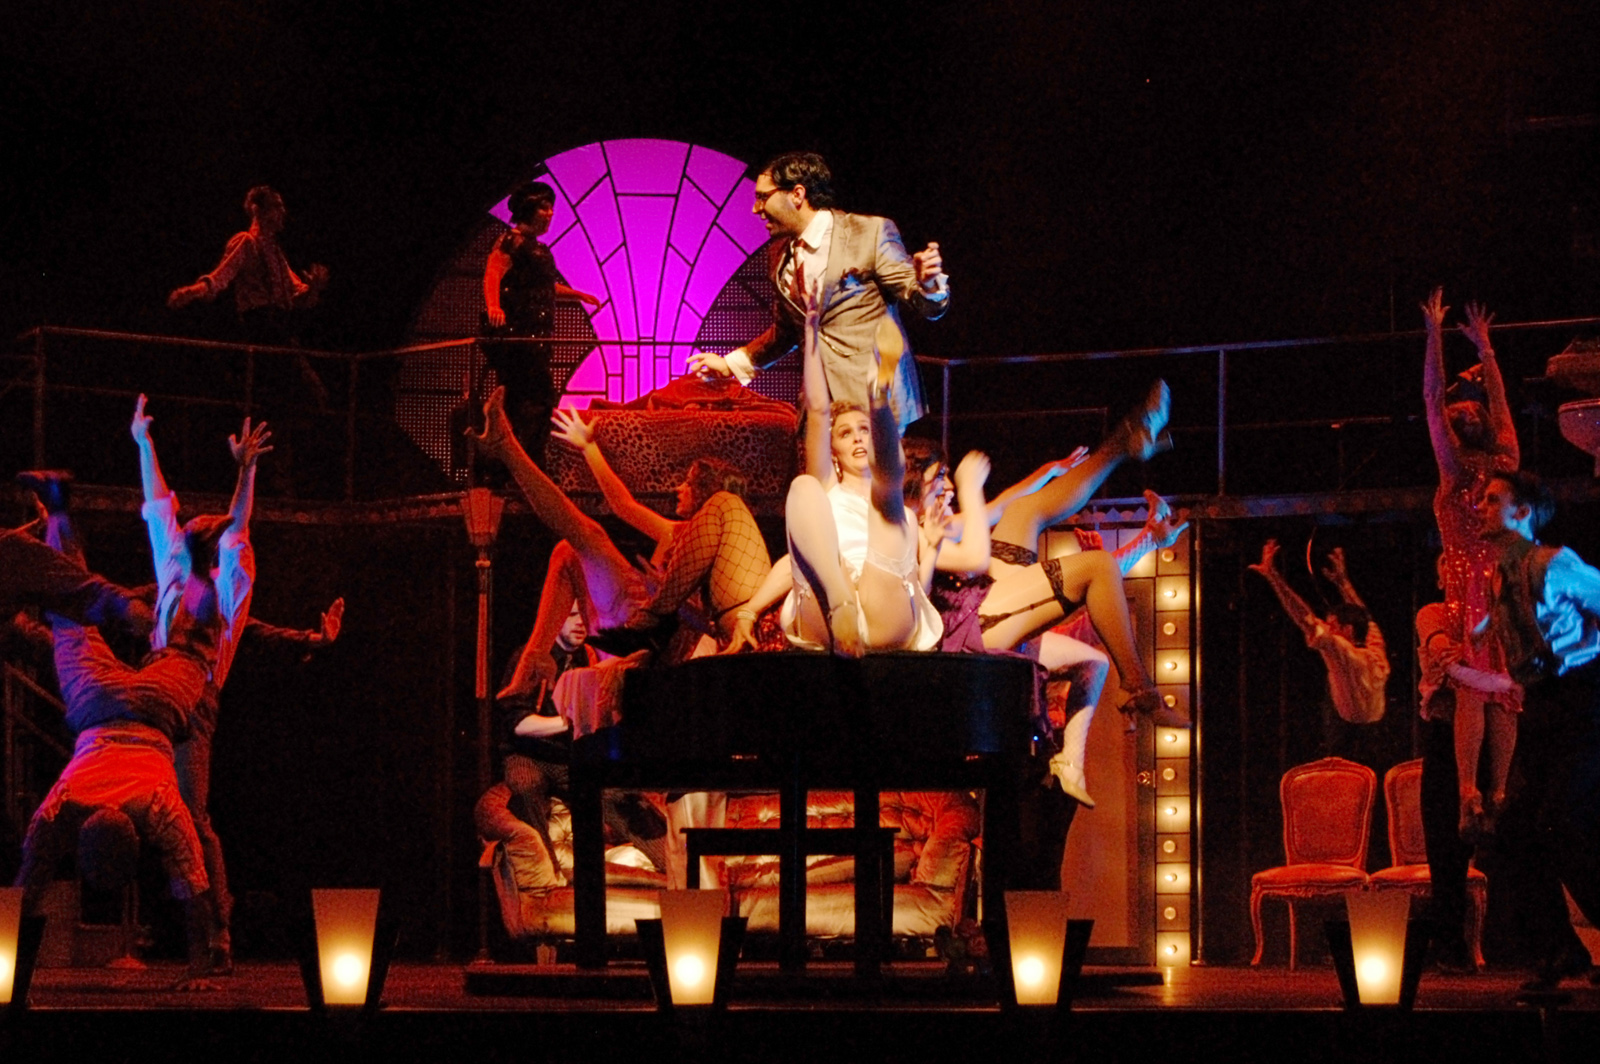
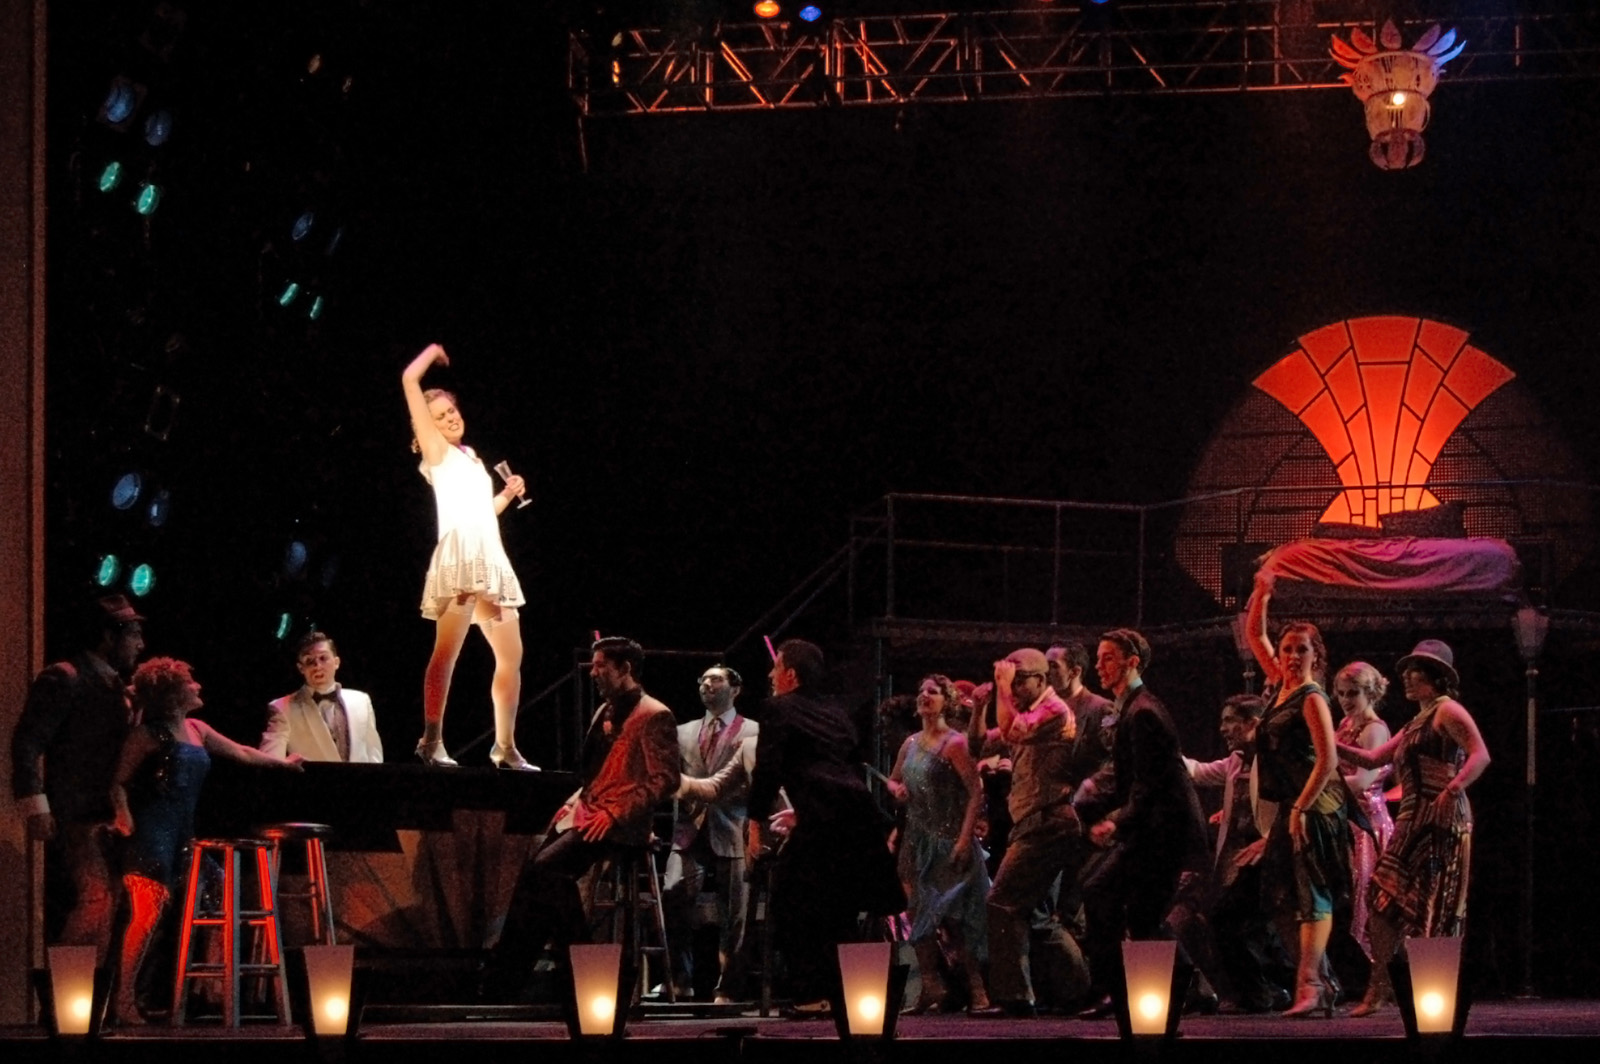
There are six people dancing on the piano in the photograph above. It featured throughout the musical, with people dancing on top, jumping up and off of it, and generally subjecting it to all sorts of abuse. I’m happy to say it sat there like a rock, never sagging or shaking no matter how hard they tapped or how much shimmy was in their shake.


A Wild Bar for a Wild Party

It is a little over a week since Elon University’s Wild Party closed, so I thought I would share some of the props I built while working as the props master on it. First is the sleek Art Deco bar. This production featured a lot of dancing and movement (in fact, the show was more of a dance piece with singing than a traditional musical) and the bar was key in a lot of the dancing. Actors jumped up and down off of it constantly and danced on top of it. Needless to say, it had to be sturdy.

Wild Party
Wild Party

The other hurdle was that I only had a bout a day to build the bar to a point that they could use it in rehearsal; it did not have to be finished, just usable. The bar had a sort of boomerang or banana shape to it. I knew it would take awhile to layout the shape, not to mention all the pieces I would need to cut that followed the shape but were inset or offset by varying amounts. Since the scenic designer, Natalie Taylor Hart, already had the footprint of the bar drafted in CAD, we decided to CNC these pieces and save some time.

CNC the top
CNC the top

The top was two layers of plywood. We were putting lights in the bar that would shine upward, so the top also had squares to hold three pieces of 3/4″ plexiglass; the squares on the top piece were large enough to fit the plexiglass, while the squares on the bottom piece were a touch smaller to create a lip for the plexiglass to sit on.

Pile of CNC pieces
Pile of CNC pieces

I also cut the footrest, a piece for a shelf in the middle, and some formers to nail the wiggle wood to. This pile of pieces would have taken awhile to draw and cut by hand, but with CAD, Natalie just had to copy the same shape over and over again, insetting the front curve by whatever measurement I gave. With this pile of pieces, I just had to cut a bunch of formers and uprights to connect them all together.

Notches and holes
Notches and holes

I decided I wanted some supports to run unbroken from the top to the bottom of the bar for strength, which meant I had to cut some notches and holes in the plywood that they could run through. If I had more time to figure the whole thing out ahead of time, I would have drawn these into the CAD. Since the pieces were already cut, I needed to measure and cut them by hand. See, even with fancy fabrication machines, you still need a solid grasp of traditional tools to build things.


Two levels complete
Two levels complete

I built the bar up one level at a time, marking carefully to keep the whole thing square and straight. I positioned the supports so they were nearly above the support below them; they were offset just a bit so I would be able to drive a nail in.

Bar skeleton
Bar skeleton

The supports along the front of the bar did double duty as formers, providing a nailing surface for the wiggle wood I would add later. I tried to keep the back as open as possible so it could be used as shelving to store all the props; the set was fairly open and skeletal, so the bar served as a place for a lot of the hand props to appear and disappear. The diagonal braces in the photograph above are just to keep the bar sturdy as they use it in rehearsal. Once the wiggle wood was added, I removed them, because the wiggle wood acted as one large piece of diagonal bracing.

Wiggle Wood
Wiggle Wood

I finished the bar onstage in between rehearsals. The curve was longer than eight feet, so I could not cover it with just one piece of wiggle wood. The center is relatively flat, so I placed a small piece directly in the center; I have found it easier to fill and sand seams between wiggle wood when they are on flat areas. The footrest also got a small strip of wiggle wood after the bar was secured to the wagon underneath it. All the faces got a thin coat of joint compound and a light sanding, and then it was on to painting.

Wild Party Bar
Wild Party Bar

You can see the bar is a bit rough around the edges in the photograph above since I did not have time to take a picture until after strike. The Art Deco design painted on the front was a great touch added by Natalie and her crew. As she also pointed out, despite all the climbing and dancing done on this bar, she never saw it sag or wobble.

How to Draw an Ellipse

I have three new videos up on my Prop Building Guidebook companion website. Two are on painting techniques (spattering and sponging), while the third shows a quick method for drawing an ellipse. I’ve attached that below. My book comes out next Tuesday, so that is it on the videos for now. But if you want to request a video for a specific technique, or demonstrating a certain tool, let me know, and I’ll see what I can put together.

A Grand Wedding Cake for Cloud 9

We just closed and struck Cloud 9 here at Elon University. I was the prop master on the show and built a lot of the pieces. One of the fun (and funny) props I constructed was a grand Victorian-era wedding cake. It was meant to be a bit over-the-top, with a grand appearance at the end of Act One when the hastily-arranged wedding occurs. Part of the visual humor came from the cake toppers; the scenic designer (Natalie Taylor Hart) wanted the groom to be a detailed representation of a man striding atop of a Royal Orb, while the bride would be a much smaller and crudely-made figurine stuck in the cake as an afterthought (the play, for those unfamiliar, deals with gender politics in various degrees).

Sculpting the Cake Topper

To make a sculpted figurine of the groom, I started off with bending a wire armature into the pose I wanted. This also let me establish the proportions of the limbs. It wasn’t anything fancy; I cut up a wire hanger and held it in place with plumber’s putty. Plumber’s putty is a type of epoxy putty which is soft and shape-able when you first mix it together, and becomes rock hard after a few minutes. I liked it on this project because I could build up the sculpture bit by bit, allowing the parts to become hard as I worked on other things. I could return to the sculpture later and add more bits without worrying about smooshing the parts I already made. It also did not need to be fired or coated to finish it. The putty I used was left over from another show, so I did not have to spend any more money on a show with a tight budget.

In the last frame of the picture above, you can see I added some clothes. The putty is not very good for getting fine details; you can machine and carve it after it has hardened, but I wanted a quicker way to get some semi-realistic clothing texture on top. I took muslin and soaked it in glue and water, than manipulated it over top until it “draped” like a shirt and pants. After the glue dried, it retained its shape.

A Grand Wedding Cake

The rest of the cake was pretty straightforward. The bottom base is a strip of wiggle wood wrapped around plywood formers, while the top is a solid chunk of white bead foam coated in joint compound. I used painter’s caulk for the icing details. Normally you want to use acrylic caulk rather than silicone caulk, because silicone caulk does not take paint. However, I found some newer stuff which is a mix of acrylic and silicone; the acrylic makes it paint-able, while the silicone keeps it a bit flexible and lets it dry a lot faster. I bought a few decorative cake icing tips, and just attached them to the end of the caulk tube so it would come out all fancy.