Category Archives: How-to

Guides to building props or using certain techniques and materials

Circus Platform

One of my recent projects was a circus platform (though its more of a stool). It’s a very simple-looking shape, but it’s a little tricky to pull off. Think of the bottom half of a cone and that is what I had to build.

Platform structure
Platform structure

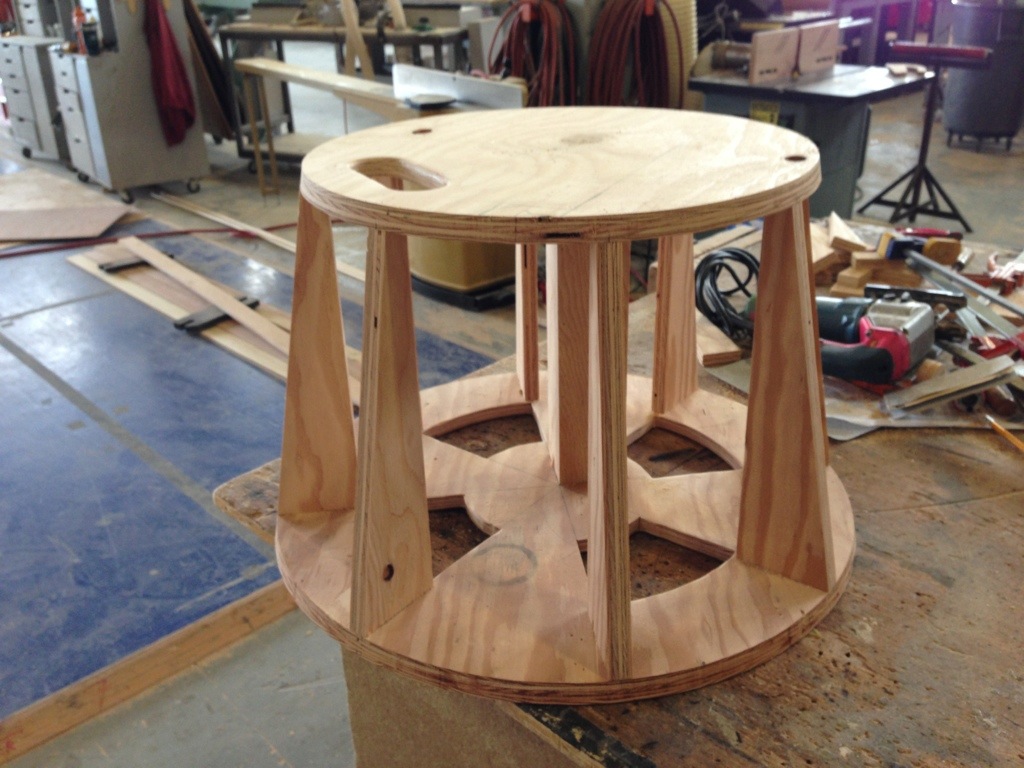
I started off making the structure for the platform. It had two circles of plywood, joined by a few lengths of plywood cut at a taper. The circles also had their edgers beveled to match the angles of the taper.

Attaching the wiggle wood

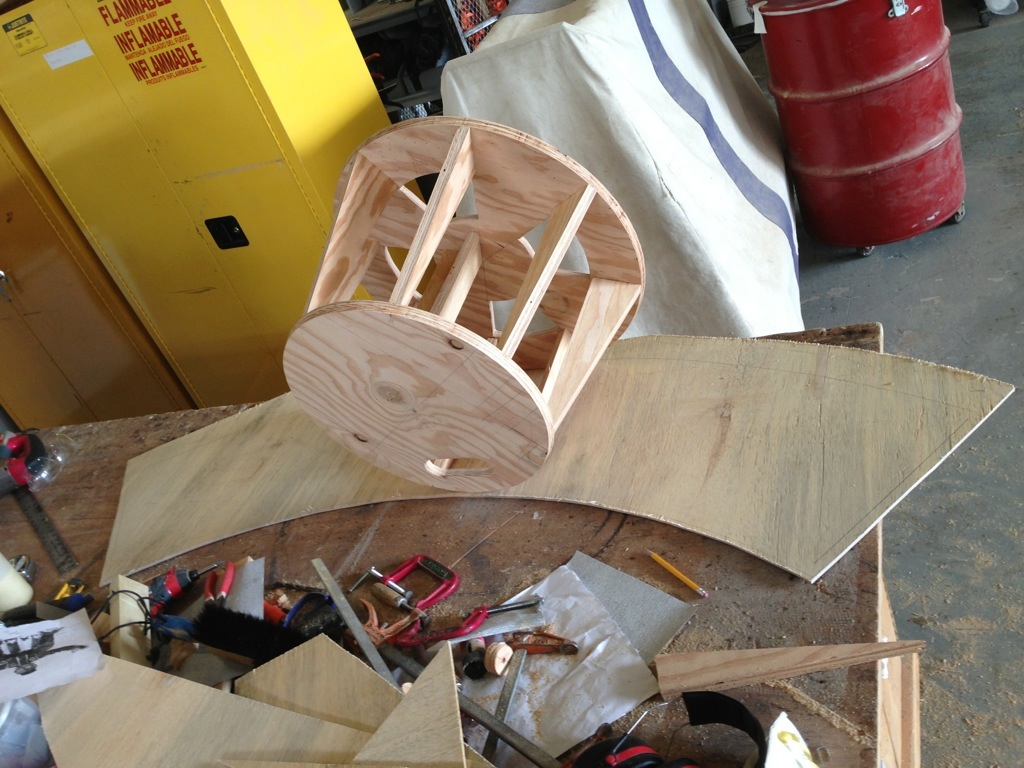
Adding the wiggle wood skin was one of the tricky parts. With a tapered shape like this, you can’t just wrap the wiggle wood straight around it. It actually requires a radiating arc shape like in the photograph above. I only rough cut the shape above, leaving a bit of extra all around that I can trim off once it is attached.

Trimming the bottom
Trimming the bottom

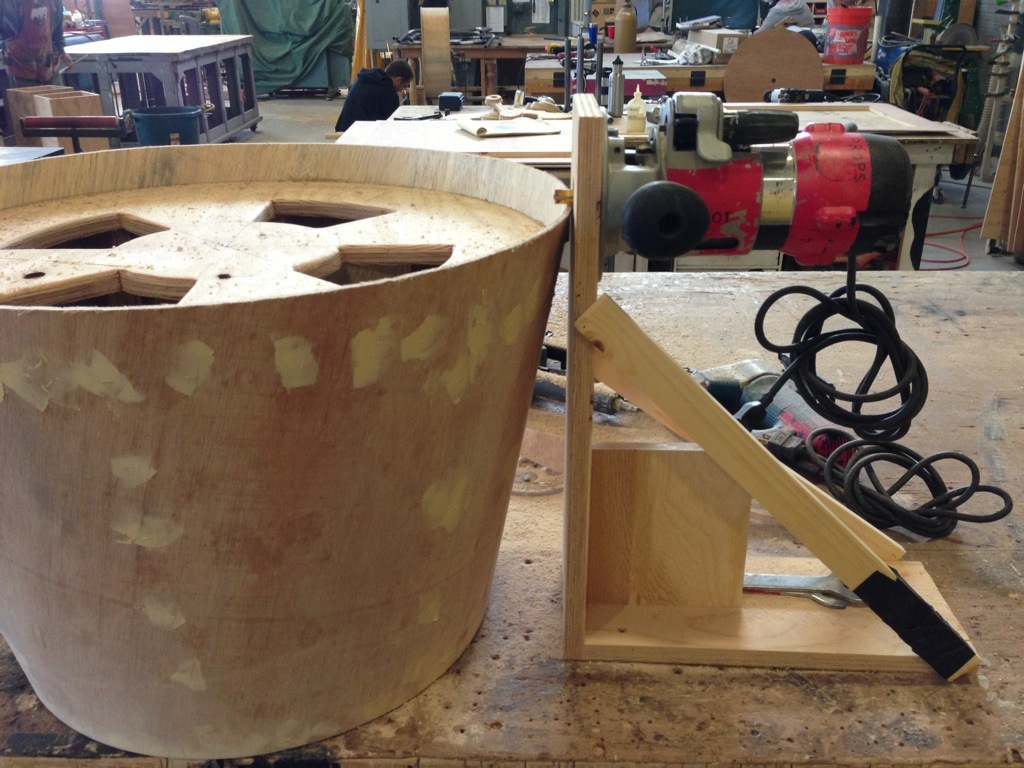
The top was easy to trim, as it wanted to be flush to the plywood circle seat. The bottom was a different matter; it needed to extend past the bottom circle, since it was getting castered, and the wiggle wood would hide the casters. I set up a horizontal routing jig so I could cut the wiggle wood to a consistent height all around its circumference.

Casters
Casters

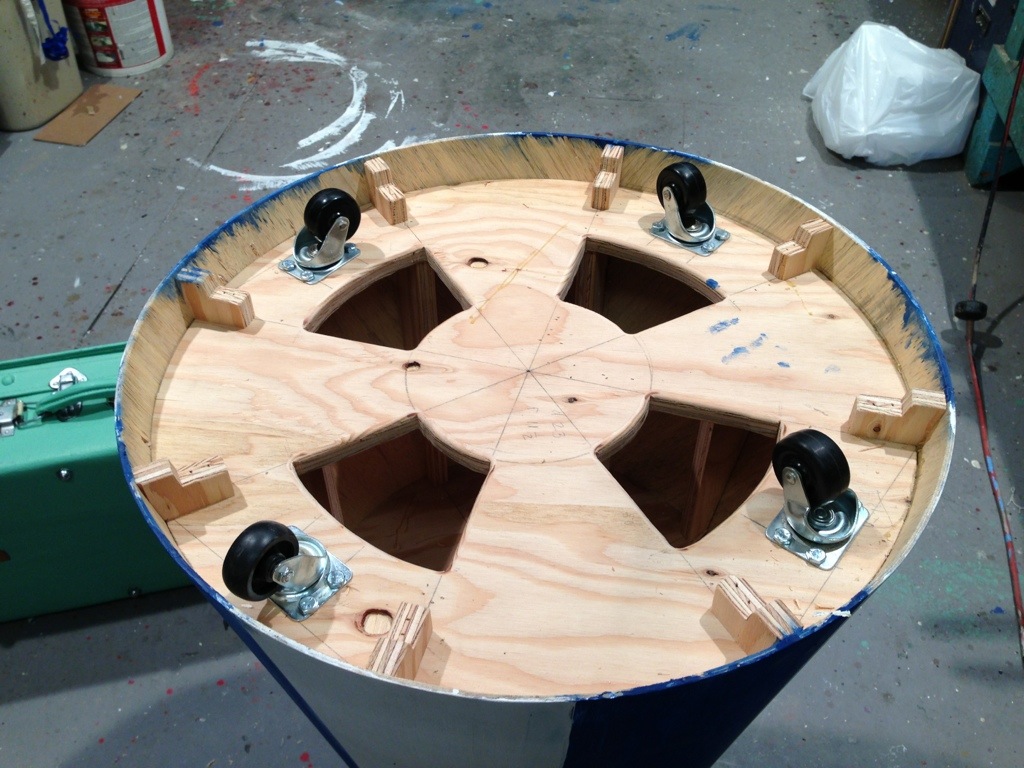
I had cut four wholes in the bottom of the stool, and now that it was time to attach the casters, I had access to get my hand inside and bolt them on. That’s planning ahead!

Final platform
Final platform

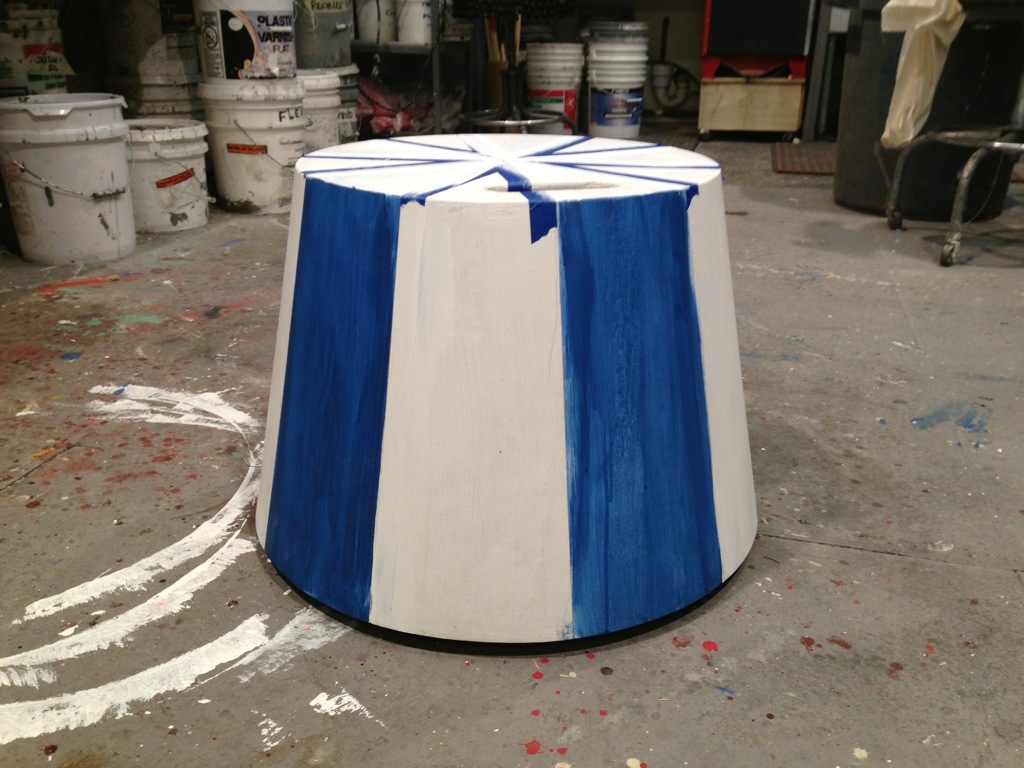
And that’s my circus platform! The photo above already has some paint on it, though the final prop will have much more.

Halberds

For one of the operas we are doing this summer, we needed some “sconces” made up of armor and weapons: shields with swords crossed behind them and that sort of thing. The designer wanted some pole weapons on one; we had a halberd in stock he really liked. Since we only had one, I had to replicate a bunch more to match it. Since these halberds were only going to be decorative, I could crank them out quickly with scrap materials.

Plywood shapes
Plywood shapes

In the photo above, I traced and cut out the main shape of the halberd blade from quarter-inch plywood. You can see the original blade at the very top of the photograph.

Attaching the foam
Attaching the foam

I attached a piece of 1-inch pink foam to each side of the plywood. I rough cut the foam to the shape, but left it oversized so I could trim it to the exact shape after the glue dried. I used Gorilla Glue to adhere it.

Sanded and shaped
Sanded and shaped

After the glue dried, I trimmed the foam to the shape of the plywood. I used a knife to make the bevels, followed by sandpaper to refine the curves.

Adding raised detail

Next I did a very “proppy prop” thing; I used hot glue to adhere some cord to create raised detail. These halberd blades are only meant to be decorative, and are way upstage; also, this is how the original one was made, and I needed them all to match.

Finished unpainted piece

The whole piece was then coated in FoamCoat, and sent off to the painters.


Vacuum Formed Balustrades

One of the first projects I worked on when arriving in Santa Fe was actually for a scenic element. One of the shows has a number of decorative balustrades way upstage, and they wanted to vacuum form them. I was tasked with turning the wooden master.

Clamping the boards
Clamping the boards

The first step was gluing up a number of poplar boards. This was going to be a fairly thick piece. I made two, so I could split them down the middle and give them four halves to vacuum form on a single sheet of plastic.

Turning the blank
Turning the blank

The lathe in our props shop has a duplicater set up. This allows you to cut out the profile of what you want to turn in a thin sheet of plexiglas, and the blade can follow that shape. You still need to finish it up by hand to make sharp corners and smooth it out, but it helps keep your shapes and sizes consistent across multiple pieces.

Completed balustrades

Above are the two balustrades, ready to go!

Cutting in half
Cutting in half

Next I had to split them directly in half. Luckily, we have a massive bandsaw, and I could build an oversized dowel-splitting jig to cut the whole baluster in half in one pass.

Mounting the wooden forms

The next step included a new technique for me. I had to drill holes throughout the wooden mold for the vacuum to pull air through, paying particular attention to the undercuts. They also asked me to mount the molds on a sheet of plywood with a gap underneath, and drill holes all along the periphery. Since the vacuum form platen only has holes at regularly-spaced intervals, it would not suck the plastic tight against the bottom of the mold; this technique was like creating a custom platen to sit on top of the regular platen.

Vacuum formed copies

That was actually the end of my part. The scenery department took my molds and began running them through the vacuum former. I don’t have any pictures of that, but I do have a video of the machine in action. Above is a photo of the resulting pieces as they get mounted to the scenic piece.