My major project for the past few months involved engineering and constructing a number of animal puppets for Triad Stage’s production of “Snow Queen”. I wrote about the white-tailed stag last week. One of the most complicated puppets in terms of motion and movement was the crow. He also had the most stage time out of all the puppets, appearing on his own in several scenes. I began work on him shortly after beginning the stag, so that I could have plenty of time to develop the means to have a single puppeteer perform all the actions he needed to perform.
You can see a bit of the “evolution” of the puppet’s mechanisms in this video.
The major difference between the prototype puppet in the video and the final puppet was that I switched the pole to connect on the side rather than from behind. It gave the puppeteer much more control over the puppet by letting him manipulate the orientation of the crow’s body by twisting the main control pole, rather than having to stoop and squat.
Head and neck mechanism
As you saw in the video, the head and neck were controlled by an inner pole which was free to rotate on its own. Strings ran inside which could turn a bar that held the head.
Hand controls
At the other end of the control bar was a similar bar that held the other ends of these strings. The puppeteer could both swing the bar back and forth and rotate the inner pole with just one hand. The other hand was free to flap the wings.
Wing mechanism
If you look closely, you will see the wings were actually attached to mousetraps. Pulling a string moved the wings down, and the springs in the mousetrap moved the wings back up when the string was released.
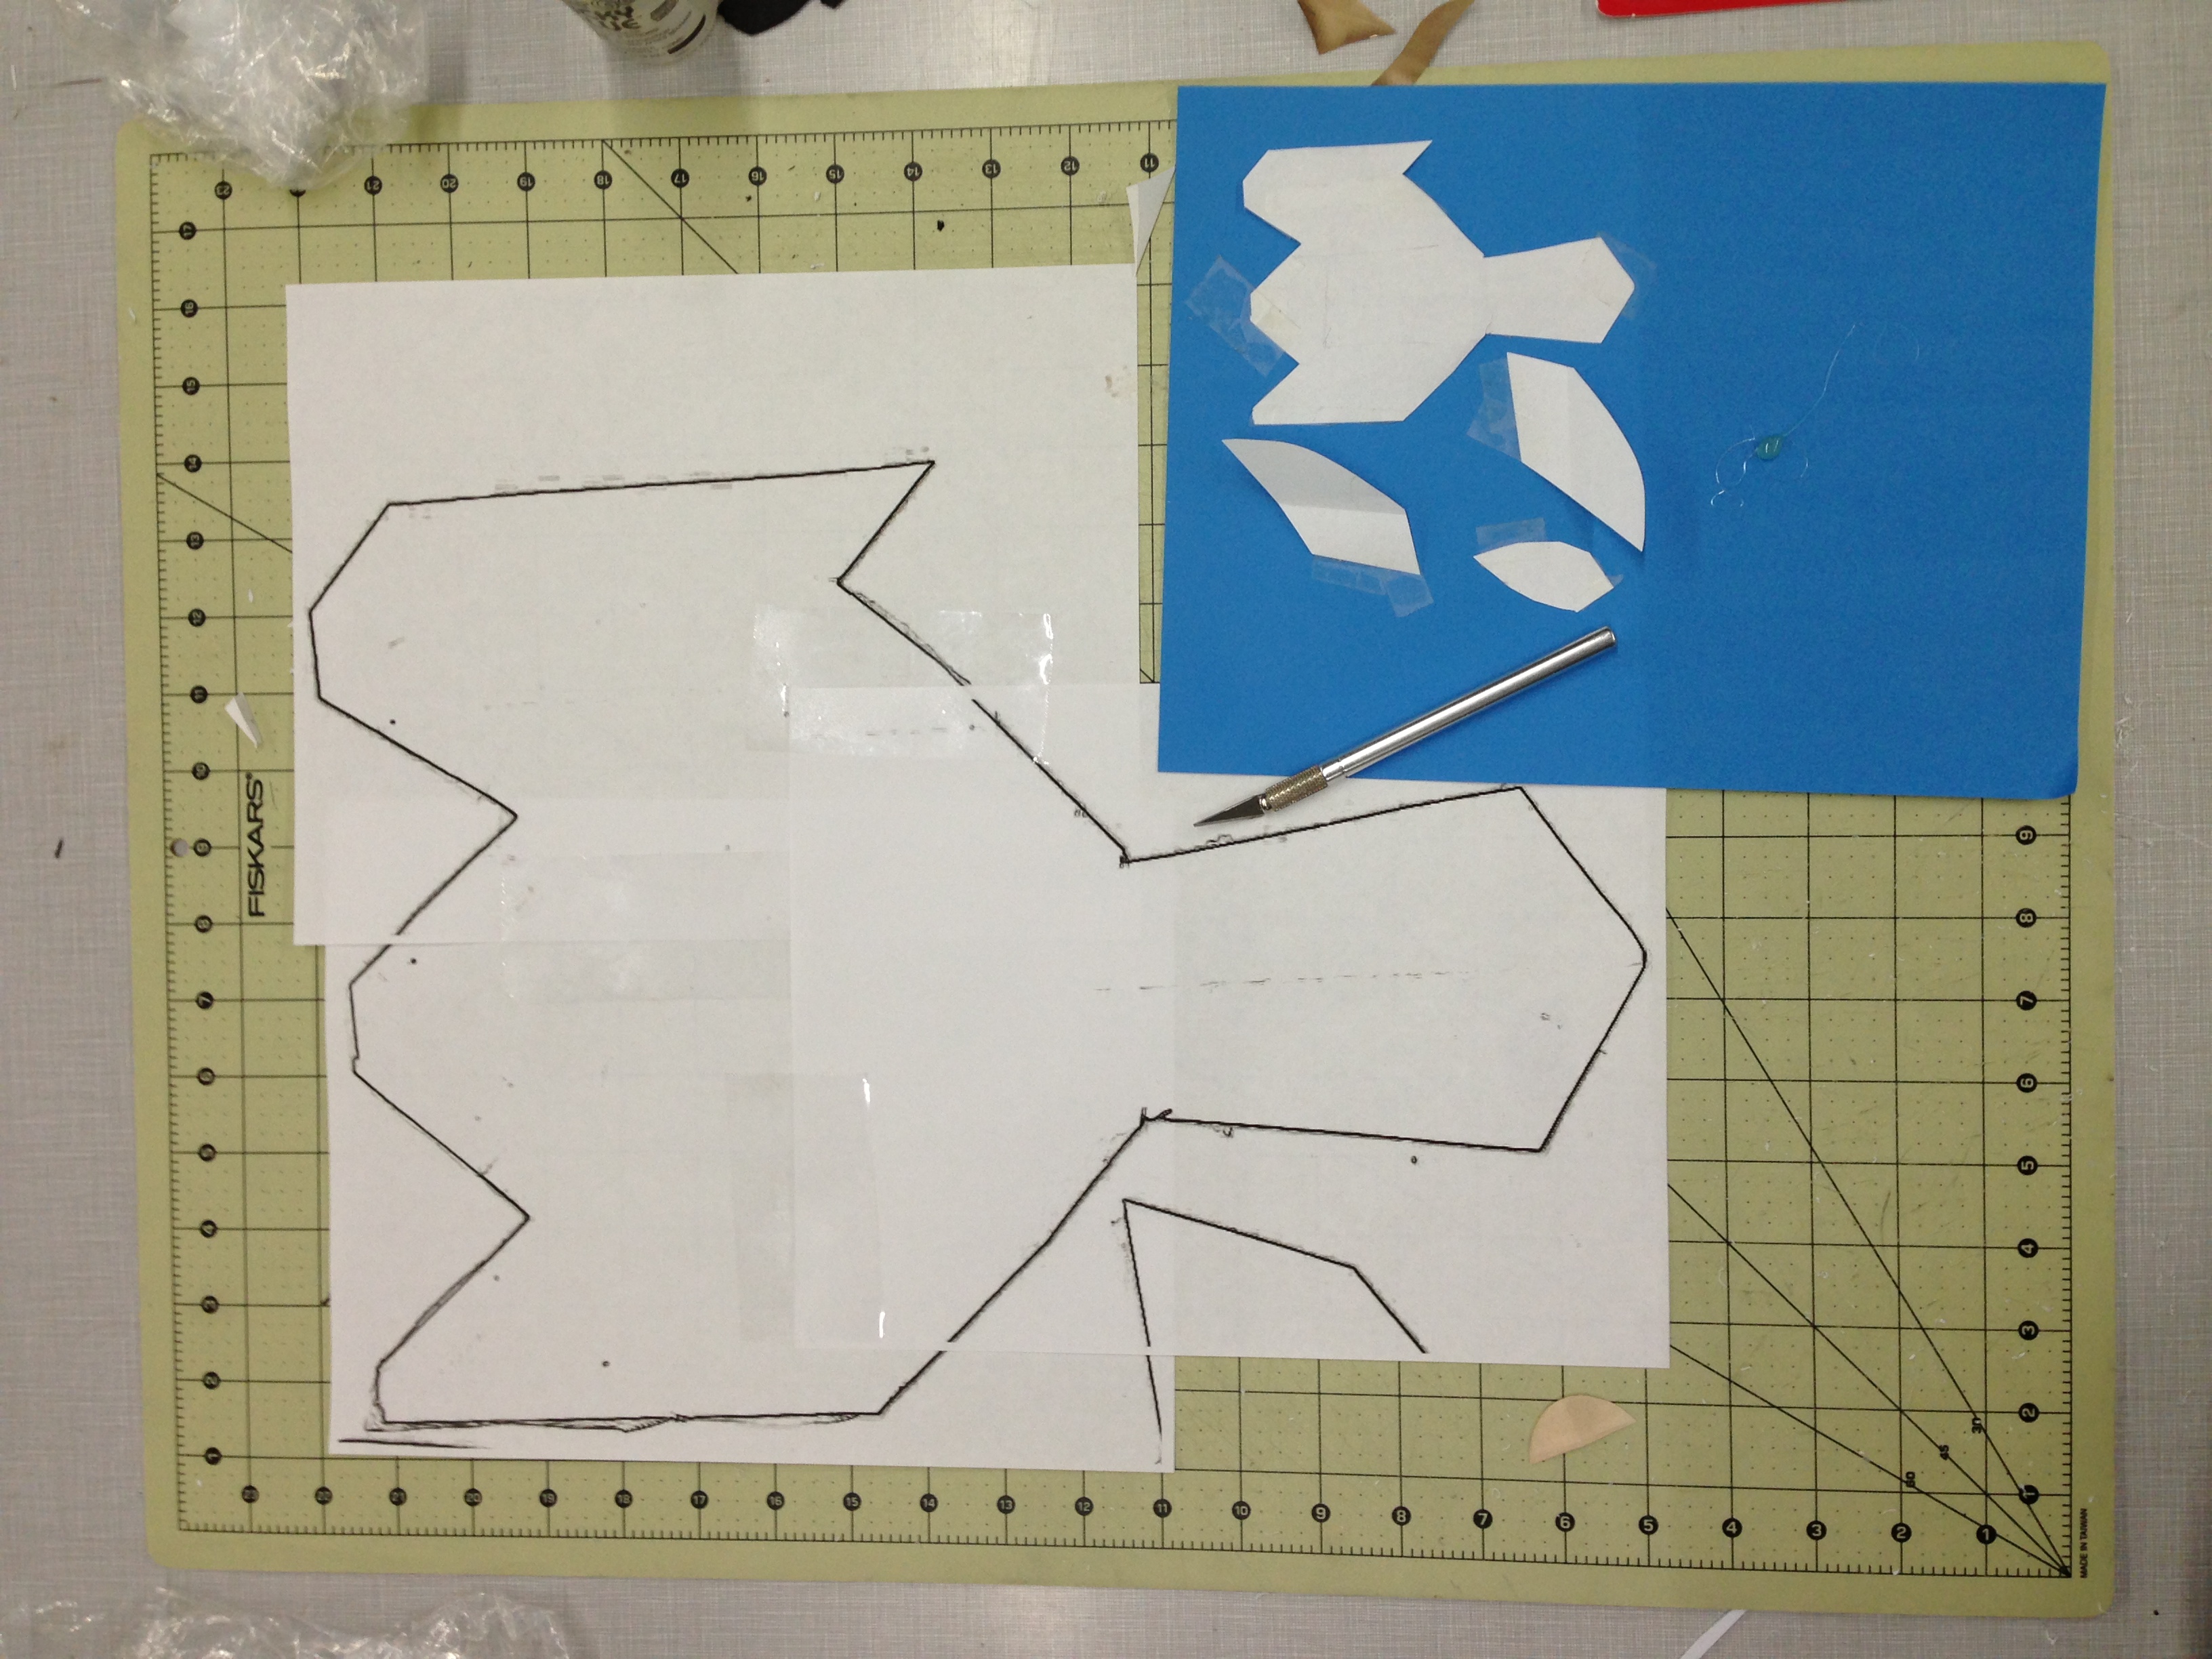
Bird pattern
The pattern for the crow’s body was developed in a small prototype by the puppet designer, Bill Brewer. I enlarged this pattern and cut it out of black EVA foam sheets. I came up with a pattern for the head and beak to match the look; like the other puppets in the show, the appearance was not meant to be realistic, but was stylized to make the crow look like he was cut and folded out of sheets of paper.
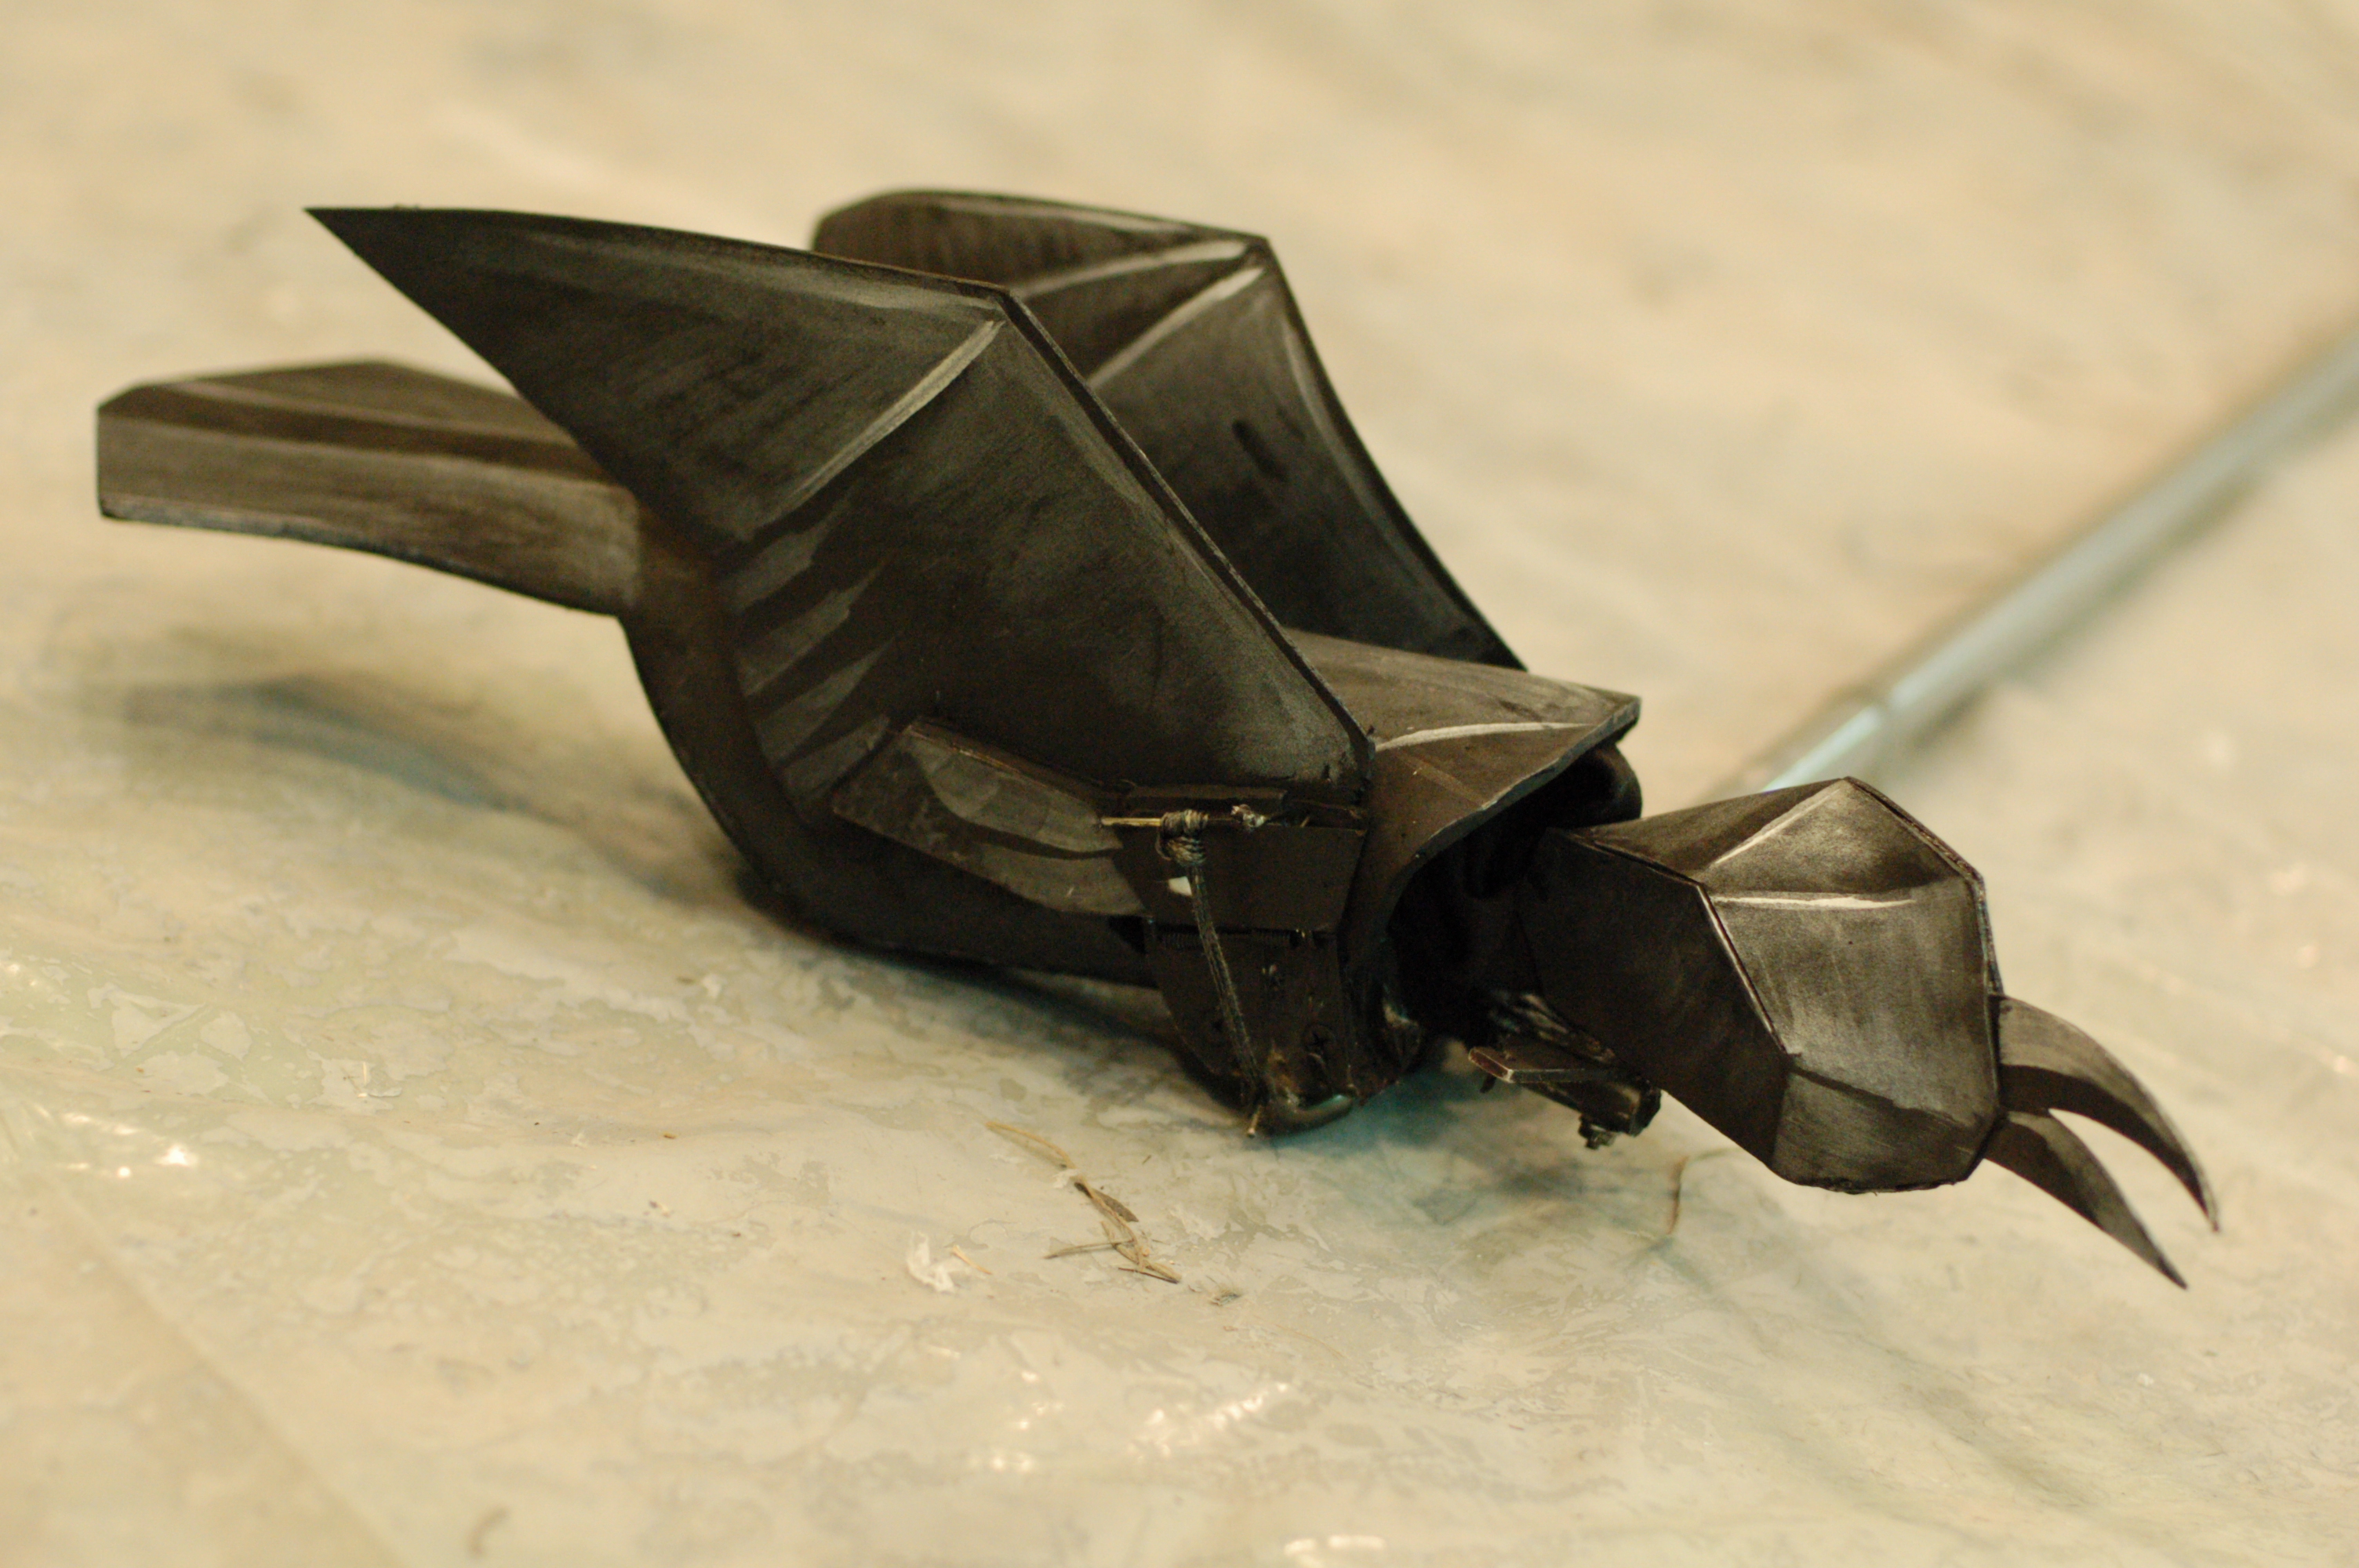
Crow puppet
The solid black crow tended to disappear when on stage, so he was given a final paint job by the scene designer, Howard Jones. He accentuated the flat planes and folds on the crow with white and silver paint, helping make the crow “pop” against the background.
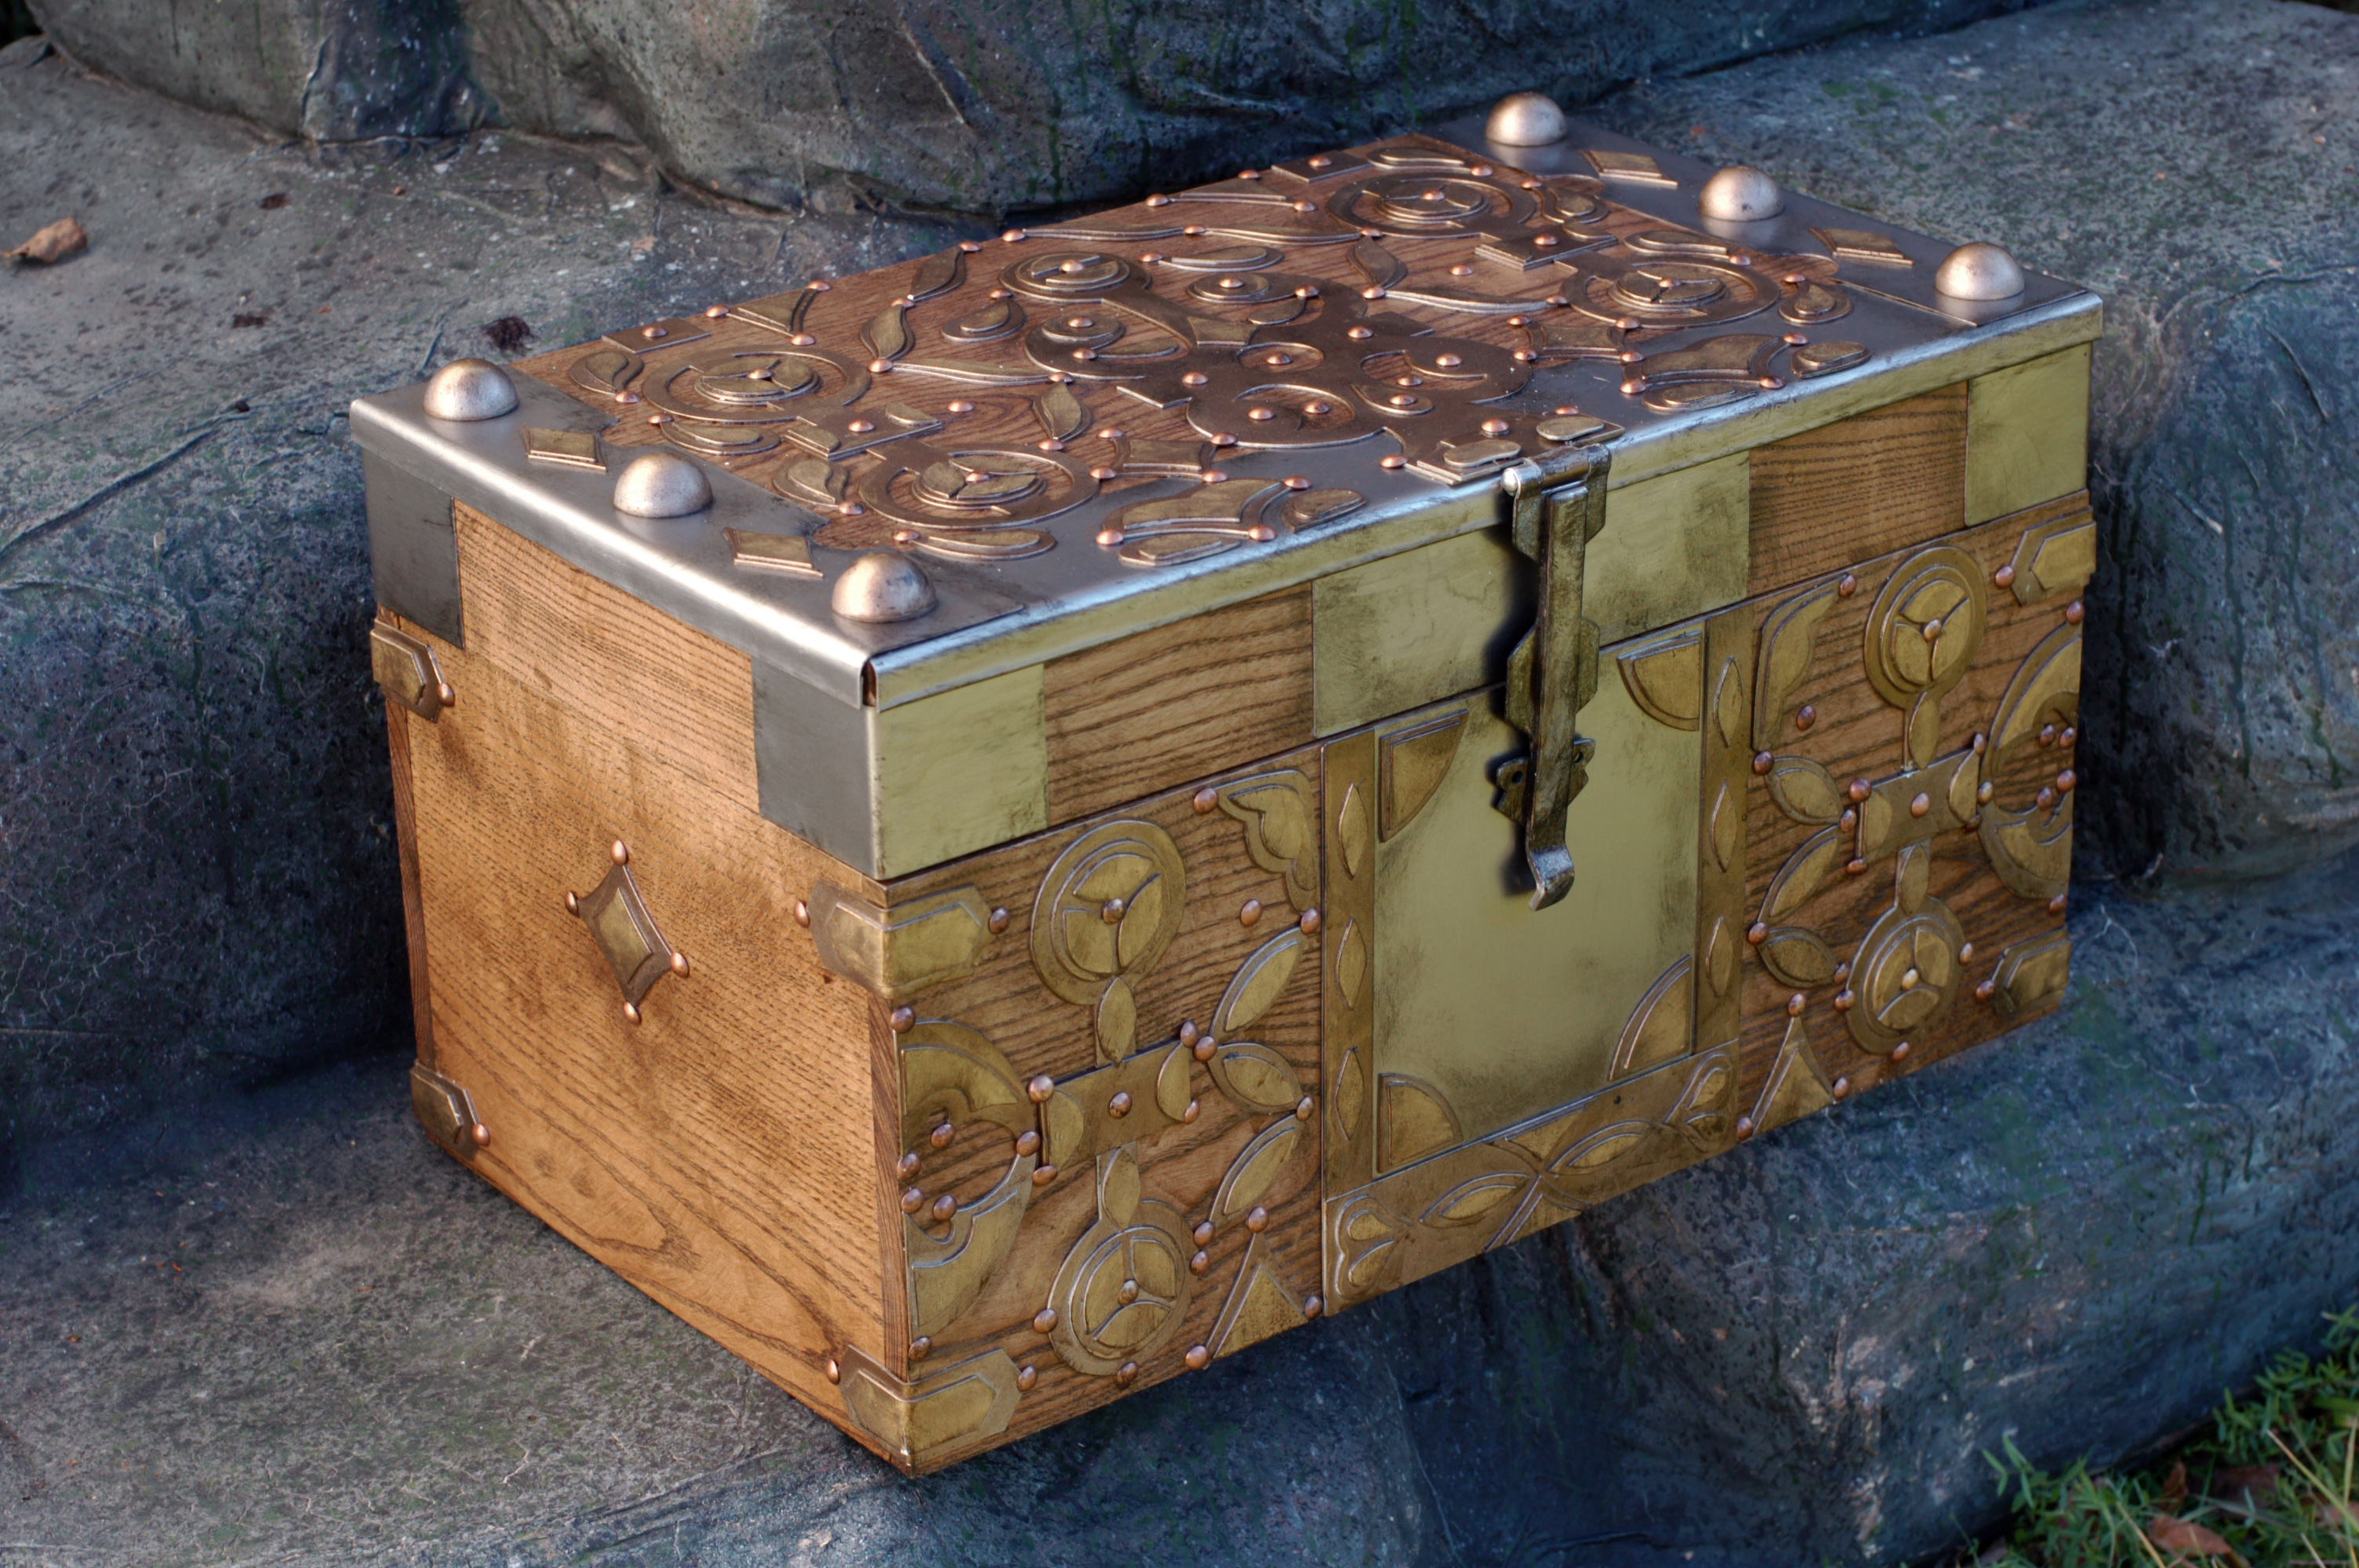
Usually, I am building props for a show or production I am working on. I rarely have time to work on my own projects. However, someone was interested to see if I could replicate a chest from the television show Game of Thrones. Now, I have nothing to do with the show itself, but it sounded like an interesting challenge to see if I could match something I could only see on screen. There wasn’t anything particularly tricky about this chest; it just had a lot of pieces and parts made of an assortment of materials, and some very time-consuming detail. For those who watch the show, this is the chest given to Daenerys in season one, which held her petrified dragon eggs.
I shot video of most of the build along the way and somehow edited several months of work into seven and a half minutes of video, giving an overview of the process.
If you are interested in more detail and photographs, read on!
Daenerys’ chest of dragon eggs
The first part was the box itself. I worked out a quick mock-up of the whole piece in SketchUp to figure out the sizes and proportions of all the parts. I decided to use ash on this because it is hard and strong like oak, but I really hate working with oak. The grain pattern of ash was also a better match to the real chest than oak. We have a great local hardwood store that I visited, and I was able to find boards wide enough that I could build every side (except the top) from a single width of wood. The bottom was a piece of oak plywood.
Wooden box
The chest has a number of areas covered in metal. I bought a sheet of 22 gauge steel and cut it up by hand with my airplane snips. I used my sheet metal bending brake on the corner pieces, while the rolled-over edges of the top pieces were bent by hand with sheet metal tools and pliers. Although I could have saved time by making these out of plastic and painting them to look like metal, the “roll over” parts would have ended up too fragile; on the very corners, you can see how thin the metal is, and any plastic that thin would flex whenever you touch it. The hasp on this chest also rests against a metal section, so it gives that solid metal-to-metal sound every time you open and close the lid.
Sheet metal layers
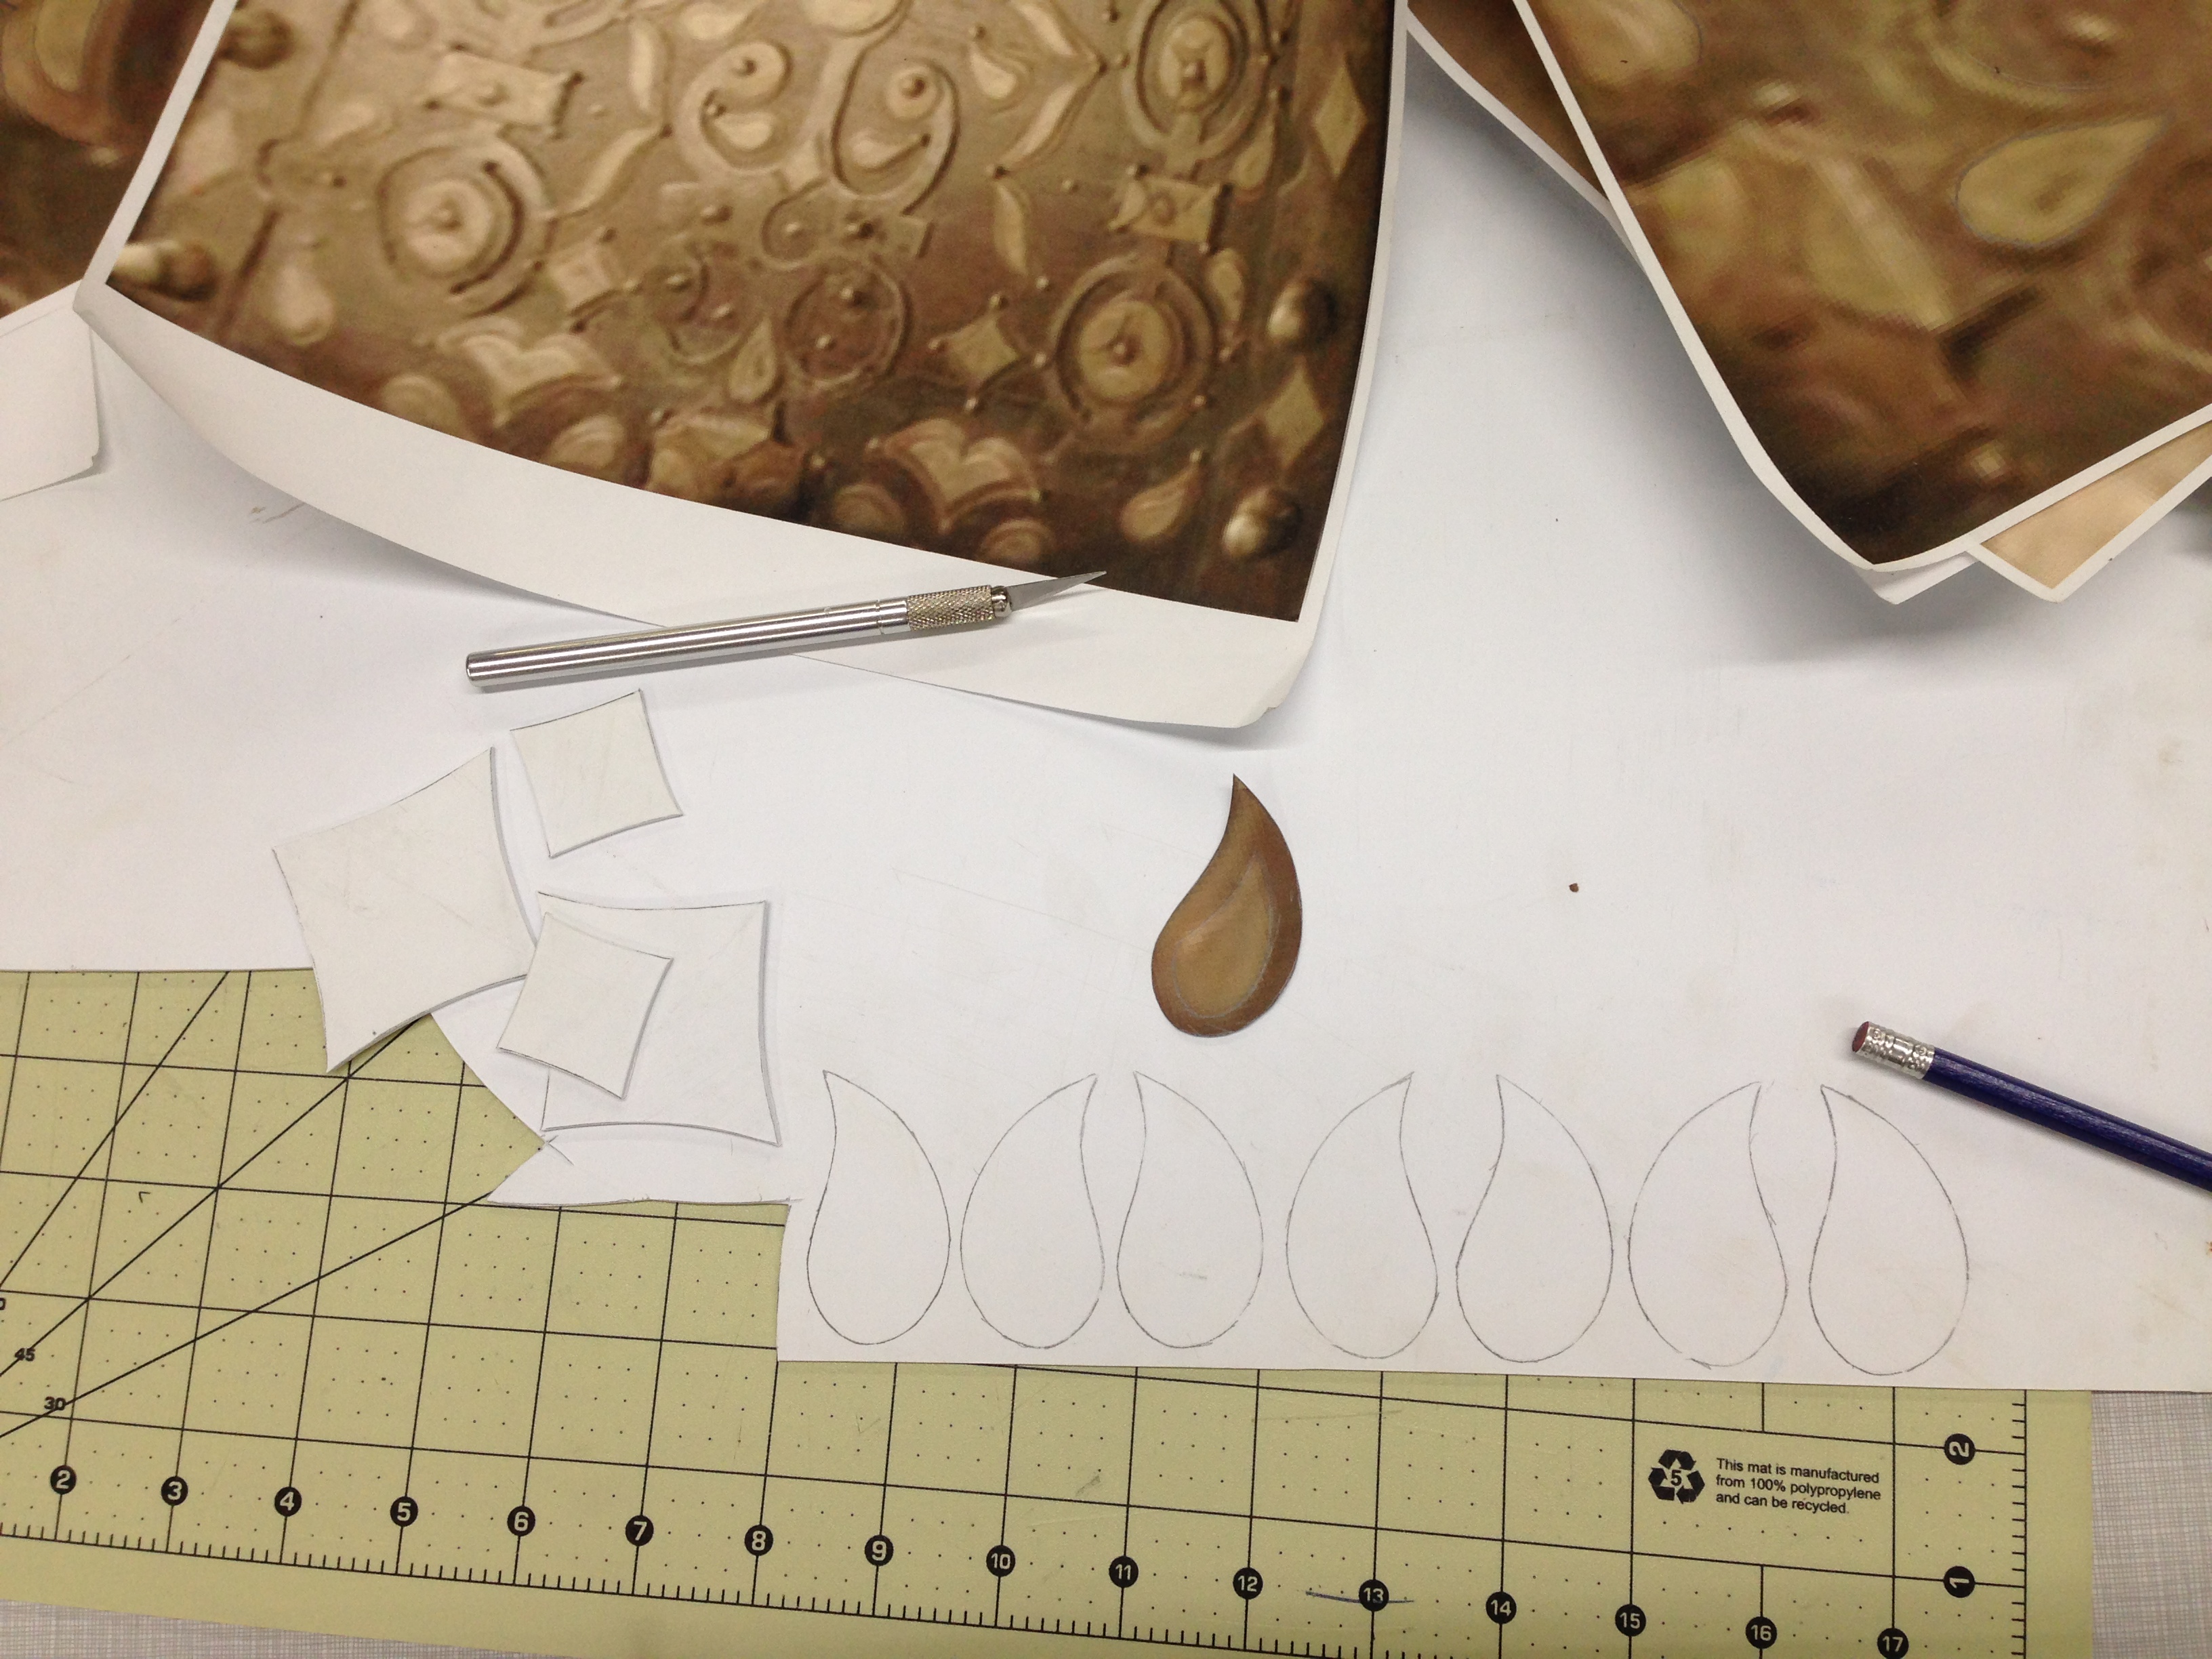
The most time-intensive part was the applied decoration. I used styrene plastic for this because using actual brass would have been prohibitively expensive and time-consuming, and a cheaper metal would have required just as much paint to match the appearance that the added labor was not worth it. I began by going through all the scenes in the TV show where the chest appeared and pulling out as many clear screen shots as I could, and then manipulating them in Photoshop to get a straight-on view. I scaled them up to full-size, printed them out and cut the pieces into patterns to trace on the styrene. Some parts of the design needed to be extrapolated slightly because I never got a clear view, but because it was symmetrical, repetitive and followed a certain logic, I was pretty confidant with how well my version matched the original.
Patterns and reference
Nearly every element was made of at least two layers of styrene, so after cutting the several hundred pieces out, I began gluing them together using model airplane glue. I did not attach them to the box just yet, but I did lay them out to test fit everything.
Unpainted decoration
With all the pieces ready, I began painting. They received a base coat of hammered silver spray paint, followed by a heavy dusting of hammered bronze spray paint. They would receive more paint later on, but at this point I began attaching them. Working on one side at a time, I first laid every piece out and used careful measurements to make sure everything was symmetrical and evenly-spaced. I then traced every single piece in place and labeled them by number before taking them off. I did some tests and found contact cement gave the strongest bond, though that meant I had to apply it to both the plastic piece and the box, and I could not apply it to the parts of the box where the wood was visible, so I had to carefully paint it within the traced outlines I had made. Luckily, the contact cement bonds almost instantly, so I could begin working on another side after one was completed.
Spray painted pieces
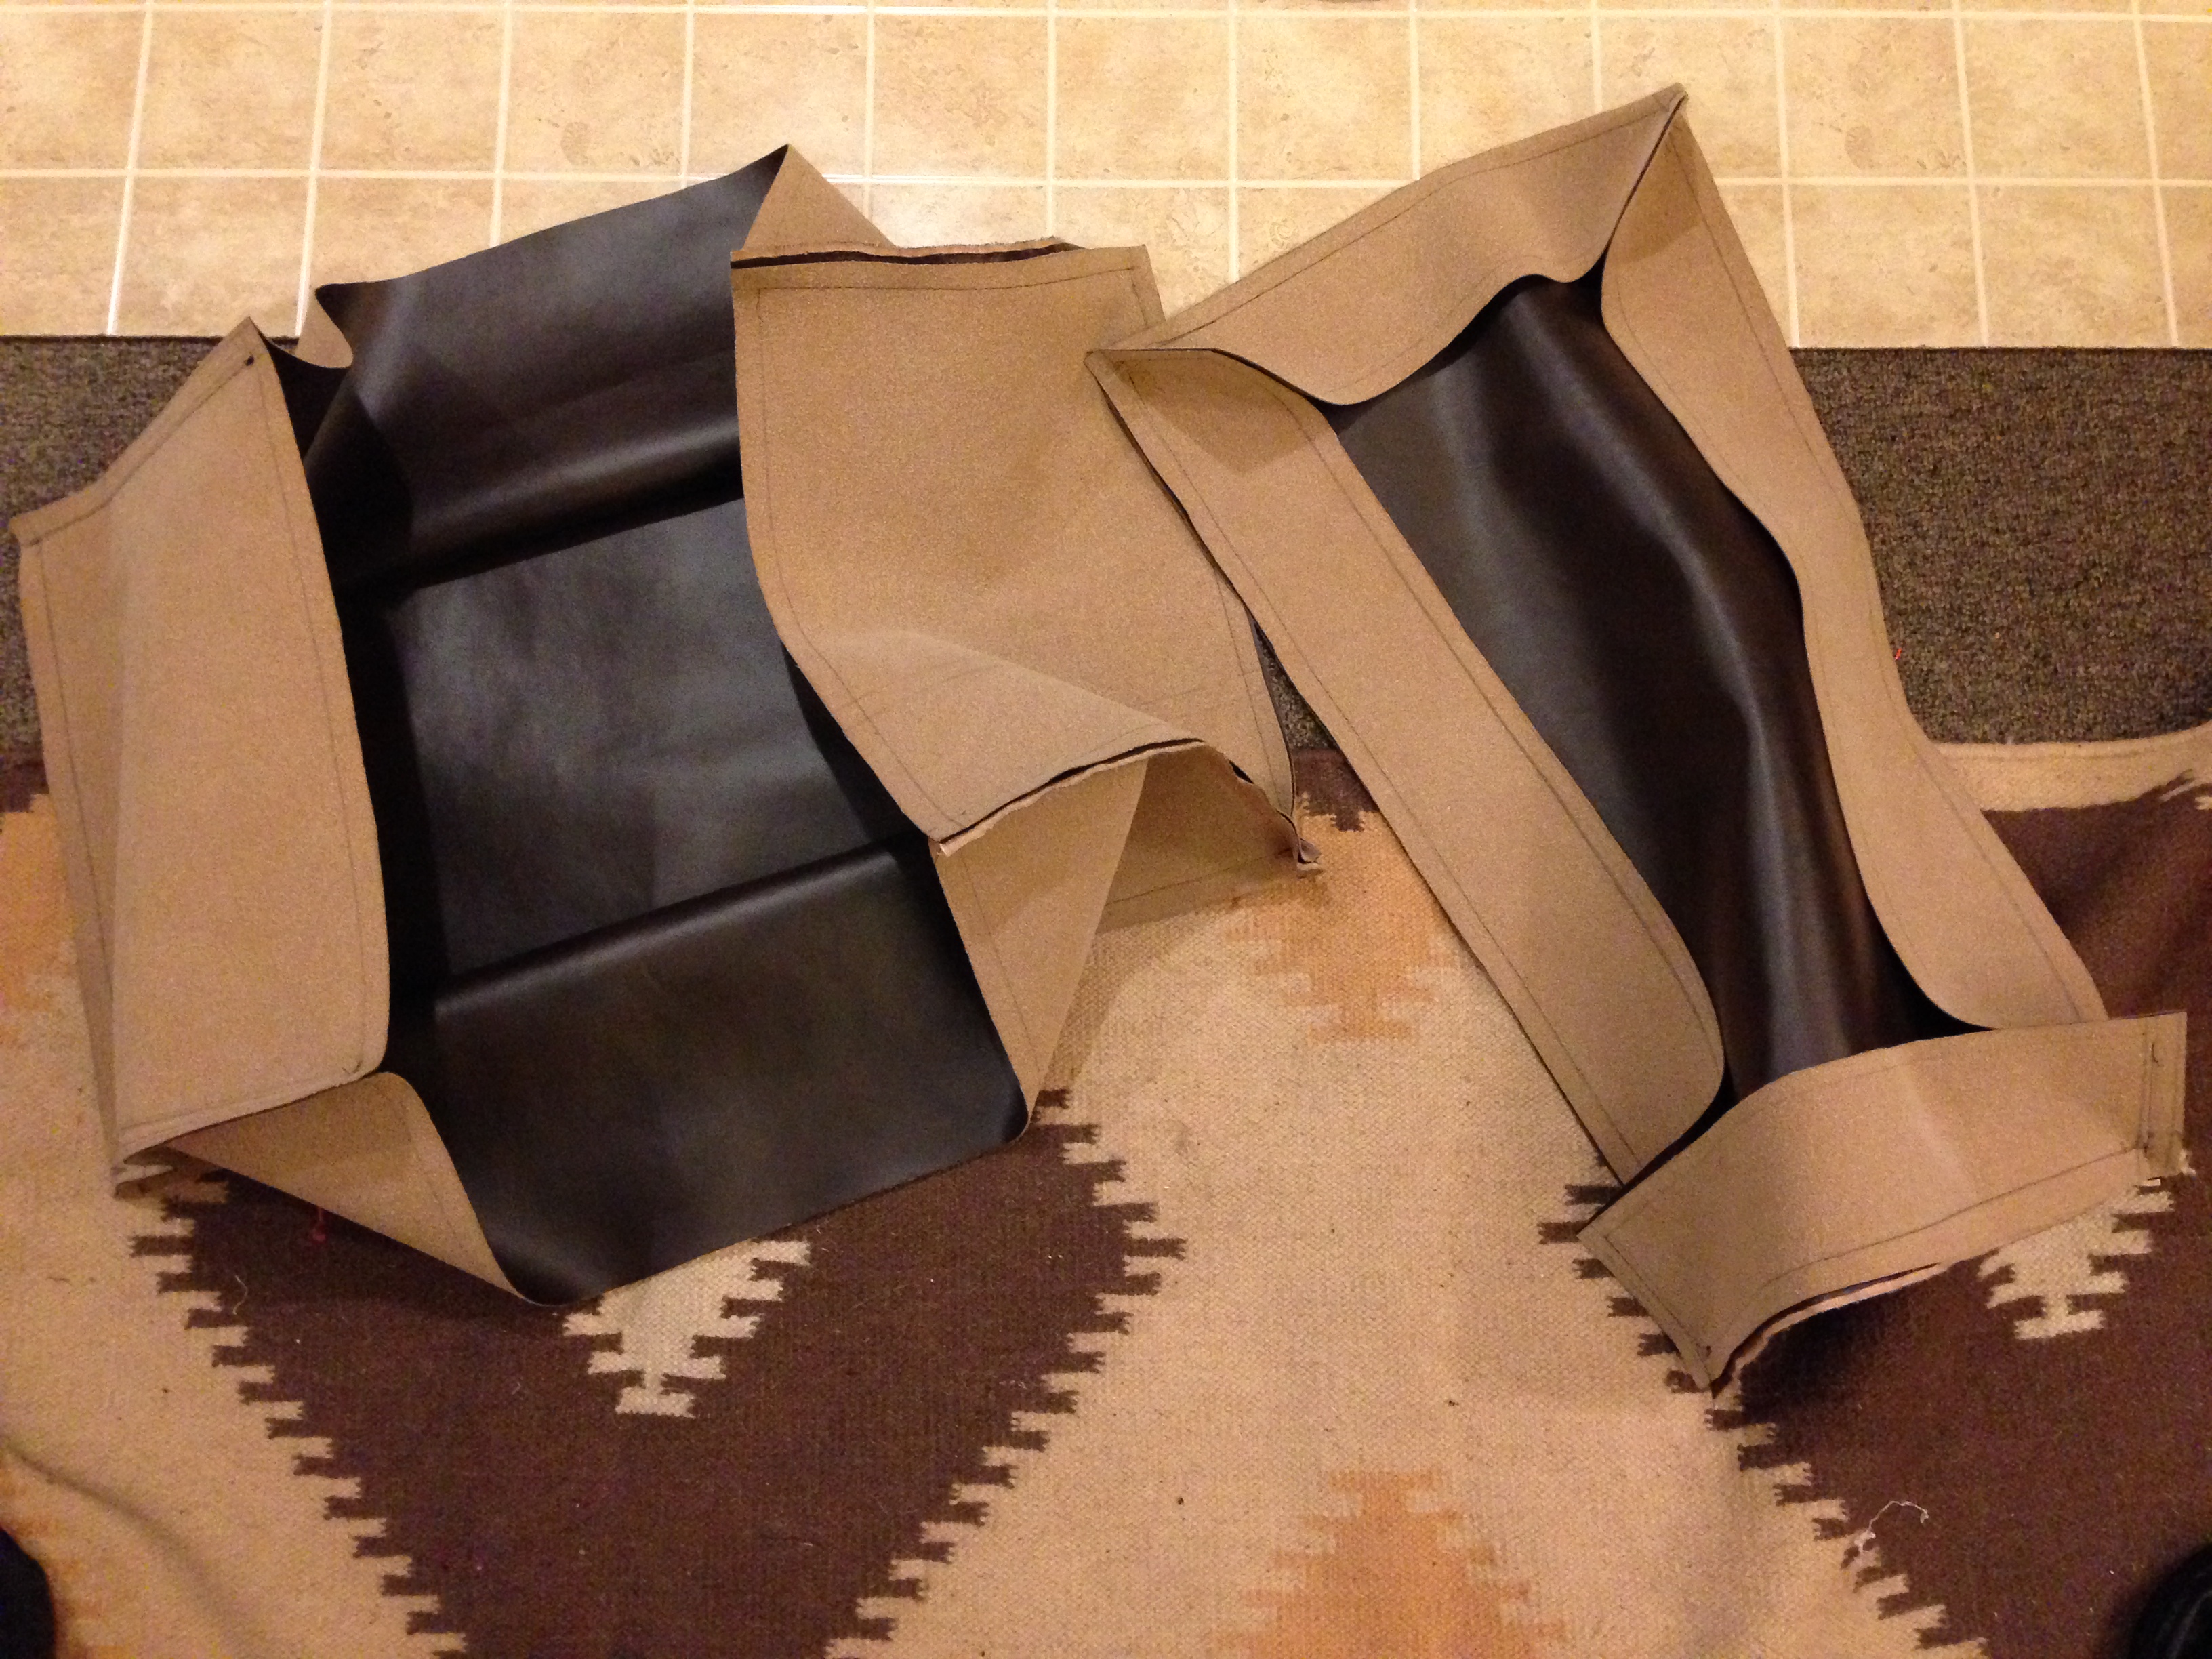
The inside of the chest was leather, though I went with a slightly-more processed version which was already finished and could fit through my sewing machine. I stitched all the pieces together first, and then attached them in as a single unit. I used a bit of spray adhesive to keep them from shifting around, but they are mostly held in place with the visible upholstery tacks. I pre-drilled holes for the tacks so I could make sure the spacing was even, and also because the ash was too hard to just hammer the tacks straight in.
Leather interior
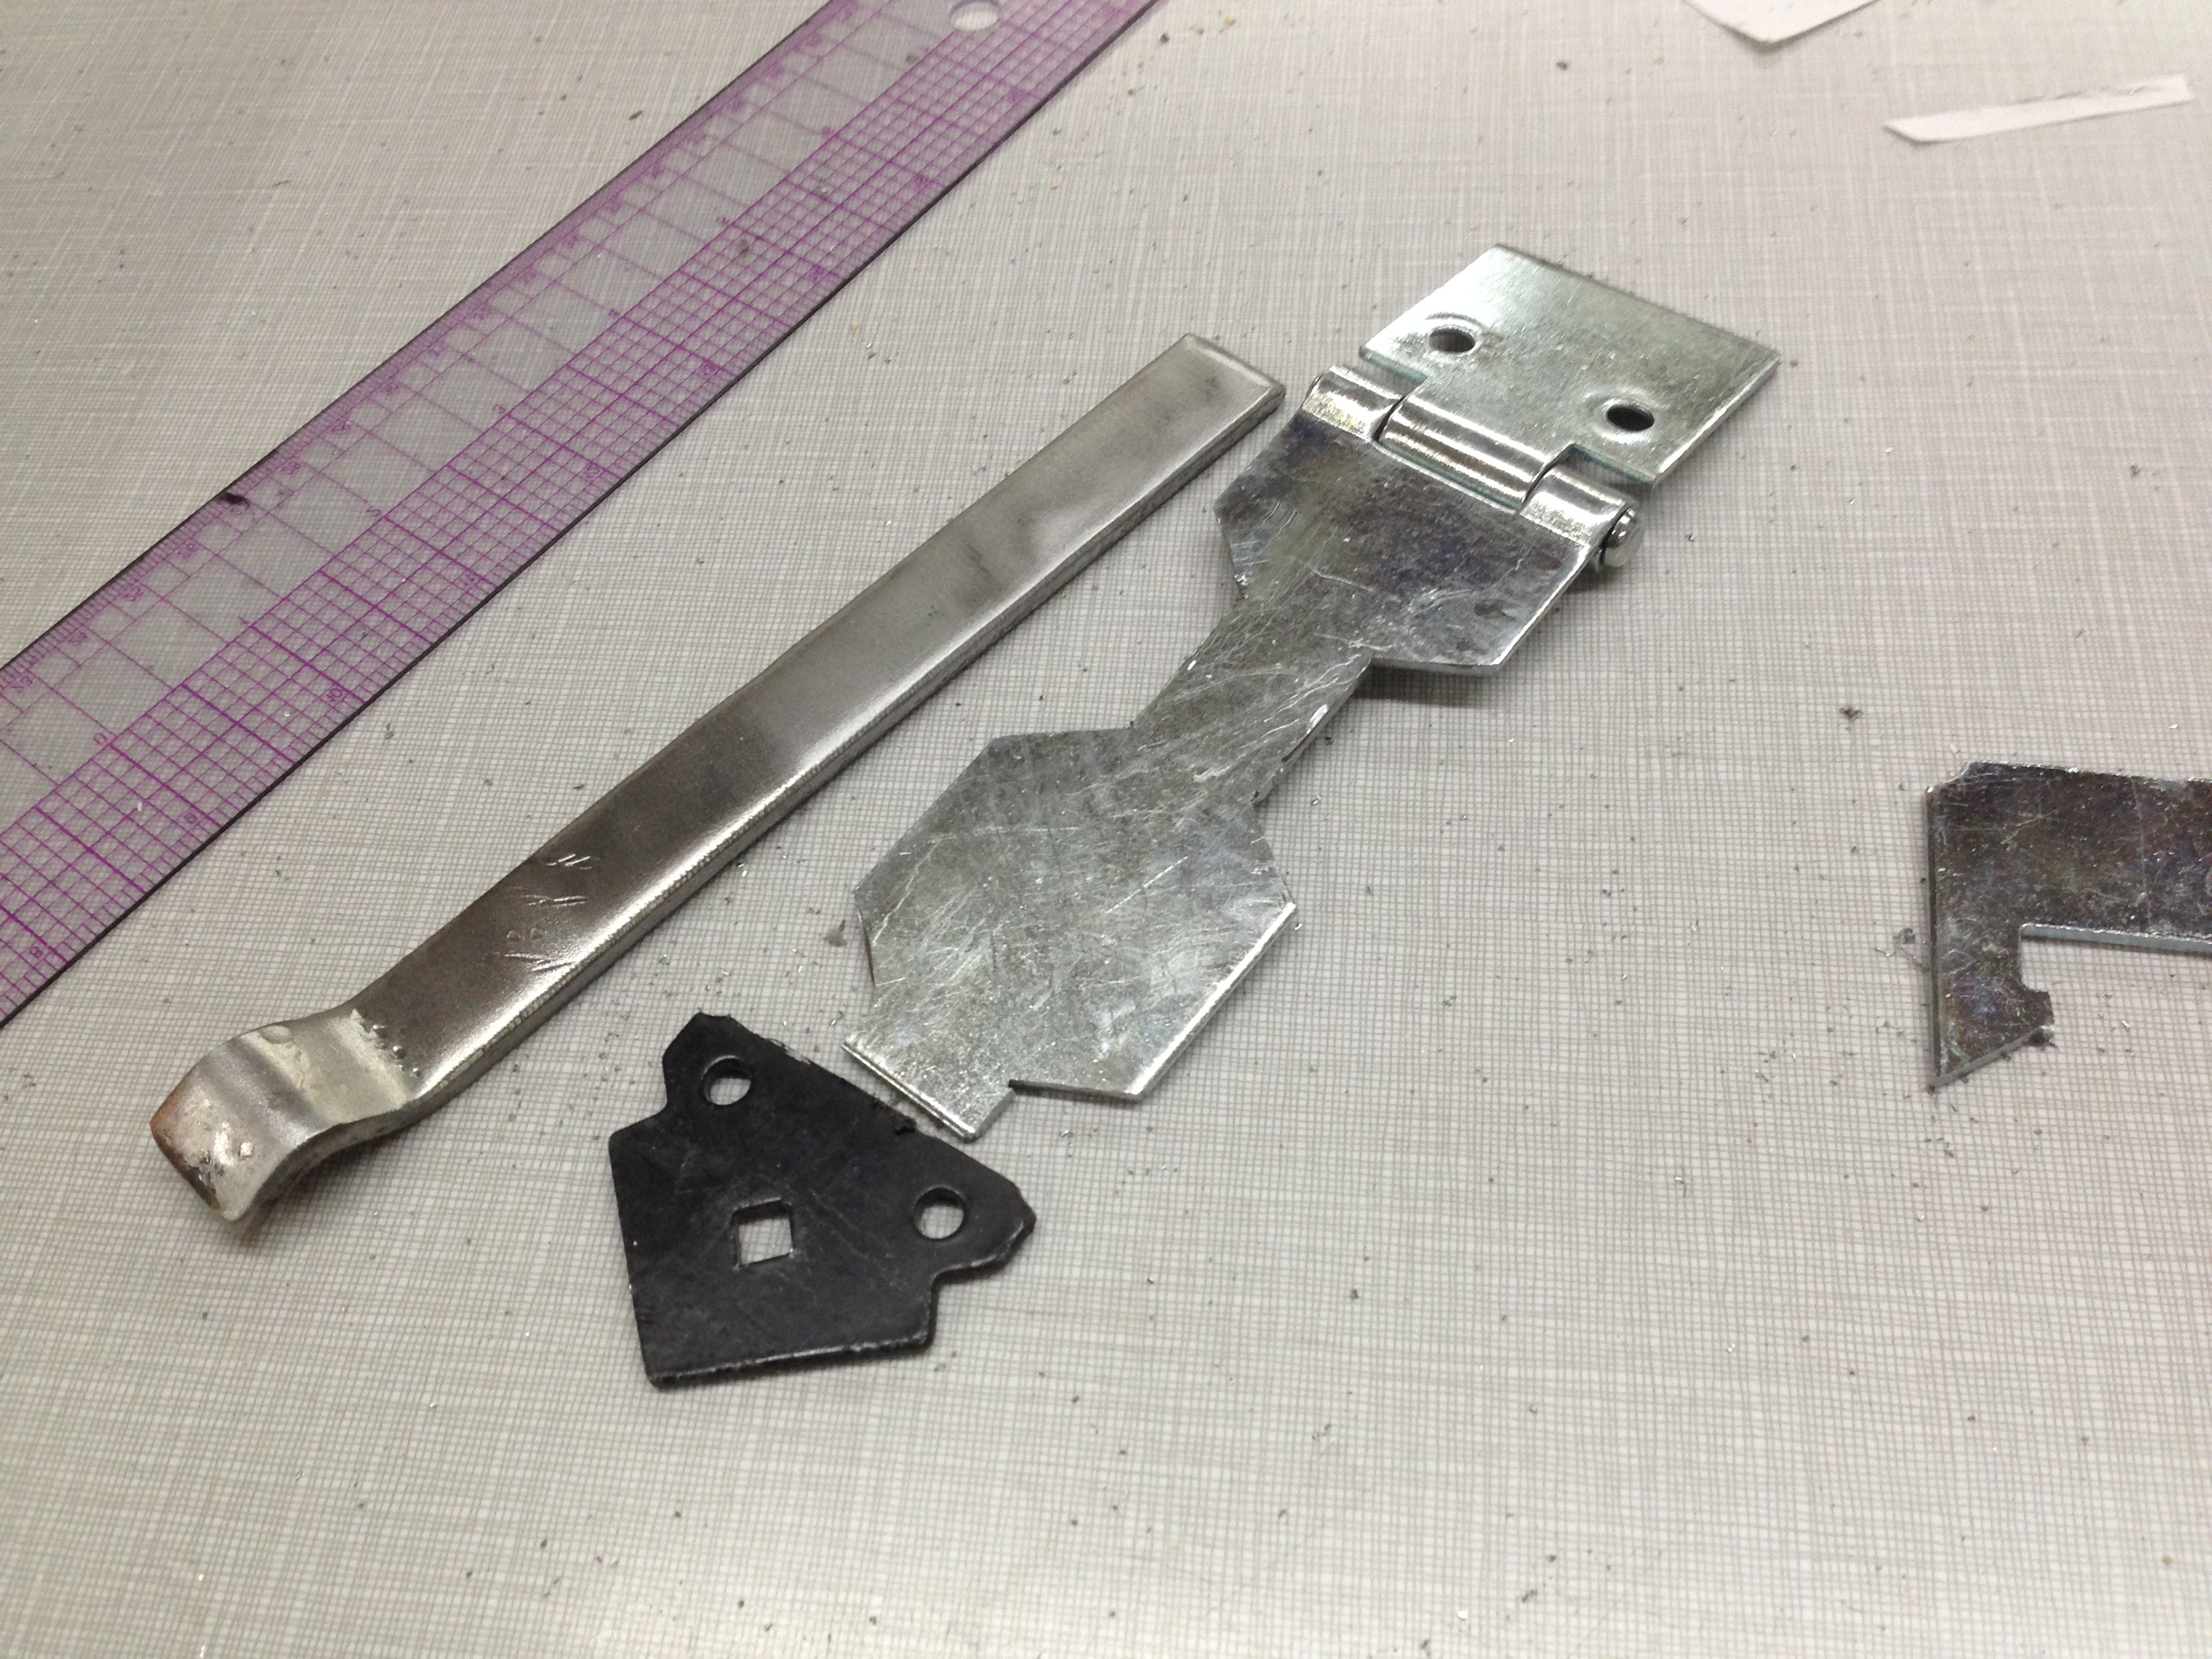
I found hinges online that were so close to the ones on the real chest that I wouldn’t be surprised if the prop makers bought theirs from the same supplier. I could not source the hasp though, so I had to fabricate it from scratch. I started with a basic hardware store hasp and cut notches in the edges. The tip was cut from another decorative gate hinge. I cut a bar of steel to length and bent a curl in the edge, than plug welded the whole thing together from behind and ground the welds flush to the surface.
Pieces for the hasp
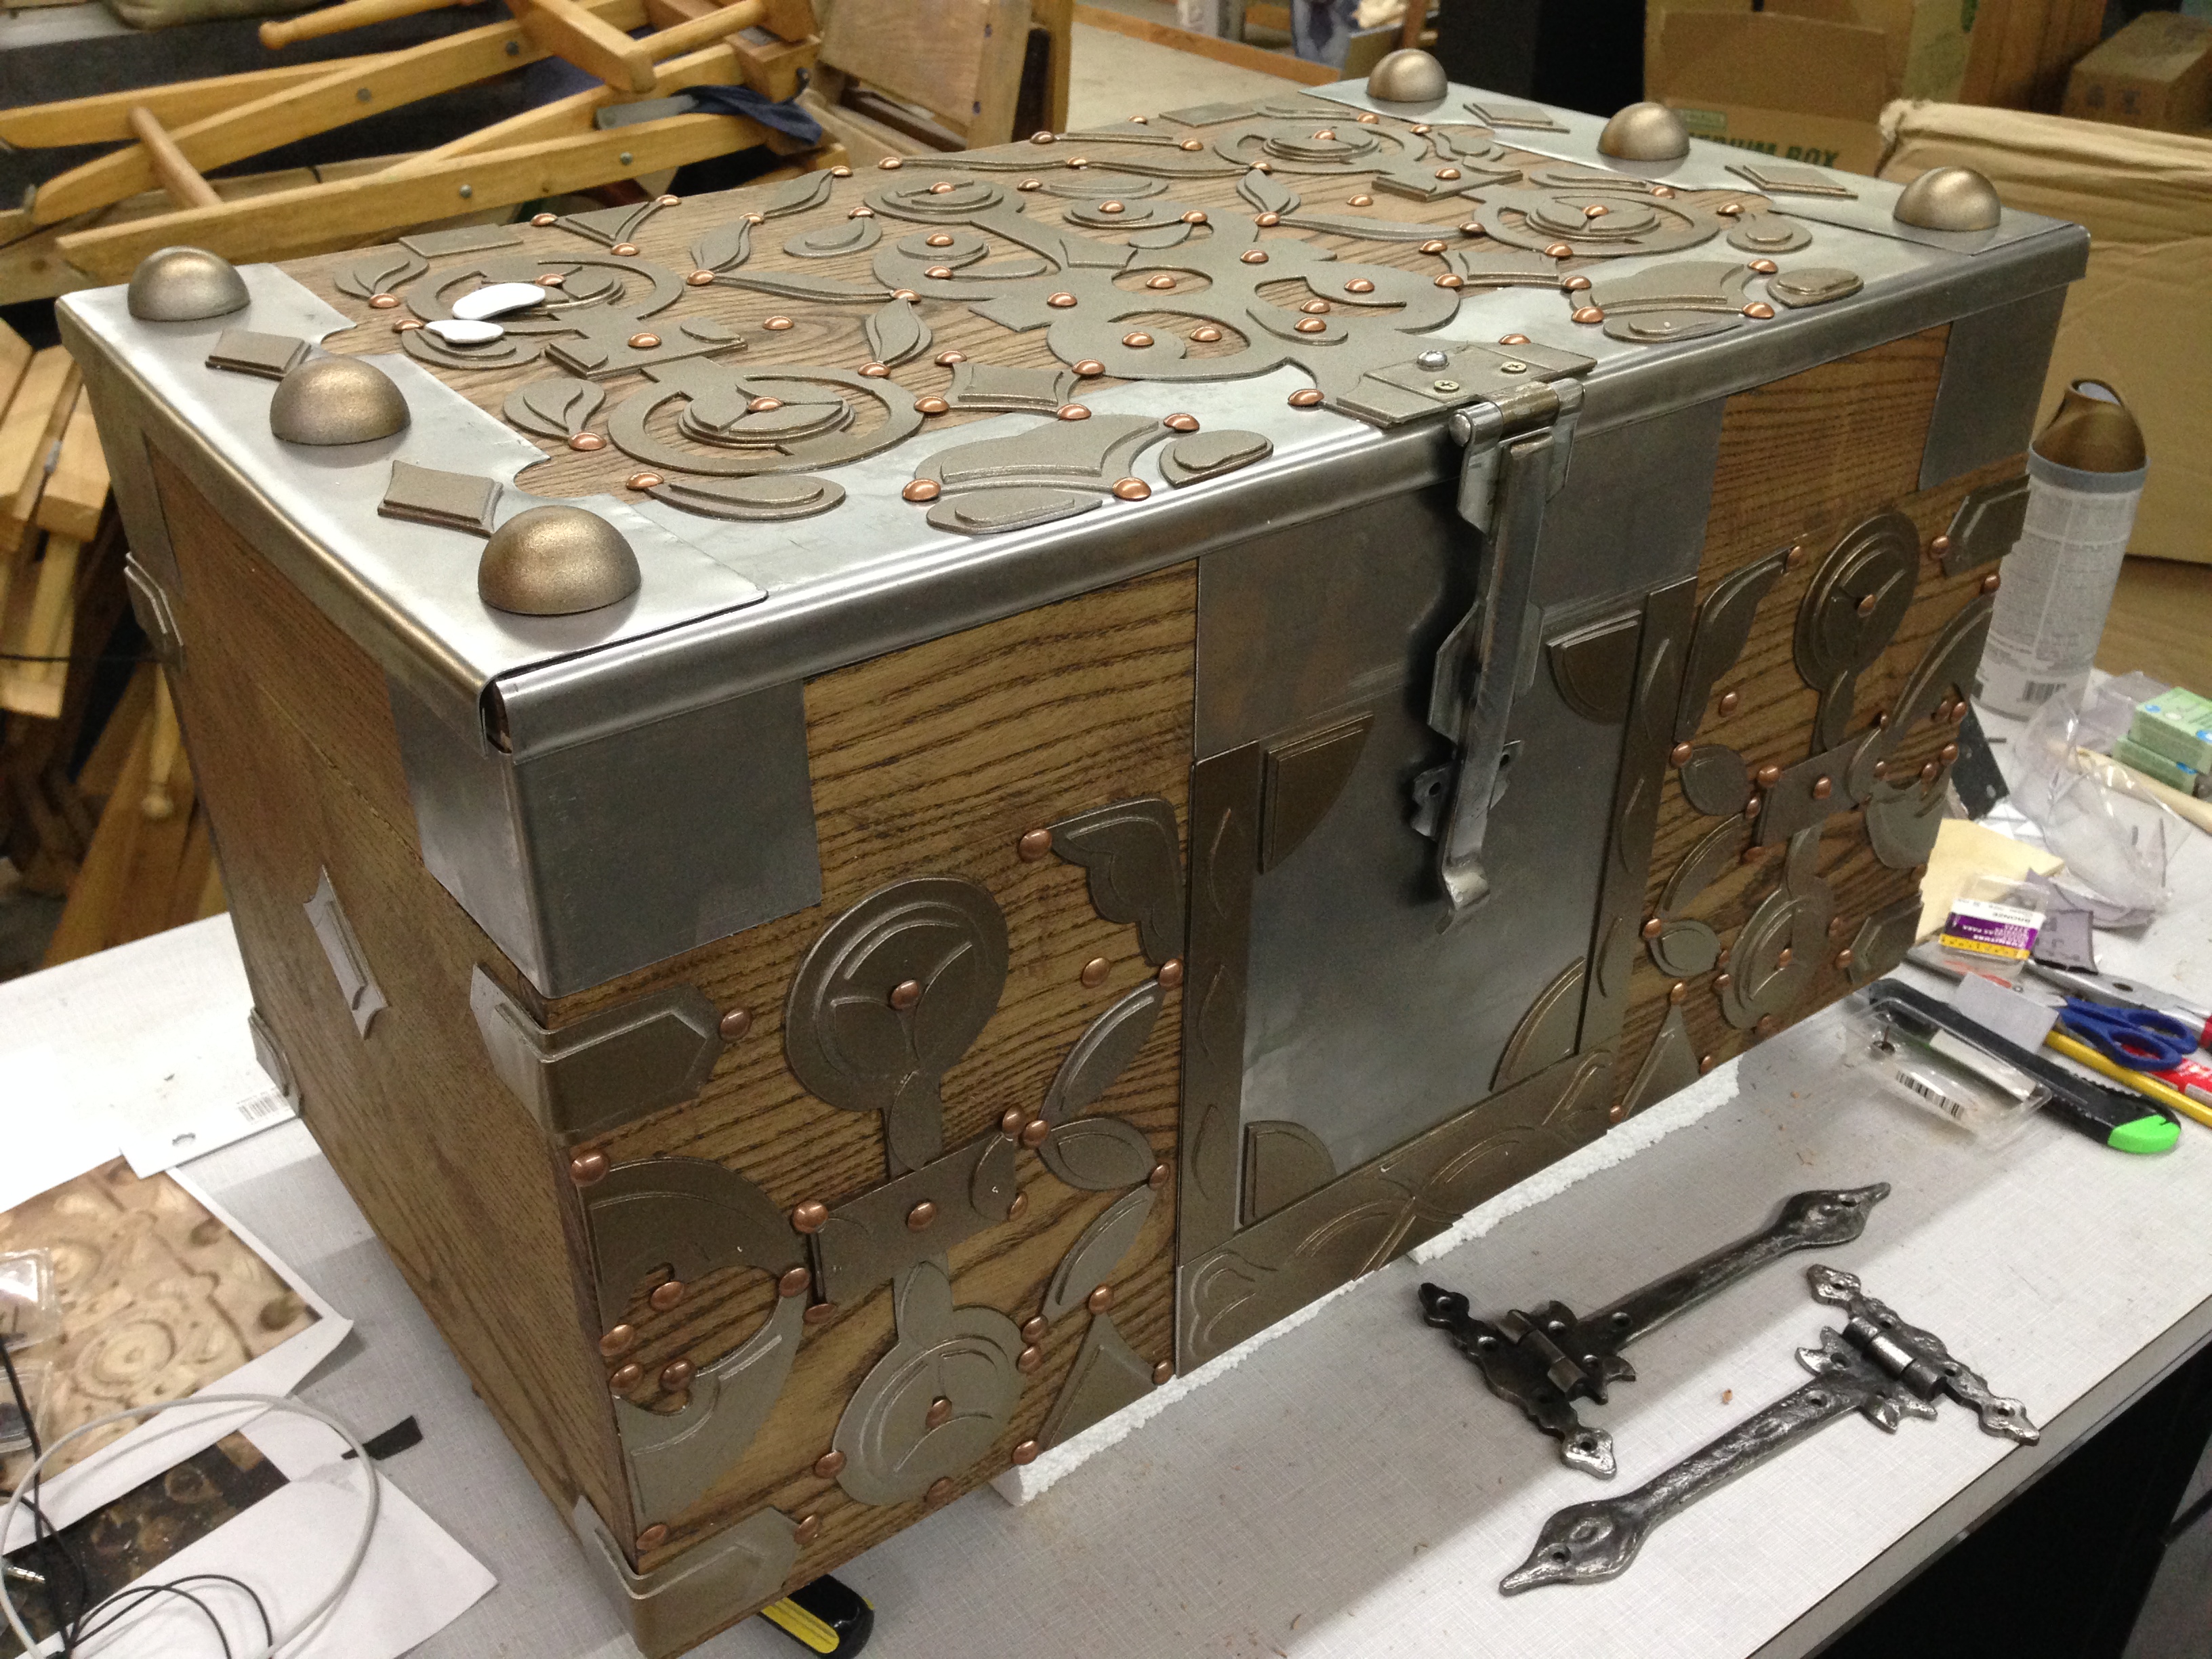
With all the pieces in place, all that was left was some painting and sealing. The top layers of all the decoration were sponged with a lighter brass color to set them off, and the whole chest was washed down with some dark browns and blacks to age and weather it. Finally, everything was coated in a clear satin Polycryclic.
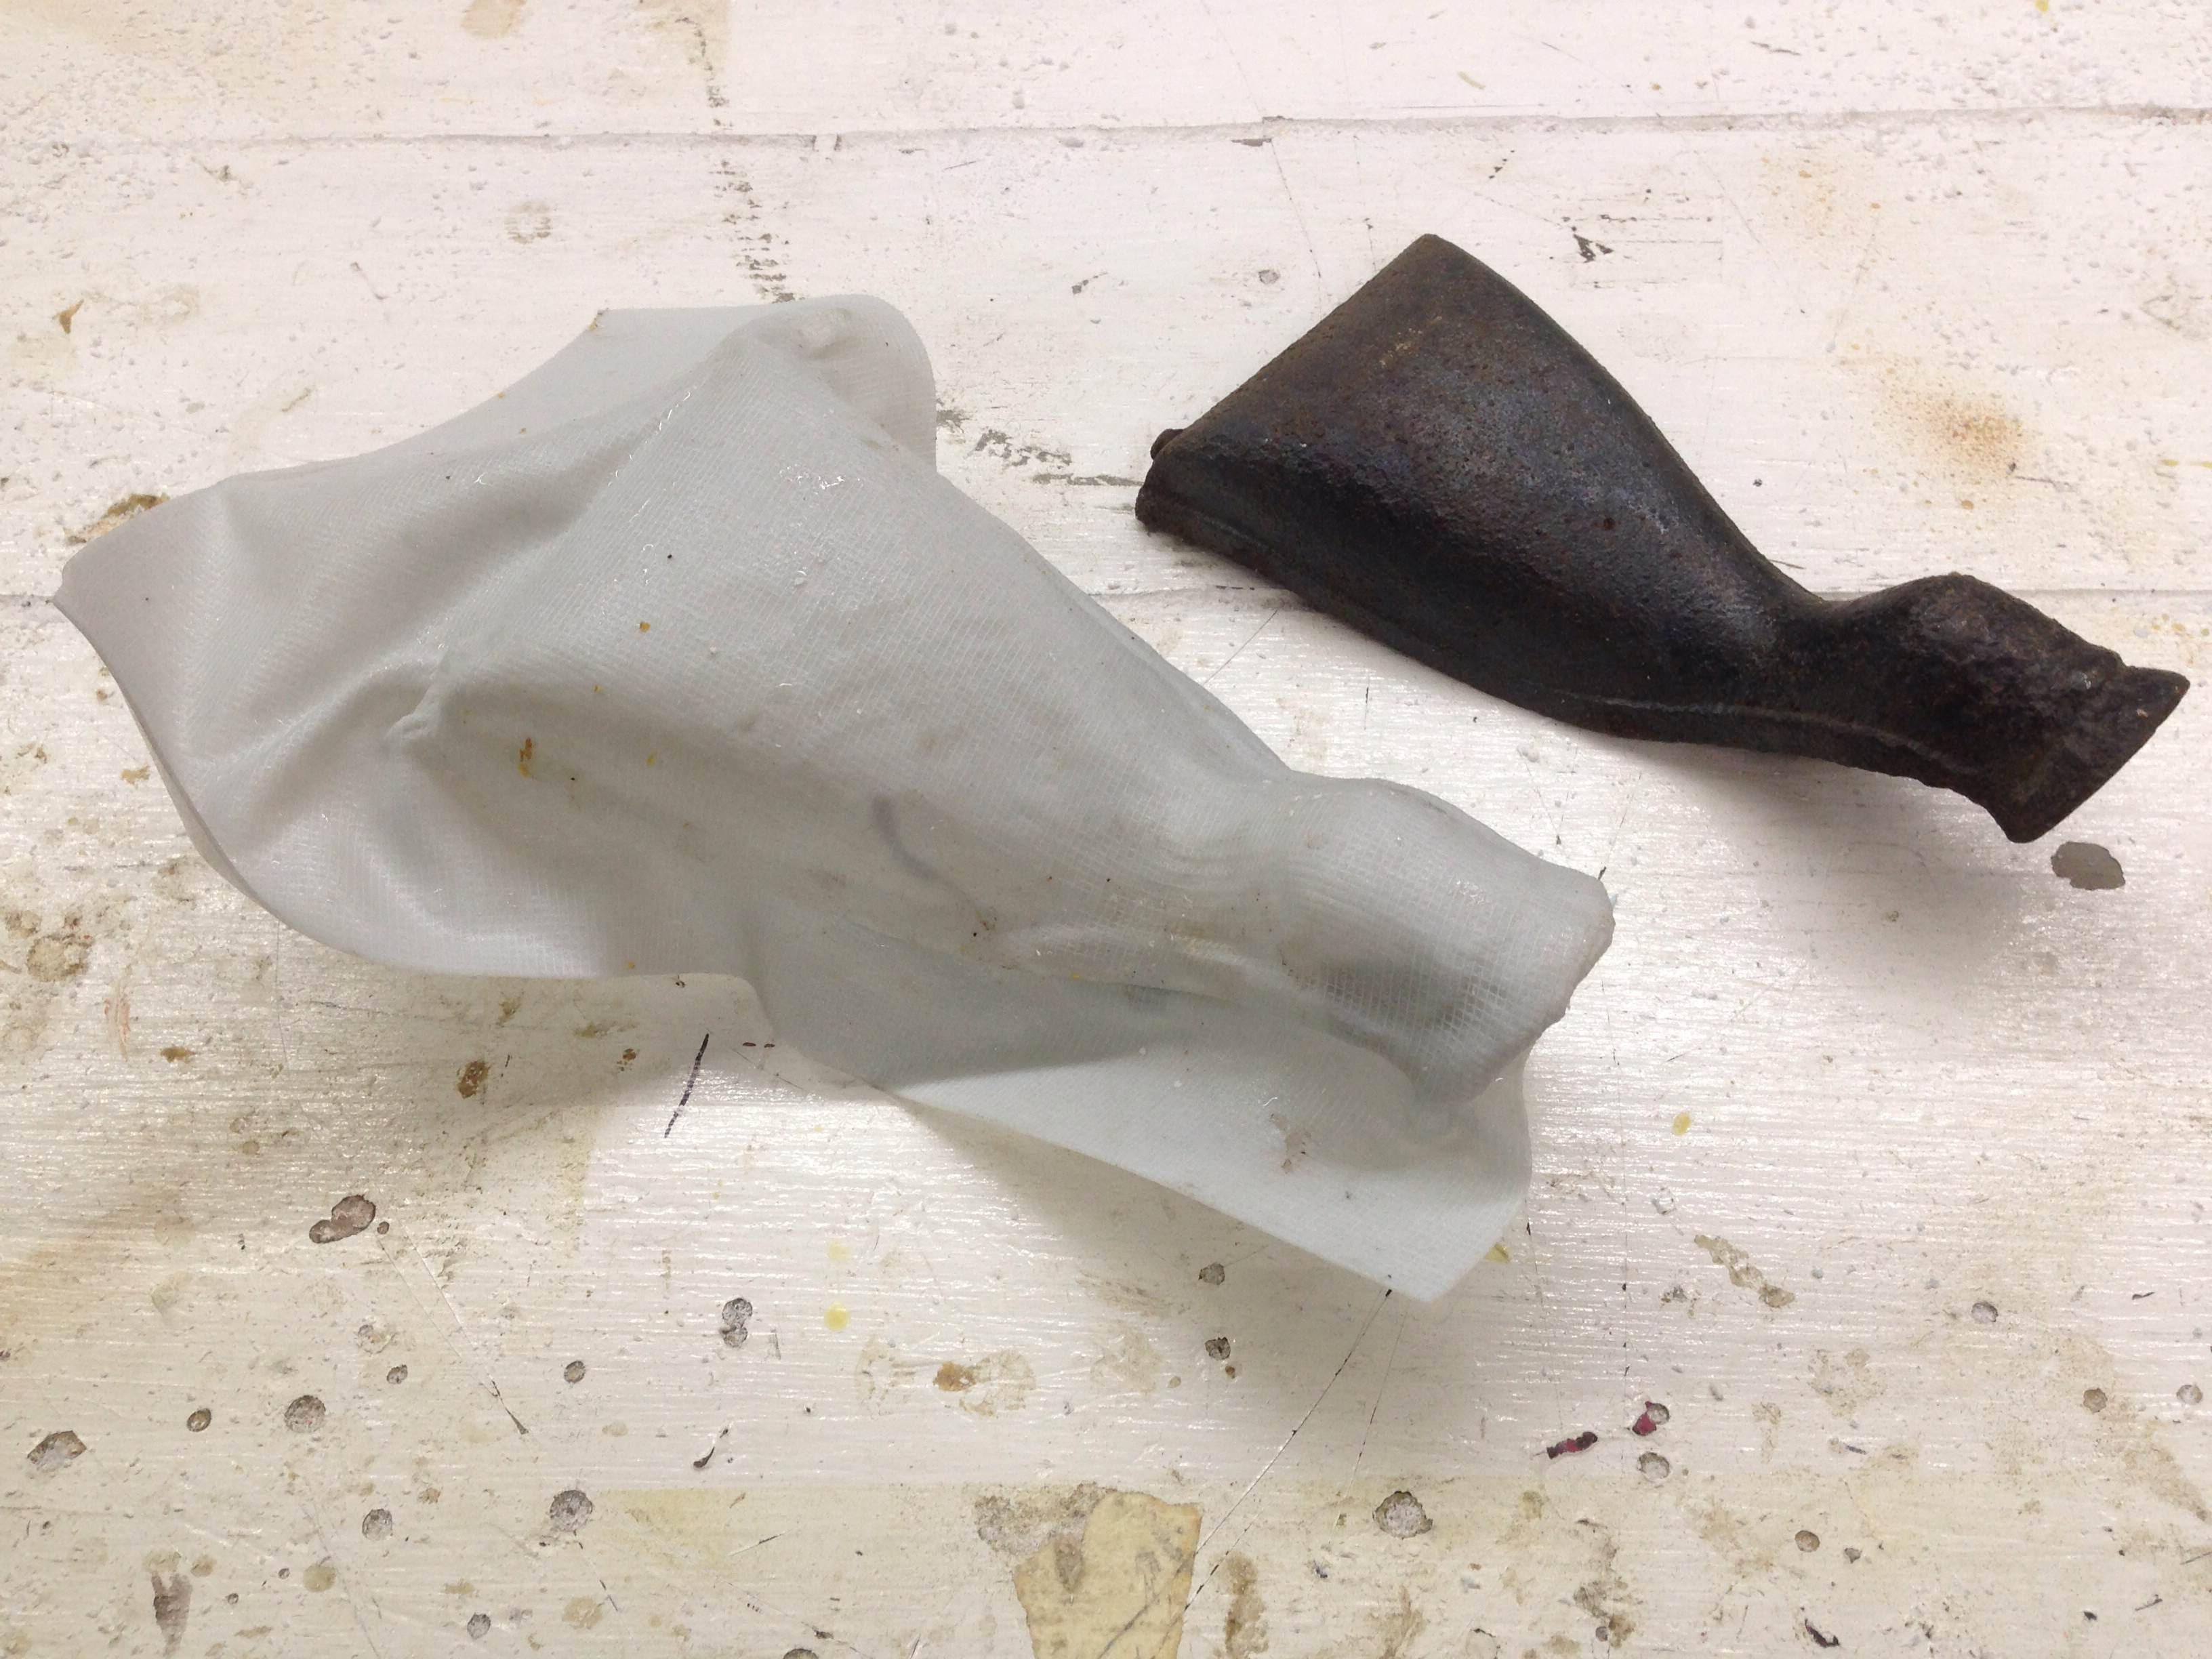
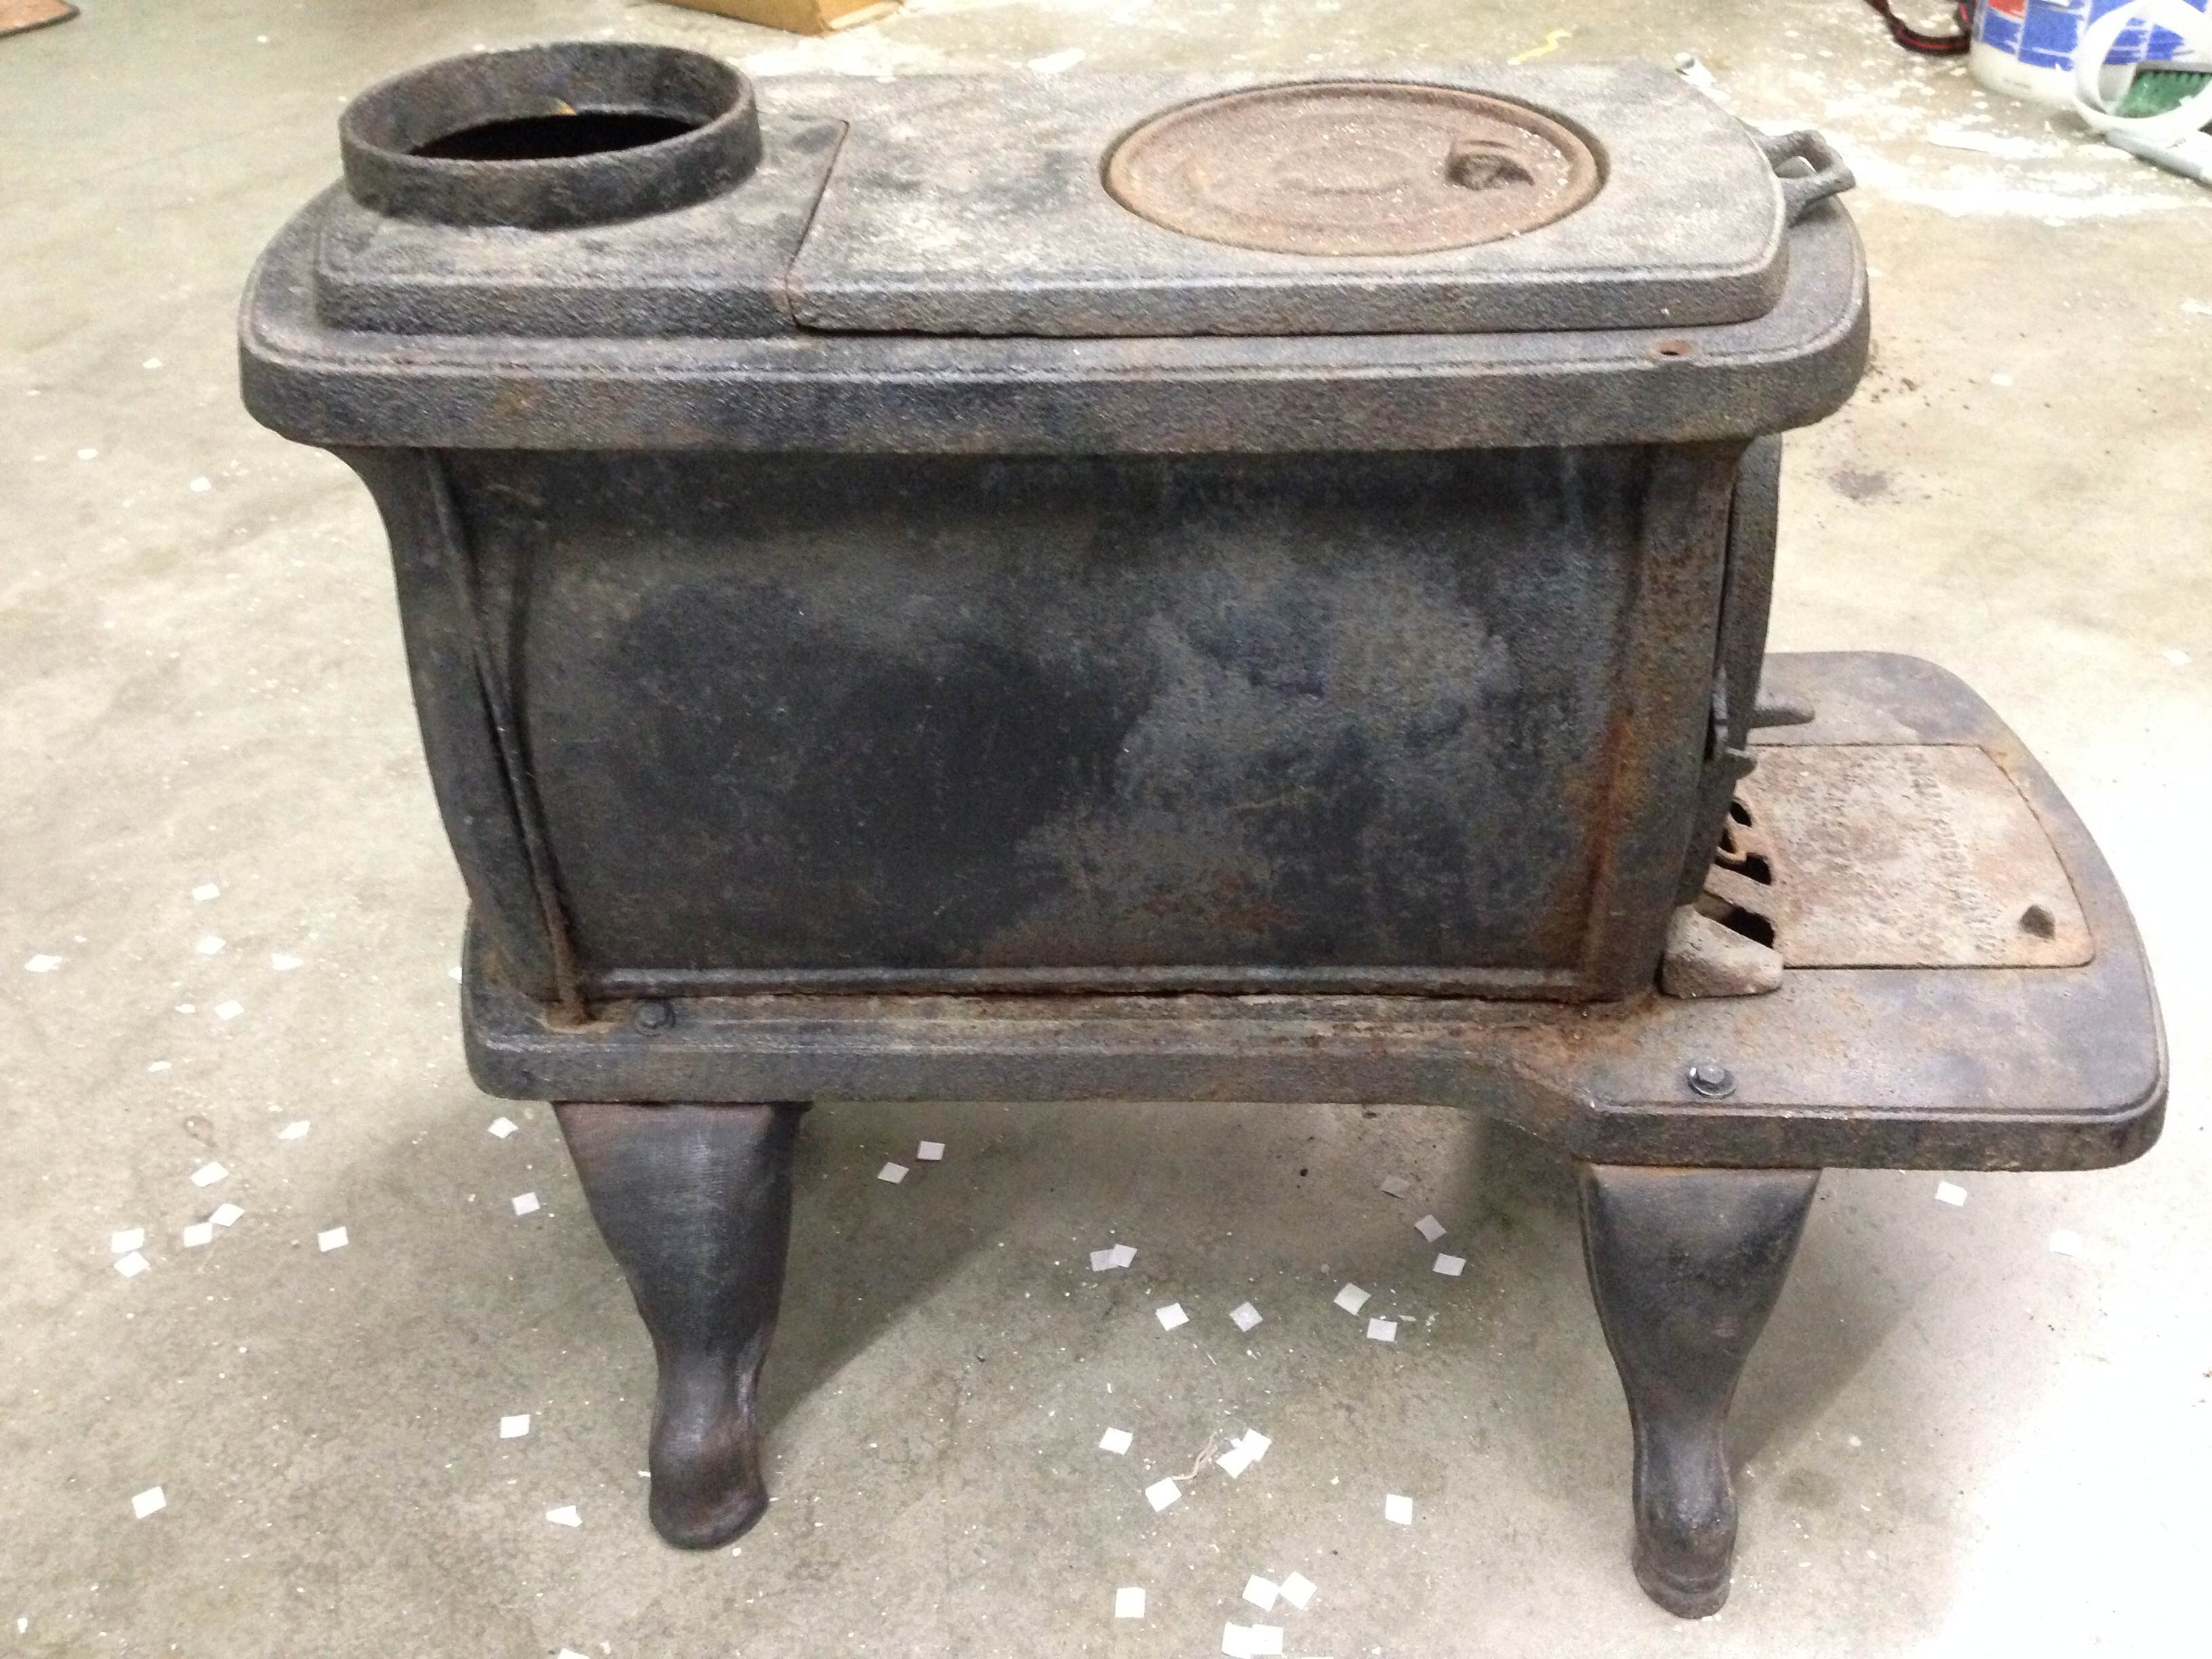
For our upcoming production of Snow Queen at Triad Stage, I am building some super-awesome puppet animals. But you won’t see those until December. Instead, I will show you a stove leg I had to replace. See, the show needs a wood-burning stove, and we had a great one in stock, but one of the legs was broke and another was missing. I could have molded and cast some new ones, or sculpted a new one out of wood, but I needed a ten-minute solution that did not cost anything.
Luckily for me, I had ordered several sheets of Wonderflex for the aforementioned puppets. I figured I could just use a few of the scraps to make myself some new legs.
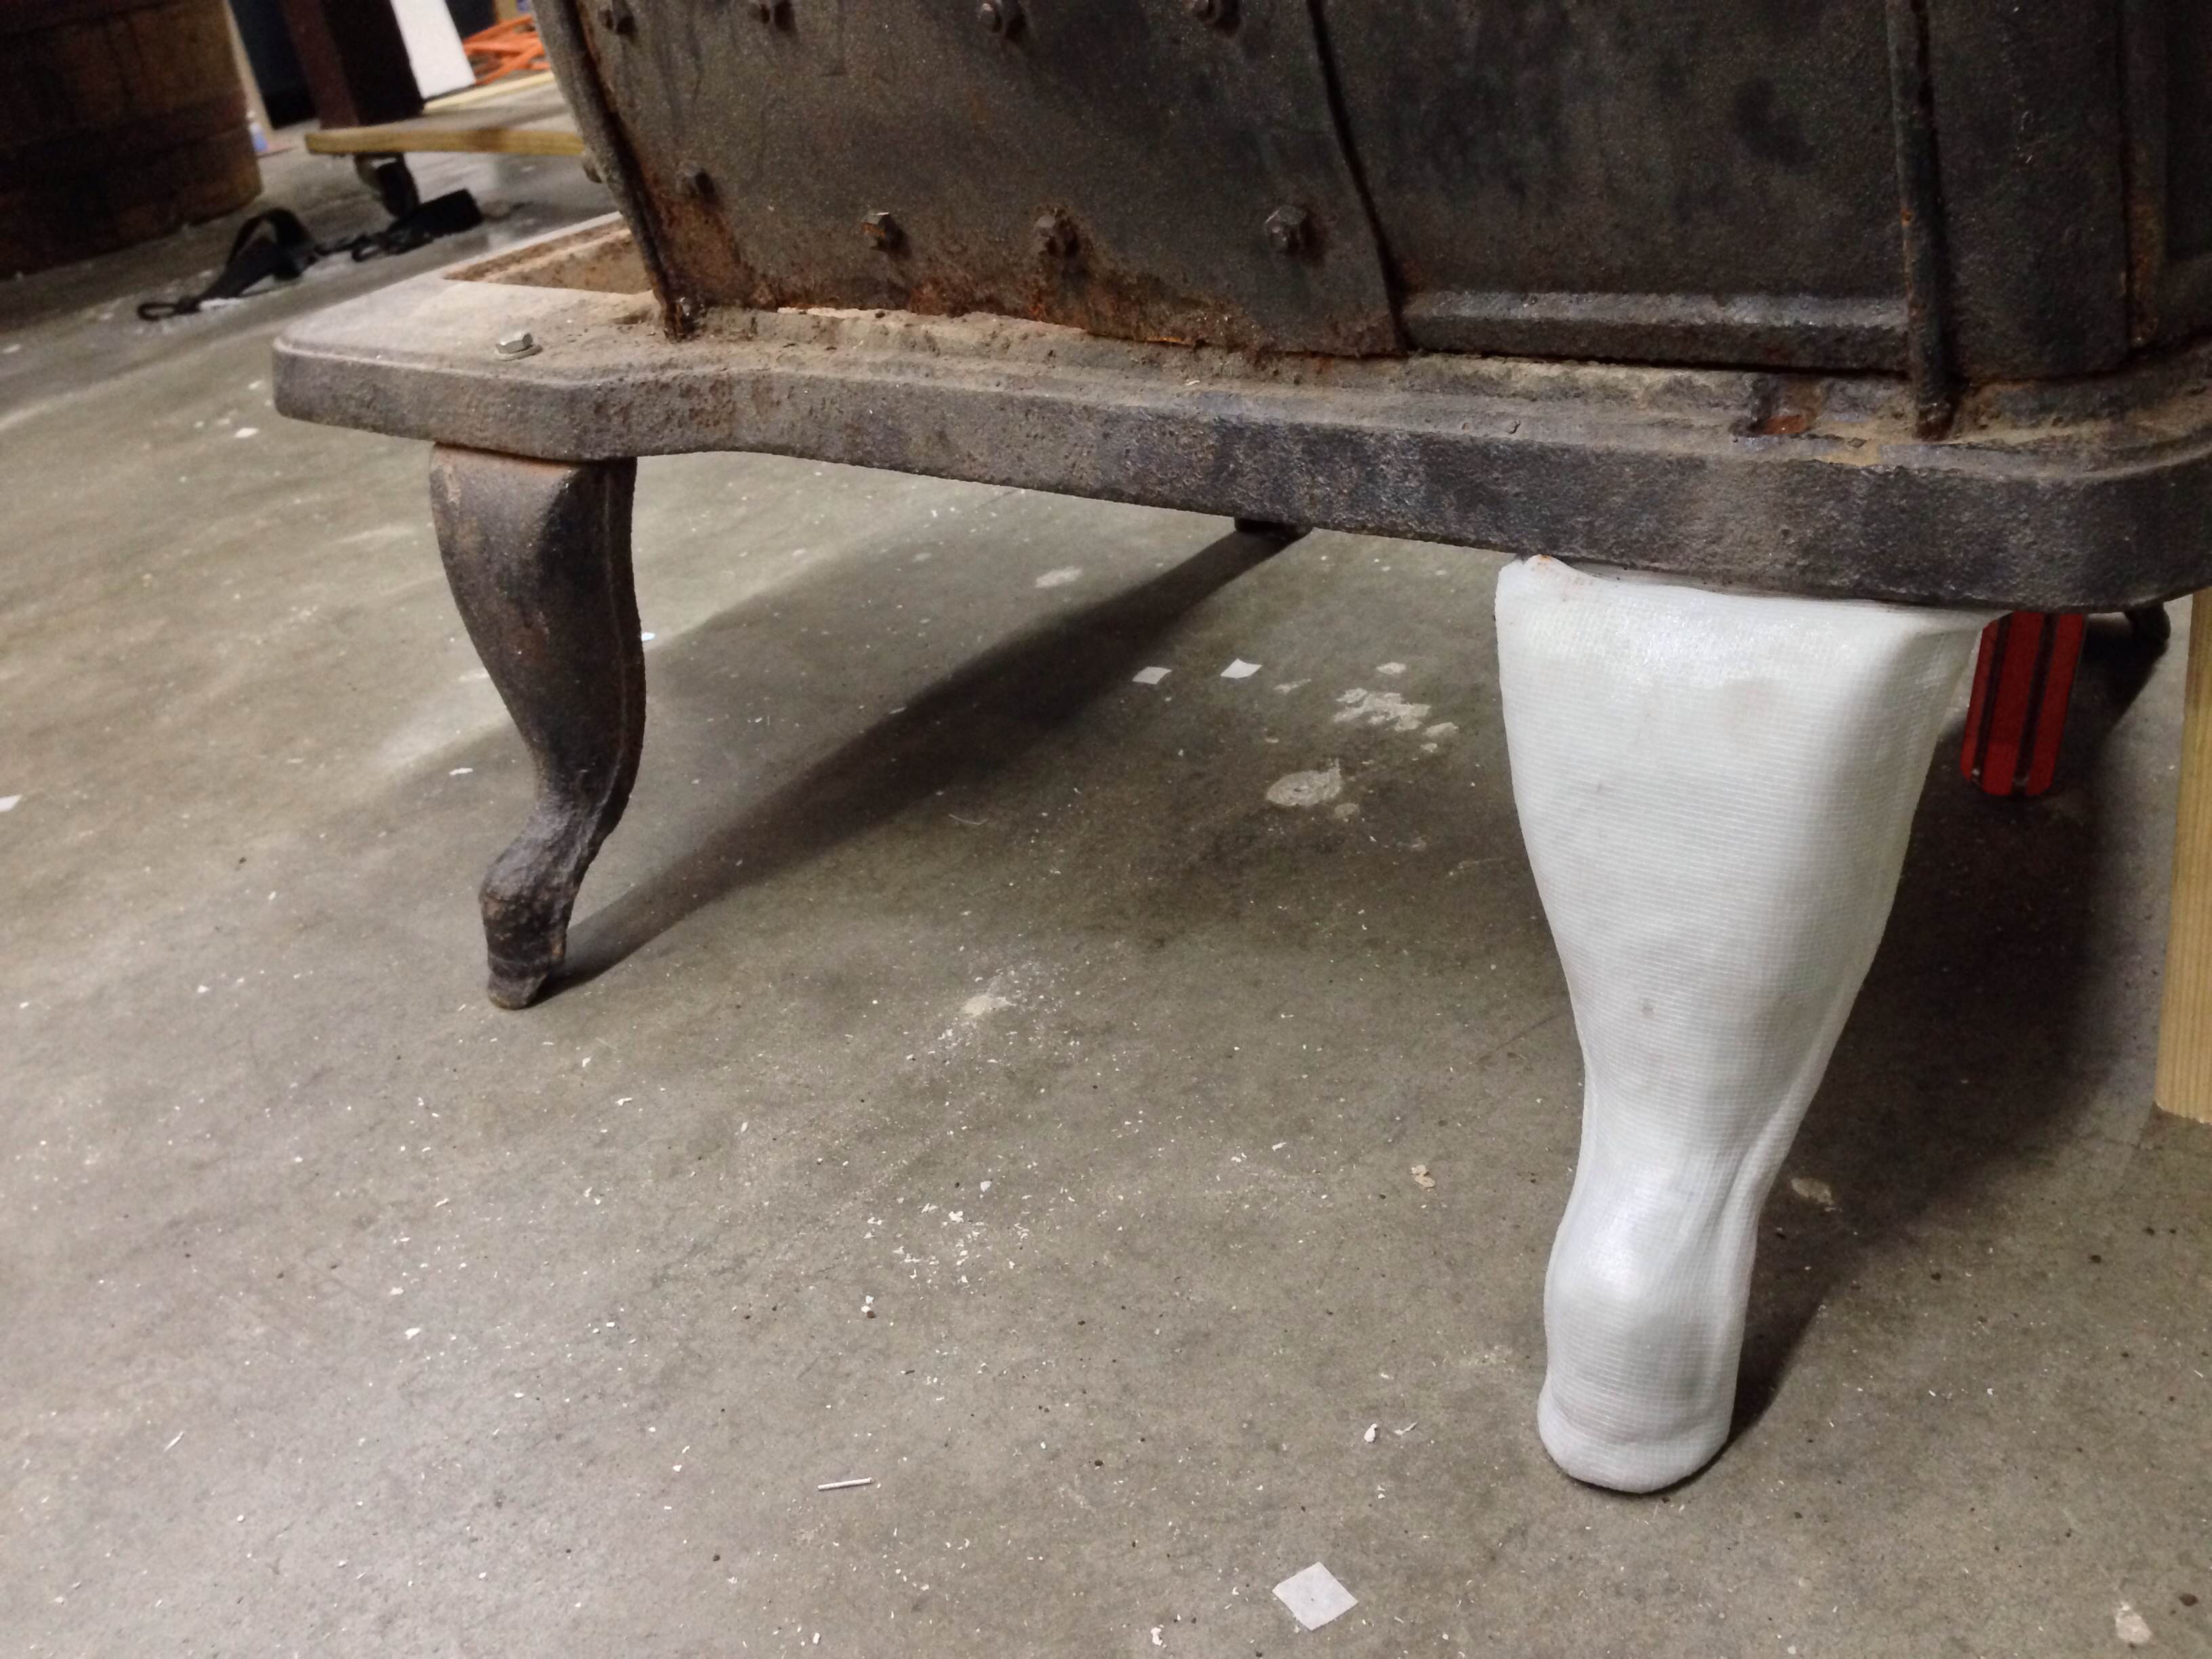
Wonderflex leg
Wonderflex gets sticky when hot, and I did not want it sticking to the leg, so I wrapped the leg in aluminum foil (not pictured here). Next, I heated the Wonderflex and essentially draped it over one of the legs. I worked it tight against the surface using my hands, and really dug in along the sides to pick up the raised-edge detail in the original. I wrapped the remainder around the back. Once it had cooled a bit, I carefully pried it apart and pulled the original leg out, than let the Wonderflex finish cooling until it was hard again. I was able to peel most of the aluminum foil off the back of the Wonderflex (the back had picked up the texture of the foil, but it did not show through on the front).
Trimmed and attached
I trimmed the excess material around the edges, leaving some extra on the top. I placed the leg in place and heated up this extra top material and shaped it to fit the underside of the stove. Once cool, I added a bolt to hold it in place.
Painted
Finally, I painted it. I started with a flat black spray paint, then dry-brushed some rust color and some grey. You can barely tell which leg is real and which is fake in the photograph above. Plus, the whole process was less than ten minutes of total work time, in between other tasks on the show. The end with the fake legs does have a block of wood underneath to hold it up; the Wonderflex is nowhere near sturdy enough to support a cast-iron stove on its own.
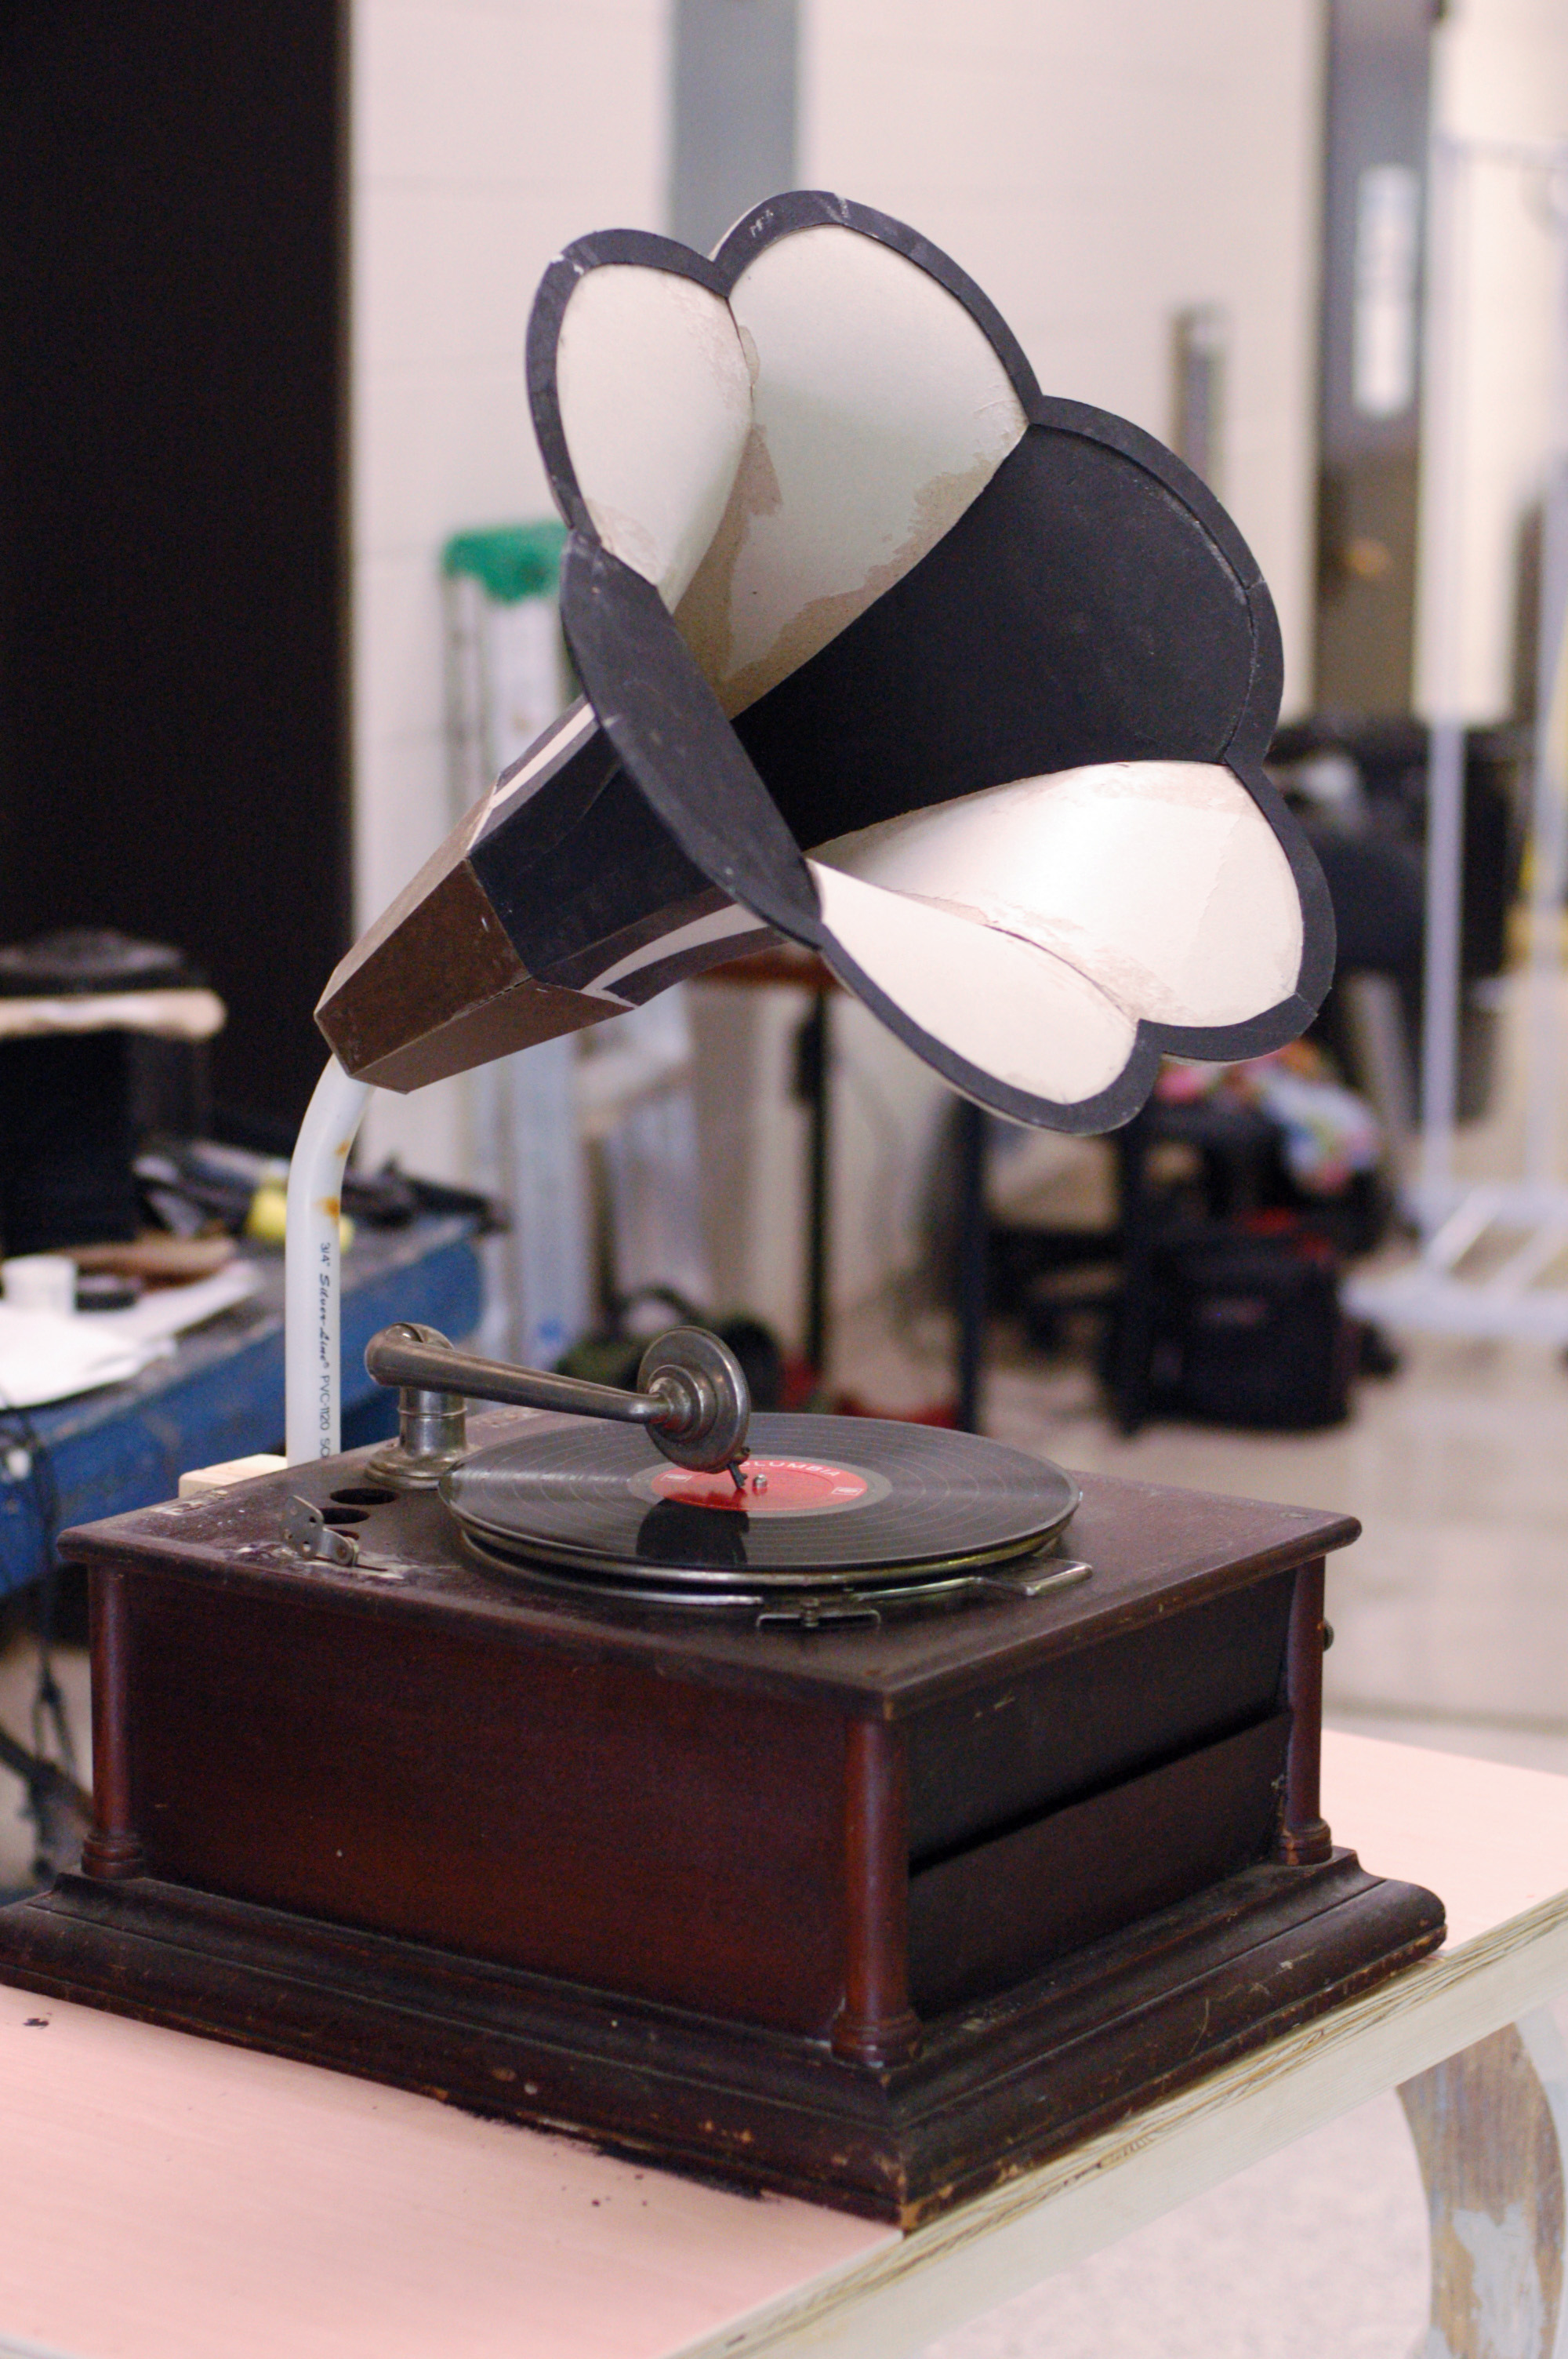
I did the props for Elon University’s Wild Party back in February, but I haven’t gotten around to posting pictures of a quick gramophone horn I made. The budget was tight and nothing was available to borrow or rent, so I decided to construct my own.
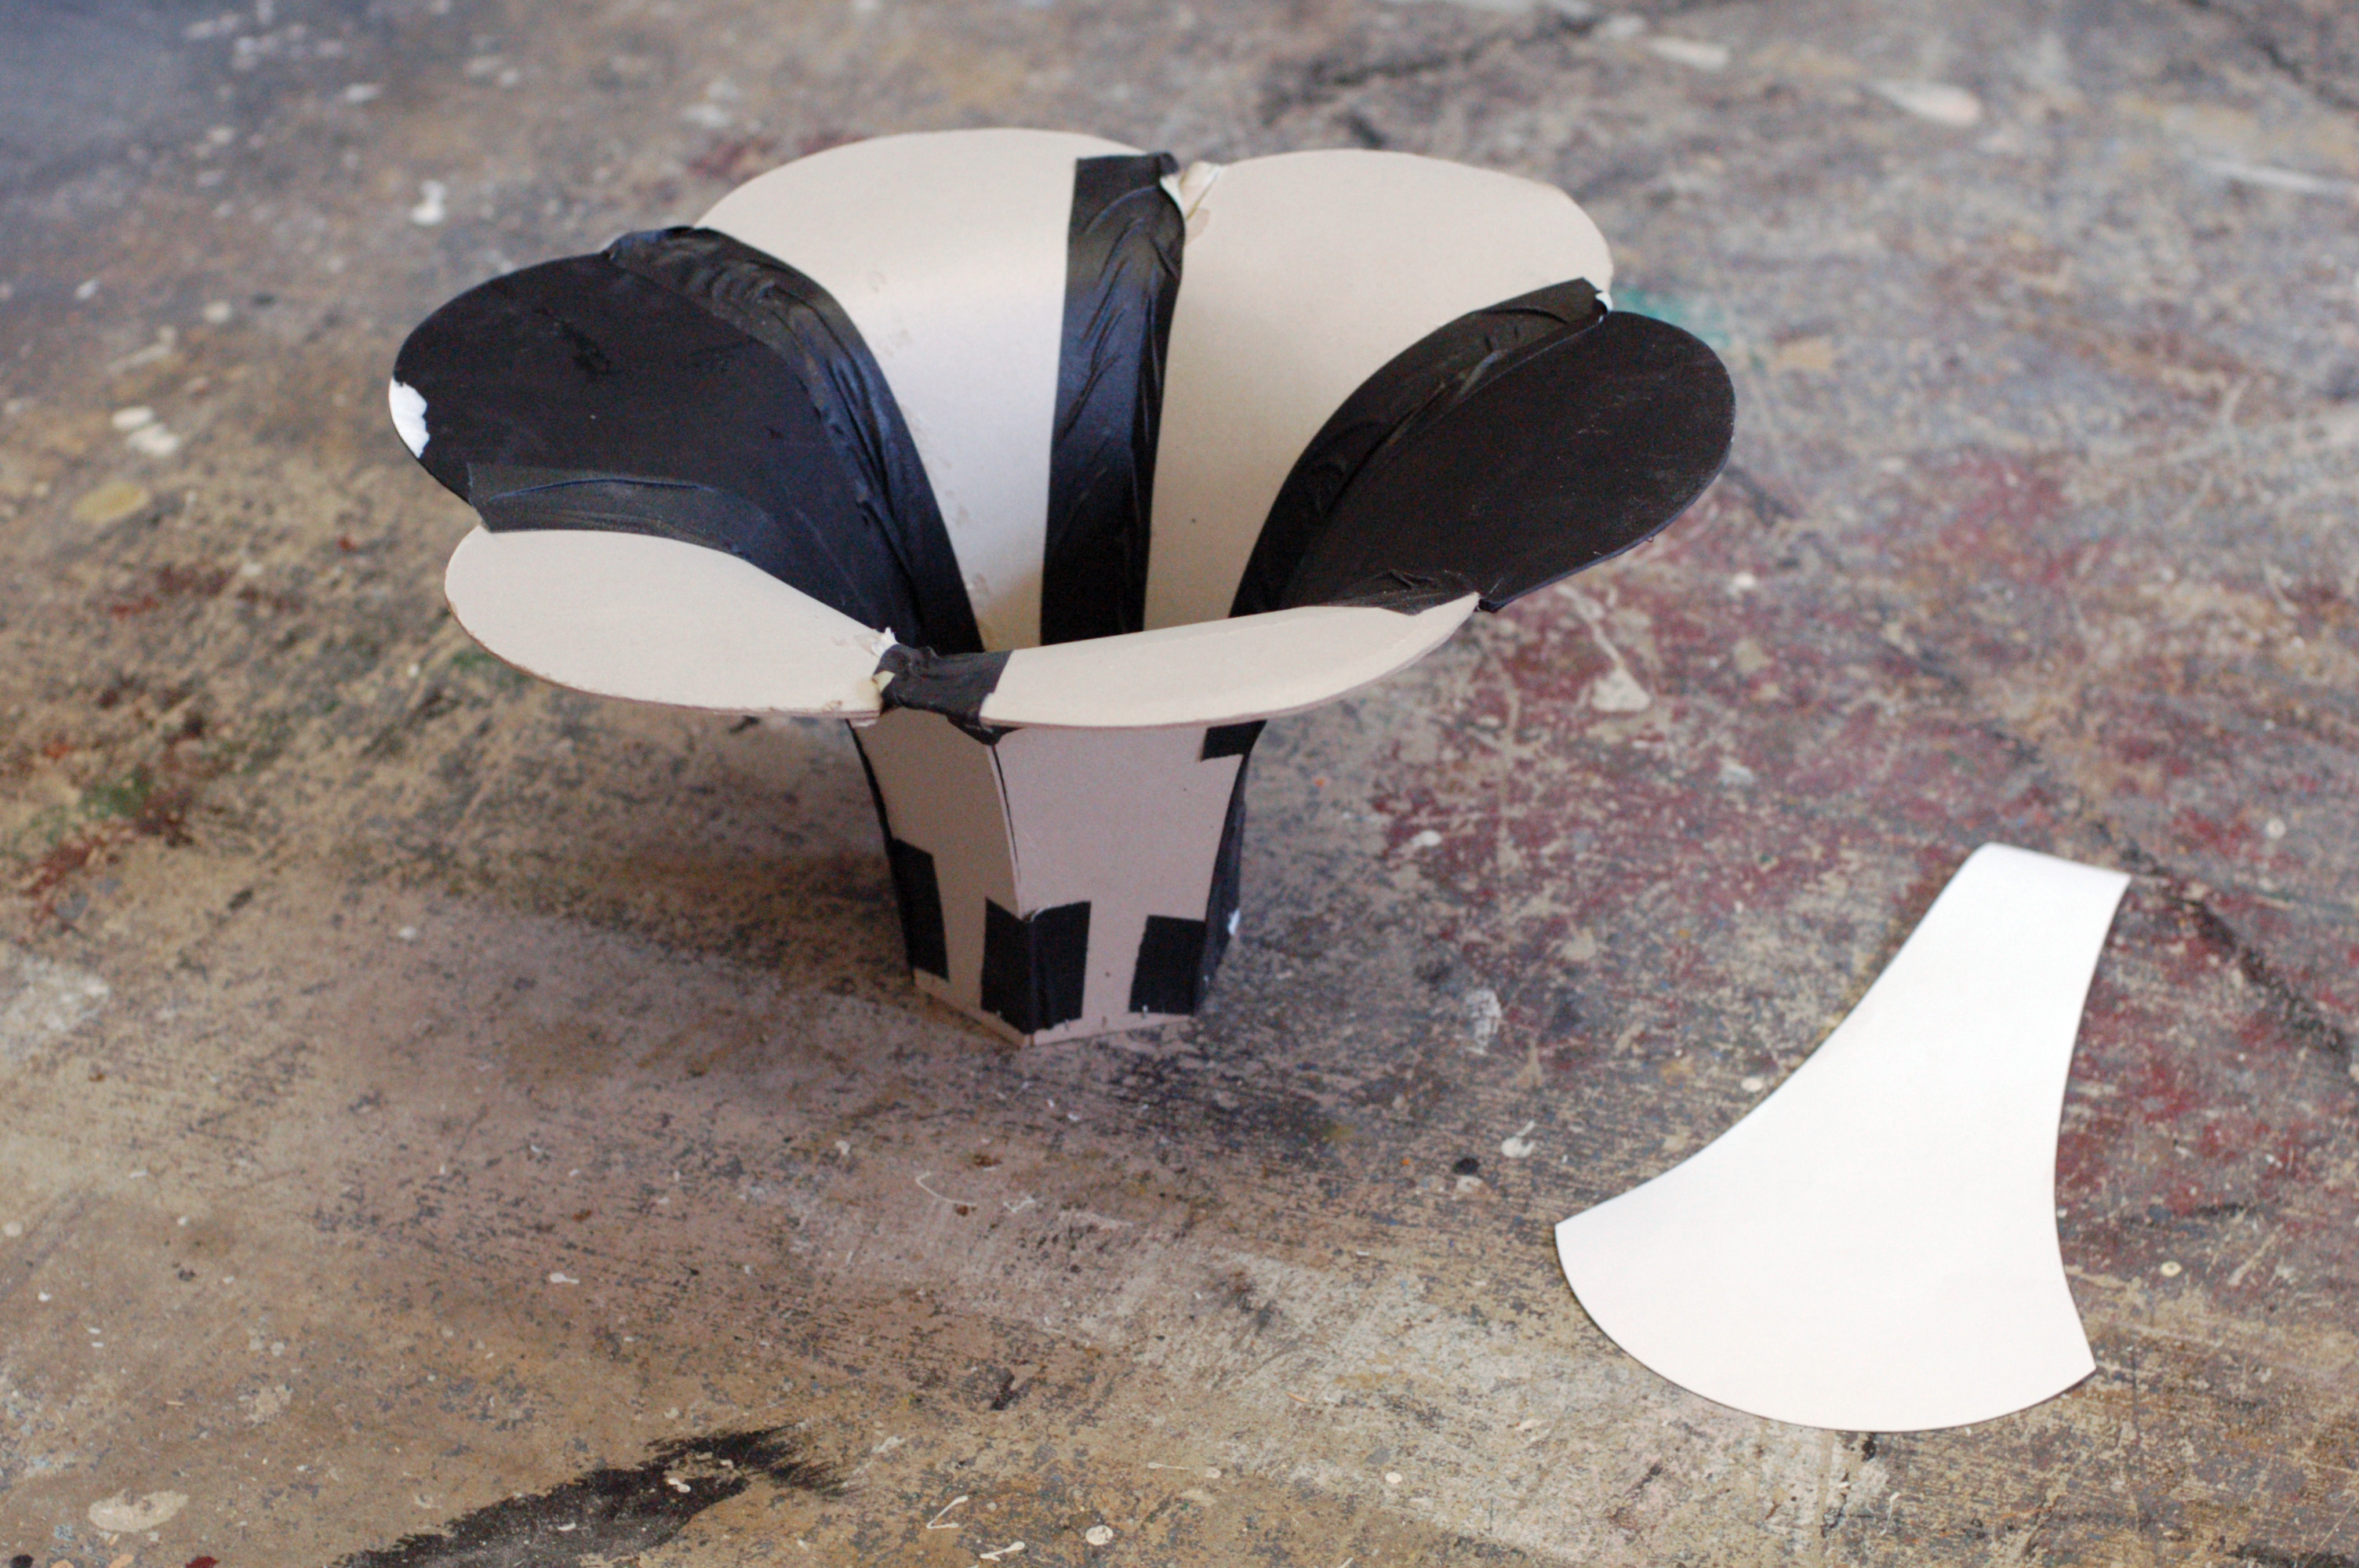
Pattern pieces
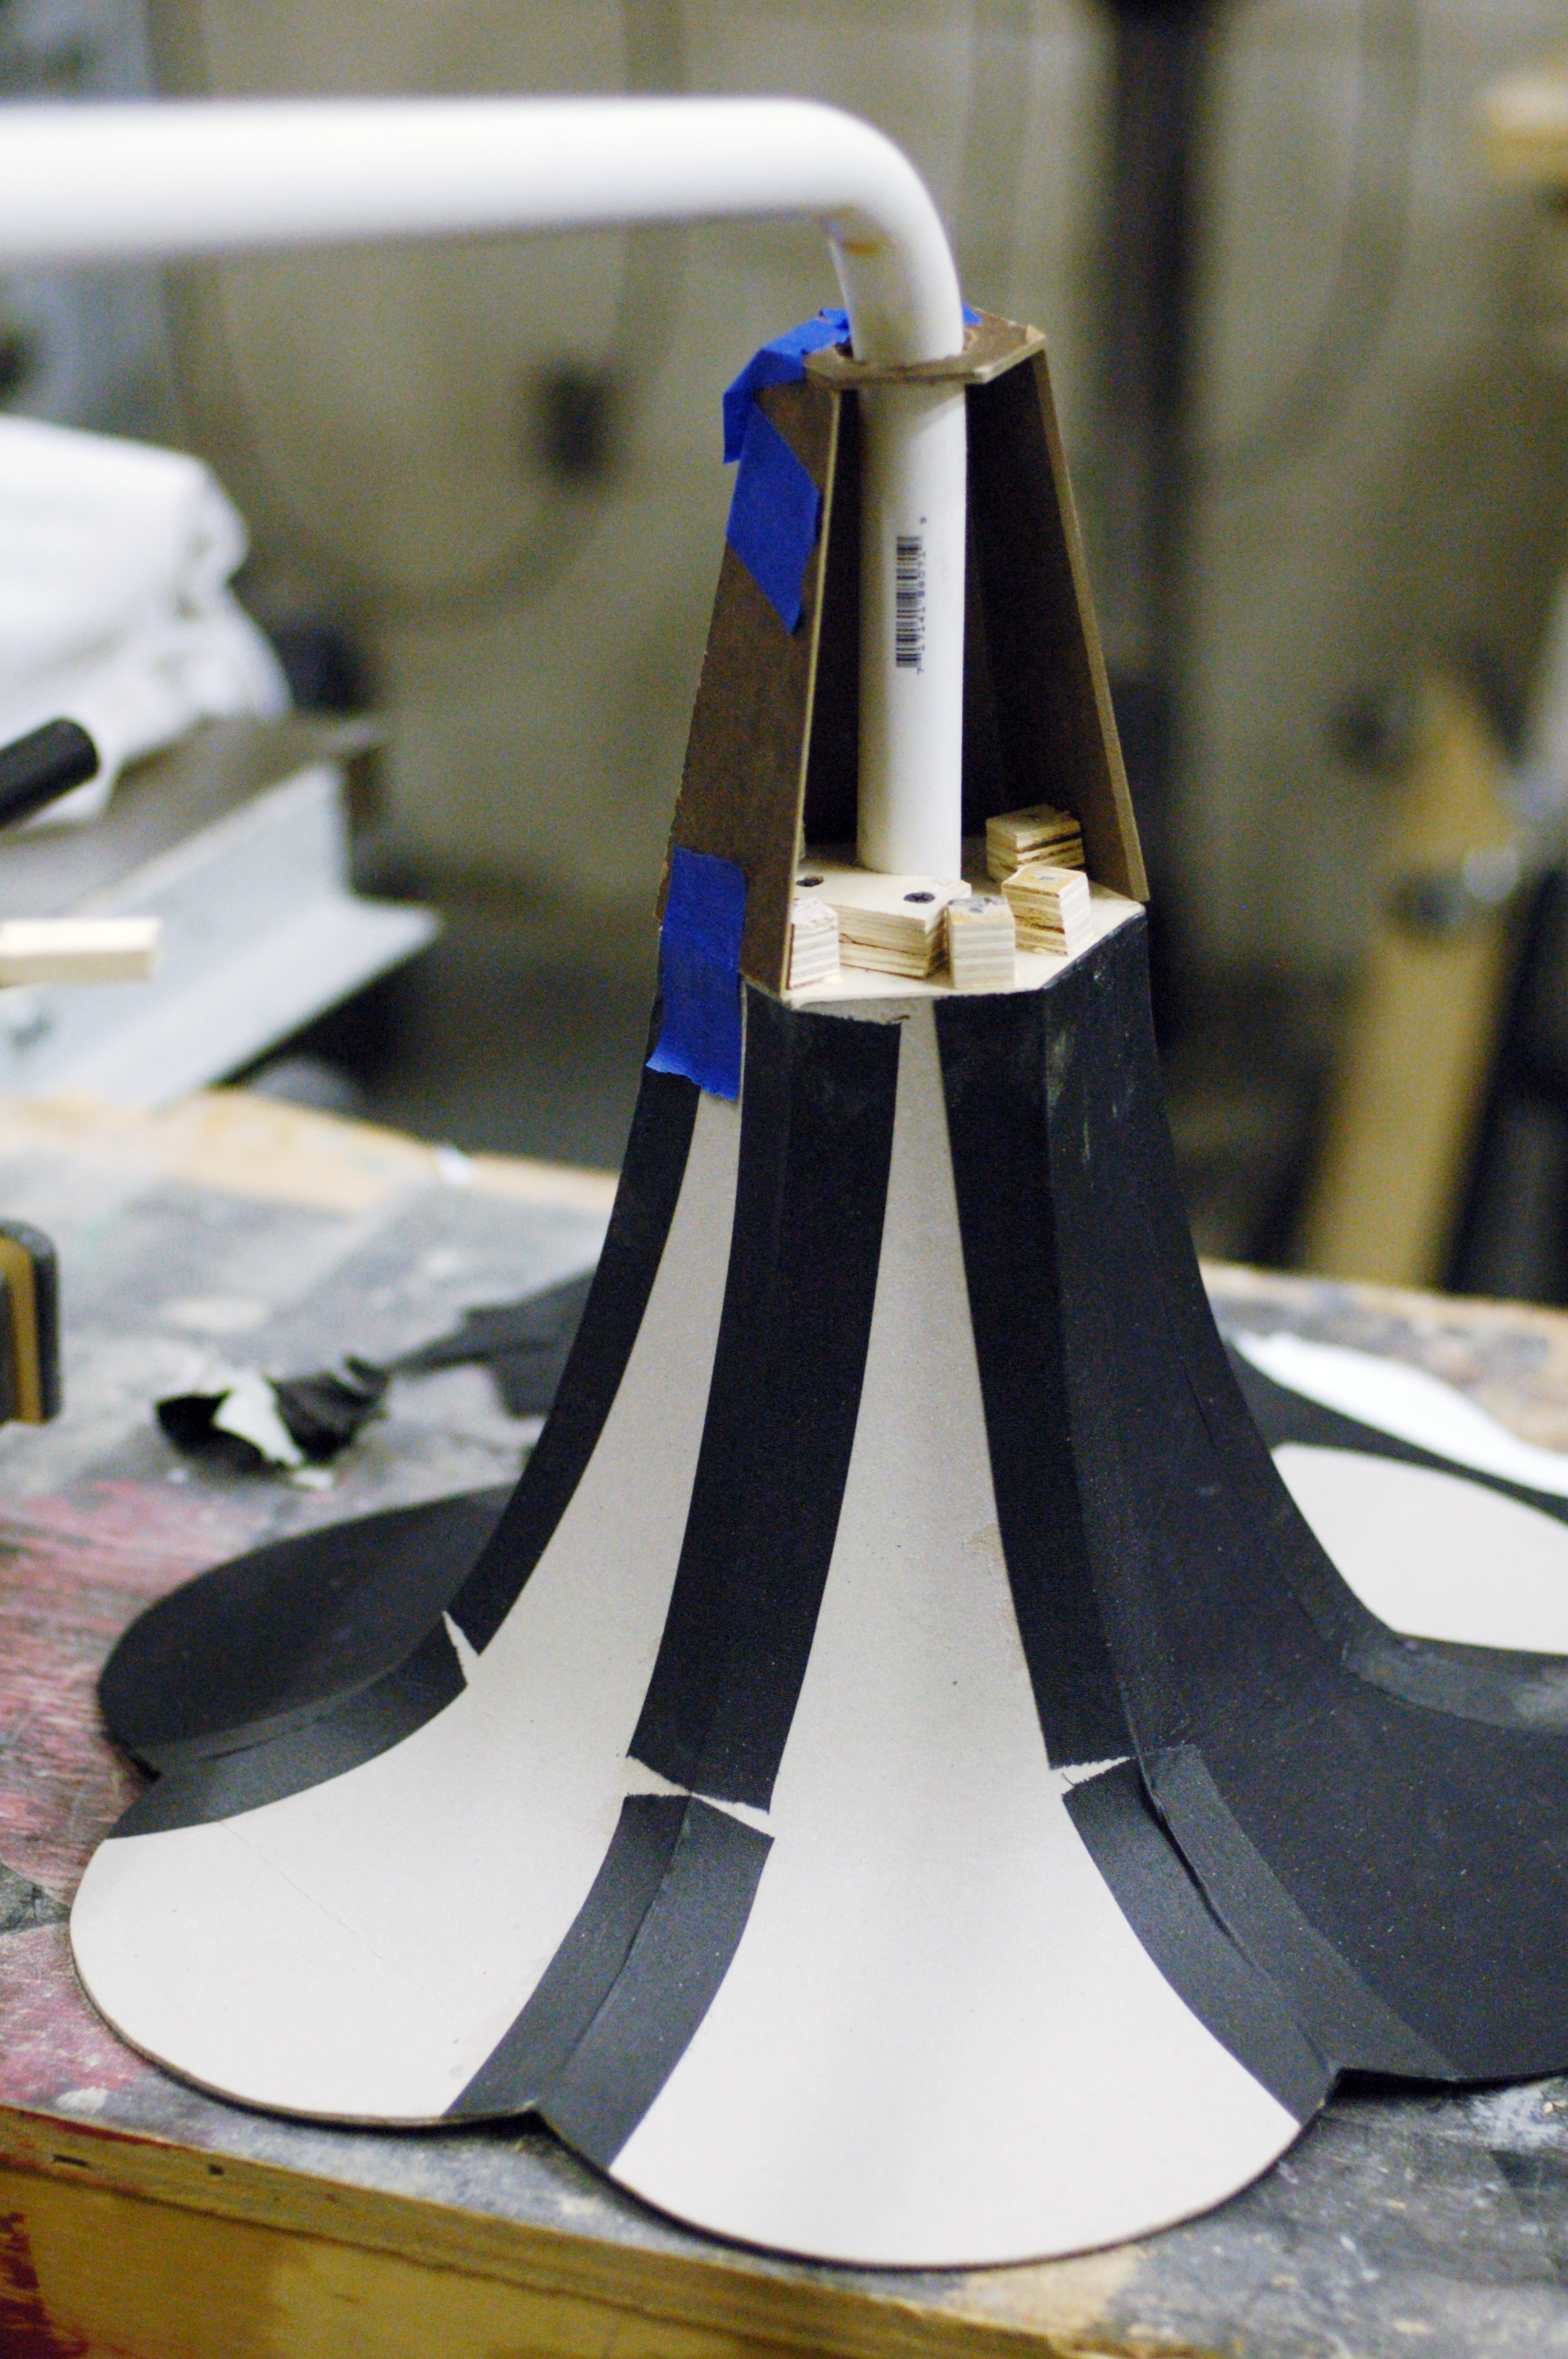
The style of gramophone horn we needed is made up of six “petal” pieces all connected together. Luckily, I found a drafting of the pattern piece needed online. I scaled it up and copied it six times onto some matboard (I used two different colors of matboard because that was all I had in the shop). I attached the bottoms of the pieces to a hexagon of plywood I had cut out.
Extending the back
The horn was attached to a length of PVC pipe which I heated up and bent. The back of the horn needed to be longer, so I cut some trapezoids of Masonite to extend the shape back.
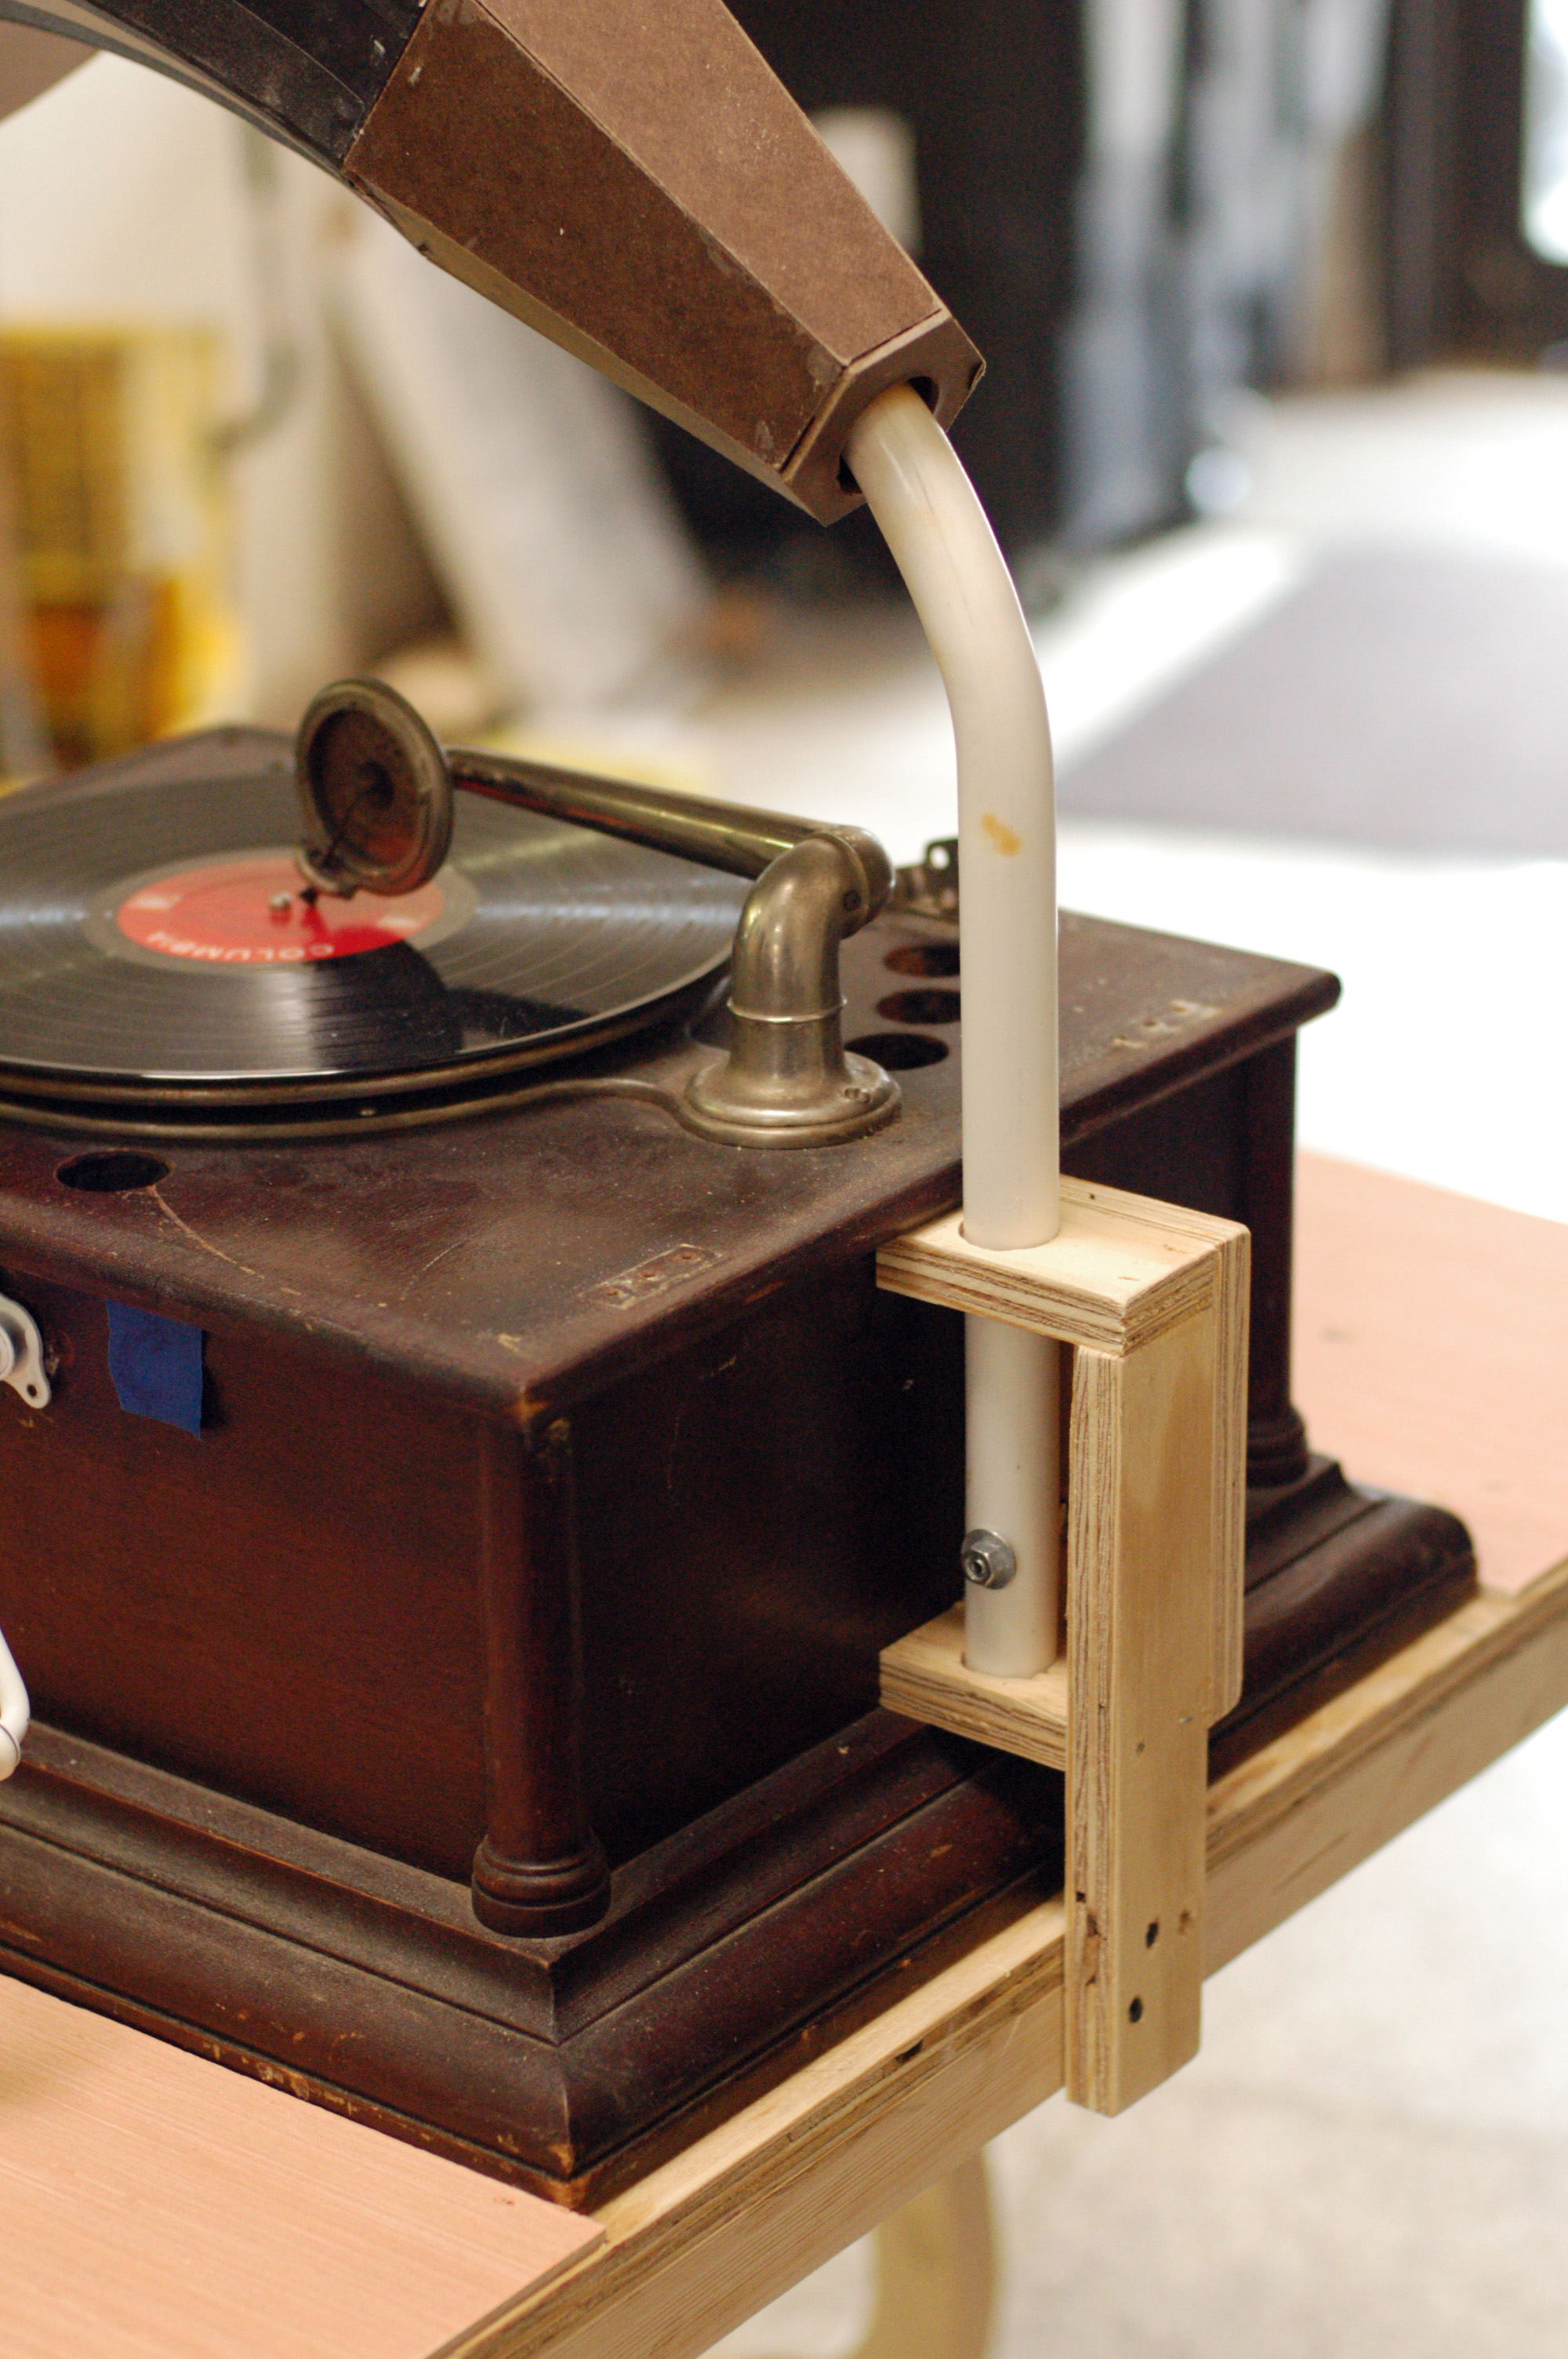
Mounting to the table
The record player itself was totally not the kind that would have a gramophone horn, so there was nowhere to attach it (a big apology to all you fans of historical accuracy). It was also a rental piece, so it could not be modified. Since the upstage side would never be seen, I attached the horn itself to the table, and built this little plywood bracket to hold the horn so it would look like it was coming out of the record player.
Almost finished
I cut out some matboard “trim” to run along the circumference of the horn to strengthen it and give it a nice clean edge. It was almost ready for paint, but the back of the horn still looked pretty bad.
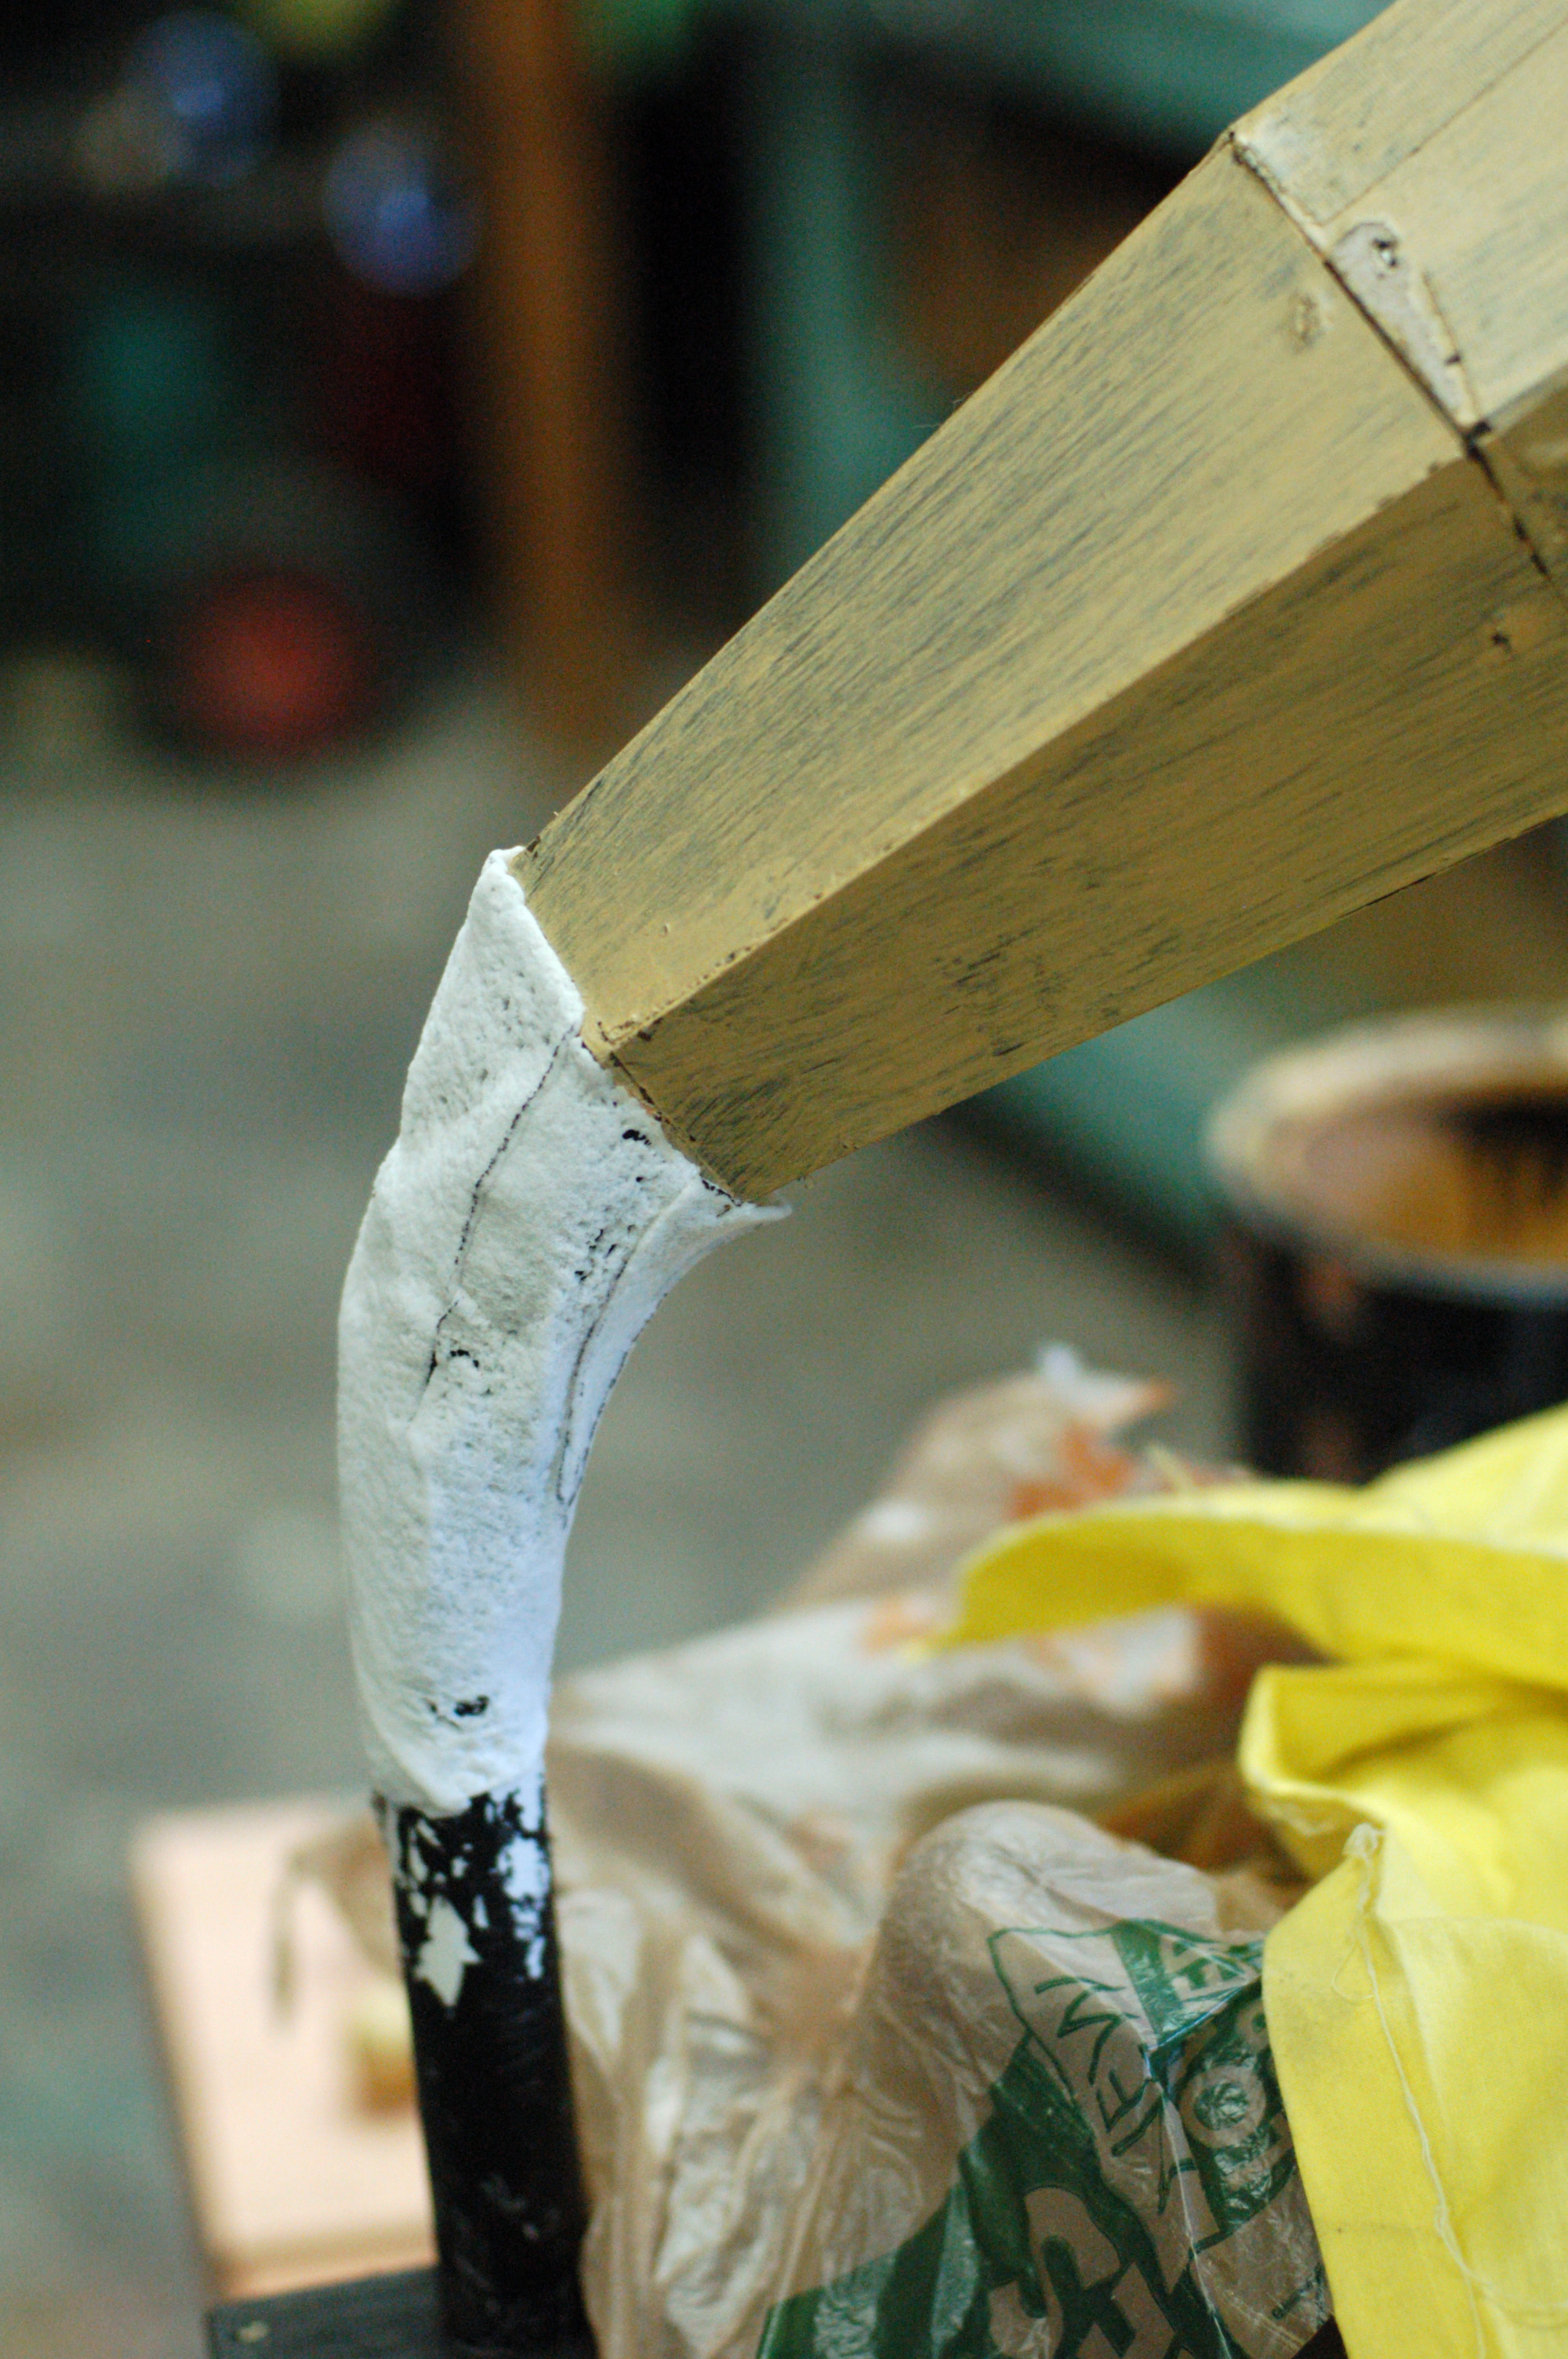
Tapering on a curve
To finish off the shape, I needed a piece that could taper from the horn to the pipe, while curving around the bend in the pipe. The shape was also starting from a hexagon and ending up as a circle. Also, it was only a day or two before opening night. The quickest solution I could think of was to pattern a scrap piece of Wonderflex and wrap it on there. It needed some sanding and filling to make it smoother, but otherwise it worked like a charm.
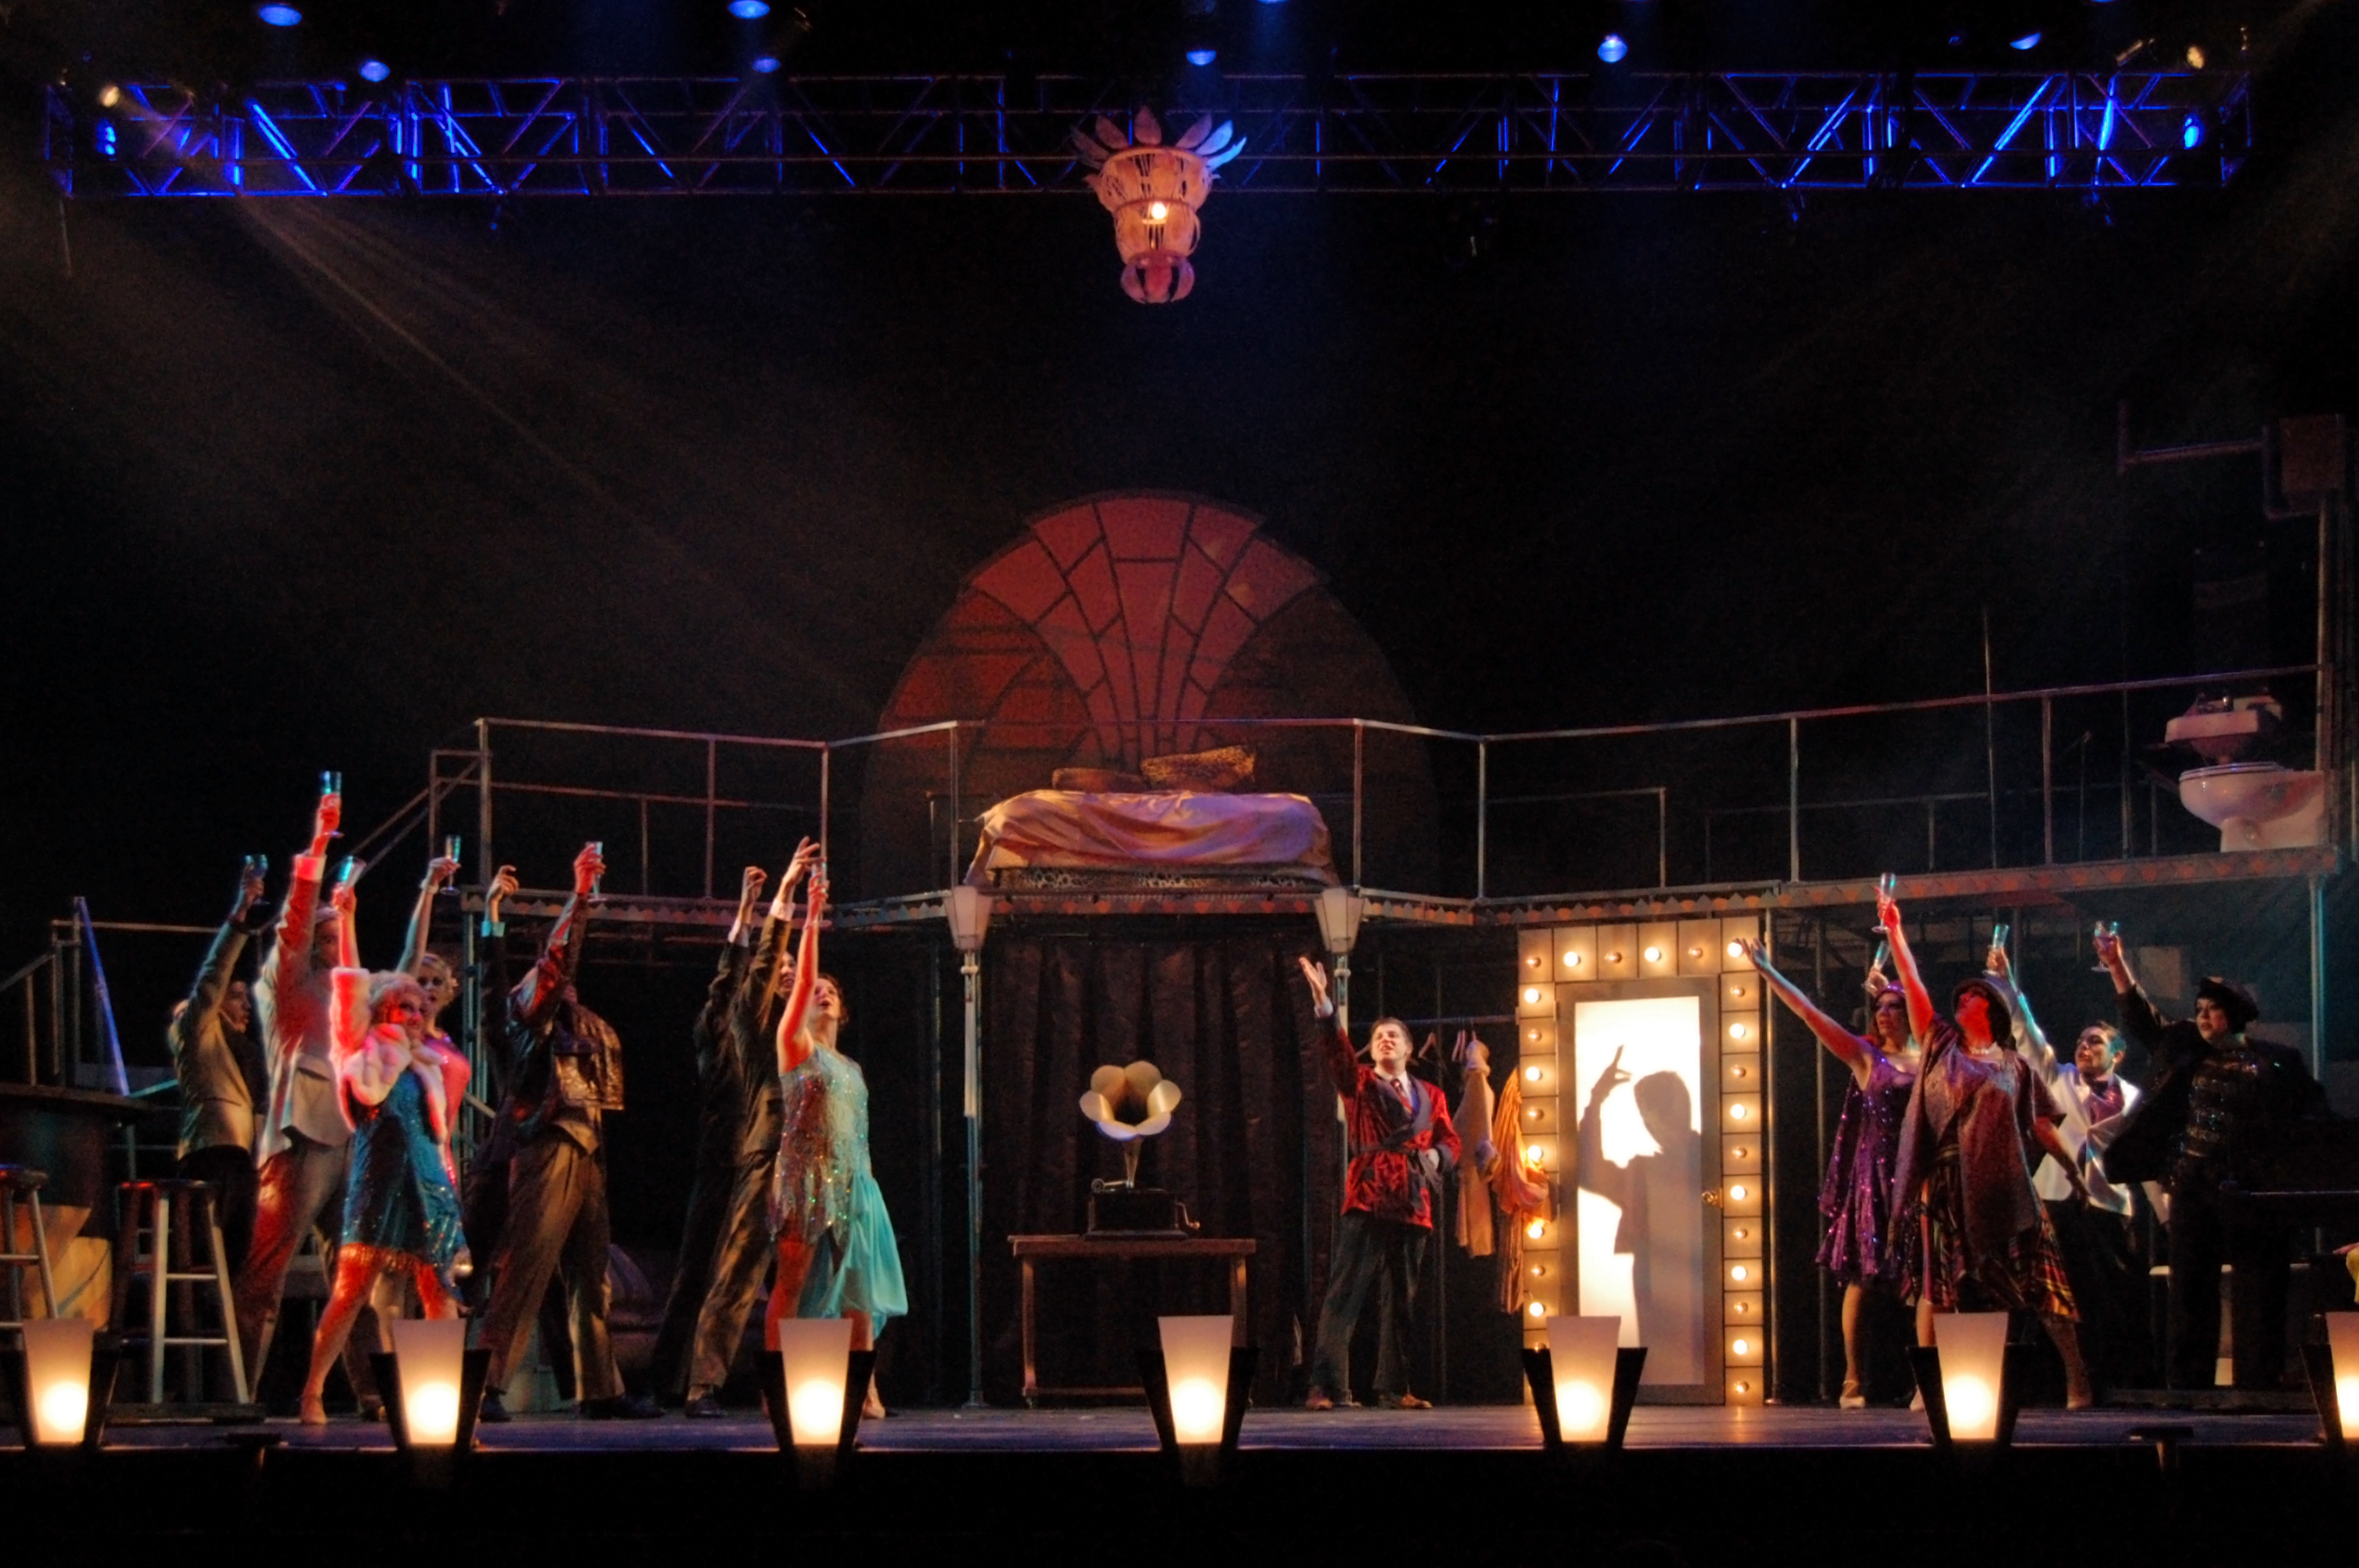
Wild Party
So there you have it; a down-and-dirty gramophone horn made of paper and plastic.
Triad Stage’s production of Wait Until Dark was set in a hip and modern New York City apartment circa 1963. The kind of furniture it required was not easily found in your typical antique store, nor was it cheap to come by. One key piece we needed was a sleek upholstered settee; with the stage in a thrust configuration, it needed to be low-profile as well. A settee like this easily cost as much as my entire props budget, so I had to build it from scratch.
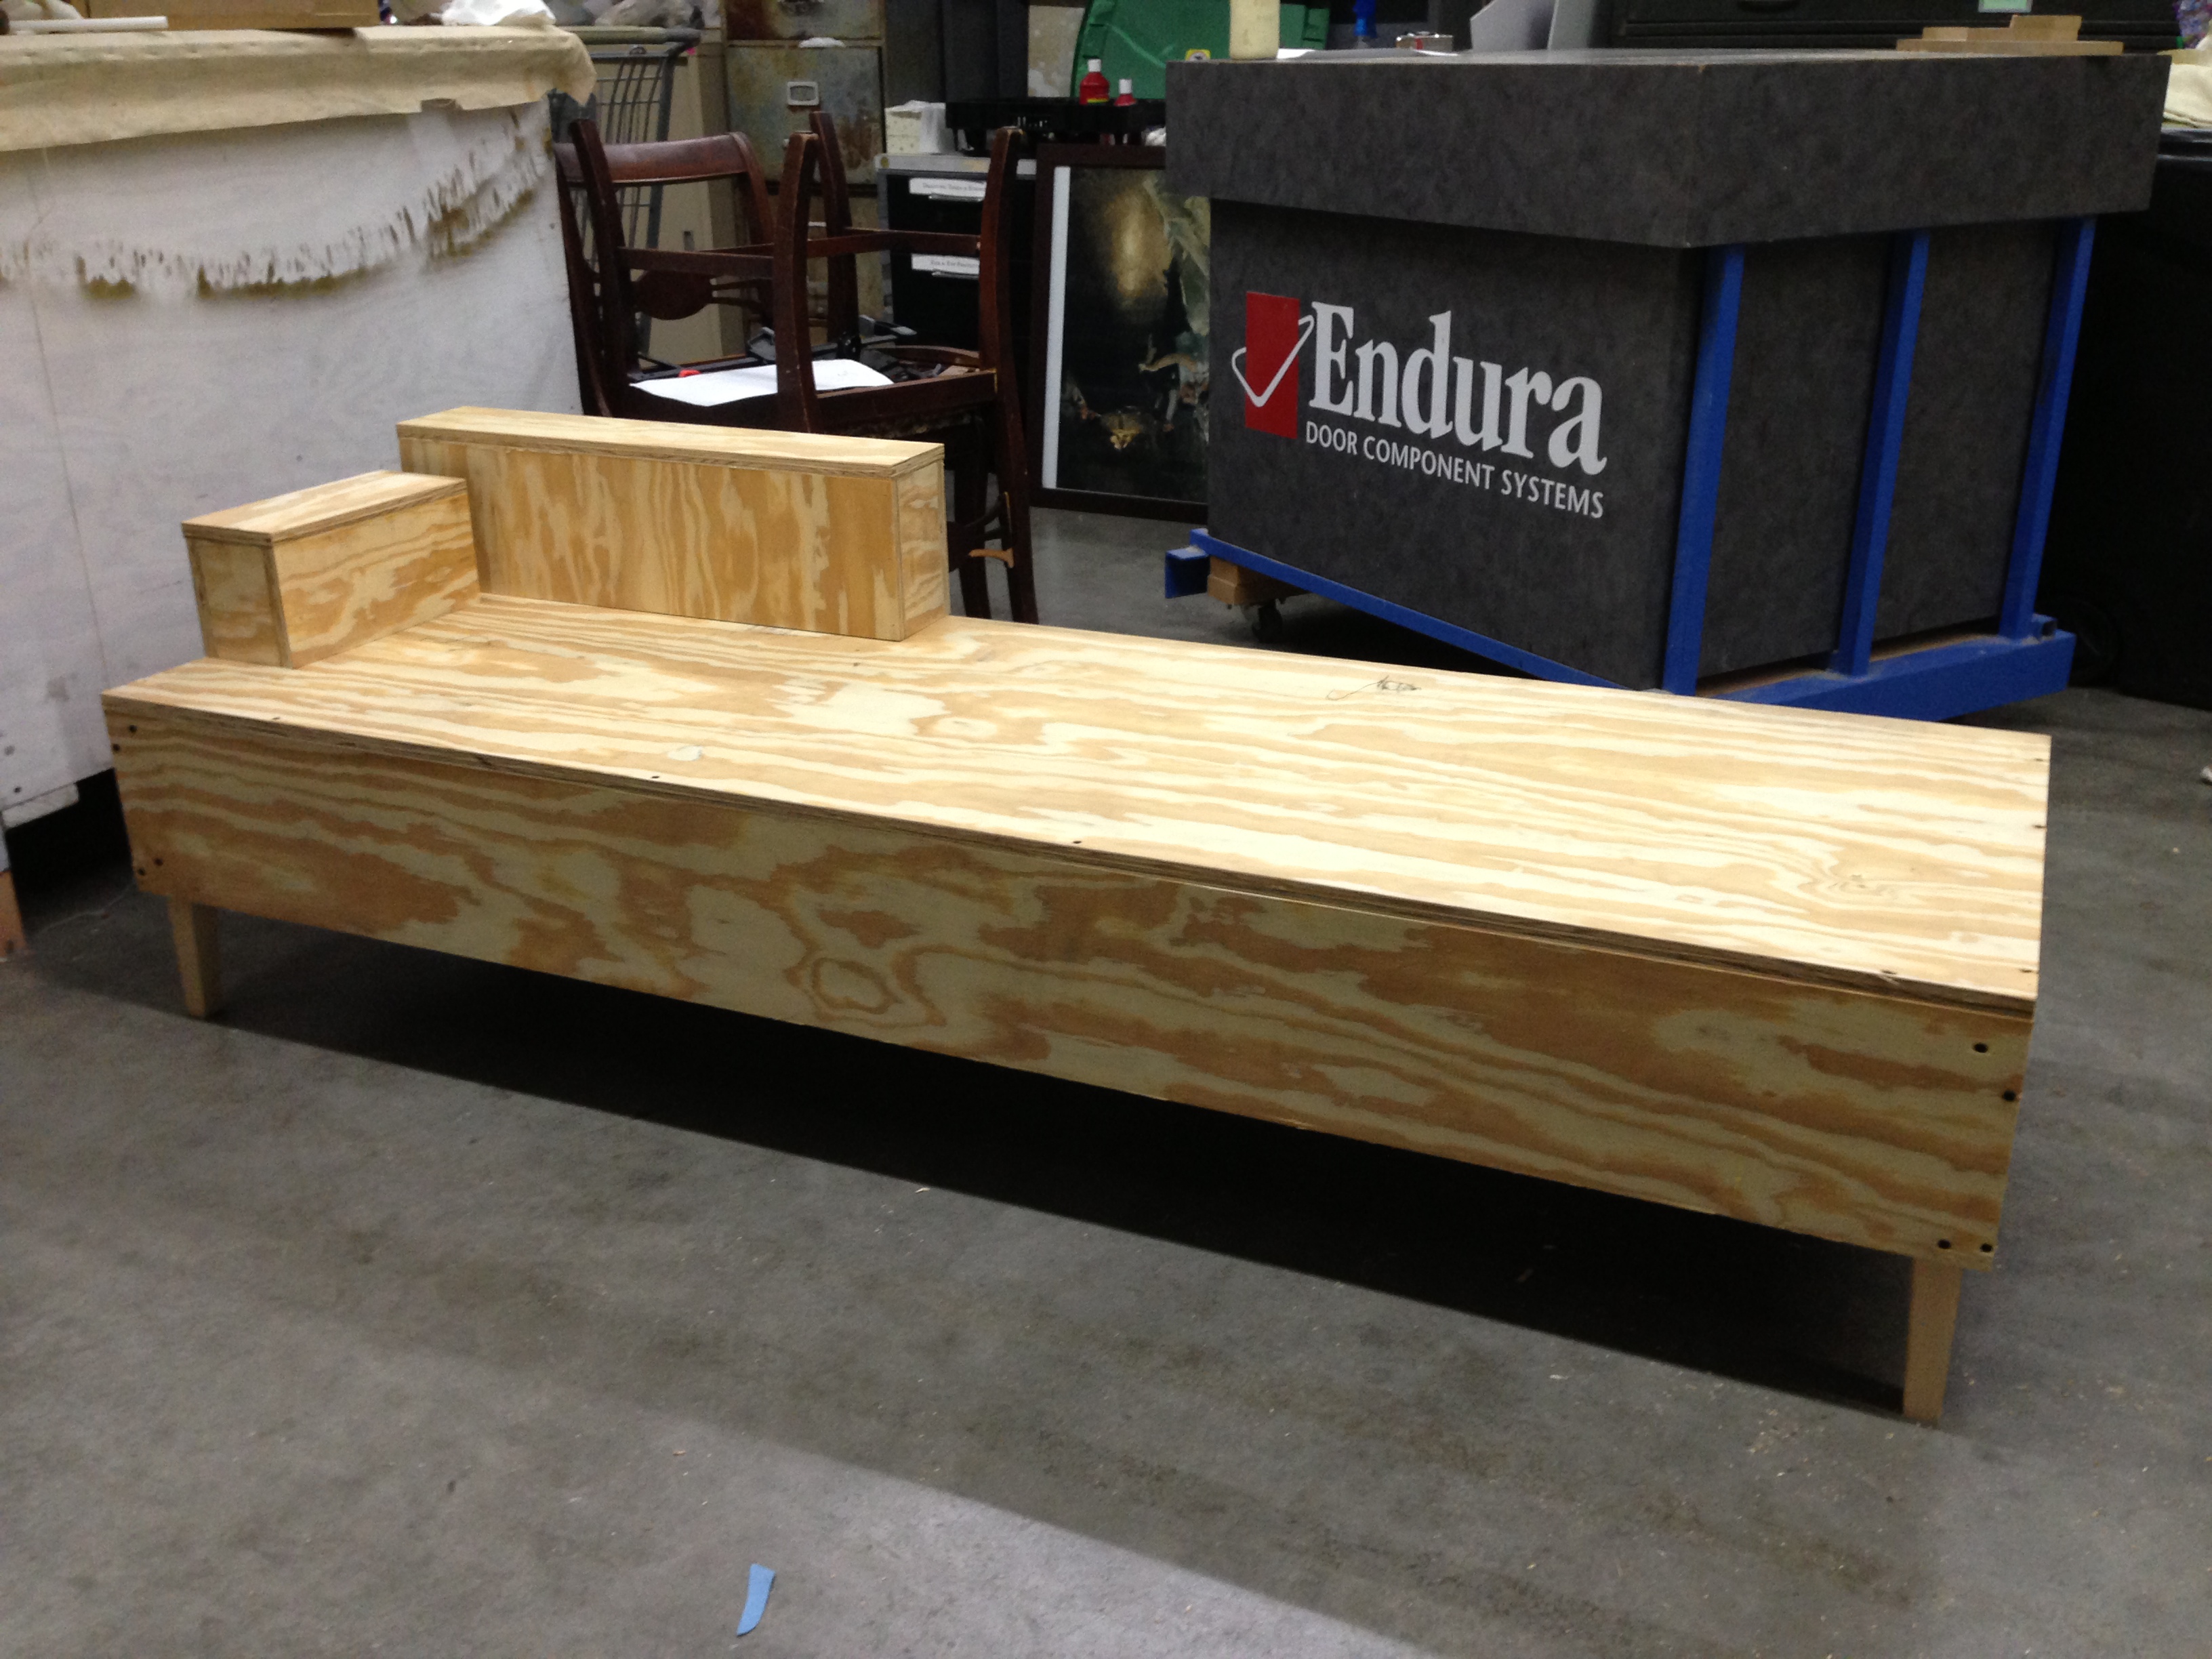
Settee structure
I started off by building the basic shape out of plywood, with wooden tapered legs. A lot of the challenge here was thinking forward to how I would upholster and attach all the parts. It’s easy to work yourself into a corner if you don’t plan ahead; you may end up covering a bolt with a piece of fabric, but you cannot attach the bolt until the fabric is on. It can be quite the brain-twister.
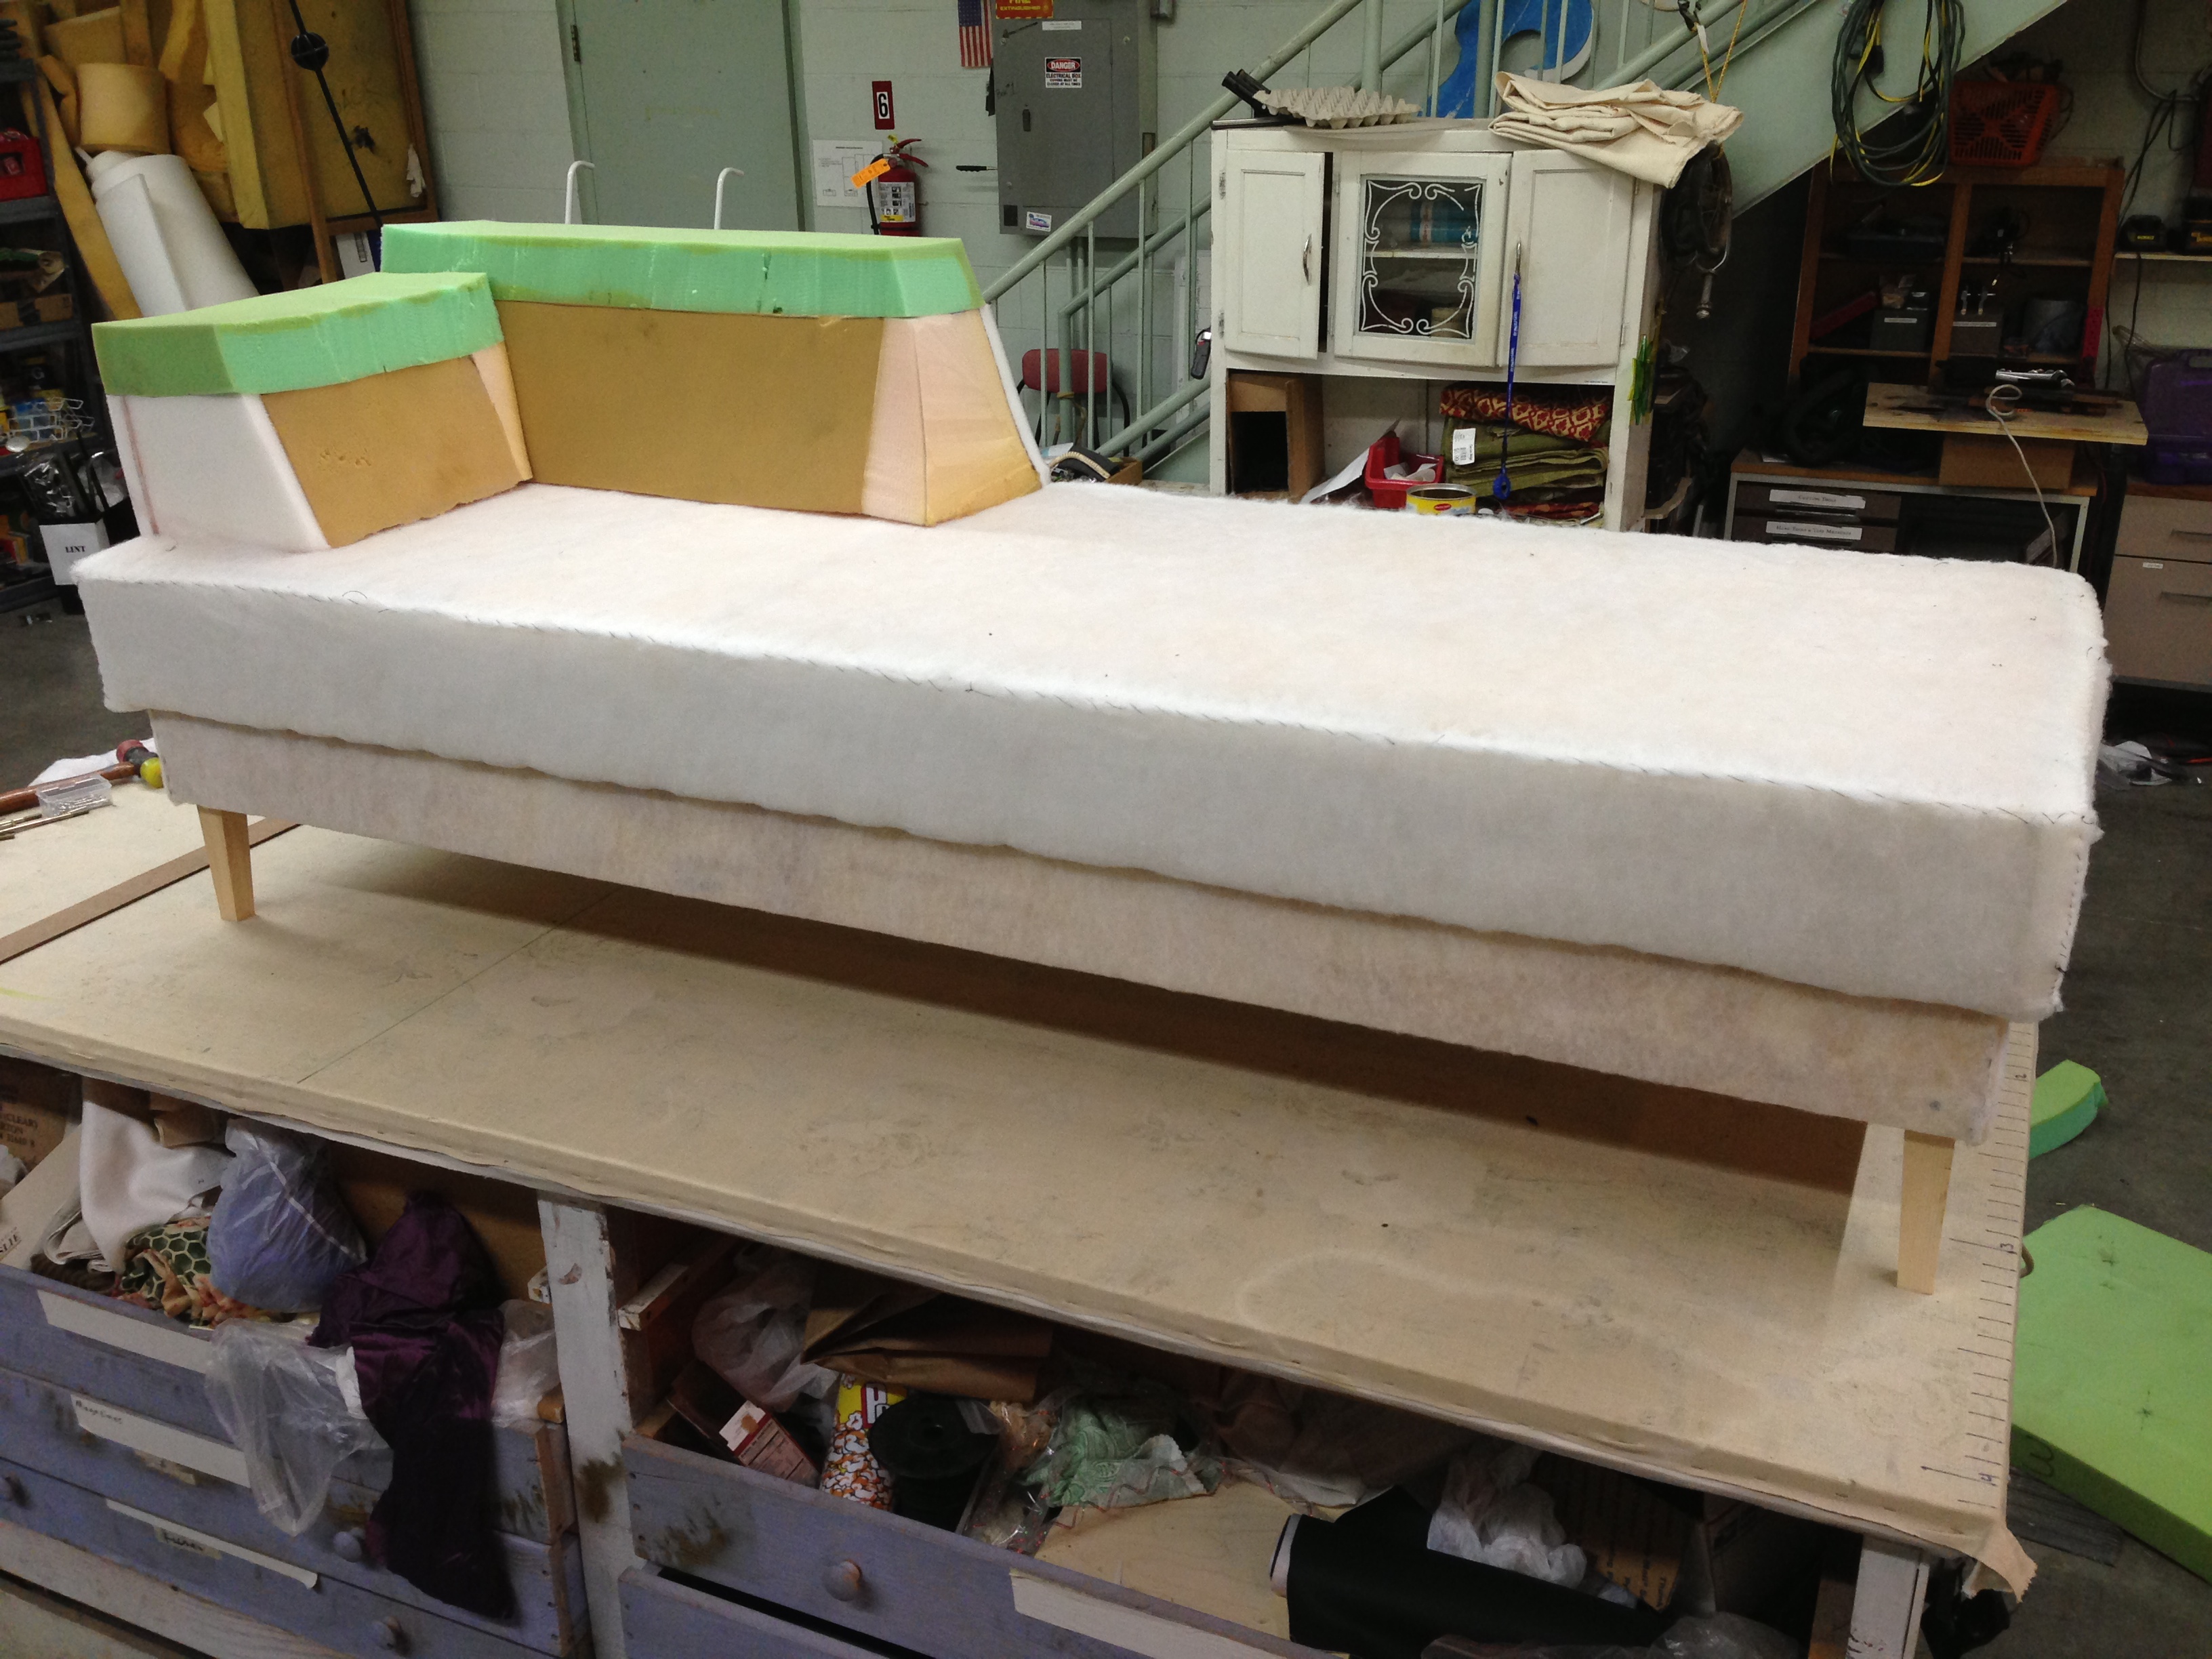
Padding and batting
I then began covering the plywood with upholstery foam, followed by batting. The cushioning was a lot more stiff than what you may typically find in a settee, since actors tend to sink into soft cushioning, making it harder to stand up quickly. I find myself reinforcing and stiffening a lot of upholstered furniture for this reason, so I just built this settee to be somewhat stiff from the get-go.
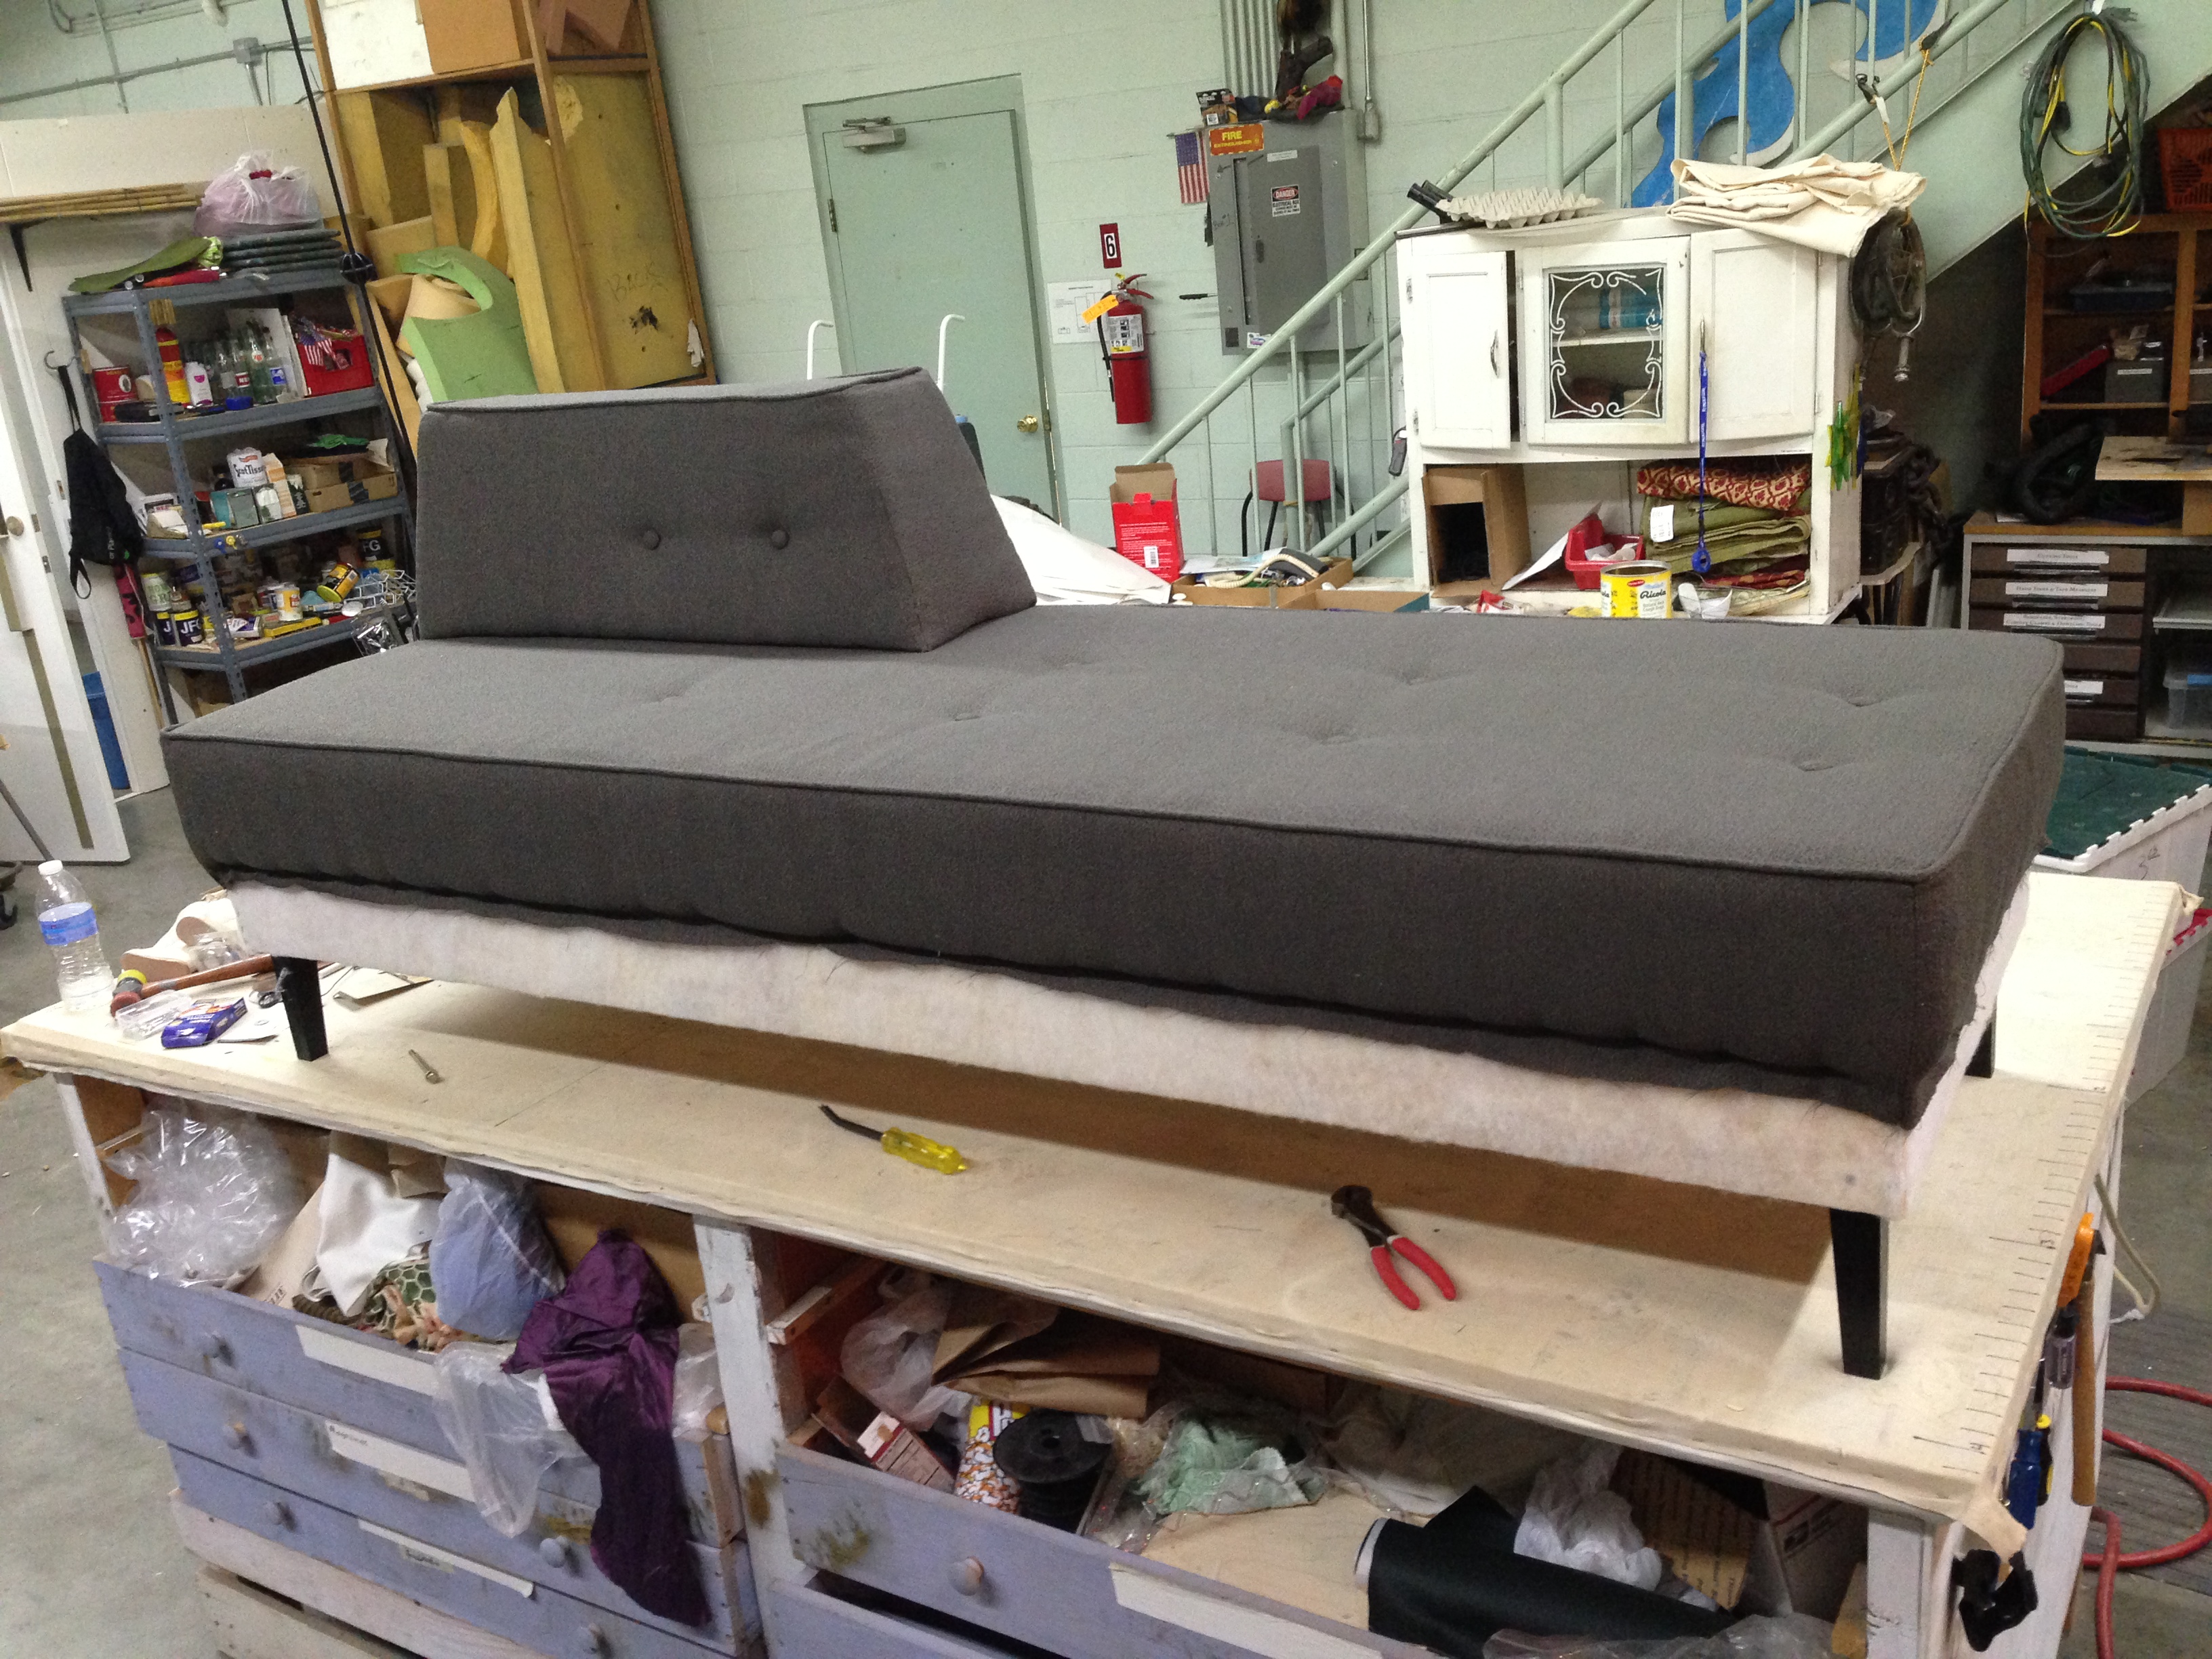
Fabric and piping
I was lucky to have the costume shop pitch in and help me with the fabric parts. Once I found a fabric the designer approved of, my intern cut all the pieces, and the costume shop made all the piping and stitched the pieces together. All I had to do was staple it on.
Button tufting
This particular settee had some buttons, so I got to try button tufting for the first time. It only had nine buttons laid out in a simple grid, so it was relatively easy to figure out. The cushions on top were attached by bolting through the settee into the plywood below. Again, that was only possible by planning it all out ahead.
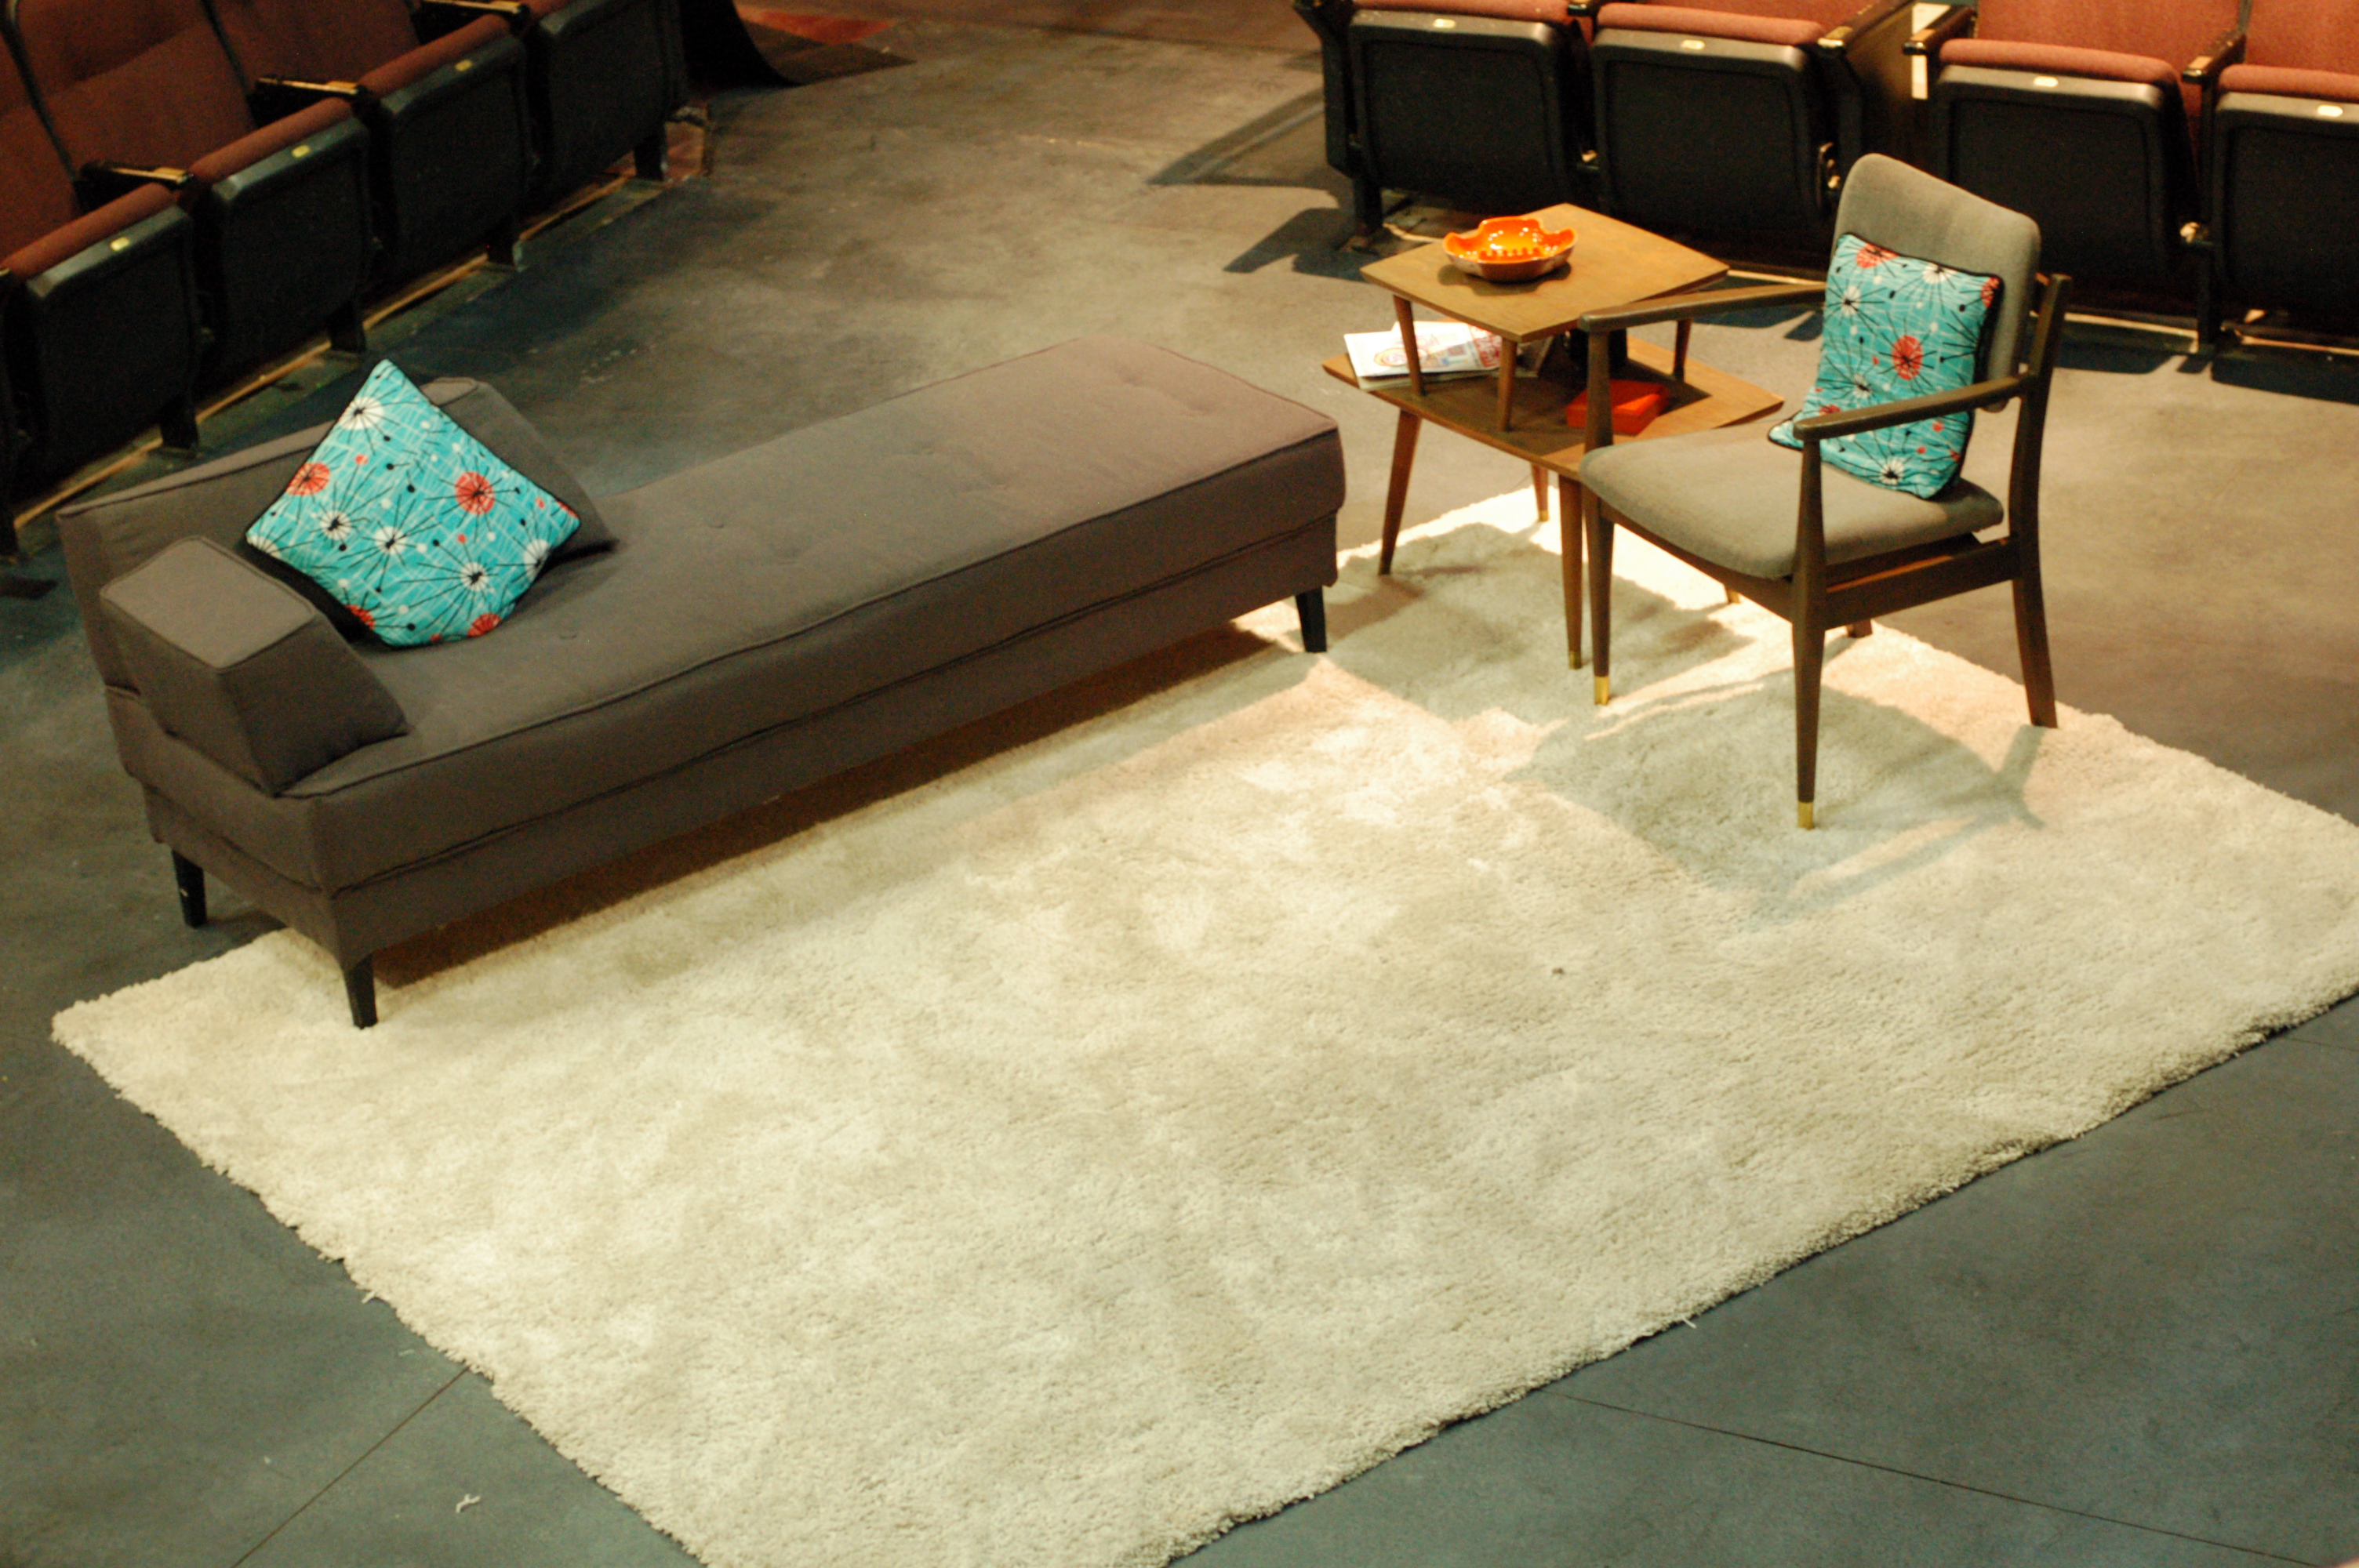
Settee on stage
So there is the final piece with all the fabric attached. It was very much a group project, with the other people at Triad chipping in, as well as my wife giving me a crash-course in upholstery as I built this. The result was a piece of furniture that helped give the set the right touch.
Making and finding props for theatre, film, and hobbies