Category Archives: How-to

Guides to building props or using certain techniques and materials

Building a Bar for “Anna Christie”

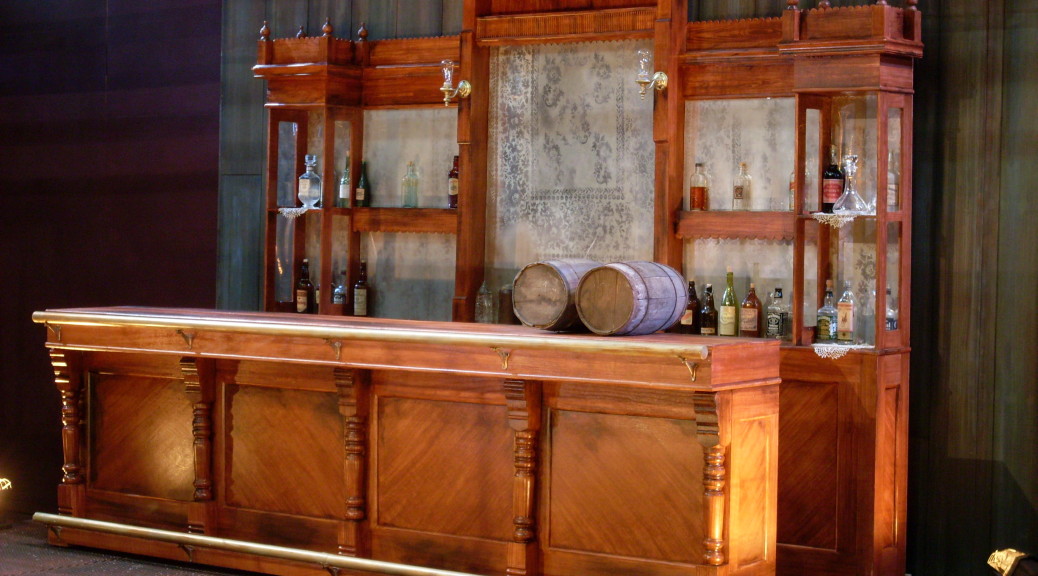
The first scene of Anna Christie takes place in a small waterfront bar in the New York City harbor around 1910. For our production at Triad Stage, the design had a large back bar and front bar which could appear for that scene and strike backstage when it ended. The scenic designer drafted the front bar and the back bar for the props shop to build, and away we went. Standing nine and a half feet tall, at almost twelve feet long, the back bar really pushed the limits of the definition of a “prop”.

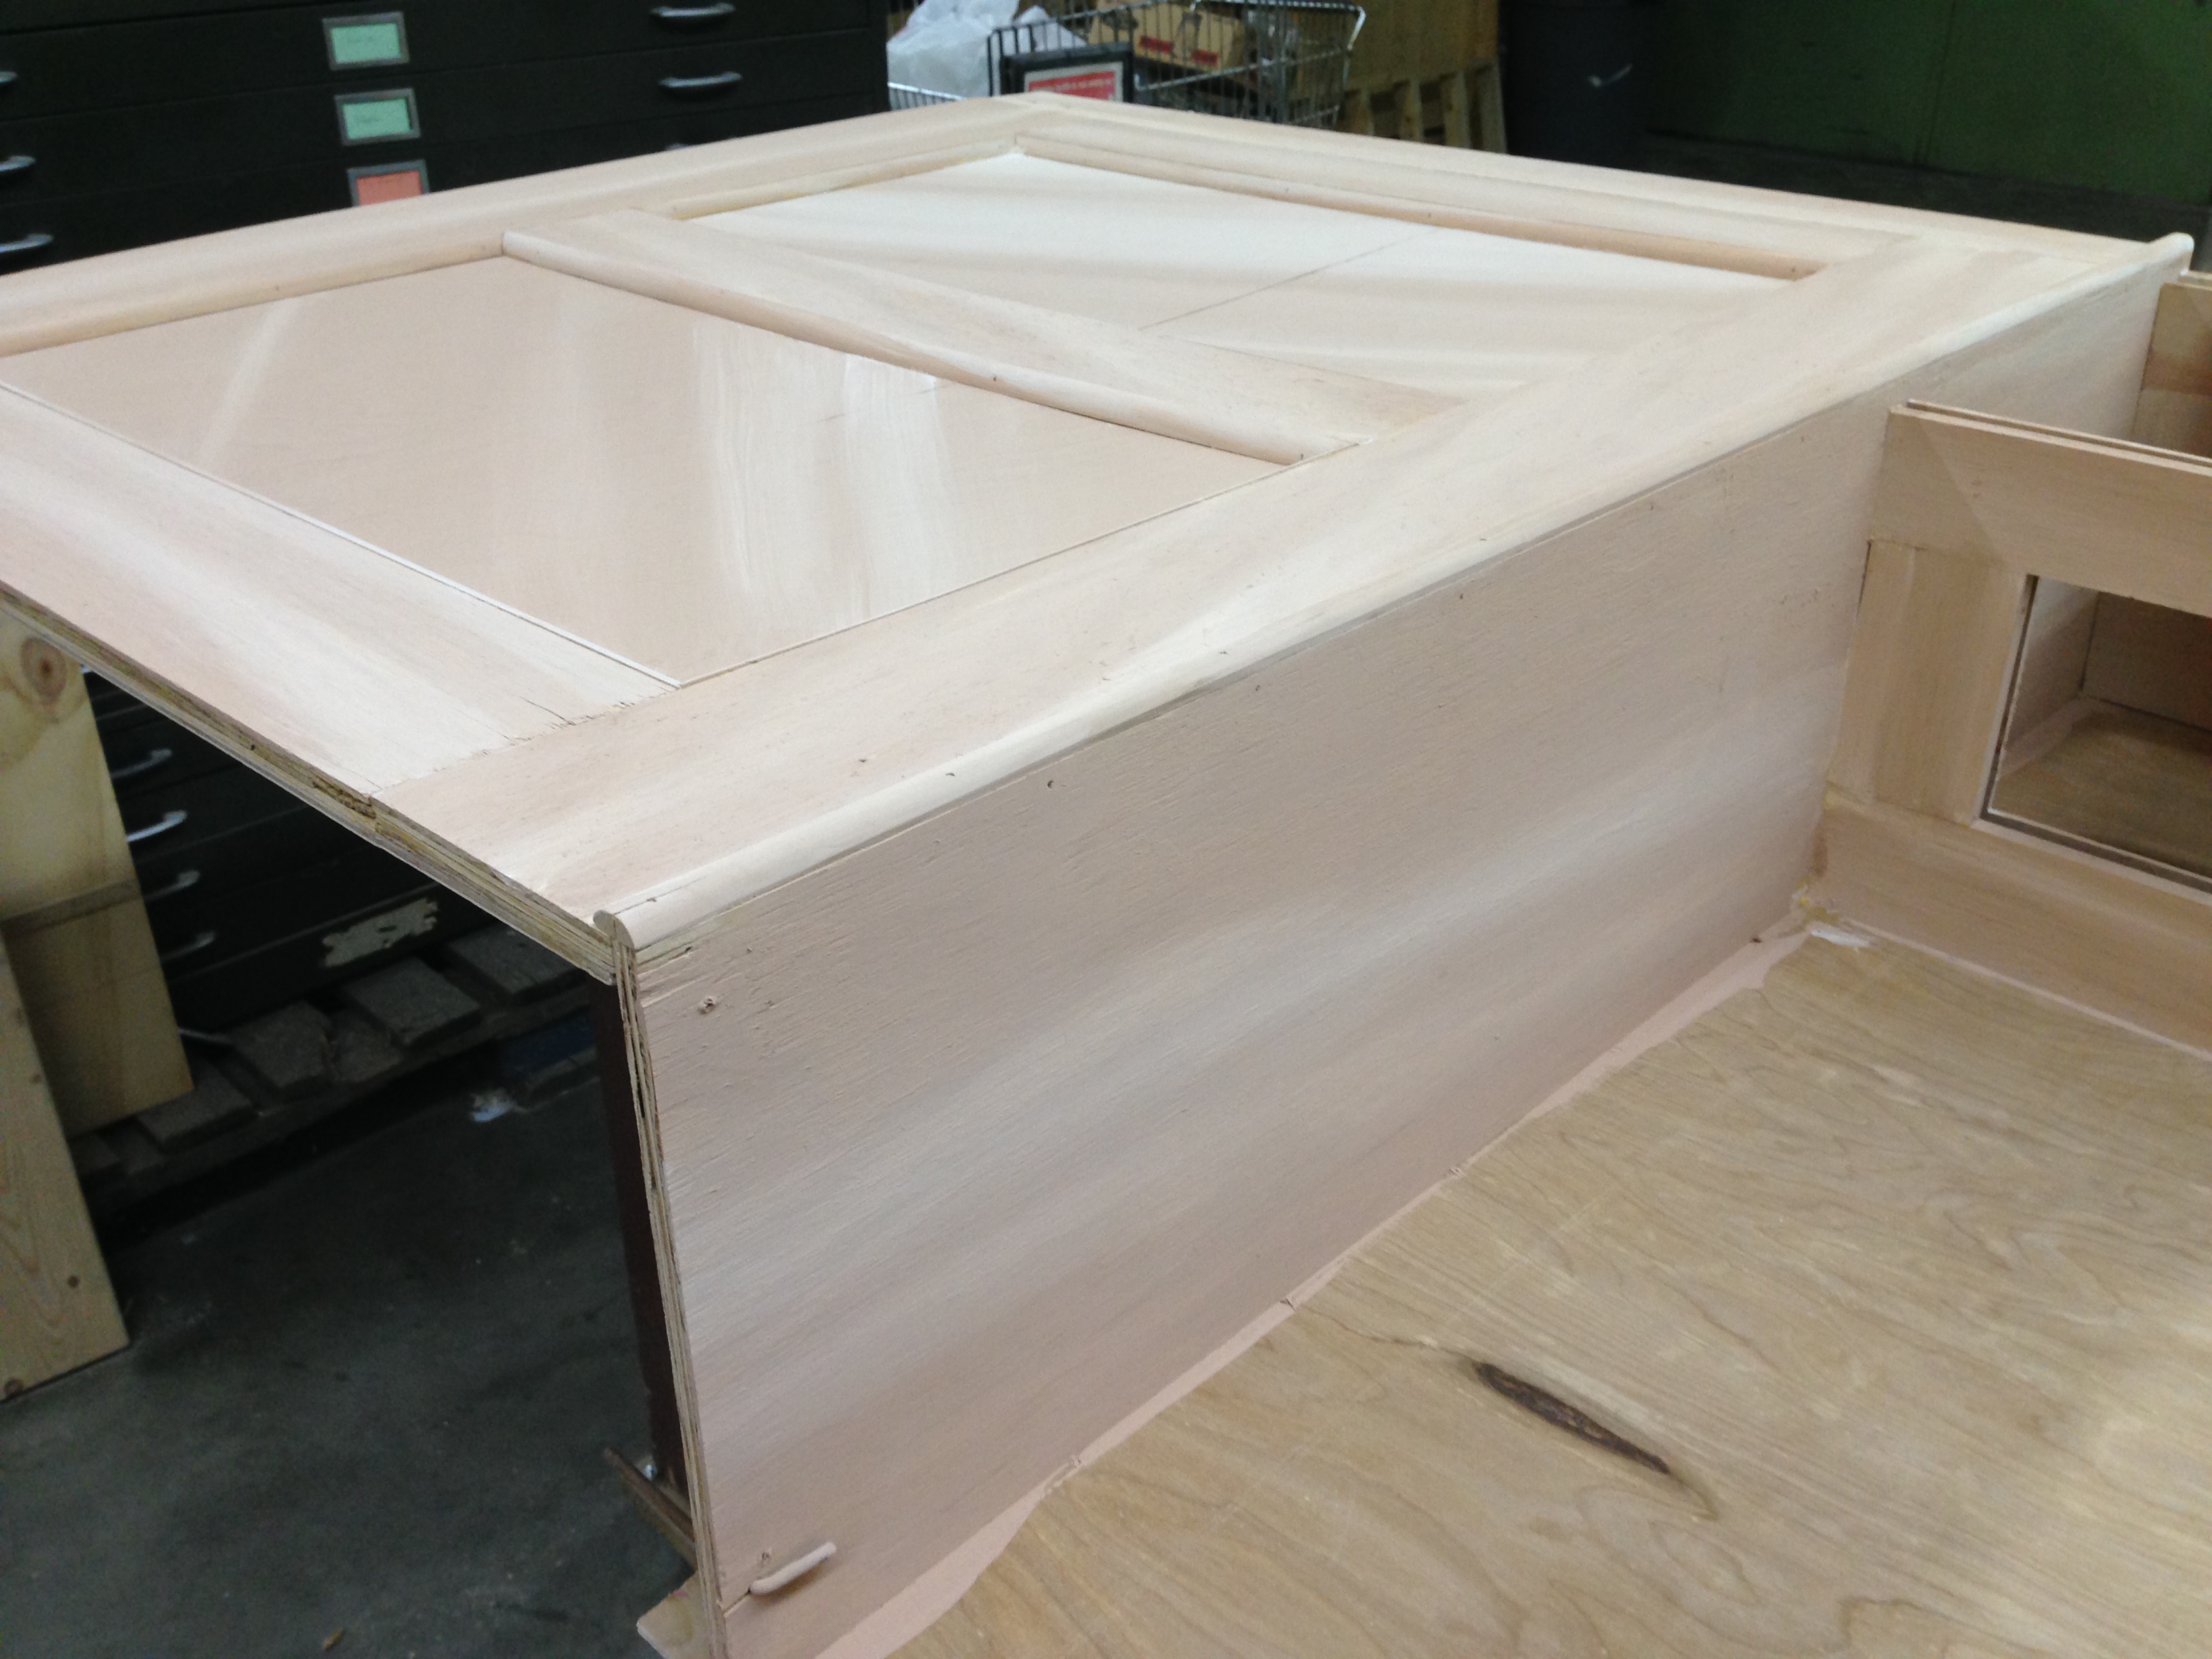
The back bar was built mostly out of lauan with half-inch plywood framing pieces to make it as light as possible, since it would need to be pushed on and off stage a vista by three crew members.

Beginning construction

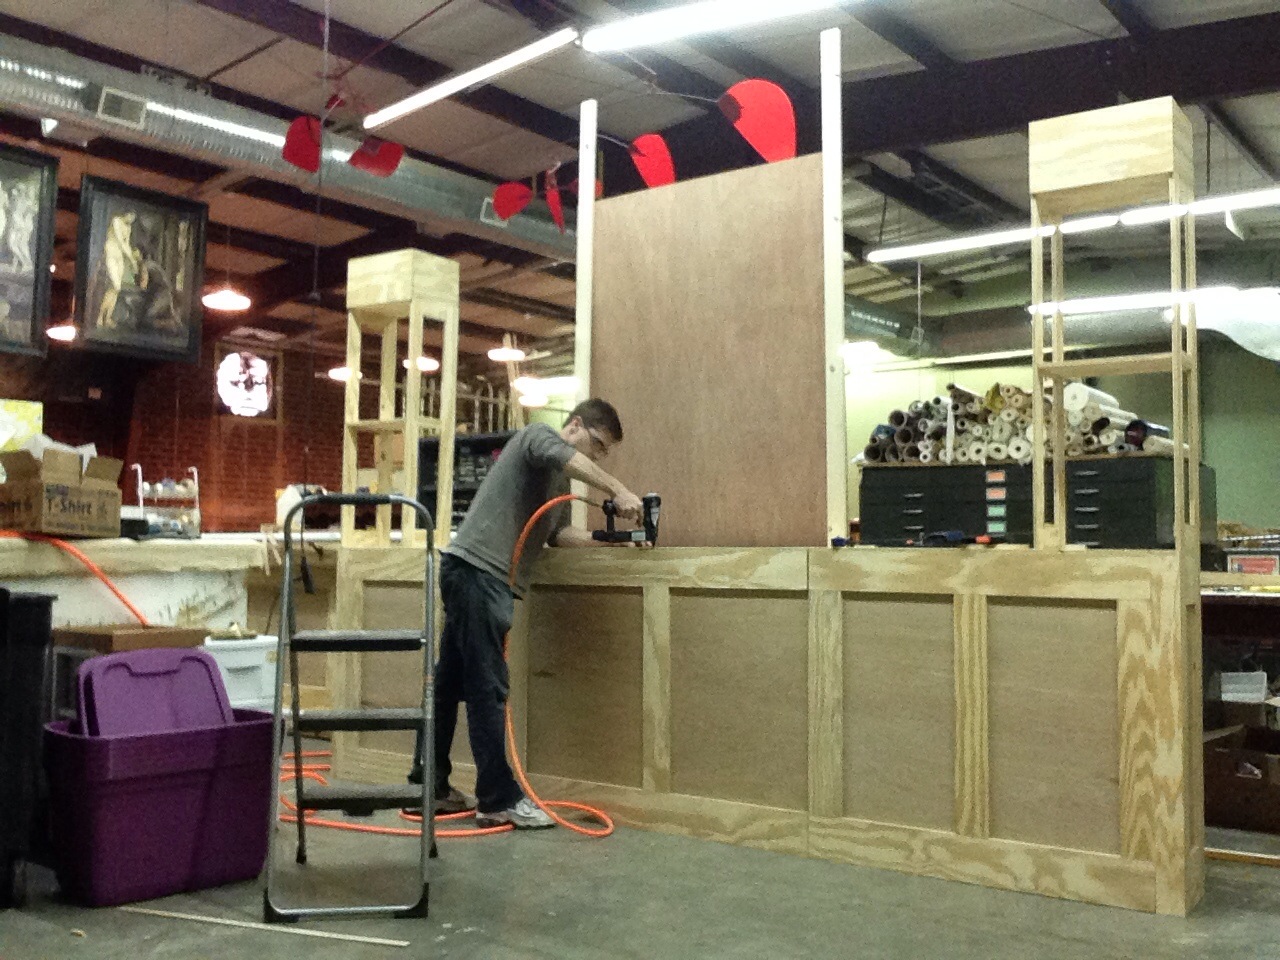
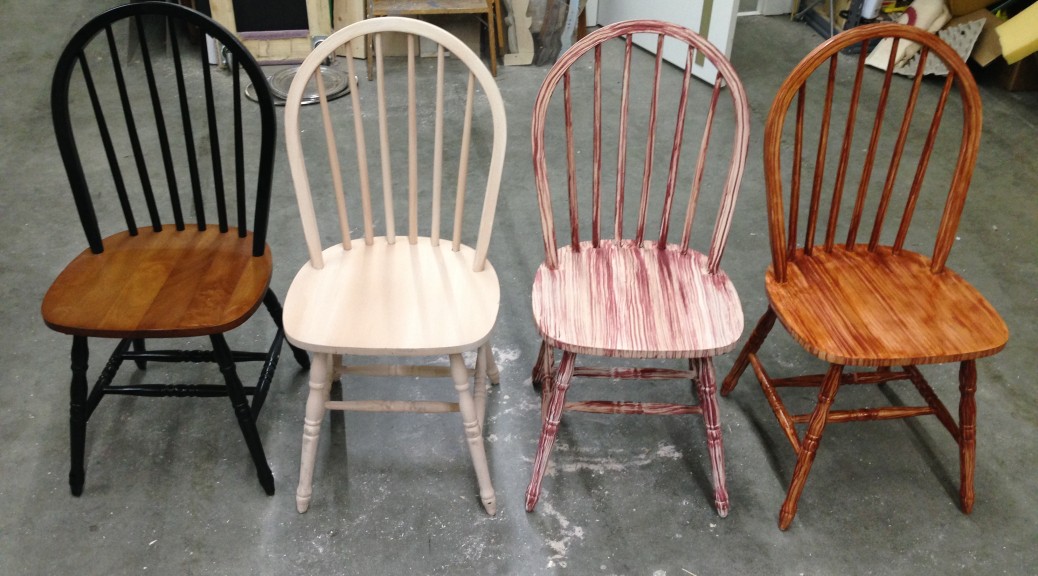
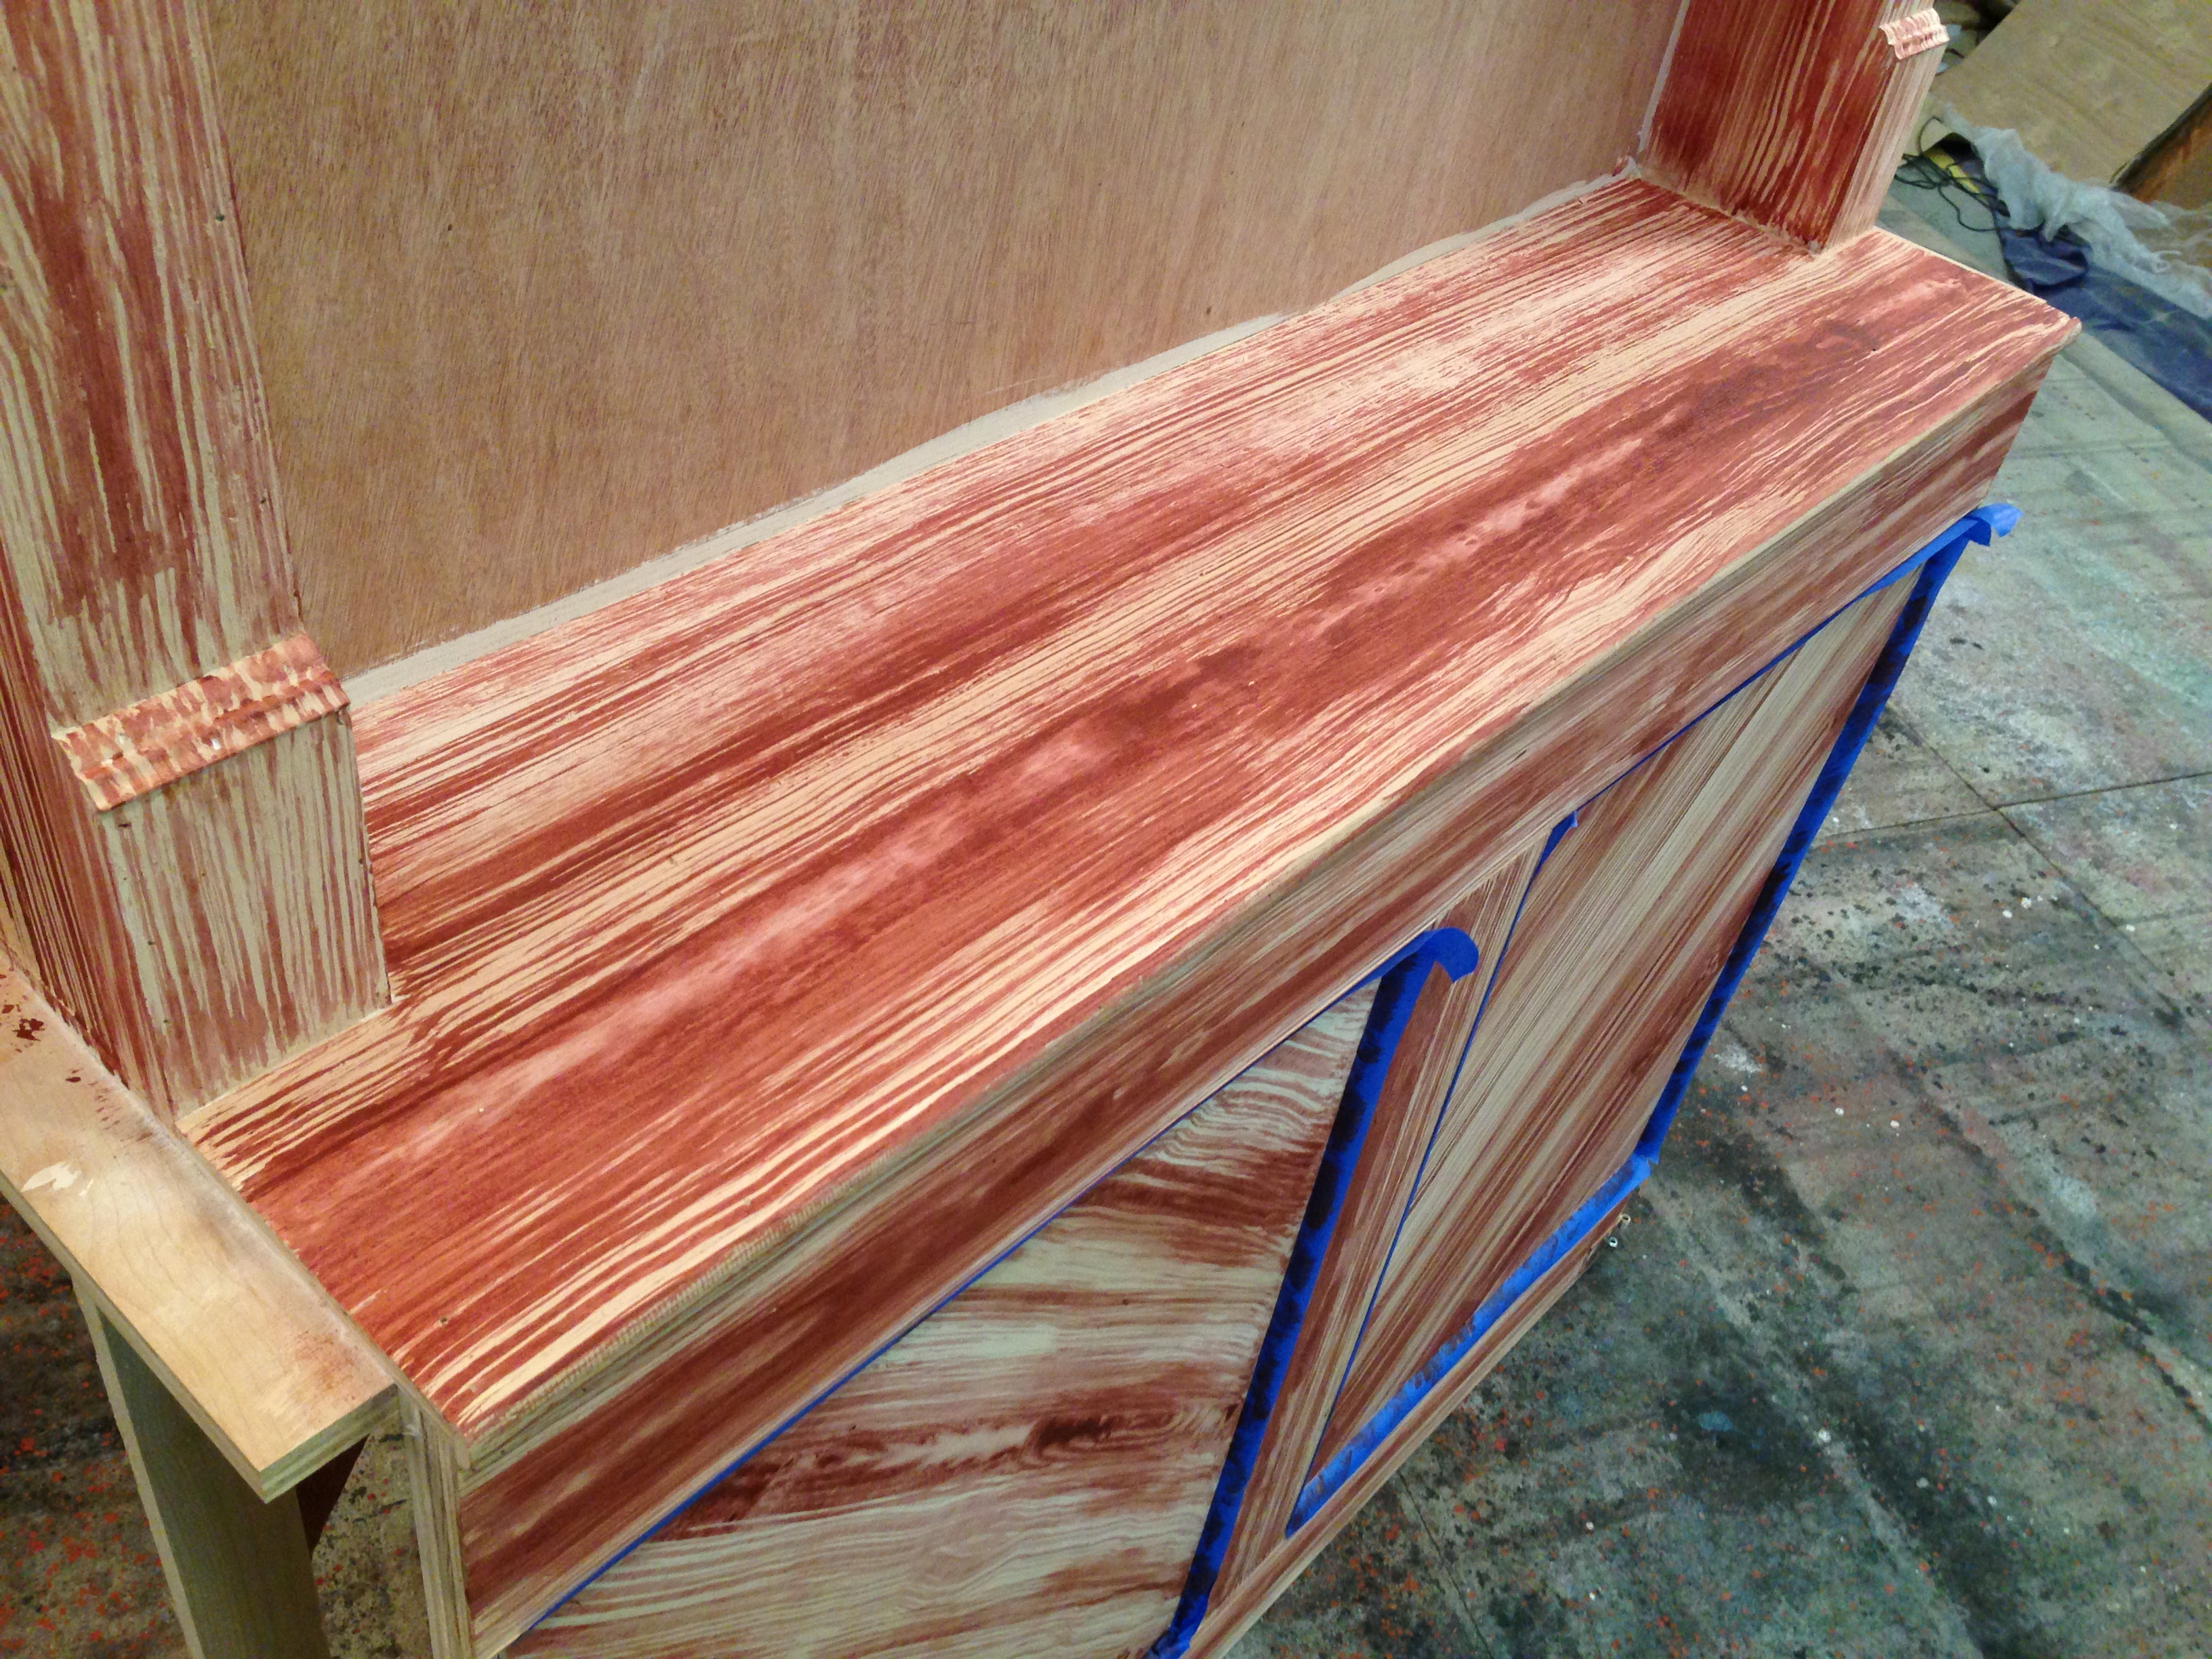
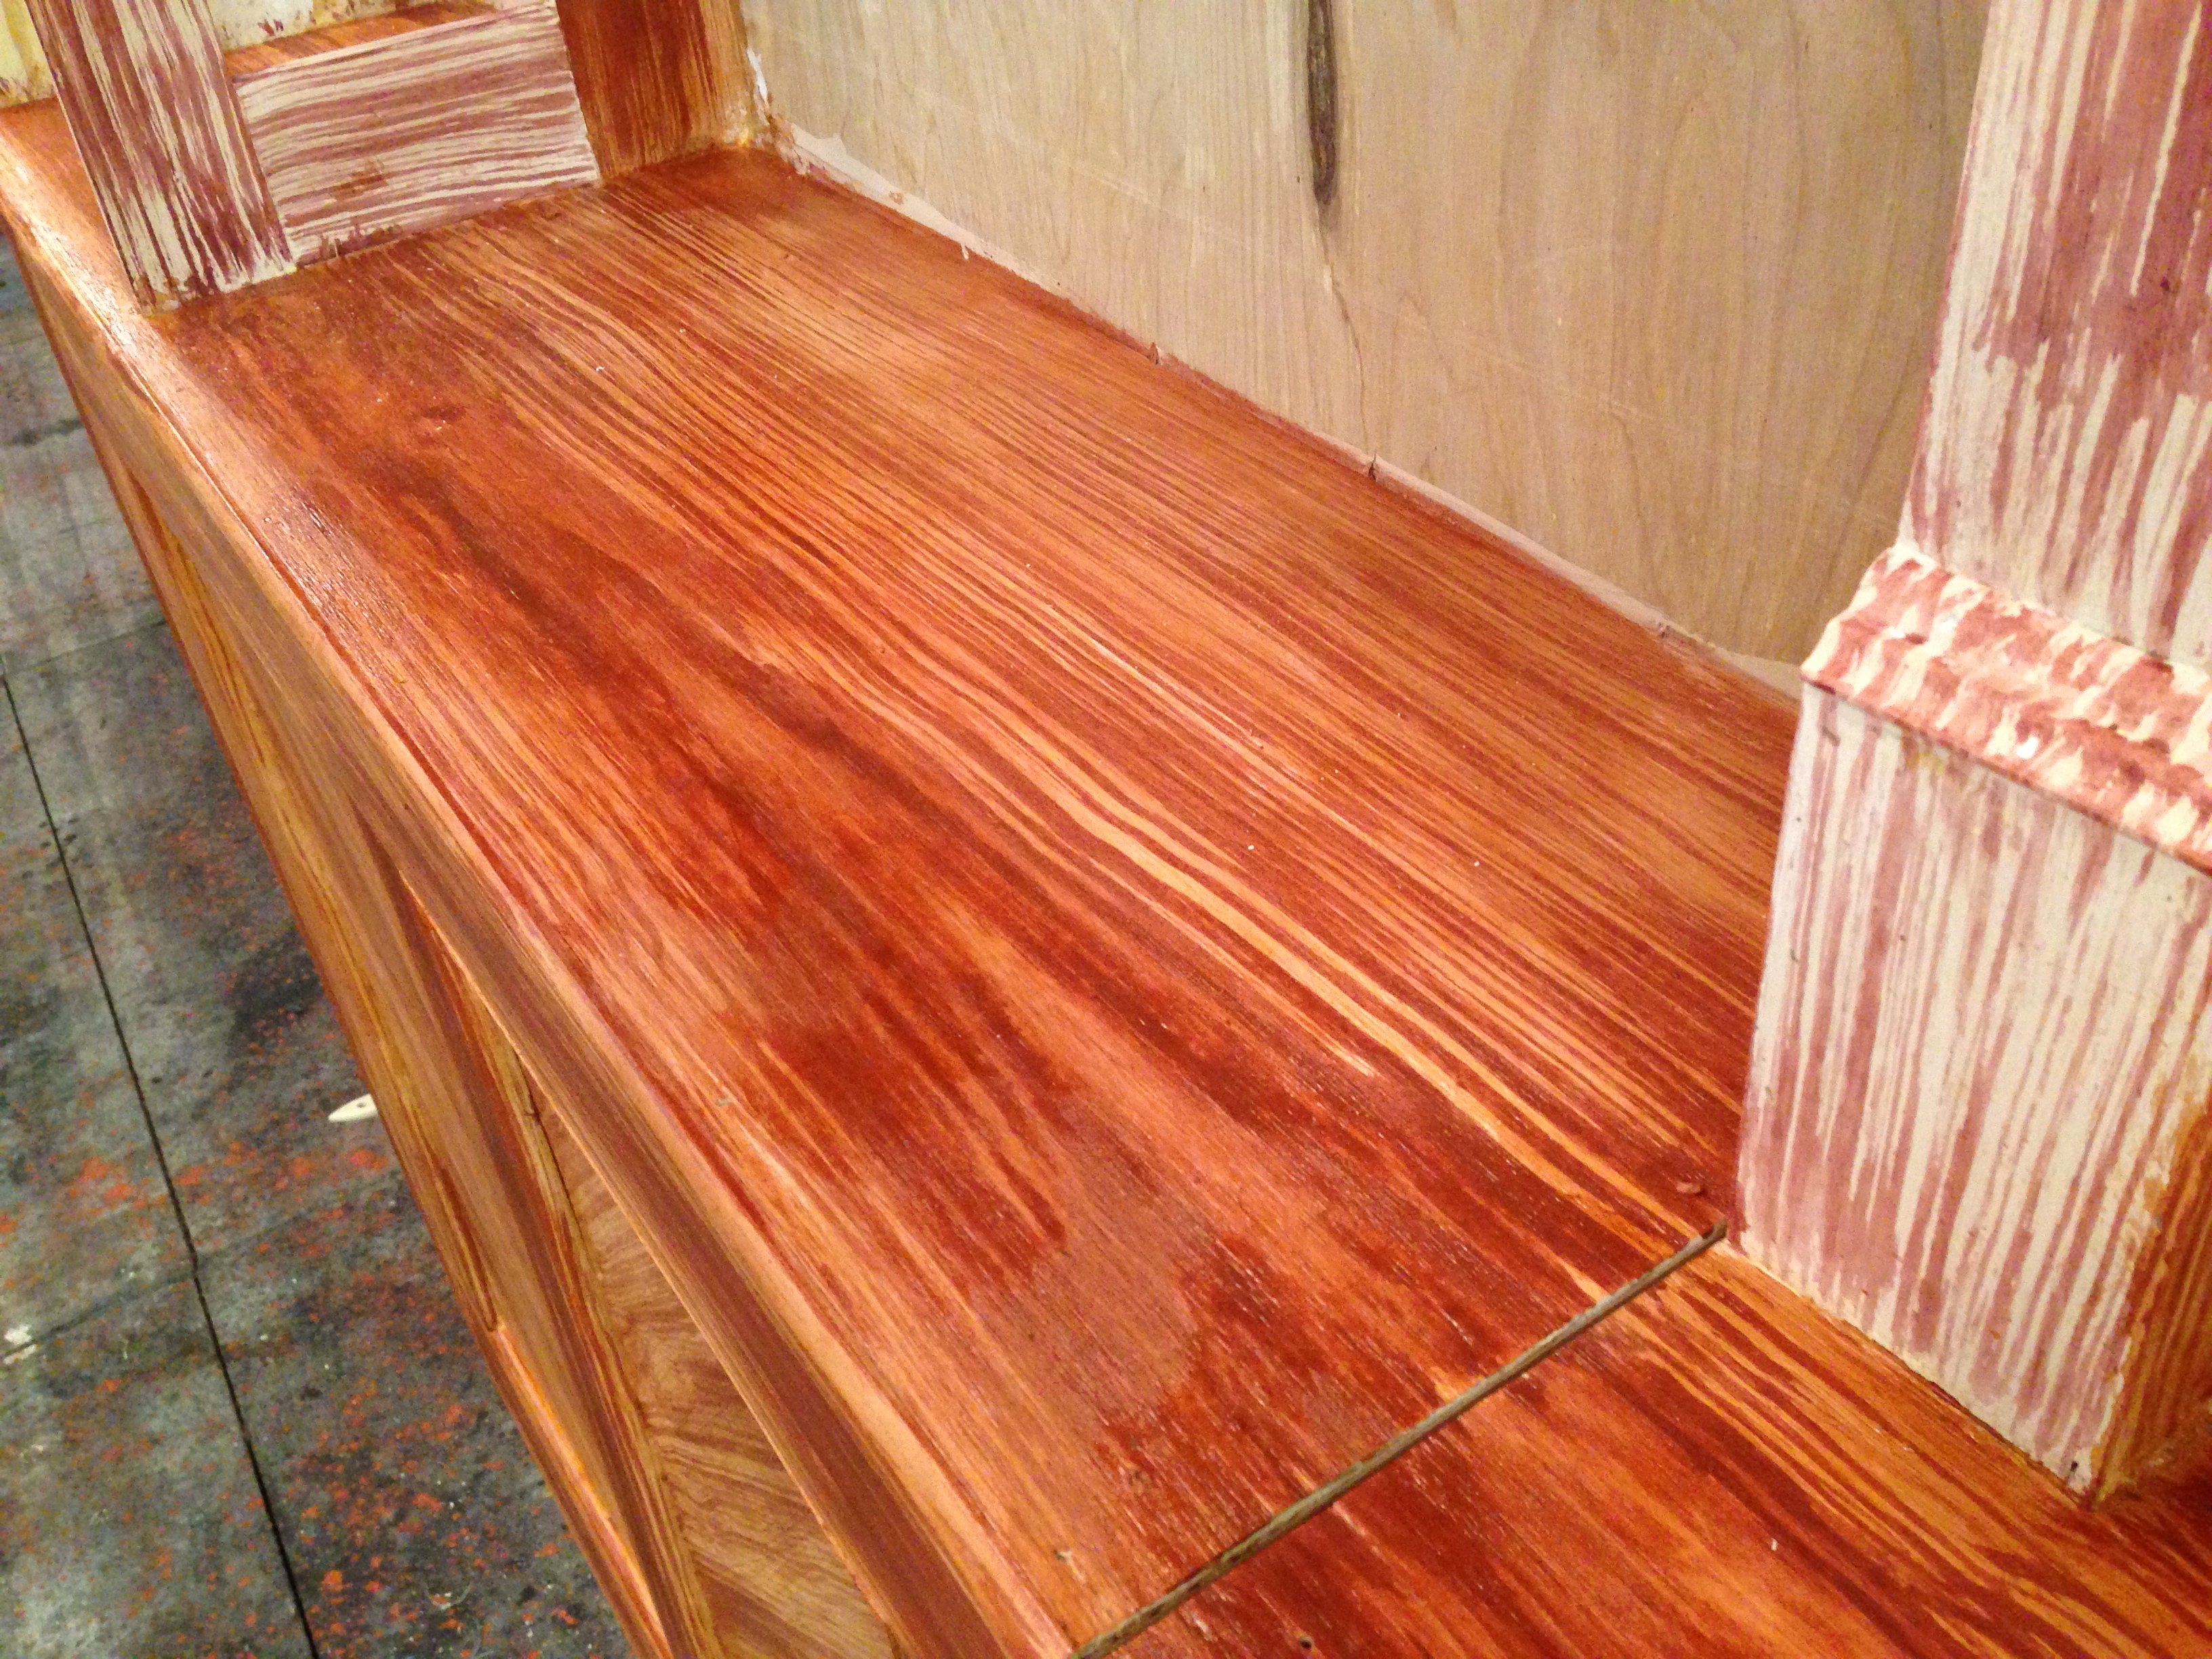
It was constructed in three sections to make transportation to the theatre possible. You can see two of the sections below, showing where the piece broke apart. You can also see the beginnings of the wood grain paint treatment which I wrote about last week.

Two sections
Two sections

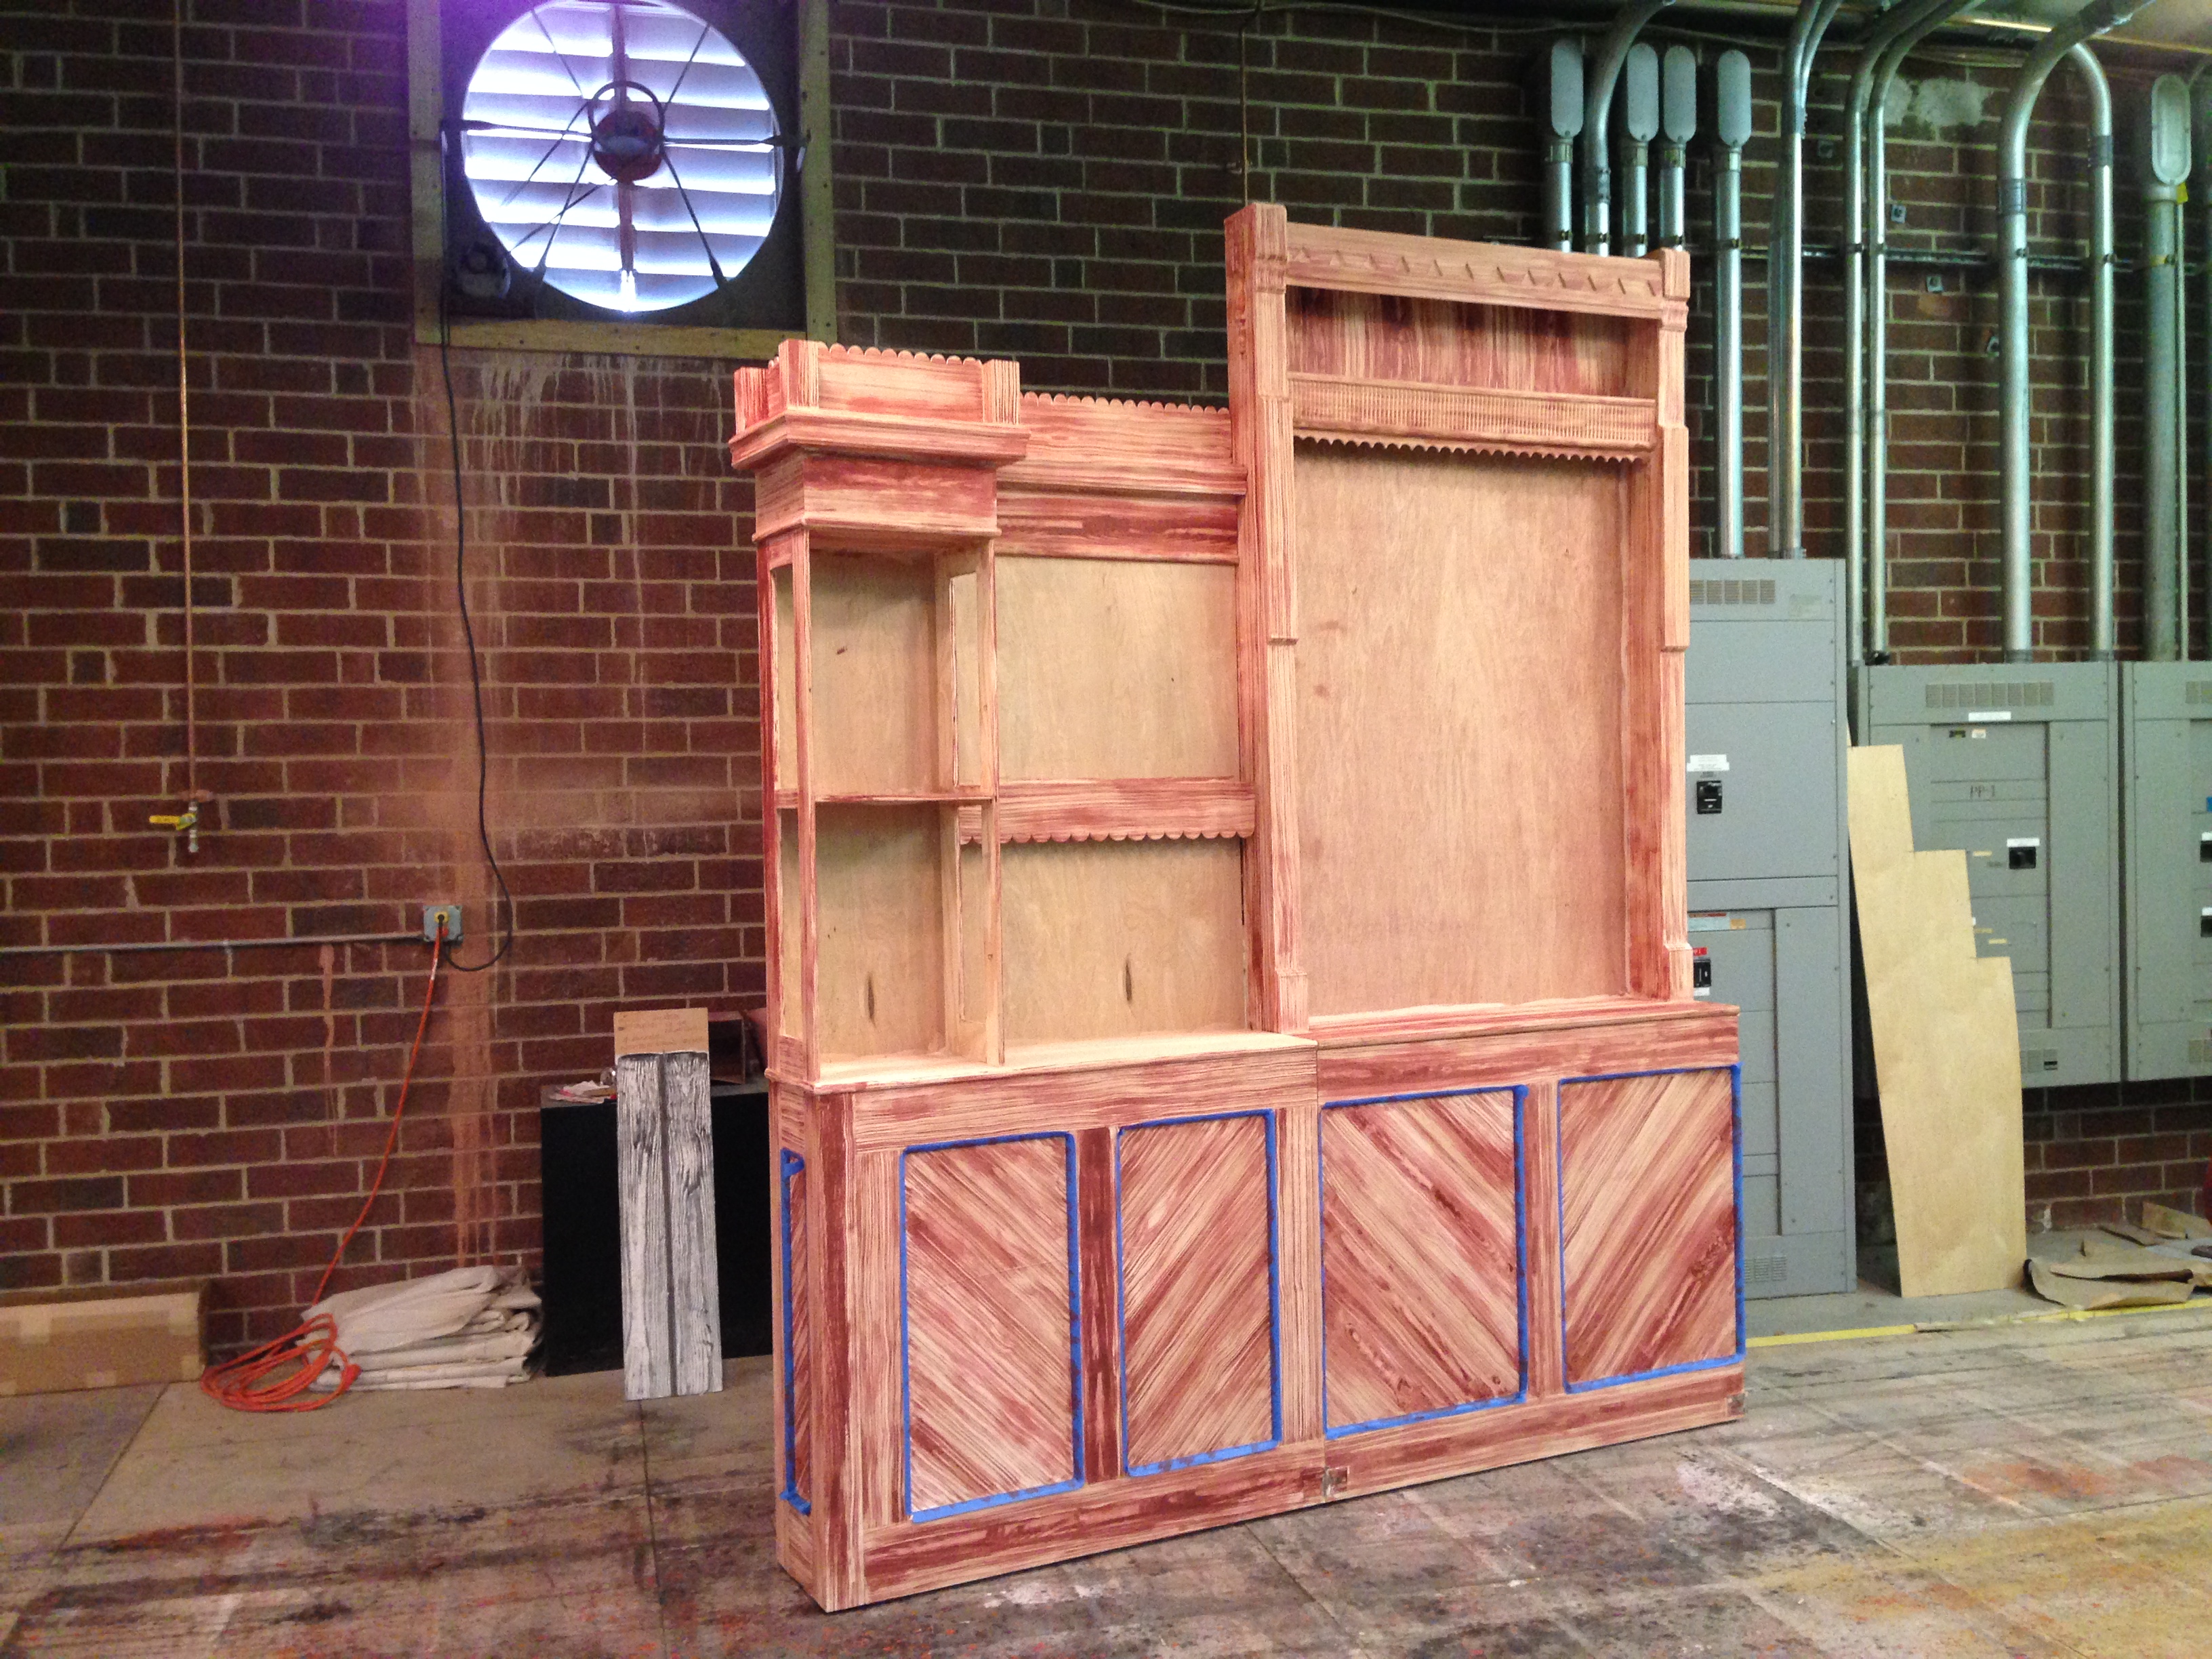
Most of the vertical surfaces on the top section of this piece were meant to be antique frosted mirrors. I used some silver Mylar as the mirror, laid a section of lace on top, and spray painted through it. This left a lace-like design on the Mylar, and after a few more coats of spray frosting over the whole thing, it looked just like a mirror.

Making the mirror
Making the mirror

The unit was originally on wheels, but when it got to the theatre, the noise it made while moving was deafening. The stage floor consisted entirely of expanded steel panels. We discovered that plastic furniture gliders actually made moving the unit completely silent and fairly effortless. They also ensured the unit remained stationary when no one was touching it.

Back bar
Back bar

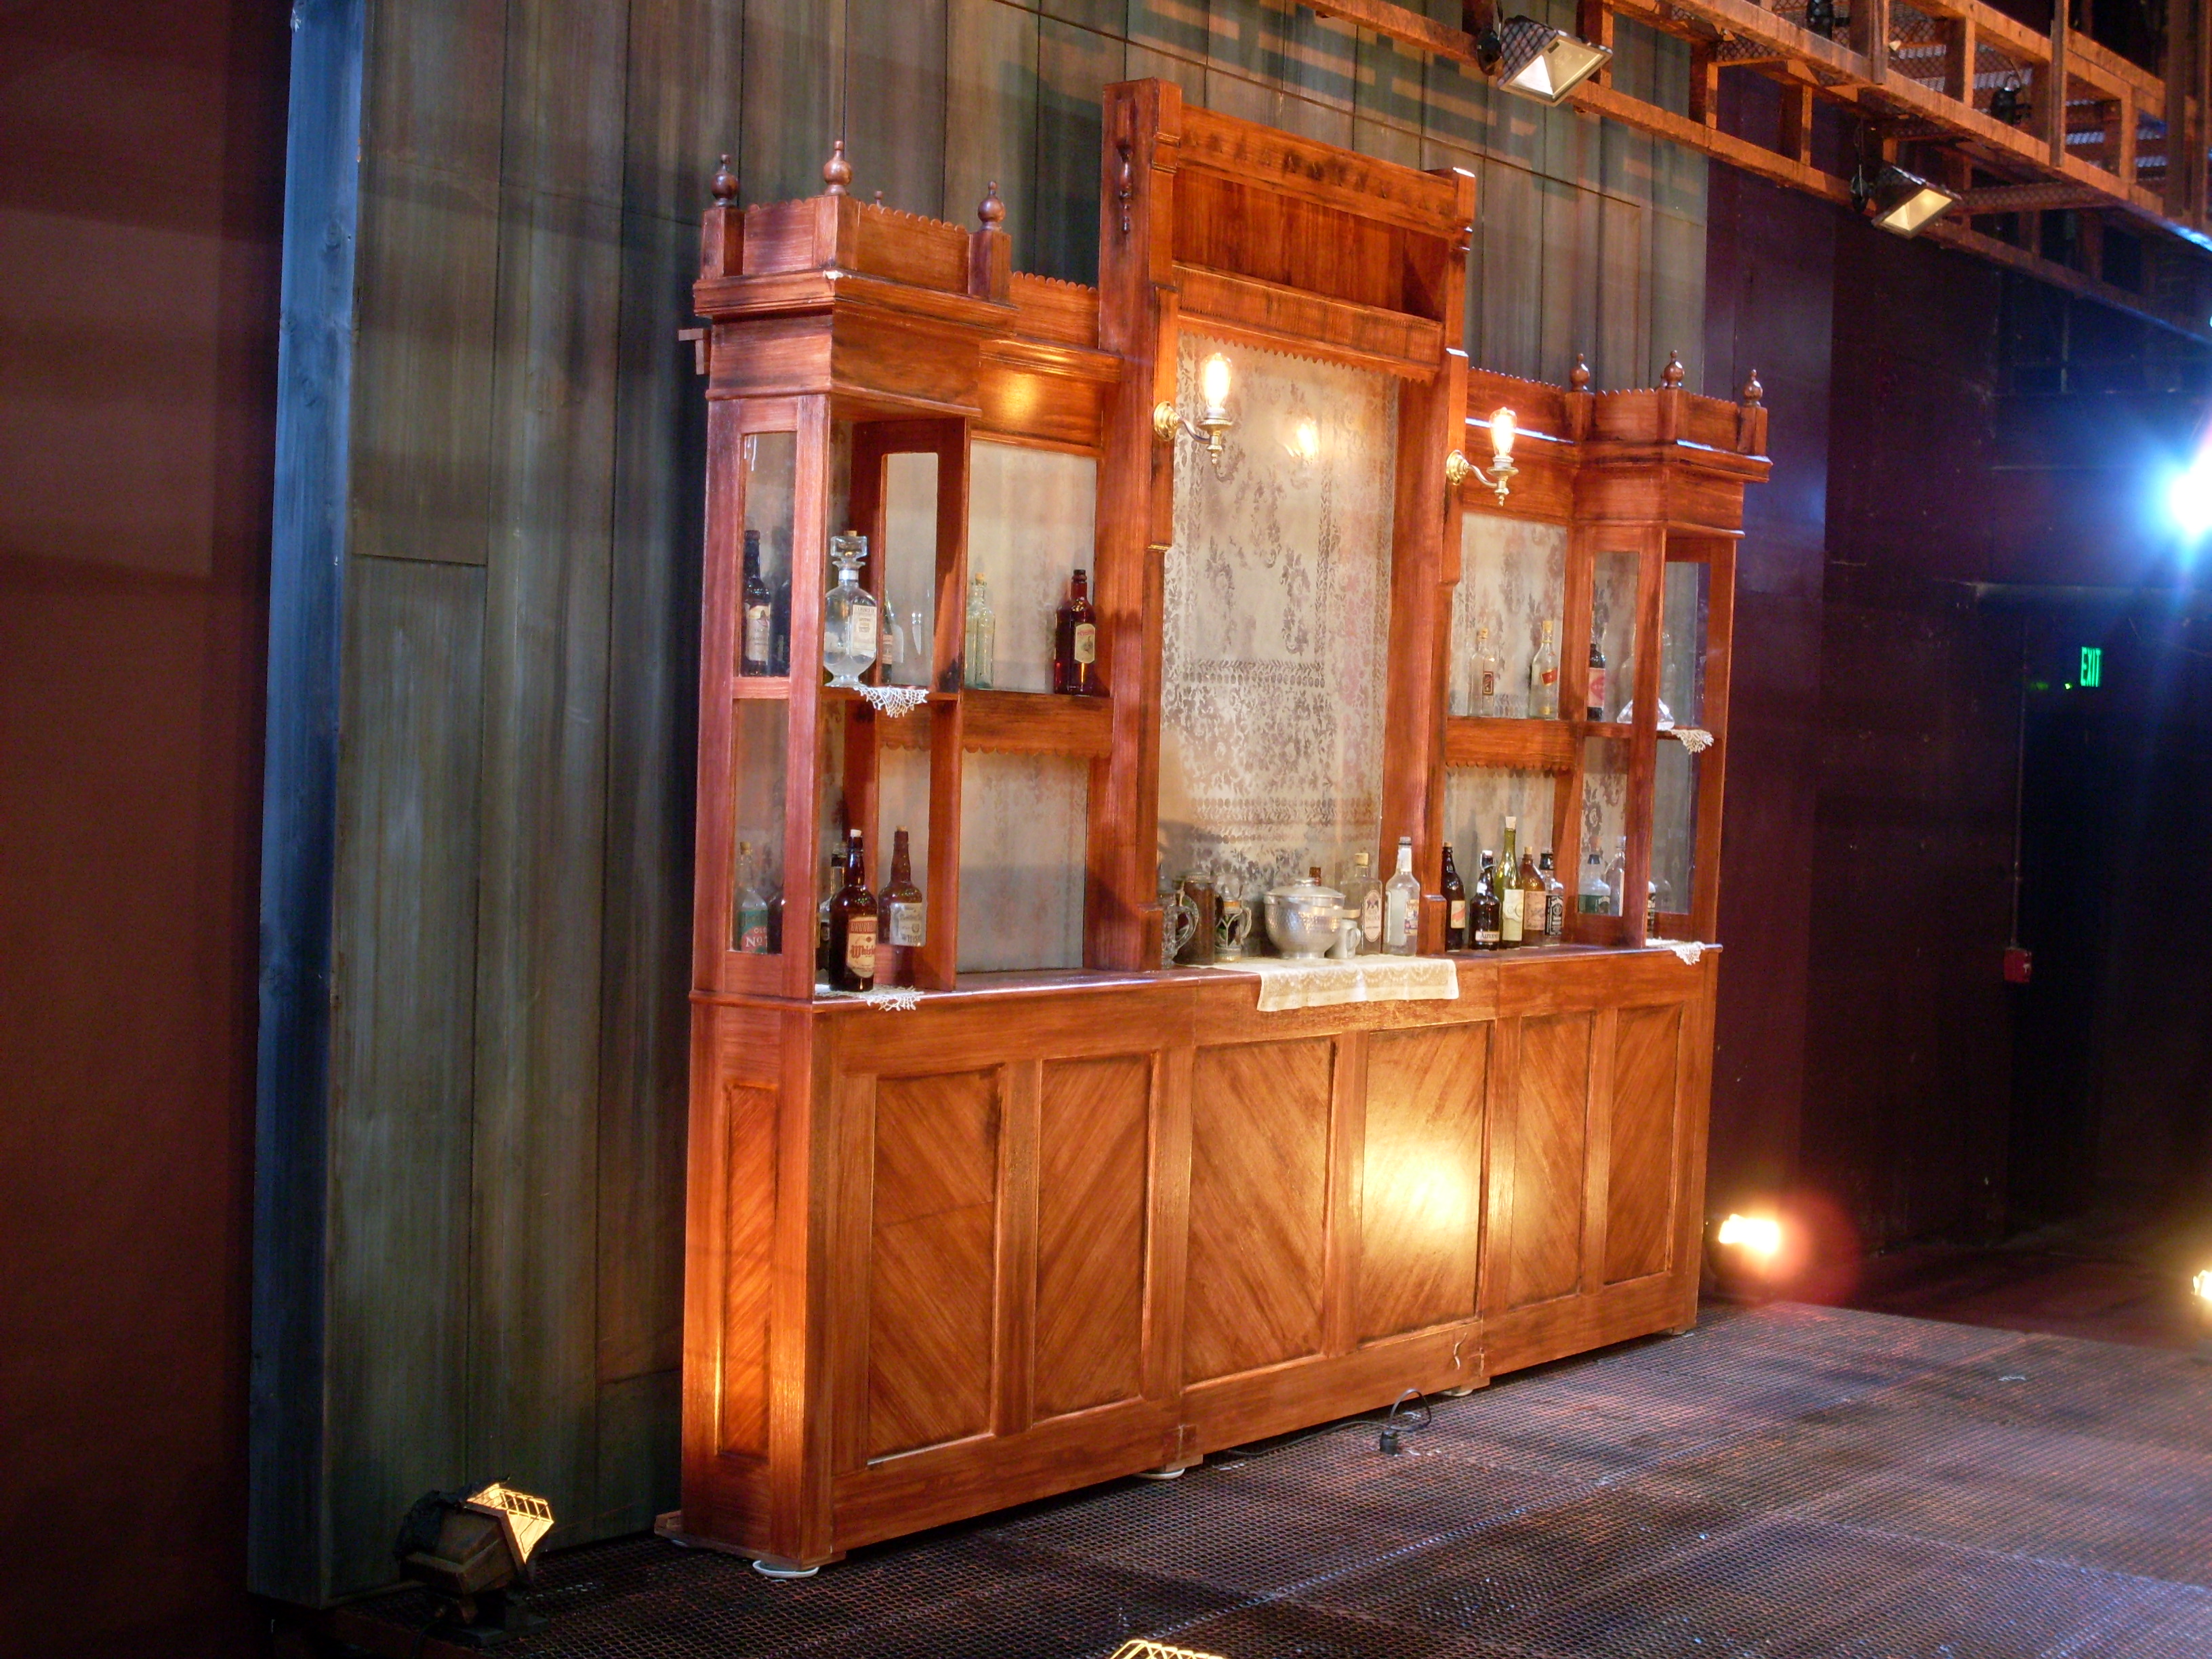
With some practical sconces, some lace runners and doilies, and a whole bunch of vintage liquor bottles, the piece was complete. Below is a photo of the whole setup, which includes the front bar that our prop shop also constructed.

Full bar
Full bar

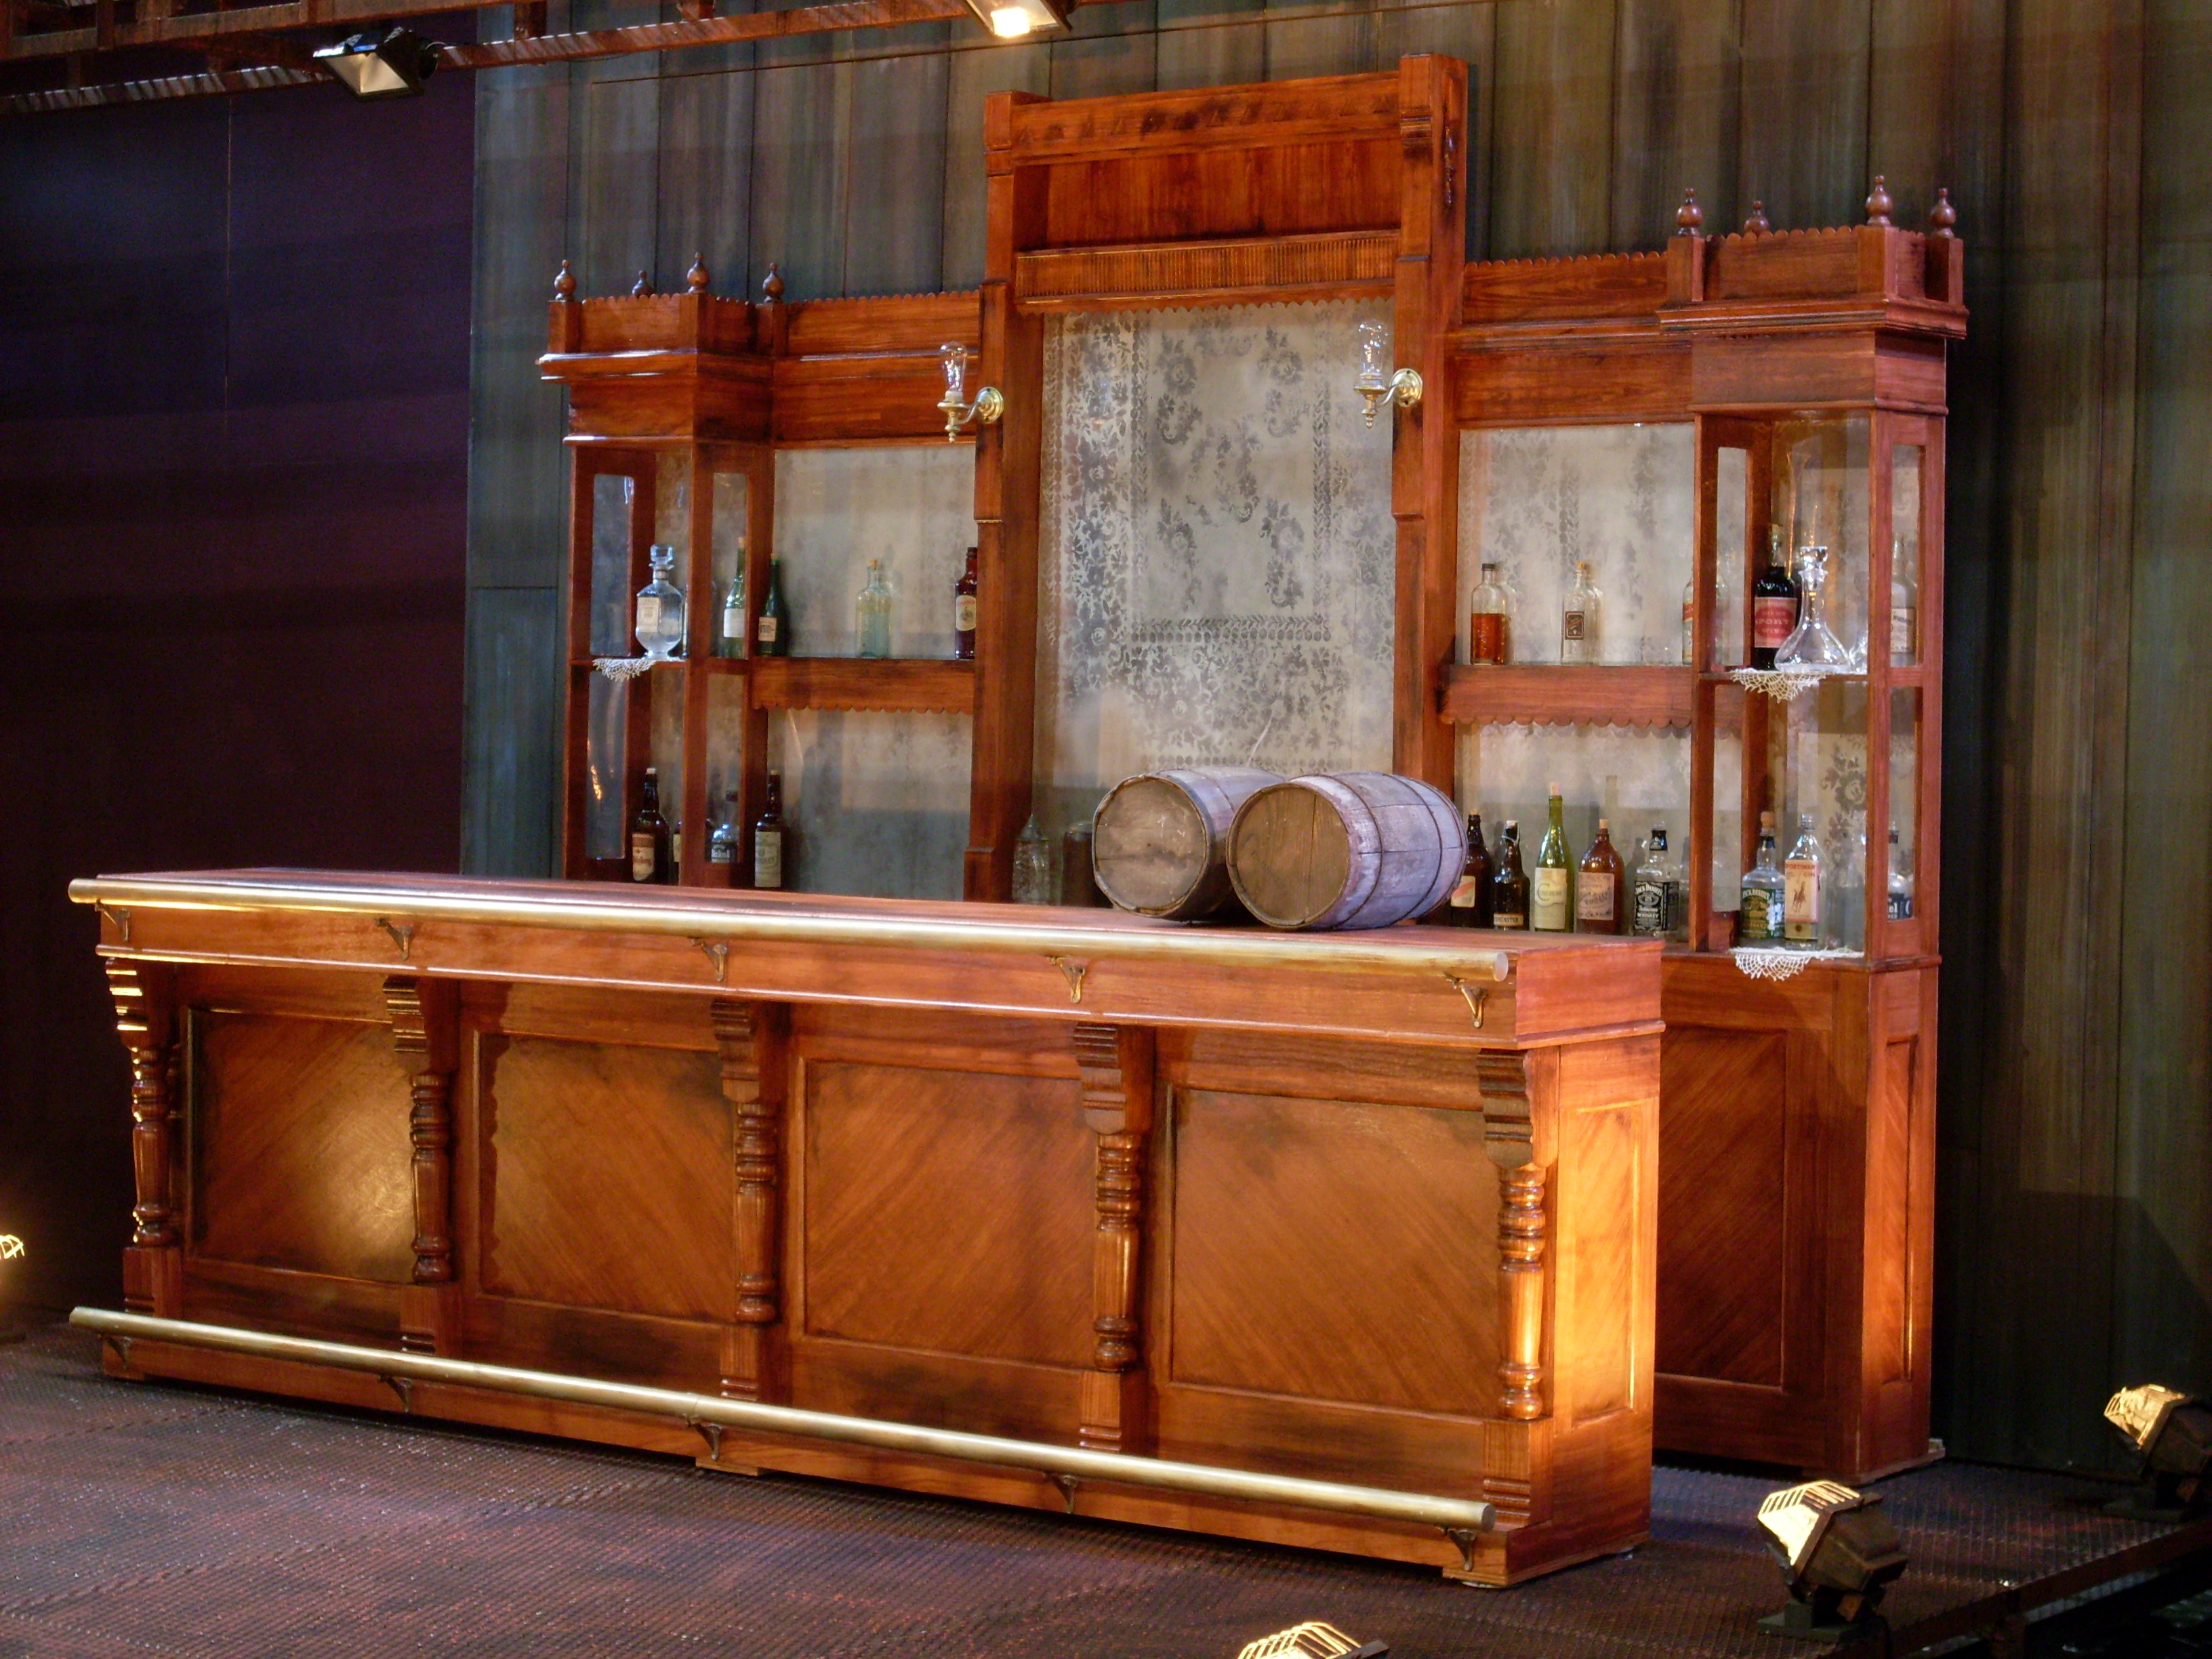
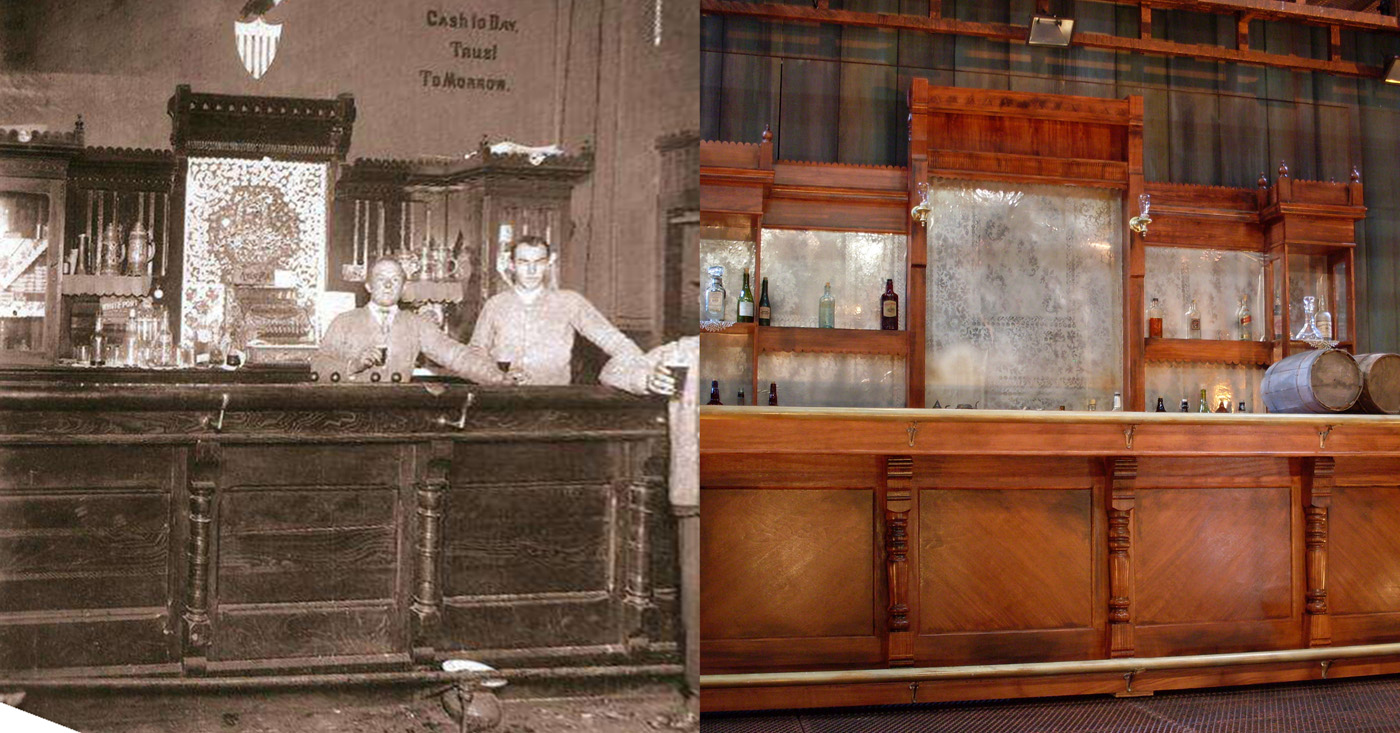
You can also see a side-by-side comparison of the final piece with a research image. Obviously the proportions and specifics were changed in the design, but the inspiration is fairly clear.

Research vs final piece

Graining Some Wood

Our production of Anna Christie closed last night at Triad Stage. The first act takes place in a bar, filled with wooden furniture. The bar, tables and chairs all needed to match, and since they were constructed from a variety of wood and other materials, the best way to do that was by painting all of them.

Our scenic charge artist, Jessica Holcombe, helped us develop a process to match the wood sample that our designer picked out. The base coat was a wet blend of two colors: a light tan, and a slightly darker beige. We blended them in the direction that the fake grain would go.

Base coat
Base coat

The next layer was a maroon/pink graining layer. A lot of the graining was done simply with a chip brush lightly dragged along the surface to make stripes. For some of the larger surfaces, we broke out the grain rocker to make some knots and other grain characteristics.

Graining
Graining

For the third layer, we made a glaze from some amber shellac and a bit of brown tint, and painted that over the whole thing.

Glaze coat
Glaze coat

The picture below shows the progression of this graining process, starting with an unpainted chair I bought.

Step-by-step wood graining process

When the furniture got on stage under the lights, it was too bright and the grain had too much contrast. We added another glaze coat of tinted shellac, this time using a darker brown to tint it. Jessica also showed us how to flock (edit: I mean “flog”) this layer, giving it a bit of the subtle pores and perpendicular stripes you can see below.

Final glaze
Final glaze

When doing a wood grain, the more layers you can add, the richer and more realistic your final result will be. There are many other techniques and tricks you can utilize depending on the specific type of wood you are trying to replicate; it is important to have a clear reference photo or physical sample of what you want your wood to look like.


Making Fake Beer

Our first show of the calendar year at Triad was Anna Christie. One challenge that arose was the need for a realistic lager beer. The first scene takes place in a bar, and the bartender pours several beers from a keg onstage. We couldn’t use real beer, because the amount the actress had to actually consume would have laid her on the floor before the scene was through. So I needed a self-contained and consistent means to produce several glasses of a fake frothy beverage on a bar which entered at the beginning of the scene and was struck a vista at the end. I shot a little video showing how I did it:

How to Draw a Hexagon

Say you want to draw a hexagon with equal sides. Say you want this hexagon to fit within a circle of a certain size. Go ahead, say it; I’ll wait.

You can do this with just a compass and a straight-edge. First, start off by drawing your circle with your compass. The distance from the pointy end of your compass to the pencil end is the radius of the circle. Don’t change this distance just yet.

Draw your circle
Draw your circle

Pick a spot on your circle where you want one of the hexagon’s corners to be and mark it. Now stick the pointy end of your compass on this mark and draw a line with your compass that crosses the circle. Move your pointy end to this intersection and repeat, all the way around the circle. The picture below will help if this does not make sense.

Mark off the corners

Your final mark should overlap with your first mark. You now have six marks evenly spaced around your circle. Connect these marks with your straight-edge, and you have yourself a hexagon.

Connect the dots
Connect the dots


Â