Category Archives: Features

In-depth articles written specifically for this blog.

Analysis of a Chair

I’ve always thought it might be helpful to have a way of determining the identity and style of a chair by using visual means rather than by memorizing the names of all sorts of periods and styles. Sure, one can attempt to divide all chairs into forty distinct styles, but that is more helpful after the fact. As a props person, we are often faced with an existing chair, or picture of a chair, and we need to discern its style so we can find more like it. “This chair has kind of a Chippendale back, but with turned legs. What is it?”

Well, I haven’t accomplished anything like that, but I have come across a series of plates in the book Furniture Designing and Draughting, by Alvan Crocker Nye, published in 1907. These plates break down and illustrate the variations in each of the parts of a chair. If you remove ornamentation and look at just the basic shapes, you can design almost any chair from Western furniture history simply by picking and combining these variations. Even with the rudimentary distillations of chair design in  these plates, you can create 486,000 distinct-looking chairs.
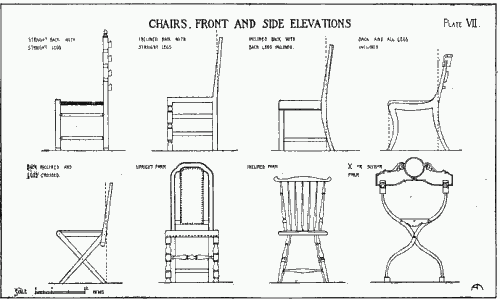
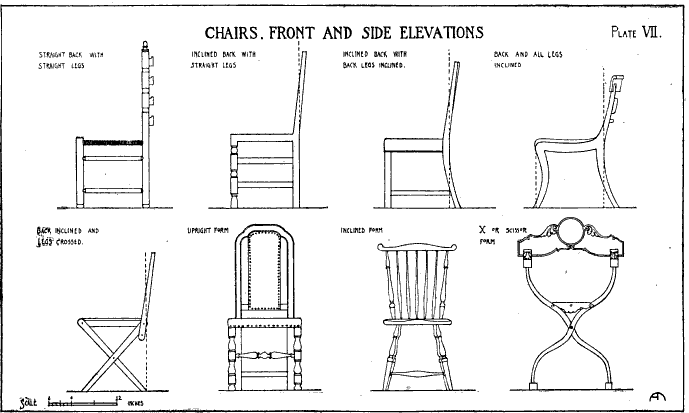
Chairs - Front and side elevations

Plate VII above shows variations on how the legs can be oriented. In the top row, we see side elevations of a chair with a straight back and straight legs, an inclined back with straight legs, an inclined back with back legs inclined, and the back and all legs inclined. In the second row, we see the back inclined and legs crossed, than front elevations showing an upright form, an inclined form, and finally an X or scissor form.
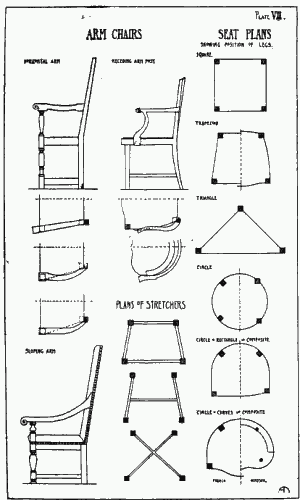
Arms, seats and stretchers

In Plate VII, we see the variations a chair’s arms can take. Under the “horizontal arm” drawing, we first see a plan showing how the orientation of the chair’s arm matches the shape of the seat. The two plans below it show how the arms curve out so the space between the arms is wider than the shape of the seat at the back. The two plans under the “receding arm post” show how the arm can be a compound curve or can be a continuation of the curve of the chair’s back. Finally, the elevation of the “sloping arm” chair shows that the arm can be higher in the back than in the front.

The plans of stretchers show how the reinforcing bracing of the legs can be arranged in either a box (trapezoid), an H, or an X (or cross) configuration.

Finally, the last column shows us different seat plans: square, trapezoid, triangle, circle, a circle and rectangle composite, and a circle and curves composite.
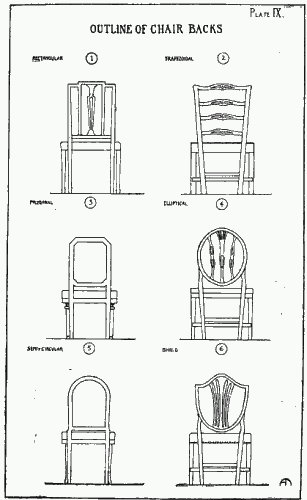
Outline of chair backs

Plate IX shows outlines of common chair backs. 1) Rectangular. 2) Trapezoidal. 3) Polygonal. 4) Elliptical. 5) Semi-circular. 6) Shield.
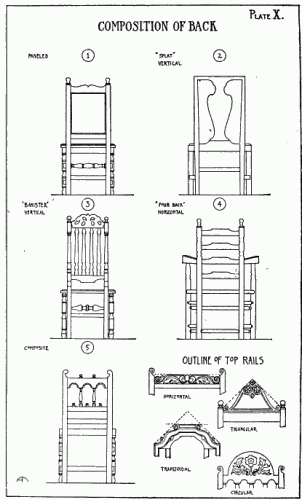
Composition of back
Composition of back

Plate X gives various compositions of the chair back. 1) Paneled. 2) “Splat”, vertical. 3) “Banister”, vertical. 4) “Four Back”, horizontal. Variations include the “Three Back”, or the much rarer “Five Back”. 5) Composite.

In the bottom right corner of the plate are four outlines of top rail shapes: horizontal, triangular, trapezoidal, and circular.

Working with What you Have

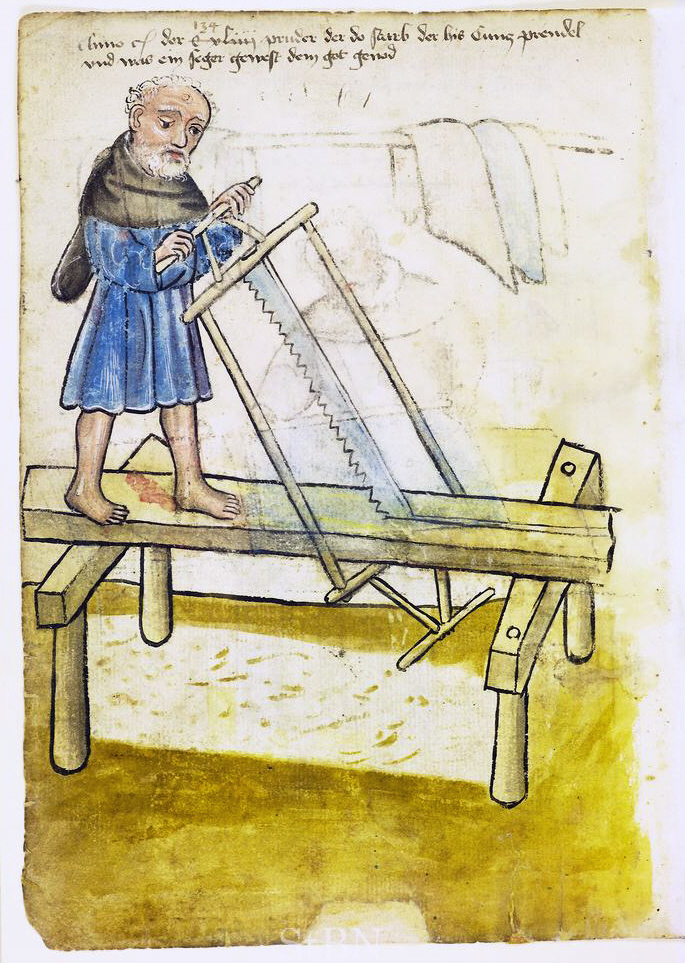
Ripping a long board, circa 1443

It’s easy to think how hard it is to get started building props. Tools and machines are expensive, materials are hard to work with, and there are just so many to choose from. But think of this: the vast majority of materials we work with today were unavailable before World War II: all manner of plastics, all foams, all our composite materials, even our glues and paints. Nearly every kind of coating and adhesive has some form of synthetic polymer in it; before that, we had hide glue, wheat paste and rubber cement (well, after the 1900s that is). Even plywood as we know it was not something you could just go out and buy. It existed, but it was made by the carpenter himself, by laying up layer after layer of thin veneers.

For most of our theatrical history, props have been constructed with little more than papier-mâché, real wood, plaster, clay, leather, and natural fabrics. Animal glue and wheat paste were among the few adhesives available, and paints were limited to oil paints, casein, and varnishes. Think of all the theatre which was created and performed with this limited technology: everything from the Ancient Greeks, to Shakespeare and Molière, or Kabuki in Japan, up to the grand operas of the Gilded Age.

Think too of the tools we have available to us. Electricity and pneumatics have given us incredible power and speed in the palms of our hands. The industrial revolution and machine age have brought us standardized parts and precision unimaginable in previous times. Even our simple hand tools have benefited; a hand saw blade today is produced more quickly, cheaply, and precisely than before the industrial age. The steel it is made from is stronger and more consistent (and far less expensive).

From the weapons used by Alexander the Great to conquer the world, to the furniture found in Versailles, our museums are filled with amazing items created with nearly none of what our props artisans have available today. We can purchase a sheet of metal from a hobby shop which is superior in properties than the metal used by Genghis Khan to create his weapons which conquered the world. We can buy a Dremel tool for a pittance; imagine how envious the people who built the first railroads would be to see such a tool.

So if you are just starting out with prop making, or want to practice doing more of it, don’t wait until you can afford the fancy tools or can master the most modern materials. Think about what you can do with what you have, rather than what you can’t with what you don’t.

Do the soldiers have swords or guns?

A design concept which pops up here and there is the “timeless” time period. Especially popular with Shakespeare and Greek classics, the designer and director wish to stage the play so that the scenery, costumes and props do not convey any specific time period. The goal is usually to allow the production to focus on the language, rather than worrying about all the historical minutia which comes from picking a specific time period and the inevitable anachronisms which will be introduced.

The problem which tends to creep up is that while “timeless” means everything comes from a vague time period, the props one uses have to be specific. All objects used by humans are inevitably colored by history and geography. While a designer may have an ever-morphing Platonic ideal of a piece of furniture swimming around in her or his head, the prop master must ultimately choose this furniture from a finite number of pieces.

My boss, Jay Duckworth, and I were talking about the questions which arise between a prop master and a set designer when such a situation occurs. Presented below is an imaginary conversation to further illustrate what might happen:

Prop Master: So I want to pick out some chairs. What period is this show set in?

Set Designer: It’s timeless. It is unrecognizable as any specific time period.

Prop Master: Great. But what period should the chairs be from?

Set Designer: They should not convey any period. They should be timeless.

PM: Okay. Wood timeless, or metal timeless?

SD: What?

PM: Should they be made out of wood or metal? Which is more “timeless”?

SD: Show me some options.

PM: Are they upholstered? Do they have arms?

SD: Whatever looks the least like any specific time period. They should be completely generic.

PM: Like, curvy generic? Or straight generic?

SD: No, they should look like the most representative example of a generic chair you can think of.

PM: So you want a contemporary chair.

SD: No, a timeless one.

PM: Great, we’ll come back to this. Now, there are soldiers in this play. Which country are they from, and which war did they fight in?

SD: They should not look like they come from any specific place or time. They are archetypes of a soldier throughout history.

PM: That’s cool. So… should they be carrying guns or swords? Are they from gun times? Or sword times?

SD: Whatever looks the most archetypal.

PM: It’s a pretty big investment to outfit fourteen soldiers with swords, sheaths, and sword belts only to decide later you want to switch to guns. Maybe they could have clubs?

SD: I want something that could kind of be “all weapons”. Something the audience might think is a sword at one point, but makes them think of a gun at another point. Nothing specific.

PM: Clubs it is. Now onto this letter. I just wanted your thoughts because it features so heavily in the action. Do you have any feelings about what the letter should look like?

SD: Like everything else. It should be timeless. An archetype of a letter.

PM: A paper archetype or a parchment archetype?

Rebecca Akins: Surviving Forty Years of Making Props

On the second full day of this year’s S*P*A*M conference, we watched a presentation by Rebecca Akins. Ms. Akins has designed costumes for Childsplay Theatre (our host in Arizona) for the past twenty-five years, and has been constructing costumes, puppets, costume props and masks for at least that long as well. She divided her presentation in two parts. The first was on materials and methods she’s used in the past which she now knows to be hazardous to your health. The second was on “new good things”, which are less-toxic replacements for these.

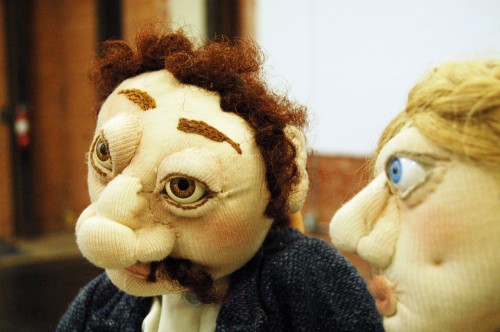
A puppet couple by Rebecca Akins

One of her earlier shows was a production of Devils in 1971. She created latex masks, Celastic armor, and sprayed the costumes with aniline dyes. Anyone who has worn latex knows it does not allow the skin to breathe, and the latex masks were very uncomfortable to the actors with the heat and build-up of sweat underneath. Aniline dyes are extremely toxic, and spraying them is a great way to fill your lungs with poison, especially with little ventilation and no respirator.

Ms. Akins used Celastic a lot in those days, starting with Celastic mitres, crowns and wigs for The Balcony in 1969, through at least 1981 with masks for a production of The Pied Piper. For those who are unfamiliar, Celastic is a fabric impregnated with plastic. When you soak it in a solvent, it becomes soft and flexible, hardening to a stiff but lightweight shell when the solvent evaporates. The toxic part is not the Celastic itself, but the solvent used to soften it; common choices include acetone and methyl ethyl ketone (MEK). All solvents are harmful to humans, and can enter the body through the skin, lungs, stomach or eyes. Not all gloves will protect against them, and not all respirators are designed to filter out their vapors.

She mentioned a material I had never heard of called “blue mud cement”. It is a powdery mixture of asbestos fibers and “spackle-y” binders; when mixed with water, the paste will dry hard and lightweight (it was originally developed for plumbing pipe insulation). For a 1974 production of A Midsummer Night’s Dream, she created forms in chicken wire, wrapped them in plaster bandages, and coated the whole thing with blue mud cement. It sounds like a mix between Bondo and chopped fiberglass, except that it’s, you know, asbestos.

Cutting and carving Styrofoam with a hot knife or wire is another technique she described; the fumes created when Styrofoam melts are fairly toxic.

In 1984, Ms. Akins worked with fiberglass for the first time to create a mascot head for a Phoenix sports team. Fiberglass creates strong and lightweight shells, but she found the individual particles got into her skin and clothes and irritated her immensely, and the resins used give off a lot of fumes while curing; it is also an inhalation hazard when sanding the hardened fiberglass. She used fiberglass again in 2002 with more adequate protection (ventilation, a respirator and thick sleeves), but decided it was too much of a hassle to continue working with it.

The second half of her presentation dealt with “new good things”, that is, newer materials which attempt similar results with less toxicity. Examples include Fosshape, Thermaflex (or Wonderflex), leather, fabric, paper and silicone casting gels.

Paper, used in papier-mâché, is one of the oldest prop-making materials. Indeed, Ms. Akins has been using it since at least 1973 for a production of The Bacchae. She continues using it even today. She showed us a number of masks and puppet heads she has constructed over the years, many of them made with a mix of paper pulp, sawdust, and PVA glue. This gives her a material which she can sculpt and form like clay, but which dries to a lightweight and sturdy piece which is paintable and sandable. The fact that some of these pieces have been on tour since the mid-90s is a testament to their durability.

Fabric is another less-toxic material. She uses soft sculpture a lot for puppets; fabric, thread, fiber fill (stuffing) and paint are the only materials needed to make three-dimensional shapes.

soft sculpture

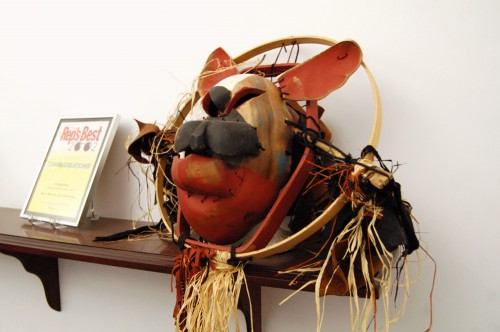
She showed us a number of examples of “found objects as materials”. An old leather handbag became a dog mask, a group of woven baskets transformed into a camel, and dryer hoses turned into snakes and an elephant’s trunk. Though using found objects has long been a staple of propmaking, Ms. Akins reminded us it remains a fairly non-toxic–and environmentally friendly–method, even today. Below is a photograph of a dog mask made out of wooden bowls.

dog mask made of wooden bowls

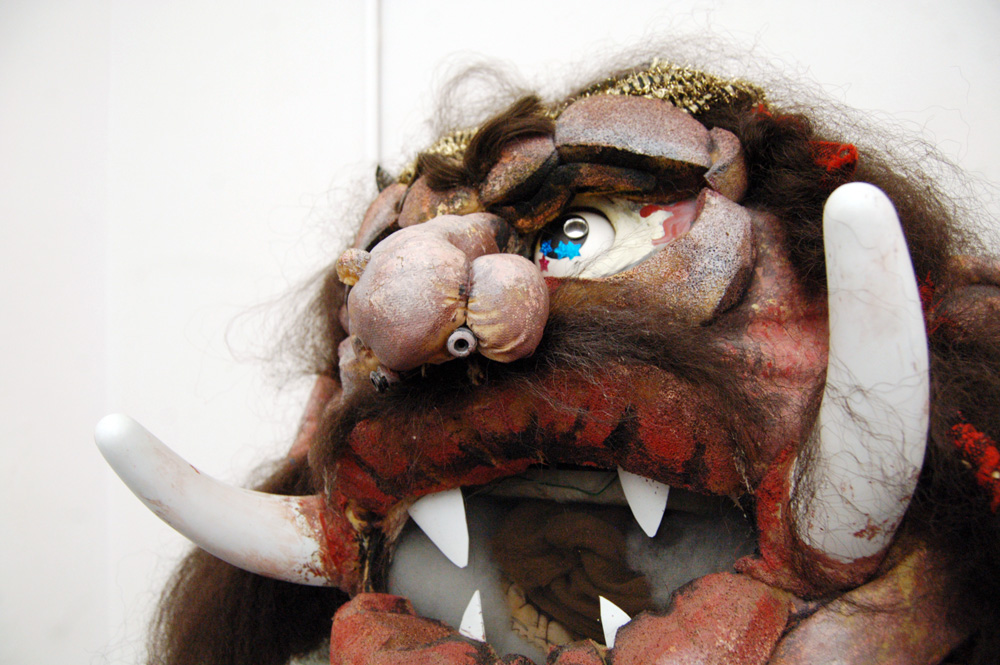
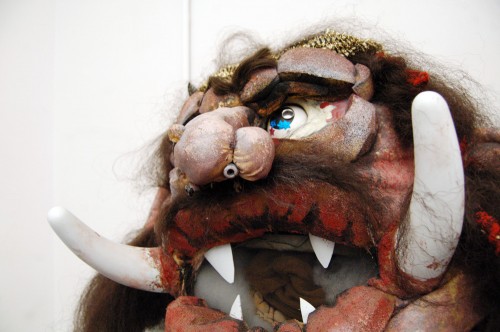
In 2004, she began using Fosshape to make a head for a production of Big Friendly Giant. Like Themaflex and Wonderflex, Fosshape is a plastic-impregnated fabric which becomes soft and pliable when heated, and retains its shape when cooled. In many ways, it is similar to Celastic, except you use boiling water or a heat gun to soften it, rather than a bucket full of solvents.

Big Friendly Giant mask

Finally, she described her first forays into using silicone mold materials. She would make a model in clay, mold it in silicone, and then cast it in resin. In one case, she mixed resin and Bondo together to make a puppet head; this gave her a translucent pinkish head which looked a lot like skin.

At the end of her presentation, Ms. Akins reminded us that whatever materials and methods you choose, you should endeavor to make the prop with as much care as possible. She left us with these closing words: “The more gorgeous a thing is, the more respect it is treated with.”

Childsplay Theatre part 2

Previously, I showed photographs of our tour of the Childsplay props shop. Today, I will show photos from our tour of the rest of their facilities.

The dye room, located next to the costume shop, also had a spray booth which was shared with the props department.

Spray booth

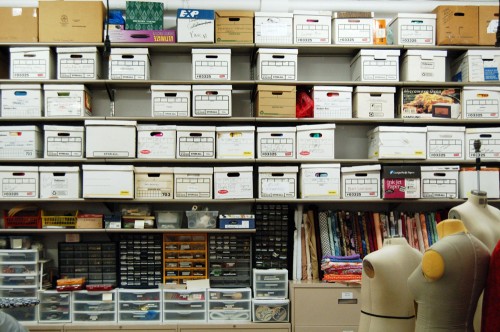
The costume shop itself was clean and well-organized. I love shelves full of labelled boxes.

Costume shop storage

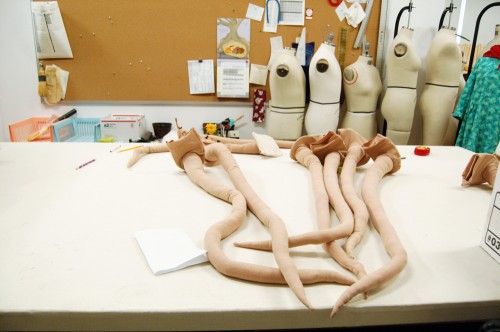
Someone was working on a bunch of tails for a giant mouse costume.

Mouse tails

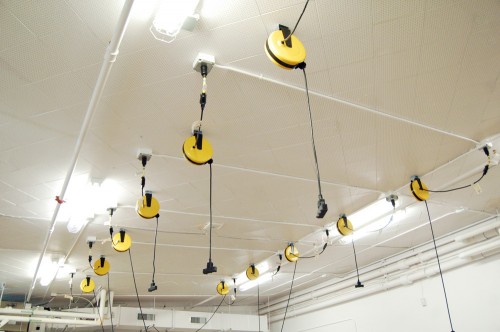
I enjoyed the copious number of power cords hanging from the ceiling.

Ceiling power cords

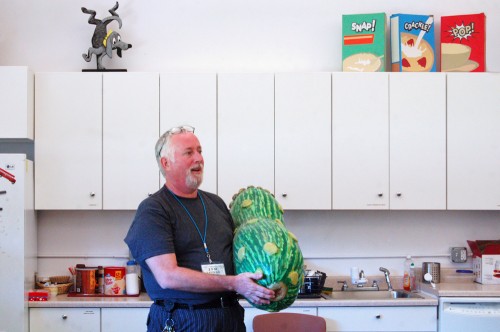
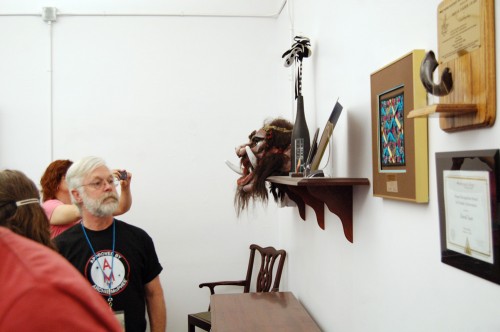
We also toured the administrative offices of Childsplay. Old props and bits of artwork appeared everywhere. Here, Jim Luther, the prop master, shows us one of his creations.

Snap, Crackle, Pop

We saw many of Childsplay’s awards they’ve won over their 35 year history.

Jim Guy looking at awards

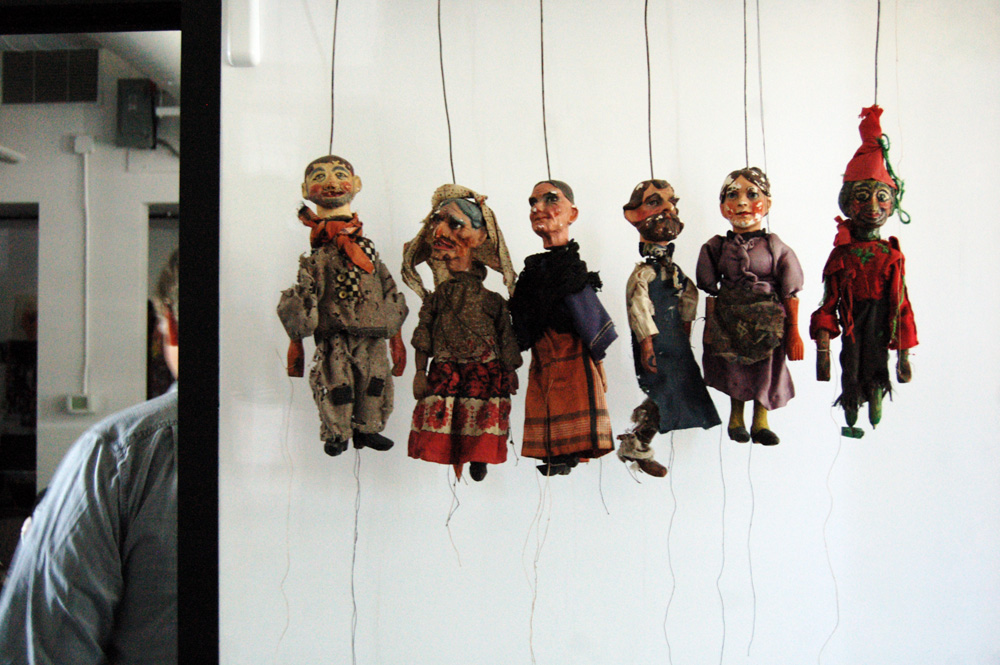
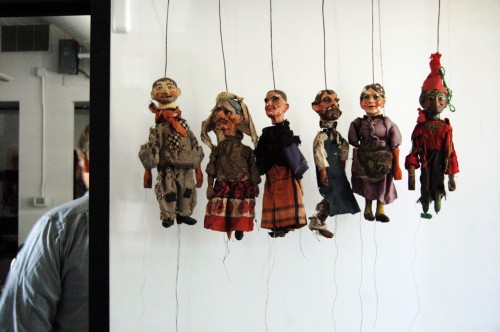
These puppets are delightful.

Puppets

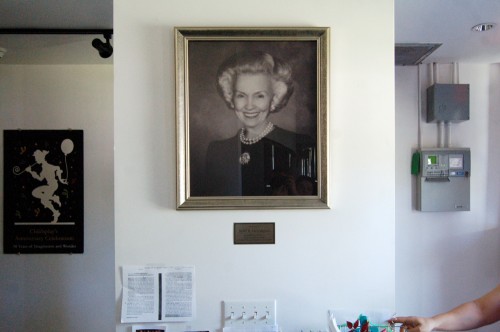
Below is a portrait of Sybil B. Harrington, namesake of the Sybil B. Harrington Campus for Imagination and Wonder, which is where all these shops and offices are located.

Sybil B. Harrington

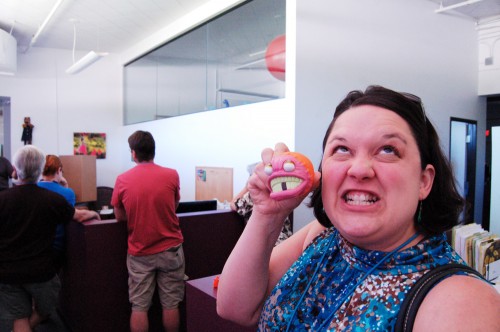
My wife, Natalie, found her long-lost twin sitting on one of the desks.

Natalie's friend

I hope you enjoyed sharing my tour of Childsplay Theatre in Arizona. Enjoy the weekend, and stay tuned for more information from this year’s S*P*A*M conference.